


 [14.11] Sheriff's EUW Grandmaster In-Depth Samira Guide
 Build Guide By SheriffADC


 111,225
Views
111,225
Views
 4
Comments
111,225
Views
4
Comments
Samira Build Guide By SheriffADC
4
Comments
111,225
Views
4
Comments
Samira Build Guide By SheriffADC
 Thank You!
Your votes and comments encourage our guide authors to continue
creating helpful guides for the League of Legends community.


Recommended Items


Runes: Default


+10% Attack Speed
+9 Adaptive (5.4 AD or 9 AP)
+65 Base Health


Spells:

Cleanse

Flash


Items

Ability Order Default

Daredevil Impulse (PASSIVE)
Samira Passive Ability


Threats & Synergies
 Threats
 Synergies
 Show All
Extreme Threats
Ideal Synergies
Show All
Extreme Threats
Ideal Synergies
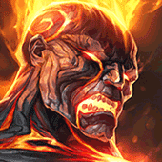
Nilah
One of the hardest counters for Samira, because your champ has no poke she gets a free lane (bonus XP for her and her support from passive), there is nothing to block with your Blade Whirl, her Jubilant Veil can deny you getting Style-grades (she is immune to the one second S-tier combo), if she saves her ult she can just interrupt yours.


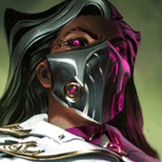


Alistar
Excellent support for Samira, just chill level 1 since you both are useless at that point. If he tries to knockback an enemy towards you with his W do NOT instantly autoattack them because that will cancel the knockback and instead knocks the target up for 0,5 seconds with your passive.


 Synergies
Alistar
Excellent support for Samira, just chill level 1 since you both are useless at that point. If he tries to knockback an enemy towards you with his W do NOT instantly autoattack them because that will cancel the knockback and instead knocks the target up for 0,5 seconds with your passive.


Champion Build Guide
Peak Rank: Grandmaster 825 LP EUW
Main Champs:
Hello! I'm Sheriff , a Grandmaster
Pros
- Very fun to play
- Excellent snowballing
- Great in teamfights
- Easy to 1v9 games when ahead
- Good scaling
Cons
- Countered by CC
- Too coinflip, in most games you will either drop 15 kills or 15 deaths
- Gets easily outranged/outpoked by most ranged champs in the botlane
- Very reliant on support
- Useless when weaksided
- Really low base damage without items
I already rated the matchups and synergies above but I would just like to say a few general words about them. When playing
Hover over the icon to see the default description.
I assume that you already have the basic understanding of what her abilities do so instead I will just give some extra detailed information about them.
The passive dash range towards CC'd enemies scales from level (lvl 1/4/8/12/16). This means that on earlier levels you have to be close to your support so you don't miss out on an opportunity to engage.
The bonus movespeed is not much but at higher Style-grades (B+) it can allow you to chase down opponents who don't have any bonus movespeed on them. This bonus also scales from level (lvl 1/6/11/16).
Hover over the icon to see the default description.
This is just your basic trading/poking/farming ability. The base damage on it is absolutely miserable for the first couple ranks but it scales really well. One small thing to note is that your autoattack comes out faster after using
Hover over the icon to see the default description.
This is what people call "
Hover over the icon to see the default description.
Not rocket science, just a basic dash that resets with takedowns (assuming you damaged them within the last 3 seconds). Always use
Hover over the icon to see the default description.
This is pretty much the whole point of the champion: massive AOE damage. However you need to have vision on an enemy to activate it, for example you cannot ult
In theory
Basic Auto-Q-Auto Trade
Very simple to use in quick trades, gives you 3 Style-grades (halfway to S-tier).
Short Trade Into All-In
Not the fastest combo but it's pretty easy to start from. Remember that you only have to tap
Jumpscare Combo (B+)
This combo includes a mindgame: you pretend that you have no intentions of going in and you are just running away. Once you have gathered enough Style you start your
Jumpscare Combo (C)
Same idea but a bit slower since you are going in with one less Style-grade than before so you need that extra autoattack before you can ult.
the One Second S-tier Combo
Dives with the one second S-tier combo should look like this:
Check the very top of the guide for some example rune pages (6 in total) and their notes for explanations!
Keystone
Doesn't really need a long explanation,
Primary Tree: Precision
Slot 1:
I take this 99% of the time, it fits the "daredevil" playstyle perfectly, allows you to make risky (and fun) outplays.
If the enemy team is really tanky (3+ tanks) you might need some extra mana in fights (tankier enemies = longer fights = more mana used).
Slot 2:
Honestly, this rune isn't even that good because it's been nerfed multiple times in the past but it's still the best Legend-rune for
If you feel like you want some extra earlygame power, this rune replaces the 10% attack speed shard and allows you to take double adaptive shards (+5.4 AD). Only downside is that you will feel the lack of
Slot 3:
Just like
Decent rune if your team is full of enchanters (you won't be spending that much time on low HP for
Just like
Secondary Tree Option 1: Domination
Slot 1:
Offers some solid burst damage for aggressive all-ins. Personally I liked the old version more when it gave you lethality and after the rework I use it a bit less.
Personally I almost never use this but if you struggle with lane sustain it can be useful. My main concern is that it feels kinda useless after laning phase.
Slot 2:
Extremely good rune when you're snowballing. If you manage to get those 10 takedowns in the earlygame having that 18 bonus AD feels really good.
Slot 3:
Just like
Secondary Tree Option 2: Resolve
Slot 1:
---
Slot 2:
Very strong defensive scaling for free. Goes well with
This used to be good against the
Can help you in laning phase if enemy botlane has 2 long range poke champs (
Slot 3:
Strong defensive scaling for free. Goes well with
Almost always take this when playing with enchanters, it makes their champions more useful and also increases your
Very situational rune when enemy team has many CC champs. Personally I've only used it against
Secondary Tree Option 3: Inspiration
Slot 1:
To me this is just a safer version of
Slot 2:
---
Slot 3:
Having lower cooldowns on your summoner spells never hurts. Excellent when the enemy ADC also has this rune (you can match their
Shards
Slot 1:
Slot 2:
Slot 3:
Starting Items
After patch 13.20 this is your default start against most lanes. The bonus HP from
Against heavy poke lanes you will need some extra sustain. Gives you a faster
First B / Early Buys
Getting a
Solid component that upgrades into
Builds into both
If you have some extra gold and the game is still in early laning phase (before 10min).
Grab tier 1 boots if you don't have any damage items to buy or if you need to get back to the lane faster.
First Item
Simply the most reliable first item for
A very expensive but also a very strong item. Usually you would be buying
Decent item that provides survivability. Just make sure to grab a
Extremely fun snowballing item for fistfight games, just keep in mind that you shouldn't buy it on autopilot every single game.
The stats are almost equal to
Second Item
If you rushed
Default second item if you didn't buy it first.
If the enemy team has many assassins you might need some safety. Excellent synergy with
If you already have
Extremely fun snowballing item for fistfight games, just keep in mind that you shouldn't buy it on autopilot every single game.
You already have good waveclear so this item is not for that, it just gives you really strong damage in combos and all-ins. You can and you should use the active during your
Third Item
If your first 2 items were
About 70% of the time this is your best third item. This is when people are starting to have enough bonus armor for it to have proper value.
If the enemy team has many assassins you might need some safety. Excellent synergy with
If the enemy team has a lot of poke and you really need some sustain this is very useful.
A fine item to close out games against squishy teamcomps.
Before the changes in patch 13.1B this item used to be completely useless on
If the enemy team is AP heavy and you didn't buy
Just like
This is still good as a third item, I wouldn't buy it any later than this.
You already have good waveclear so this item is not for that, it just gives you really strong damage in combos and all-ins. You can and you should use the active during your
Fourth Item
If you still didn't buy any armor pen and the enemy team is getting tankier, now is the time to do so.
Before the changes in patch 13.1B this item used to be completely useless on
At this stage of the game
Really good defensive item that also gives you some damage. Helps you carry teamfights, even better against AD heavy teams.
If you are playing against uncleansable CC (
Solid item for long teamfights where you just wanna stay alive to do damage.
A fun off-meta armor pen option. Makes your
Excellent armor pen choice against 2+ heavy armor champs, really fast to stack on
A very cheap armor item against heavy AD comps.
Just like
Last Item
Really good defensive item against assassin-heavy comps. If you went
This item is stronger the later you buy it, very strong at level 18.
Really good defensive item that also gives you some damage. Helps you carry teamfights, even better against AD heavy teams.
Extremely strong item against AP heavy comps.
Another strong item against AP, even better if you have an enchanter. It also improves your
Great choice against 2+ crit champs (
Excellent armor pen choice against 2+ heavy armor champs, really fast to stack on
If you are playing against uncleansable CC (
A rare situational choice if the enemy team lacks poke that can easily break the spellshield and if they have some very important spells that can mess you up (great example:
Extremely rare situational item when the enemy team is full of shields and no one on your team can build this item.
Solid item for long teamfights where you just wanna stay alive to do damage.
Boots
About 70% of the time these are your boots of choice, combine with
Very simple; against AP heavy and CC heavy teamcomps.
Good against many slowing champs such as
Decent choice if you value your summoner spells, you are not buying these for the ability haste. If the enemy team has
Really greedy, if you feel like you already won and don't need defensive boots. Personally I would just never go these if I care about winning.
Situational Buys
50 MR for 900g, amazing buy against a fed AP assassin (or
If you are playing against uncleansable CC (
Solid item if enemy healing is becoming a problem, can be upgraded into
Elixir
Usually the default elixir for
If you need some tenacity and survivability.
Doesn't need to be explained,
I take
Good against assassins or burst champs. Remember that
In patch 14.10
Decent if the enemy team has no burst or CC, however I would still personally almost always go
Earlygame
First thing you need to understand is that what comes to base-stats
Midgame
This is when you wanna start participating in teamfights and getting objectives with your team. Usually play for midlane since that's the closest to all other objectives. Ideally you should have 2 items right now and that is your first spike. If you are the strongest member on your team you have to be ready to teamfight because that is where your champion excels. If your team tries to take a fight without you, just try to ping them back as much as you can. Don't get poked too much so you're not forced to recall. Try to only recall for big items (let's say items that cost more than 1000g). Also make sure to ping that you are recalling for an item.
Lategame
Pretty much like midgame but with less recalling because the objectives and fights are becoming even more important. With many items you are extremely strong damage-wise but you are still playing ADC so 1 simple mistake and the game might be over for you. In teamfights you need to understand what abilities can mess you up and you have to wait for them before going in. Against some comps you could just slowly poke them with
Q: Best champion to ban if you're onetricking Samira?
A: Honestly, unless there's some ADC/support that you just personally hate I would probably ban some tanky hard CC champion like
Q: Is Samira mid/top viable?
A: Not really, she can work on those lanes in a good matchup but in midlane she cannot lane against most mages and in toplane she gets destroyed by most bruisers/tanks.
Q: Best Samira skin?
A: PsyOps with obsidian chroma.
Q: Should I sell boots for a sixth item?
A: I know that
PsyOps: 8.5/10 - Overall just a really good skin, even better with the obsidian chroma!
Soul Fighter: 8.5/10 - This skin would easily be 10/10 if it was legendary. As cool as it looks it's just not worth 3250 RP. Still, if we ignore the price and just focus on the skin itself, it's definitely one of the best ones.
Default: 8/10 - If you don't like spending money on skins, don't worry; Samira has one of the best Default skins in the entire game!
High Noon: 7.5/10 - Only reason I'm putting this under Default is because her Default skin is already very close to High Noon and Default doesn't cost you any money. Overall the skin is very decent and has some cool chromas too.
Space Groove: 0.5/10 - Absolute disgrace of a skin, I have never even played with it and I never will (unless you pay me). Everything about it is just ugly and there is not a single bit that I like.


 Twitter
 Twitch
You must be logged in to comment. Please login or register.