


This guide has not yet been updated for the current season. Please keep this in mind while reading. You can see the most recently updated guides on the browse guides page
 Bunny's Guide to Nami, the Tidecaller
 Build Guide By NirvanaBunny

 36,489
Views
36,489
Views
 13
Comments
36,489
Views
13
Comments
Nami Build Guide By NirvanaBunny
13
Comments
36,489
Views
13
Comments
Nami Build Guide By NirvanaBunny
 Thank You!
Your votes and comments encourage our guide authors to continue
creating helpful guides for the League of Legends community.


Runes: Bunny's Masteries


+8 Ability Haste
+10 Adaptive (6 AD or 10 AP)
+15-90 HP (lvls 1-18)
Spells:

Exhaust

Flash

Items

Ability Order Bunny's Sequence...Kinda

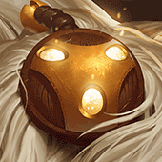
Surging Tides (PASSIVE)
Nami Passive Ability


Threats & Synergies
 Threats
 Synergies
 Show All
Extreme Threats
Show All
Extreme Threats
 Ideal Synergies
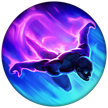
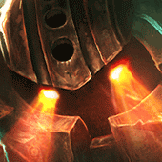
Pyke
I'm ranking Pyke here because he's just a scary champion. While there are some good and bad Pykes, he can do STUPID damage if you don't keep him in check.


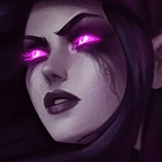


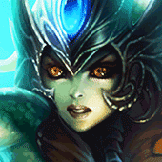
Caitlyn
The fact that Caitlyn has so much range makes her a difficult target to hit, but paring that up with Nami's range and CC makes it almost impossible to win lane. These two can control the bottom lane with almost no issue if played right.


 Synergies
Caitlyn
The fact that Caitlyn has so much range makes her a difficult target to hit, but paring that up with Nami's range and CC makes it almost impossible to win lane. These two can control the bottom lane with almost no issue if played right.


Hi! I'm NirvanaBunny! I play League of Legends casually--and just recently started trying in ranked. I am a support main at heart, but I can play other roles such as Mid Lane and ADC. I am a college student and a twitch streamer, though I do not stream a lot of League (You can find me HERE if you're interested).
Also, if you enjoy this guide please feel free to check out my other up to date guide(s).
Please be sure to comment on this guide your thoughts, and if you really like it please upvote it :D I work hard on these and I don't mind a little cirtizism!
| .. | .. | .. |
|
In this guide, I will tell you how and why I play/build
Where do I start when it comes to describing supports and the rules they follow?
Support is probably one of the most important roles, and underrated roles, in the game. They control the flow of the game and a great deal of map control. A lot of things happen behind the kills that most people do not realize or refuse to. As the name implies, this role helps the team to achieve victory by enabling them to get kills and objectives, such as the
As a support, you head to the bottom lane with your AD Carry, and as the name implies, you support them. When you are in laning phase, don't last hit the
Watch whole map, not just your own lane and ping/inform your allies of approaching enemies. Pinging missing champions and maybe even writing in the chat goes to this section and even if your mid doesn't say anything, but the enemy is gone there, you can ping it instead. Remember to buy and put
| .. | .. | .. |
|
|
Pros
+ High team-fight potential + Strong peel + Strong poke + Heals + Self sustain + Basic Attack buff + Stuns |
|
Cons
- Squishy - Little escape - Countered easily - Mana reliant - Skill-cap - Team reliant Like all champion, |
| .. | .. | .. |
|
|
|
|
|
|
|
|
|
I am not exactly sure if |
|
|
|
|
|
This is probably my favorite option when playing |
|
|
This is probably my second favorite mastery for |
|
|
I found that this is an alright alternative to |
|
|
This is my current go-to! |
|
|
Now I personally don't use this mastery....at all. I don't feel as it works for a support champion, which is why I did not use this one. [/b][/i] |
|
|
Poking your enemy is lane is almost a must, but I don't recommend |
|
|
|
|
|
This is my personal choice when playing |
|
|
This is probably the best choice to get out of the |
|
|
This mastery works really well with healing kits because the heals and shields she has will be stronger, even more so when your allies are below 40% HP. |
| .. | .. | .. |
|
|
-
|
|
| .. | .. | .. |
|
|
|
|
Surging Tides (Passive): This is her passive. When |
|
|
|
Aqua Prison (Q): This is a good CC ability and is great for denying enemy ganks! The biggest issue (other than its cool-down time) would be the skill to time it. It takes some skill to learn, but I think the practice is well worth it! |
|
|
|
Ebb and Flow (W): This is probably my most used ability on When cast on an enemy first: Enemy ==> Ally ==> Enemy When cast on an ally first: Ally ==> Enemy ==> Ally |
|
|
|
Tidecaller's Blessing (E): This I feel like is self-explanatory. The ability empowers your ally's basic attacks for 3 attacks. I tend to use this ability more when my ADC and I plan on playing super aggressively or to try and secure my ADC or jungler a kill. |
|
|
|
Tidal Wave (R): This is quite an engage when used correctly! This ability is incredibly wide when cast and it does damage! This knock-ups enemies when they are hit, which is nice for champions like |
| .. | .. | .. |
|
|
#1
Tidal Wave 6 / 11 / 16 #2 Ebb and Flow 1 / 4 / 5 / 7 / 9 #3 Aqua Prison 2 / 8 / 10 / 12 / 13 #4 Tidecaller's Blessing 3 / 14 / 15 / 17 / 18 |
Alright, so to be clear I tend to vary on my skill sequence, but I always tend to start off with my W. A lot of times I don't completely ignore |
| .. | .. | .. |
|
|
|
This is an alright item on |
|
|
This item is good for its raw healing power in a single item slot and also for its active, which cleanses CC from an ally. That makes it great for teams against heavy CC! Though, I feel like it should be taken only if you don't plan on taking |
|
|
If I use this item I usually run this after I run |
|
|
This is an alright situational item. I have seen it from time to time when playing games, but I personally don't recommend it. I can see this being viable in heavy AP teams and you become the target and are dying easily, but other than that I would say skip it and purchase something a little bit more useful. |
|
|
This is alright all things considered. I've seen this in some games throughout the years, but it's not one I can personally recommend for |
|
|
This is the best red that I've ever seen; it's perfect in every way. That being said, this hat will amplify your ability to heal due to it increasing your AP. I almost always shoot to buy this last. |
|
|
This. This is a good situational item all around for almost every--if not every--support in the game in my opinion. I buy this when I know I'm going to be needing to play more defensively and I need to keep everyone alive in team fights. |
|
|
This item I find to be more useful on champions like |
|
|
This item can come in handy if used correctly. Once you activate it two cute little ghost dudes will come out and look for nearby enemies. If they find them they get slowed and you will have vision on them--even if you don't have vision in that particular area. While it's not ideal in every situation, it is in some. I use it on |
| .. | .. | .. |
|
This is where I'll talk about how I usually play as
This phase usually goes from the beginning of the game to when the first tower, ally or enemy, is down. So, with that in mind, the main thing you want to do during this phase is to keep your ADC alive and to try to get a tower. Do not forget that you are
With what CC you have, try to poke the enemy as much as you can. Remember that your Q has a long cool-down time early, so spare how you use it. I would always try to empower your ally's base attacks with
Once you hit level 6 you'll get
Alright, now tower is gone. This makes the game a little bit more tricky when it comes to your opponents. You can be easily picked off especially when you are trying to ward (for rough warding map click here! Remember that wards/Results may vary). Always remember to keep vision on
In team-fights you should be sure to position yourself somewhere in between the front and the back. While you are very squishy you also have some good engage and your
Remember, your ultimate is slow and will knock enemies up and slow them. This can be very important when initiating or trying to disengage team-fights.
This is probably the hardest phase to determine when is happening, but usually it's usually when everyone starts to group together and 5v5 for towers.
Now I feel like there's not of a difference between the Late-Game and the Mid-Game play-style. Team-fifights are usually the same along with the objectives.
| .. | .. | .. |
|
~Fixed some spelling errors
9 June 2019
~Added
2 May 2019
~Fixed some spelling errors
2 April 2019
~Fixed some spelling errors
10 March 2019
~Added Sona Guide shortcut
9 March 2019
~Fixed some spelling mistakes
~Fixed how dates are written in Change Log
19 January 2019
~Fixed some spelling errors
5 January 2019
~Added Leona Build Image with link
3 January 2019
~I revamped the look of the guide
~Added the Skill Sequence section
~Fixed some grammar and spelling mistakes
13 December 2018
~Fixed some spelling mistakes
24 November 2018
~Added Janna guide and added Nautilus in counters
~Fixed some spelling mistakes.
14 November 2018
~Revised and updated for the first time in like 3 or 4 years
23 April 2015
~Updated for Season 5
6/19/14
~Small fix within the typing areas
6/17/14
~Changed Name and another building set (AP Support Nami)
~Fixed little errors within the build itself
4/20/14
~Fully Updated
| .. | .. | .. |
|


 Twitch
You must be logged in to comment. Please login or register.