





 ⚡ TEEMO TOP AD CRIT — THE TOP LANE TERROR ⚡
 Build Guide By RaptorHunter
68
9
 159,195
Views
 2
Comments
159,195
Views
2
Comments
Teemo Build Guide By RaptorHunter

 Thank You!
Your votes and comments encourage our guide authors to continue
creating helpful guides for the League of Legends community.
Recommended Items


Runes: TOP LANE TERROR










+10% Attack Speed
+9 Adaptive (5.4 AD or 9 AP)
+65 Base Health
Spells:

Flash

Ignite
Items


Ability Order R > E > W > Q

Guerrilla Warfare (PASSIVE)
Teemo Passive Ability


Threats & Synergies
 Threats
 Synergies
 Show All
Extreme Threats
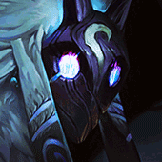
 Ideal Synergies
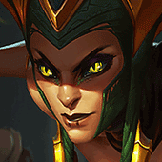
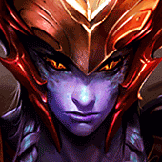
Akali
One of the hardest matchups. Her Shroud denies your auto-attack game plan and she can quickly close the distance. Pressure her early, but play very carefully once she has access to her full combo.









Sejuani
Sejuani gives Teemo exactly what he wants: reliable crowd control and long enough lockdown to freely auto-attack. Her engage also compensates for Teemo’s lack of hard CC.
 Synergies
Sejuani
Sejuani gives Teemo exactly what he wants: reliable crowd control and long enough lockdown to freely auto-attack. Her engage also compensates for Teemo’s lack of hard CC.


|
⚡ THE TOP LANE TERROR — QUICK GUIDE ⚡ ━━━━━━━━━━━━━━━━━━━━━━━━━━━━━━━━━━━━ Game Plan: Pressure the lane → Kite the matchup → Scale into a crit carry. First Major Spike:  Blade of the Ruined King Primary Goal: Use range, movement speed and sustained auto-attacks to control extended fights. Fight Pattern: Auto → Stack Press the Attack → Trigger
BotRK slow → Kite with
Move Quick → Keep firing.Main Rule: Never trade your range advantage for a melee fight you do not need to take. |
⚡ AUTO • KITE • CRIT ⚡
━━━━━━━━━━━━━━━━━━━━━━━━━━━━━━━━━━━━
|
👹 BECOME THE TOP LANE TERROR 👹 ━━━━━━━━━━━━━━━━━━━━━━━━━━━━━━━━━━━━ This guide presents a different way to play Teemo. Instead of building around traditional AP burst, mushroom damage or full on-hit scaling, this setup turns Teemo into a fast AD crit marksman built around
Blade of the Ruined King, sustained auto-attacks and constant movement.The goal is not to stand still and trade damage face-to-face. The goal is to control the distance, keep firing and never give the enemy a clean way to reach you. With
Press the Attack,
Blade of the Ruined King and
Move Quick, every extended trade becomes a test of spacing.You pressure melee champions with repeated auto-attacks, use BotRK to punish health stacking and rely on movement speed to decide when the fight continues and when it ends. As the game progresses, critical strike items transform Teemo from a lane bully into a genuine ranged carry capable of shredding bruisers, punishing squishies and dominating side lanes. This playstyle rewards spacing, patience and disciplined movement more than reckless aggression. Keep your range. Keep moving. Keep firing. |
|
🏹 WHY PLAY TEEMO AD CRIT? 🍄 ━━━━━━━━━━━━━━━━━━━━━━━━━━━━━━━━━━━━ AD Crit Teemo is not simply an AP Teemo replacing Ability Power with Attack Damage. It changes the way Teemo approaches the entire top lane. Instead of relying primarily on
mushrooms, spell damage or full on-hit scaling, this setup turns Teemo into a mobile ranged marksman built around repeated auto-attacks, sustained damage and precise spacing.The foundation of the build is
Blade of the Ruined King.Its Attack Damage, Attack Speed, sustain, current-health damage and slowing effect give Teemo exactly what he needs against the bruisers and tanks commonly found in top lane. Rather than trying to burst a target immediately, Teemo can progressively wear them down while maintaining distance.
Press the Attack reinforces this pattern. Repeated auto-attacks reward Teemo for staying on the target long enough to establish control of the fight, while BotRK makes it increasingly difficult for the enemy to disengage or simply absorb his damage through Health stacking.The build also takes advantage of Teemo's natural
movement speed.By maxing
Move Quick second and combining it with
Celerity and
Boots of Swiftness, Teemo gains the freedom to control the distance of most extended trades.This is where the playstyle separates itself from a traditional crit marksman. Teemo still brings
Blind,
invisibility and
mushroom control, giving him defensive and tactical tools conventional ranged carries do not have.As critical strike items come online, the build transitions from lane pressure into genuine carry potential. Blade of the Ruined King wins the long fight. Critical strikes make every successful kite more dangerous. AD Crit Teemo offers several unique advantages: - Strong sustained auto-attack damage. - Excellent damage into high-Health bruisers and tanks through BotRK. - High movement speed for spacing, chasing and disengaging. - Powerful scaling through critical strike items. - Built-in sustain for extended top lane trades. - Blind, invisibility and mushrooms remain useful even without building AP. - Flexible itemization against both squishy targets and heavy frontlines. AD Crit Teemo is not about turning Teemo into another ADC. It is about turning Teemo's range, speed and utility into a true top lane marksman playstyle. |
|
🧠 HOW THE BUILD WORKS ⚙️ ━━━━━━━━━━━━━━━━━━━━━━━━━━━━━━━━━━━━ This build is designed around three principles: sustained damage, movement and controlled spacing. AD Crit Teemo does not want to stand still and exchange damage face-to-face. The entire setup is designed to let Teemo attack while controlling the distance of the fight. The first major power spike is
Blade of the Ruined King.BotRK provides Attack Damage, Attack Speed and sustain while adding damage based on the target's current Health. This makes it particularly effective against the bruisers and tanks commonly found in top lane. Its slowing effect adds another important layer to the build. After repeatedly attacking the same champion, Teemo gains an opportunity to create additional distance or continue chasing the target. This naturally complements
Press the Attack, since both mechanics reward Teemo for maintaining a clean sequence of auto-attacks.The second part of the build is movement.
Boots of Swiftness,
Celerity and a second-maxed
Move Quick combine to make Teemo extremely difficult to catch.Movement speed is not simply a defensive statistic in this setup. Every extra step of distance can create another auto-attack. Once BotRK and Swifties establish the foundation, the build transitions into critical strike scaling. Against squishy compositions,
The Collector increases Teemo's ability to punish fragile targets.Against tanks and bruisers,
Lord Dominik's Regards provides the Armor penetration required to preserve physical damage against defensive builds.
Infinity Edge then becomes the primary damage multiplier.At this point, Teemo is no longer simply wearing opponents down through poison and BotRK. His auto-attacks themselves become a serious threat. The final items adapt to the game.
Phantom Dancer reinforces sustained DPS and mobility.
Mortal Reminder answers heavy healing.
Immortal Shieldbow provides additional protection when enemy burst threatens to end the fight before Teemo can kite.Other situational crit items can be selected when their utility better matches the enemy composition. The complete build follows one simple progression: BotRK gives Teemo the tools to fight. Movement speed gives him the space to keep fighting. Critical strikes turn that space into carry damage. The result is a Teemo that does not need to choose between pressure and scaling. He pressures through range early, controls fights through movement and scales through critical strikes. |
|
🛠️ FROM KITE TO CRIT ⚡ ━━━━━━━━━━━━━━━━━━━━━━━━━━━━━━━━━━━━ Every item in this build serves one of three purposes: sustained damage, movement control or critical strike scaling.
Doran's Bow establishes the playstyle from level 1.Its Attack Damage and Attack Speed strengthen Teemo's early auto-attacks, help activate
Press the Attack faster and give him the stats needed to pressure melee champions immediately.The sustain also makes repeated top lane trades more forgiving. The ideal first recall combines
Pickaxe with basic
Boots.Pickaxe provides an immediate damage increase for every auto-attack while also benefiting the bonus AD scaling of
Toxic Shot.Boots begin strengthening the other half of the build: spacing.
Blade of the Ruined King is the core item and the first major power spike.Its combination of Attack Damage, Attack Speed, sustain and current-health damage is especially valuable against the bruisers and tanks commonly found in top lane. Its slowing effect also creates natural synergy with
Press the Attack.Both reward Teemo for landing repeated auto-attacks on the same target. Attack repeatedly → activate PTA → trigger BotRK's control → keep kiting.
Boots of Swiftness complete the core.Combined with
Move Quick and
Celerity, they give Teemo the movement speed required to stay at the edge of enemy threat ranges.This allows him to chase when ahead, disengage when threatened and continuously reposition between auto-attacks. After the core, itemization changes according to the enemy composition. Against squishy teams,
The Collector increases Teemo's ability to punish fragile targets.Its offensive profile works particularly well when opponents cannot survive several consecutive critical auto-attacks. Against tanks and bruisers,
Lord Dominik's Regards becomes the preferred option.BotRK pressures their Health while LDR attacks their Armor, giving Teemo two different tools for breaking through durable frontlines.
Infinity Edge is the central crit multiplier of the build.Once Teemo has established enough critical strike chance, Infinity Edge turns every successful spacing window into significantly more damage. At this stage, the opponent is no longer only being worn down by BotRK and
Toxic Shot.The auto-attacks themselves become the threat.
Phantom Dancer reinforces the sustained-DPS version of the build.Its Attack Speed works perfectly with repeated autos, while its movement-focused profile complements Teemo's ability to kite through extended fights.
Mortal Reminder becomes valuable when healing is a major part of the enemy composition.It provides an alternative penetration option while reducing the effectiveness of champions who depend heavily on sustain.
Immortal Shieldbow is the defensive crit choice.Use it when enemy burst threatens to kill Teemo before he has enough time to apply his sustained damage.
Stormrazor is an offensive situational option when stronger opening attacks and additional control are more valuable than maximum sustained DPS.
Hexoptics C44 rewards disciplined max-range positioning.It fits naturally into a playstyle built around staying at the edge of Teemo's attack range, and its additional range after takedowns can make late-game cleanup significantly safer. The synergy between these items follows one simple philosophy: BotRK helps Teemo start and sustain the fight. Movement speed keeps the fight at the distance Teemo wants. Critical strike items make every successful auto-attack increasingly dangerous. The items are different, but they all serve the same purpose: Give Teemo enough damage to threaten the target and enough movement to keep applying it. |
|
⚡ RUNES OF THE MARKSMAN 🎯 ━━━━━━━━━━━━━━━━━━━━━━━━━━━━━━━━━━━━ This rune page supports the build's three priorities: sustained auto-attack damage, movement speed and late-game scaling.
Press the Attack is the defining keystone of the setup.Teemo naturally wants to attack the same target repeatedly, and PTA rewards exactly that pattern. The third auto-attack triggers bonus adaptive damage and creates a stronger damage window against the target, making extended trades significantly more threatening. This creates perfect synergy with
Blade of the Ruined King.Both effects reward Teemo for maintaining range long enough to land several consecutive attacks.
Triumph improves survivability during close duels and extended side-lane fights.After a takedown, the healing can be enough to survive retaliation, escape a dangerous fight or continue pressuring another target.
Legend: Alacrity strengthens the core identity of the build.More Attack Speed means smoother auto-attacks, faster PTA activation and better sustained DPS with BotRK and critical strike items. The final Precision rune changes depending on the enemy composition.
Coup de Grace is preferred against squishy teams.It improves Teemo's ability to finish low-health targets and works particularly well when
The Collector is part of the build.
Cut Down is preferred against teams with multiple tanks or bruisers.When the enemy composition contains large Health pools and extended frontline fights, Cut Down fits naturally alongside
BotRK and
Lord Dominik's Regards.The Sorcery secondary tree reinforces Teemo's movement-based defense.
Celerity amplifies the movement speed provided by
Move Quick and
Boots of Swiftness.This is not simply a comfort rune. Movement speed determines how many auto-attacks Teemo can safely apply before the enemy reaches him.
Gathering Storm completes the page by adding long-term adaptive scaling.As the game progresses, the additional Attack Damage strengthens Teemo's basic attacks, critical strikes and the bonus AD scaling of
Toxic Shot.The rune shards complete the setup:
10% Attack Speed improves early trading, farming and PTA activation.
Adaptive Force increases early auto-attack damage and contributes directly to the AD scaling of the build.
65 Flat Health provides additional safety during the first levels, when Teemo is most vulnerable to early all-ins.The complete page follows one simple philosophy: Attack repeatedly. Control the distance. Scale into a ranged crit carry. |
|
🎯 WINNING WITH AD CRIT TEEMO 🏆 ━━━━━━━━━━━━━━━━━━━━━━━━━━━━━━━━━━━━ This build does not win by forcing every possible fight. It wins by creating situations where Teemo can deal damage without giving the enemy a clean opportunity to answer. Your greatest advantage is range. Against most melee top laners, every step they take toward you creates another opportunity to attack. The goal is to use
Move Quick,
Boots of Swiftness and disciplined positioning to constantly control that distance.Early in the game, focus on building small advantages. Auto-attack when the enemy walks forward for a minion. Use
Blinding Dart when their return damage depends on basic attacks.Back away before the trade becomes a melee fight. Then repeat. You do not need to win the lane in one trade. You win it by making the opponent lose Health every time they try to interact with the wave. Once
Blade of the Ruined King is completed, your ability to control extended fights increases dramatically.Repeated auto-attacks activate
Press the Attack, BotRK punishes large Health pools and its slowing effect helps prevent the target from escaping or immediately reaching you.From this point forward, every fight follows the same principle: Create space → Attack → Reposition → Attack again. Do not stand still simply because you are winning the damage race. The strength of this build comes from dealing damage while continuously changing your position. As critical strike items come online, Teemo becomes increasingly dangerous in side lanes. Squishy champions can no longer ignore your auto-attacks, while tanks and bruisers must still deal with BotRK and Armor penetration. This makes side-lane pressure one of the strongest ways to convert your build into a win. Push when it is safe, pressure towers and force the enemy team to send someone capable of dealing with you. Before extending into the side lane, use
Noxious Trap around jungle entrances and common approach routes.Your mushrooms may deal less damage than an AP build, but their vision and slow remain extremely valuable. They give you additional time to see enemies coming and create the distance required to escape or turn the fight. In teamfights, resist the temptation to dive the enemy backline. You are not an assassin. Attack the safest target available while maintaining your positioning. If a tank or bruiser is standing in front of you, hit them. BotRK, Armor penetration and critical strikes are specifically designed to make front-to-back fighting viable. Your winning sequence is simple: Pressure the lane → Build a Health advantage → Complete BotRK → Control the distance → Scale into crit → Dominate the side lane or front-to-back fight. The most important rule remains the same throughout the entire game: Your damage only matters while you are alive and in range to keep attacking. |
|
🌊 CONTROL THE WAVE, CONTROL THE FIGHT 🎯 ━━━━━━━━━━━━━━━━━━━━━━━━━━━━━━━━━━━━ Top lane is where this build creates its first real advantage. Most opponents need to walk into Teemo's range to farm, trade or contest the wave. Your job is to make every one of those steps expensive. During the first levels, avoid mindlessly pushing. Use
Toxic Shot to last-hit and pressure the enemy whenever they walk forward for a minion.The goal is to create a Health advantage without giving the opponent an easy all-in angle. A strong early pattern is simple: Let them walk forward → Auto once or twice → Reposition → Return to the wave. Do not chase deep into the lane for one extra auto-attack. The strongest Teemo trades are often the ones where the enemy loses Health and never gets close enough to answer.
Blinding Dart should not be used randomly.Against champions who rely heavily on basic attacks, save it for the moment they commit. A well-timed Blind can remove a large part of their return damage and give you enough time to create distance. Wave position is extremely important. If you constantly push toward the enemy tower, you create a long lane behind you and make yourself vulnerable to ganks. Whenever possible, keep the wave slightly closer to your side while still having enough room to punish the opponent when they approach the minions. This creates the ideal environment for AD Crit Teemo: - The enemy must walk forward to farm. - You have more space behind you to kite. - Enemy ganks become easier to escape. - Your jungler has a longer lane to punish overextended targets. When you want to recall, build a wave and crash it into the enemy tower. A clean crash gives you time to purchase
Pickaxe, basic
Boots or components toward
Blade of the Ruined King without sacrificing unnecessary minions.Once
BotRK is completed, your lane pressure becomes much stronger.You now have sustain for repeated trades, health-based damage against durable opponents and additional control once several auto-attacks connect. This is the moment where many melee matchups become significantly easier to manage. However, do not confuse a power spike with permission to stand still. BotRK makes your trades stronger. It does not remove the need to kite. Your ideal lane cycle is: Control the wave → Punish every step forward → Preserve your spacing → Crash when needed → Recall on your terms. As you reach level 6, use
Noxious Trap to protect the lane rather than treating mushrooms purely as damage.Place them in river entrances, common jungle paths and behind your retreat route. Even without heavy AP investment, the slow and vision can create the extra second you need to survive a gank or turn a chase into another sequence of auto-attacks. The most important laning rule is simple: You do not need to kill the enemy top laner to win the lane. You only need to make farming more dangerous for them than it is for you. |
|
🏃 KITE FIRST, DAMAGE SECOND 🎯 ━━━━━━━━━━━━━━━━━━━━━━━━━━━━━━━━━━━━ Kiting is the most important mechanical skill in this build. AD Crit Teemo does not need complicated combos. He needs to maintain enough distance to keep auto-attacking without allowing the enemy to fight back efficiently. Every trade should follow the same rhythm: Auto → Move → Auto → Move → Auto. Do not stand still between attacks. Use the small window between auto-attacks to reposition, maintain maximum range and force the opponent to spend more time chasing than dealing damage.
Move Quick is the key ability behind this playstyle.Because it is maxed second, its movement speed becomes increasingly valuable as the game progresses. Combined with
Boots of Swiftness and
Celerity, Teemo becomes extremely difficult for melee champions to stay on top of.Do not automatically activate W at the beginning of every trade. Sometimes the passive movement speed is enough. Save the active burst for the moment you need to create distance, dodge an engage or chase a retreating target.
Blade of the Ruined King reinforces this pattern.After several consecutive attacks, its slowing effect makes it easier to maintain your spacing and continue the fight on your terms. This is especially powerful when combined with
Press the Attack.The same sequence that activates your damage also helps create the distance required to keep dealing it.
Blinding Dart should also be treated as a spacing tool.Against champions who rely heavily on auto-attacks, Blind gives you a short period where you can continue damaging them while reducing their ability to answer. Use that time to reposition. Do not waste it standing still. Against champions with strong gap closers, respect their threat range before the fight begins. Your movement speed cannot save you if you are already standing inside an unavoidable engage. Good kiting begins before the enemy reaches you. Teemo's
Guerrilla Warfare passive can also create strong opening positions.Hiding in a brush or disappearing from vision can allow you to begin a fight with free auto-attacks before the enemy has time to react. Use invisibility to create the first spacing advantage, then rely on movement to maintain it. The most important habit is simple: Never move closer than necessary to deal damage. Maximum range gives you more time to react. More reaction time gives you more opportunities to reposition. More repositioning creates more auto-attacks. Spacing is not separate from your damage. Spacing is what allows your damage to exist. |
|
🎯 PREPARE YOUR POSITION BEFORE THE FIGHT 🛡️ ━━━━━━━━━━━━━━━━━━━━━━━━━━━━━━━━━━━━ AD Crit Teemo is strongest in teamfights when he enters from a safe position and keeps attacking for as long as possible. You are not an assassin. You do not need to dive past the enemy frontline to reach the carry. Your job is to stay alive, maintain your range and continuously attack the safest target available. Before
Dragon,
Baron or
Void Grubs, arrive early whenever possible.Use
Noxious Trap around entrances, flanks and retreat paths.The mushrooms are not your primary damage source in this build. Their purpose is to slow enemy movement and make your fighting position safer. Before the engagement begins, identify the champions that can actually reach you. Ask yourself: - Which enemy has the strongest engage? - Which gap closer must I respect? - Which ability can force me out of position? - Where can I move if the frontline collapses? Position outside those threat ranges before you begin attacking. Once the fight starts, use a simple rule: Hit what you can reach safely. If a tank or bruiser is standing in front of you, attack them.
Blade of the Ruined King,
Lord Dominik's Regards and your critical strikes are specifically built to make front-to-back fighting effective.Do not lose several seconds trying to walk around the frontline for a better target. No damage is worse than attacking the wrong target.
Blinding Dart should be saved for high-value moments.Blind an enemy marksman who enters your range, a melee carry committing onto you or any champion whose damage depends heavily on basic attacks. Use
Move Quick reactively.Do not waste the active simply because the fight has started. Save it for the moment you need to escape an engage, reposition around your frontline or chase once the enemy formation begins to break. When
Press the Attack and
BotRK begin activating, your sustained damage becomes increasingly difficult to ignore.This is when patience matters most. Continue moving between attacks and resist the temptation to stand still just because the target is low. Against squishy teams, your critical strikes can quickly remove anyone who steps too close. Against durable compositions, stay calm and continue working through the frontline. The longer you remain alive and attacking, the more valuable the build becomes. Your teamfight pattern is simple: Prepare the area → Identify the engage threats → Stay behind your frontline → Attack the safest target → Kite backward when pressured → Chase only when the fight is already won. The objective is not to deal all of your damage immediately. The objective is to stay alive long enough to deal more damage than anyone expects Teemo to produce. |
|
⚠️ HOW THE BUILD GETS THROWN AWAY 🚫 ━━━━━━━━━━━━━━━━━━━━━━━━━━━━━━━━━━━━ This build is simple to understand, but easy to misuse. The most common mistake is standing still while auto-attacking. AD Crit Teemo is built around movement. Every auto should be followed by a small reposition whenever possible. Auto → Move → Auto → Move. If you stop moving, you give melee champions the exact fight they want. Another major mistake is using
Move Quick too early.Do not automatically activate W at the beginning of every trade. Its active movement speed is strongest when used to dodge an engage, create distance after the enemy commits or chase once the fight is already favorable. Wasted movement speed often means losing control of the next few seconds. Do not waste
Blinding Dart simply for extra damage against champions whose main threat comes from auto-attacks.Q is one of your strongest defensive tools. Against champions such as Tryndamere, Jax or marksmen, a well-timed Blind can be worth far more than the raw damage of the spell. Another common mistake is chasing beyond your safe range. Movement speed does not make Teemo immortal. If securing one extra auto requires walking into an enemy stun, dash or jungle collapse, the trade is usually not worth it. Your goal is not to attack at any cost. Your goal is to attack without being punished. Do not assume
Blade of the Ruined King means you can suddenly fight every bruiser at melee range.BotRK improves your sustained damage, sustain and control. It does not replace spacing. BotRK makes good kiting stronger. It does not make bad positioning safe. Itemization is another area where games are easily lost. Do not follow the same critical strike path every game.
The Collector is strongest when the enemy team is fragile.
Lord Dominik's Regards should move earlier when Armor and durable frontlines become the real problem.
Mortal Reminder should be purchased when healing is meaningful, not simply because it exists.
Immortal Shieldbow becomes valuable when surviving burst matters more than maximizing theoretical DPS.Another mistake is playing like an assassin in teamfights. Do not run past a tank simply because the enemy ADC is visible behind them. Your build contains BotRK, Armor penetration and critical strikes specifically so you can deal meaningful damage front-to-back. Hit the safest target first. Finally, do not forget that
Noxious Trap still has value even without AP.The damage is lower, but the slow, vision and control can protect your side lane and create the distance required to continue attacking. Avoid these habits: - Standing still between auto-attacks. - Activating W before you actually need the movement speed. - Wasting Q when Blind could neutralize an important enemy attack pattern. - Chasing into enemy threat range for one extra auto. - Treating BotRK as permission to fight in melee range. - Building Collector into heavy Armor or LDR into a fragile team without thinking. - Diving the backline instead of dealing safe front-to-back damage. The build gives Teemo damage, sustain and movement. Good positioning is what turns those tools into a carry. |
|
❓ ANSWERS FOR AD CRIT TEEMO 💡 ━━━━━━━━━━━━━━━━━━━━━━━━━━━━━━━━━━━━ - Why
Blade of the Ruined King first?
Blade of the Ruined King gives Teemo exactly what this setup needs early: Attack Damage, Attack Speed, sustain, current-Health damage and a slowing effect after repeated attacks.It is especially strong into the bruisers and tanks commonly found in top lane, while also giving Teemo enough sustain to keep taking controlled trades. - Why
Boots of Swiftness instead of Attack Speed boots?This build values spacing more than maximum theoretical Attack Speed.
Boots of Swiftness synergize with
Move Quick and
Celerity, helping Teemo stay outside enemy threat ranges while continuing to attack.A little less Attack Speed is often worth it if the extra movement allows you to land more autos safely. - Why
Press the Attack?
Press the Attack perfectly matches the core trading pattern of the build.Teemo wants to repeatedly attack the same target, and PTA rewards him for doing exactly that. It also naturally overlaps with BotRK's repeated-attack pattern, making the third auto an important moment in extended trades. - Why max
Move Quick second instead of
Blinding Dart?Because this build deals most of its damage through repeated auto-attacks. A stronger
Move Quick gives Teemo more control over spacing, chasing and disengaging.
Blinding Dart remains extremely useful even at lower ranks because the Blind itself is often more important than the spell's raw damage.- Why
Celerity and
Gathering Storm?
Celerity strengthens the movement-speed identity of the build.
Gathering Storm provides long-term adaptive scaling, adding more Attack Damage as the game progresses and increasing the value of Teemo's critical strikes and bonus AD scaling.- When should I take Coup de Grace instead of Cut Down? Take
Coup de Grace against mostly squishy compositions where finishing low-Health targets is more important.Take
Cut Down against teams with multiple tanks or bruisers, especially when you expect long front-to-back fights against large Health pools.- When should I build
The Collector?
The Collector is strongest against fragile teams.Choose it when the enemy composition contains several squishy champions and you want stronger finishing power from your critical strikes. - When should I build
Lord Dominik's Regards?Build
Lord Dominik's Regards earlier when tanks and bruisers begin stacking Armor.BotRK attacks their Health pool while LDR helps your physical damage pass through their Armor. - When should
Mortal Reminder replace LDR?Choose
Mortal Reminder when the enemy team has meaningful healing that needs to be reduced.Do not build it automatically if healing is not a real problem. - Why
Infinity Edge?
Infinity Edge is the main critical-strike multiplier of the setup.Once enough crit chance has been built, it turns every safe auto-attack window into significantly more damage and gives the build its true marksman scaling. - Why
Phantom Dancer against tanks and bruisers?
Phantom Dancer reinforces the long-fight identity of the build.Attack Speed improves sustained DPS while its movement profile helps Teemo continue kiting during extended frontline fights. - When is
Immortal Shieldbow worth buying?Buy
Immortal Shieldbow when enemy burst threatens to kill you before you can apply your damage.Surviving long enough to continue attacking is often worth more than buying another pure damage item. - When is
Stormrazor useful?
Stormrazor is a situational offensive option when stronger opening attacks and additional sticking power are more valuable than maximum sustained DPS.- When is
Hexoptics C44 worth buying?
Hexoptics C44 rewards disciplined max-range positioning.It fits naturally into a build centered around spacing and becomes especially useful when additional range after takedowns can help Teemo continue attacking safely. - Why play AD Crit instead of full on-hit? Full on-hit usually provides more consistent sustained damage in very long fights. AD Crit trades some of that consistency for much heavier individual auto-attacks and stronger burst windows. BotRK still gives the build an on-hit anti-Health component before Teemo transitions into crit scaling. - Why play AD Crit instead of AP? AP Teemo has stronger
Blinding Dart,
Toxic Shot magic damage and much stronger
mushrooms.AD Crit Teemo instead focuses on auto-attack damage, sustain, kiting and physical DPS. The two builds have different win conditions. - Are mushrooms still useful without AP? Yes. They deal less damage, but their vision, slow and zone control remain extremely valuable. Use them to protect side lanes, cover escape routes and make it harder for enemies to collapse on you. - What is the recommended ban?
Malphite is the recommended permaban for this setup.His Armor stacking, Attack Speed reduction, reliable poke and level-six engage directly interfere with the core strengths of an AD auto-attack Teemo. - What is the main rule of the build? Never sacrifice your spacing just to deal one more auto-attack. The build is strongest when Teemo controls the distance of the fight and keeps attacking safely. |
|
📝 THE TOP LANE TERROR EVOLVES 🔧 ━━━━━━━━━━━━━━━━━━━━━━━━━━━━━━━━━━━━ NOVEMBER 2026 • Rebuilt the guide around AD Crit Teemo Top. • Added Blade of the Ruined King as the core first-item power spike. • Added Boots of Swiftness, Celerity and W-max-second as the movement core of the build. • Added the Press the Attack rune page with Coup de Grace and Cut Down adaptations. • Added separate item paths for squishy teams and tanks / bruisers. • Added Collector, Lord Dominik's Regards, Infinity Edge, Phantom Dancer and situational crit options. • Added the complete Top Lane Threats section with matchup difficulty ratings. • Added Jungle Synergies designed around frontline, crowd control and extended fights. • Reworked the gameplay chapters around laning, kiting, spacing, side-lane pressure and front-to-back teamfighting. |
|
🏁 BECOME THE TOP LANE TERROR 🏁 ━━━━━━━━━━━━━━━━━━━━━━━━━━━━━━━━━━━━ AD Crit Teemo does not succeed because he has the strongest burst or the highest raw DPS in every possible situation. He succeeds because he can control the distance of the fight better than most top laners can control him.
Blade of the Ruined King creates the first real power spike.
Boots of Swiftness,
Celerity and
Move Quick create the space required to keep attacking.
Press the Attack rewards clean extended trades.
Infinity Edge and the rest of the critical strike build turn every successful spacing window into serious carry damage.This playstyle rewards discipline more than reckless aggression. Attack when the opponent steps too close. Move between every auto. Save
Blinding Dart for the moments where Blind actually changes the fight.Save
Move Quick for the moment movement speed becomes necessary.Adapt your items to the enemy composition instead of following the same purchase order every game. Not every advantage will appear as a solo kill. Sometimes the advantage is forcing a bruiser away from the wave. Sometimes it is surviving a gank because your spacing was cleaner. Sometimes it is making the enemy send multiple champions into a side lane because one player can no longer deal with you safely. And sometimes it is simply staying alive in a teamfight long enough to land ten auto-attacks instead of three. That is the strength of this build. It does not simply make Teemo deal more physical damage. It transforms his range, movement speed, Blind and utility into a true ranged carry playstyle for top lane.
KEEP YOUR RANGE. KEEP MOVING. KEEP FIRING.
|
👹 CREATED BY RAPTORHUNTER 👹
The mind behind the Top Lane Terror
AUTO • KITE • CRIT
Thank you for reading.
━━━━━━━━━━━━━━━━━━━━━━━━━━━━━━━━━━━━
Guide writing and visual direction by RaptorHunter.
Created for educational purposes and updated for Season 16.




You must be logged in to comment. Please login or register.