





 [26.19] Milio Support | In-Depth Guide
 Build Guide By AlvesTraquina
 237
Views
237
Views
 1
Comments
237
Views
1
Comments
Milio Build Guide By AlvesTraquina
1
Comments
237
Views
1
Comments
Milio Build Guide By AlvesTraquina
x
Did this guide help you? If so please give them a vote or leave a comment.
You can even win prizes by doing so!
Vote
Comment
I liked this Guide

I didn't like this Guide
 Thank You!
Your votes and comments encourage our guide authors to continue
creating helpful guides for the League of Legends community.
Recommended Items


Runes: Standard / Default
1
2
3

Sorcery





Resolve






+8 Ability Haste
+9 Adaptive (5.4 AD or 9 AP)
+65 Base Health








Spells:
1
2
Standard
![LoL Summoner Spell: Flash]()
![LoL Summoner Spell: Heal]()

Flash

Heal

Items


Support Item
![]()


First Item Options
![]()


Full Build Example
![]()


Situational / Alternative Items
![]()


Threats & Synergies
 Threats
 Synergies
Extreme
Major
Even
Minor
Tiny
 Show All
None
Low
Ok
Strong
Ideal
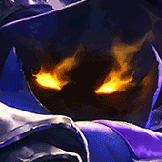
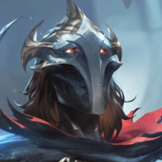
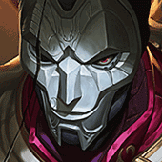
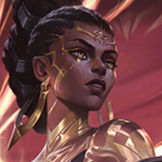
Extreme Threats
 Ideal Synergies

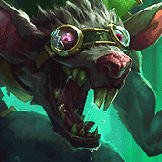
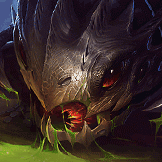
Blitzcrank
One hook can punish Milio heavily. Stay behind minions and keep Q available to interrupt his engage

























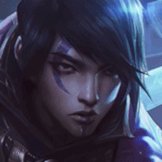
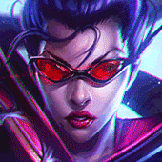
Lucian
Can exploit Milio's buffs particularly well in agressive trades


















 Synergies
Ideal
Strong
Ok
Low
None
Lucian
Can exploit Milio's buffs particularly well in agressive trades


Champion Build Guide
Introduction
Hello! Welcome to my first Mobafire guide.
I've spent a lot of time playing and researching the champion, and I wanted to share what I've learned. Since there aren't many updated and detailed Milio guides, I wanted to create something useful for both newer players and anyone looking to better understand his builds, runes, matchups and playstyle.
This guide is not meant to present a single "correct" way to play Milio. His runes and items can change depending on the matchup, team composition and game state, so I focused on explaining the reasoning behind each option rather than giving a fixed build.
I decided not to create separate in-depth rune and item chapters, as I already included the important explanations and adjustments in the notes above. The goal is to focus on the choices that provide the most consistent value for Milio without adding unnecessary information.
Hopefully this guide helps you get more out of The Gentle Flame.
I've spent a lot of time playing and researching the champion, and I wanted to share what I've learned. Since there aren't many updated and detailed Milio guides, I wanted to create something useful for both newer players and anyone looking to better understand his builds, runes, matchups and playstyle.
This guide is not meant to present a single "correct" way to play Milio. His runes and items can change depending on the matchup, team composition and game state, so I focused on explaining the reasoning behind each option rather than giving a fixed build.
I decided not to create separate in-depth rune and item chapters, as I already included the important explanations and adjustments in the notes above. The goal is to focus on the choices that provide the most consistent value for Milio without adding unnecessary information.
Hopefully this guide helps you get more out of The Gentle Flame.
About Me / Rank

Why Milio - Pros & Cons
Pros
+ Strong ADC Synergy
+ Powerful AoE Cleanse
+ Reliable Anti-Engage & Peel
+ Strong Scaling Potential
+ Strong Defensive Utility
Cons
- Long Early Cooldowns
- Extremely Squishy
- Limited Engage Potential
- Positioning Reliant
- Team Dependent
Abilities
|
PASSIVE
|
Fired Up How it works Milio's abilities empower himself or allies, marking their next attack or ability hit to deal bonus magic damage and apply a burn effect. Key Tips + Avoid wasting passive marks on low-value situations — use them when your carry can actually follow up. + Fired Up! only refreshes when reapplied; multiple marks do not stack. + Your Q triggers Fired Up even when used on allies — similar to Nami's Q interaction. |
| _____________________________ | |
|
Q
|
Ultra Mega Fire Kick How it works Milio kicks a fireball that knocks back the first enemy hit. The ball then bounces forward, exploding and slowing enemies in the area. Key Tips + Your main defensive tool — avoid using it randomly for poke when enemies can engage. + Holding Q can completely deny enemy engage attempts by threatening the knockback. + Try to hit Q through minions when possible, making it harder for enemies to react. |
| _____________________________ | |
|
W
|
Cozy Campfire How it works Milio creates a zone that heals allies, grants bonus attack range and can follow a target ally. The zone also provides vision around it. Key Tips + The extra attack range is often more valuable than the healing itself. + Use W when your carry can actively abuse the range advantage, especially during trades or fights. + W follows the nearest allied champion when placed on the ground, but you can control who receives it by casting directly on the desired ally. + Avoid using it only for small heals — the cooldown is long early. |
| _____________________________ | |
|
E
|
Warm Hugs How it works Milio shields himself or an ally and grants bonus movement speed. The ability stores up to two charges. Key Tips + Avoid using both charges without a reason — keeping one available gives you more flexibility. + The movement speed is just as important as the shield, helping carries kite and reposition. + Using E on yourself can help with dodging, trading or rotating around the map. |
| _____________________________ | |
|
R
|
Breath of Life How it works Milio releases soothing flames that heal nearby allies, cleanse most crowd control effects and grant them bonus Tenacity. Key Tips + The cleanse is usually the most valuable part of R — don't use it only as a heal. + Avoid panic-casting it; wait for important crowd control whenever possible. + The Tenacity after using R can completely change extended fights. |
Early Game — Laning Phase
Milio's early game is about creating small advantages while keeping his ADC safe. Avoid forcing unnecessary fights — your goal is to survive lane, enable your carry and reach your first items.
Game Plan
+ Play around your passive
Short trades are usually better than extended fights where enemies can punish your lack of mobility.
+ Respect enemy engage tools
Keep Q available against engage supports. A missed Q can completely change how safely you can play the lane.
+ Use W with purpose
Use W when your ADC can pressure with the extra range — not only for small heals.
+ Manage your mana carefully
Avoid wasting abilities for small advantages. Running out of resources can leave you vulnerable to all-ins.
+ Control your lane vision
Ward river and jungle entrances to prevent ganks and track enemy support movement. Against engage supports, defensive vision is usually more valuable than aggressive wards.
+ Roam only with a purpose
Milio is not a champion that wants to leave lane randomly. Roam when your ADC is safe, the wave allows it and there is a clear objective such as helping your jungler or securing vision.
Game Plan
+ Play around your passive
Short trades are usually better than extended fights where enemies can punish your lack of mobility.
+ Respect enemy engage tools
Keep Q available against engage supports. A missed Q can completely change how safely you can play the lane.
+ Use W with purpose
Use W when your ADC can pressure with the extra range — not only for small heals.
+ Manage your mana carefully
Avoid wasting abilities for small advantages. Running out of resources can leave you vulnerable to all-ins.
+ Control your lane vision
Ward river and jungle entrances to prevent ganks and track enemy support movement. Against engage supports, defensive vision is usually more valuable than aggressive wards.
+ Roam only with a purpose
Milio is not a champion that wants to leave lane randomly. Roam when your ADC is safe, the wave allows it and there is a clear objective such as helping your jungler or securing vision.
Mid Game — Rotations & Objectives
After laning phase, Milio's value comes from enabling his strongest teammates and controlling fights around objectives.
Game Plan
+ Follow proactive plays
Milio is not built to force roams alone. Move with your jungler or teammates when there is a clear opportunity, using your mobility and utility to support fights.
+ Group before objectives
Move with your team before Dragon or Baron fights and avoid arriving late without time to prepare.
+ Prepare objectives early
Set up vision before objectives start. Control entrances and choke points instead of only focusing on the objective itself.
+ Play around your team's pressure
Move with teammates who can create space for you instead of trying to support fights from unsafe positions.
+Save key abilities for fights
Avoid using Q or R before objectives when enemy threats are still missing.
+ Extend fights
Milio becomes more valuable as fights continue. Avoid using your abilities before the important moment.
Game Plan
+ Follow proactive plays
Milio is not built to force roams alone. Move with your jungler or teammates when there is a clear opportunity, using your mobility and utility to support fights.
+ Group before objectives
Move with your team before Dragon or Baron fights and avoid arriving late without time to prepare.
+ Prepare objectives early
Set up vision before objectives start. Control entrances and choke points instead of only focusing on the objective itself.
+ Play around your team's pressure
Move with teammates who can create space for you instead of trying to support fights from unsafe positions.
+Save key abilities for fights
Avoid using Q or R before objectives when enemy threats are still missing.
+ Extend fights
Milio becomes more valuable as fights continue. Avoid using your abilities before the important moment.
Late Game — Teamfights & Carry Protection
Late game Milio is extremely powerful, but small positioning mistakes become much more punishing.
Game Plan
+ Protect, don't engage
Your job is keeping carries alive and allowing them to deal damage safely.
+ Position around threats
Stay close enough to help your team, but far enough that enemy engage cannot instantly remove you.
+ Use R as a fight changer
Your ultimate can completely deny enemy engage. Wait for important crowd control instead of using it only for healing.
+ Empower the right target
Your buffs have the highest impact when used on the teammate who can safely convert them into damage.
Game Plan
+ Protect, don't engage
Your job is keeping carries alive and allowing them to deal damage safely.
+ Position around threats
Stay close enough to help your team, but far enough that enemy engage cannot instantly remove you.
+ Use R as a fight changer
Your ultimate can completely deny enemy engage. Wait for important crowd control instead of using it only for healing.
+ Empower the right target
Your buffs have the highest impact when used on the teammate who can safely convert them into damage.
Tips & Tricks
+ Maximize your support quest stacks
Look for safe opportunities to use shields or heals while interacting with enemies instead of waiting passively for stacks. Milio can generate support quest progress efficiently by using his abilities on allies or himself while also applying Fired Up through his passive.
+ Vision is part of your positioning
Milio is extremely easy to punish when face-checking. Ward with your team, use safer angles and avoid creating vision alone.
+ Consider an extra early point in Q when snowballing
In winning lanes, a second point in Q before fully committing to E max can add extra pressure. This is situational and depends on the lane state.
+ Avoid fully completing Morellonomicon
Milio can apply Grievous Wounds through his passive, but Morellonomicon is generally inefficient. If anti-heal is needed, Oblivion Orb is usually enough.
+ Learn ALT + E / ALT + W
Using self-cast shortcuts allows you to shield or place W on yourself instantly without needing to click your champion. This avoids misclicks and makes your reactions faster in fights.
Look for safe opportunities to use shields or heals while interacting with enemies instead of waiting passively for stacks. Milio can generate support quest progress efficiently by using his abilities on allies or himself while also applying Fired Up through his passive.
+ Vision is part of your positioning
Milio is extremely easy to punish when face-checking. Ward with your team, use safer angles and avoid creating vision alone.
+ Consider an extra early point in Q when snowballing
In winning lanes, a second point in Q before fully committing to E max can add extra pressure. This is situational and depends on the lane state.
+ Avoid fully completing Morellonomicon
Milio can apply Grievous Wounds through his passive, but Morellonomicon is generally inefficient. If anti-heal is needed, Oblivion Orb is usually enough.
+ Learn ALT + E / ALT + W
Using self-cast shortcuts allows you to shield or place W on yourself instantly without needing to click your champion. This avoids misclicks and makes your reactions faster in fights.
Conclusion
Final Thoughts
Thanks for reading my Milio guide!
Milio rewards patience, positioning and good decision making. While his kit may look simple, mastering when to use each ability and who to empower can completely change the outcome of fights.
I hope this guide helped you understand his strengths, item choices and how to get more value from his abilities.
Good luck on the Rift!
Thanks for reading my Milio guide!
Milio rewards patience, positioning and good decision making. While his kit may look simple, mastering when to use each ability and who to empower can completely change the outcome of fights.
I hope this guide helped you understand his strengths, item choices and how to get more value from his abilities.
Good luck on the Rift!




AlvesTraquina
Milio Guide
[26.19] Milio Support | In-Depth Guide


You must be logged in to comment. Please login or register.