





Shaco
Build Guide by Shaco Mid Lane
 [26.18] Shaco_Mid_Lane| 10+ Million Mastery AP Shaco Lane Guide | Outplay & Tilt
[26.18] Shaco_Mid_Lane| 10+ Million Mastery AP Shaco Lane Guide | Outplay & Tilt
 Build Guide By Shaco Mid Lane
222
14
Build Guide By Shaco Mid Lane
222
14
 440,014
Views
440,014
Views
 7
Comments
7
Comments
222
14
440,014
Views
7
Comments
Shaco Build Guide By Shaco Mid Lane
440,014
Views
7
Comments
Shaco Build Guide By Shaco Mid Lane
Follow


Recommended Items


Runes: Standard Runes
Sorcery





Precision




+8 Ability Haste
+2.5% Movement Speed
+10-180 Bonus Health
Spells:
Summoners
![]()
![LoL Summoner Spell: Flash]()
![LoL Summoner Spell: Teleport]()


Flash

Teleport
Items


Core items
![]()


Ability Order

Backstab (PASSIVE)
Shaco Passive Ability


Threats & Synergies
 Threats
 Synergies
Extreme
Major
Even
Minor
Tiny
 Show All
None
Low
Ok
Strong
Ideal
Extreme Threats
 Ideal Synergies

Vex
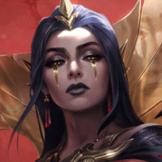
She shoves the lane, you cannot push against her. She clears your boxes easily, you cannot poke her because of her shield. Most annoyingly, her passive marks you when you ult, immediately revealing the real you. + Her passive is annoying for your Q. Ban her.












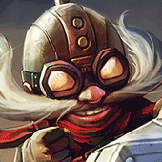

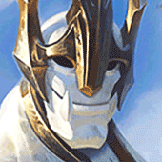
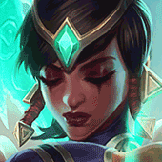



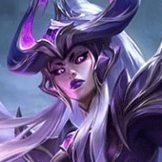















 Synergies
Ideal
Strong
Ok
Low
None



About me

WELCOME TO MY SHACO MID GUIDE
━━━━━━━━━━━━━━━━━━━━━━━━━━━━━━━━
|
SHACO MID OTP
|
CHALLENGER
|
10M+ MASTERY
|
If you thought Shaco was only a jungle champion, you're in the right place.
|
ABOUT ME ──────────────── I am a Shaco Mid Lane OTP who reached Challenger playing nothing but Shaco mid. You may have seen me featured on HappyChimeNoises — if you want the deep dive on why this pick works, that video is the best place to start. |
ABOUT THIS GUIDE
━━━━━━━━━━━━━━━━━━━━━━━━━━━━━━━━
━━━━━━━━━━━━━━━━━━━━━━━━━━━━━━━━
|
This guide is a work in progress. I'm actively adding sections, refining advice and updating it as the game and Shaco's build evolve. ✦ HAVE SOMETHING TO ADD? Questions, suggestions and matchup tips are always welcome — drop them in the comments below. |
THANK YOU FOR READING
Now go make them question why Shaco is in mid lane.
Now go make them question why Shaco is in mid lane.
Laning Phase
LANING PHASE
━━━━━━━━━━━━━━━━━━━━
SURVIVE THE LANE • FARM • SCALE
|
LEVEL 1 — SET UP YOUR BOXES
| |
|
Before the first wave arrives, place a Jack In The Box at your jungler's starting camp to help with the first clear. Alternatively, place a box behind you in lane as a safe retreat zone if the enemy tries to force an early trade. |
TIP A box is far more valuable already waiting than set up mid-fight. |
LEVEL 1–3 — SURVIVE • FARM • DON'T THROW YOUR LANE AWAY
|
Shaco is extremely fragile early. Priority is CS, XP and mana management, not unnecessary trades. Use Backstab to secure hard minions and Jack In The Box to create space and zone the enemy off your CS. |
DON'T Burn mana poking every Two-Shiv Poison cooldown. DO Look for E + Arcane Comet trades that don't cost your farm. |
MANAGE YOUR MANA — EVERY CAST SHOULD HAVE A PURPOSE
|
Stack Manaflow Band efficiently — use Jack In The Box to stack it for free rather than spending mana purely for poke. Otherwise, look for Two-Shiv Poison when Manaflow Band and Arcane Comet are both up. |
REMEMBER An E that costs you mana to farm or escape is a bad trade, even if it deals damage. |
|
YOUR FIRST POWER SPIKE
|
|
Once Manaflow Band is stacked with Lost Chapter, mana stops being a constraint — every cast before this should have a purpose, after this you can start looking for a repeatable pattern:
BOX → CONTROL SPACE → E POKE → BACK OFF → REPEAT
Don't feel pressured to force a kill. |
EARLY-GAME WIN CONDITION — YOU DON'T NEED TO WIN LANE, YOU NEED TO
Mid Game
MID GAME
━━━━━━━━━━━━━━━━━━━━
This is where AP Shaco stops being just a laner and starts becoming a map-control champion.
|
YOUR JOB
CONTROL THE MAP |
Push your wave, move first and use Jack In The Box to turn important areas into zones the enemy doesn't want to enter. You don't need immediate kills — if the enemy has to walk through your boxes to reach an objective, you've already created an advantage. PUSH WAVE → MOVE FIRST → SET BOXES → CONTROL VISION |
OBJECTIVE SETUP
Prepare the fight before it starts.
Prepare the fight before it starts.
|
01
|
PUSH THE WAVE Force the enemy to choose between the wave and the objective. |
|
02
|
ARRIVE EARLY Your setup should already be waiting — not placed as they arrive. |
|
03
|
SPREAD YOUR BOXES Cover multiple entrances instead of stacking them where one Oracle Lens clears everything. |
|
04
|
CONTROL THE APPROACH Cover their likely routes. Damage and displacement before the fight are already an edge. |
|
"Where will the enemy run when they panic?" Don't only box the objective — box the enemy's expected escape route too. When your team collapses, a Jack In The Box on their exit path can interrupt the retreat and hand your team an easy finish. |
Wave control: your boxes and DoT effects make pushing easier as the game goes on — use it to build tempo. If the enemy stays in lane, your team gets time on the objective. If they move up, they risk walking through your prep. Either way, you've forced a decision.
THE SHACO ADVANTAGE
Make them guess wrong.
Make them guess wrong.
|
DECEIVE Appear and disappear, creating uncertainty about where you'll strike. |
HALLUCINATE Bait enemies into wasting important abilities on a clone. |
TWO-SHIV POISON Finish targets who barely survive the engage. |
BOX MANAGEMENT
Don't throw boxes randomly. Every Jack In The Box should accomplish one of three things:|
ZONE
Prevent a route. |
DAMAGE
Weaken enemies. |
ESCAPE
Create a safe path. |
|
MID-GAME WIN CONDITION
WAVE → OBJECTIVE → BOXES → VISION → BAIT → FIGHT |
You are strongest when the enemy fights on your terms. Don't run blindly into a 5v5 — make them walk through your boxes, choose between wave and objective, chase the wrong Shaco. Then punish the mistake.
━━━━━━━━━━━━━━━━━━━━
THE GOLDEN RULE
"The fight starts before anyone presses R."
If you've prepared the map correctly, the enemy is already losing HP, cooldowns and positioning before the fight begins.
THE GOLDEN RULE
"The fight starts before anyone presses R."
If you've prepared the map correctly, the enemy is already losing HP, cooldowns and positioning before the fight begins.
Late Game
LATE GAME
━━━━━━━━━━━━━━━━━━━━
Don't start the fight. Make the enemy enter it already losing.
|
YOUR ROLE — CONTROL THE AREA
|
|
Late-game Shaco is strongest when he controls where the fight happens. Use Jack In The Box to weaken enemies, deny engages and make important areas dangerous to enter.PUSH → SET UP → WEAKEN → DENY FLANKS → FORCE THE FIGHT You don't need to start the fight. You want the enemy to arrive with less HP, fewer cooldowns and worse positioning. |
THE BOX NETWORK
Build your setup from the outside in.
Build your setup from the outside in.
Jack In The Box can remain active for roughly 90–130 seconds, depending on your AP. Don't wait until the objective is spawning — start preparing early and build your setup in layers.|
01
|
OUTER Enemy jungle routes and likely approaches. Damage them before they arrive. |
|
02
|
MIDDLE Paths leading toward the objective. Create multiple layers of danger. |
|
03
|
INNER Objective entrances, flanks and escape routes. Force them through your setup. |
|
DAMAGE BEFORE THE FIGHT Your ideal fight doesn't begin with both teams at full HP. Liandry's Torment makes repeated box damage and poke even more punishing.WALK THROUGH → LOSE HP → GET FEARED → LOSE POSITION |
DENY THE FLANK Not every box needs to deal damage. Cover jungle entrances, flanks, choke points and escape routes — a defensive box can be more valuable than a damage box if it stops an assassin reaching your backline. |
PLAY AROUND OBJECTIVES
Prepare before they arrive.
Prepare before they arrive.
If
Baron or Dragon is spawning soon, don't chase random kills across the map. Push the relevant wave, move toward the objective and establish your setup before the enemy arrives.|
01
PUSH |
02
MOVE |
03
SET UP |
04
DENY |
05
BAIT |
06
FIGHT |
DON'T FORGET THE TANKS
Boxes are significantly less threatening against heavily built tanks. Against them, your setup is often more valuable for controlling the battlefield than trying to burst them.
ZONE CONTROL • CROWD CONTROL • TEAMFIGHT SETUP
Focus your damage on vulnerable targets while using your boxes to control where the frontline can move.
|
THE LATE-GAME SHACO RULE
"Don't fight them at full strength." MAKE THEM WALK THROUGH THE MAP FIRST. By the time the enemy reaches the objective, they should already have lost HP, positioning, vision or cooldowns. They're not just fighting your team — they're fighting the map you prepared. |
Abilities
Backstab Bonus damage from behind Your attacks from behind deal bonus damage, this also applies to your Two-Shiv Poison. Use this for farming, unless you are far behind you should be able to last hit caster minions after 1 tower shot with Backstab.
Deceive Blink and stealth Can be used to dodge skill shots, escape ganks, reposition yourself in fights and to outplay. When you take damage, the enemy can see where you are so be careful of damage over time effects and (caster) minion attacks that are still chasing you when you press Q.
Jack in the box Fears enemies and deals AOE damage Very versatile ability. You can use it to shove waves, to create pressure so that you can farm in lane and it can zone enemies at objectives. If it hits a single target it deals bonus damage but it takes some time to activate and is squishy. Combine with your passive to make farming easier and use this ability to give your team the advantage at objectives.
Two-Shiv Poison Throws a dagger and deals damage, can apply a slow to your auto attacks. Allows you to poke in lane and it allows you to catch low HP enemies. This ability crits when the enemy is below 30% health. When this ability is up, your auto attacks slow. Sometimes it is better to be patient so that you can apply the slow on your auto attacks and wait for the enemy to be low so that you can crit.
Hallucinate Creates a clone that explodes when it diesMastering clone control is essential for AP Shaco. Your clone takes more damage and deals less damage than you which can reveal you. When the clone explodes, it deals massive damage and spawns 3 miniboxes. This ability is best used when it explodes on top of enemies as it makes all 3 miniboxes hit the enemy. You can combine Hallucinate with Deceive to trick the enemy into thinking your clone is the real you. Walk the clone out of range so it bounces back and then Deceive into the enemy. Ideally, you want to use your Two-Shiv Poison before you cast your ultimate as you can wait for your E to be up again with the confusion of your clone. If you E directly after ulting, it will reveal the real you. Bonus tip: When you use Hallucinate the real you spawns where your cursor is and the clone spawns on the opposite side of your cursor, you can hop over certain walls with this.
Strengths and Weaknesses
STRENGTHS & WEAKNESSES
━━━━━━━━━━━━━━━━━━━━
What makes Mid Shaco strong — and what you're trading away to play him.
|
PROS
| ||||||
|
|
CONS
| ||||||
|
━━━━━━━━━━━━━━━━━━━━
THE TRADE-OFF
Shaco gives up traditional lane pressure in exchange for something much harder for the enemy to deal with:
control, unpredictability and preparation.
THE TRADE-OFF
Shaco gives up traditional lane pressure in exchange for something much harder for the enemy to deal with:
control, unpredictability and preparation.
Pushing Towers
PUSHING TOWERS
━━━━━━━━━━━━━━━━━━━━
Pressure the tower without giving the enemy an easy way to punish you.
|
01
|
PRESSURE WITH Q Use Deceive to safely move around the tower and create pressure while keeping an escape available.WATCH OUT → Once Q is down, you are much easier to gank and punish. |
Q = YOUR EXIT
DON'T WASTE IT Only use Q aggressively when you have a reason. |
|
02
|
BUILD YOUR ESCAPE ROUTE Place Jack In The Box behind you or around the tower before you commit to the push.If someone engages, you already have a safe direction to retreat toward. THINK AHEAD → Your box isn't just damage — it's part of your escape plan. |
W = SAFETY
PLACE IT FIRST Create the retreat path before you need it. |
|
03
|
KNOW WHEN TO BACK OFF If the enemy disappears from the map, don't greed for extra tower damage. Your Deceive is your primary escape. If it is already on cooldown, respect the possibility of a gank. |
GOLDEN RULE
NEVER TRADE Q FOR A FEW TOWER HITS. |
THE TOWER-PUSH PATTERN
BOX → POSITION → PRESSURE → Q READY → DISENGAGE
The goal isn't to hit the tower as long as possible — it's to pressure it while keeping control of your escape.
BOX → POSITION → PRESSURE → Q READY → DISENGAGE
The goal isn't to hit the tower as long as possible — it's to pressure it while keeping control of your escape.
Trading in lane
TRADING
━━━━━━━━━━━━━━━━━━━━
BURST • DISENGAGE • RESET
| 01 — THE BASIC TRADE | |
|
One of your strongest early trading tools is combining Deceive with Backstab.Use Deceive to approach the enemy, attack them from behind to trigger Backstab, then disengage before they can punish you.The damage can be surprisingly high, but there is one major drawback:
WARNING → Don't use this trade blindly when the enemy jungler could be nearby. |
| 02 — POKE WITH E | |
|
Two-Shiv Poison is your safest way to apply pressure from range. Try to use Two-Shiv Poison when Arcane Comet is available to maximize the value of your poke.
Don't throw E whenever it comes off cooldown if it means wasting mana for very little damage. Look for moments where Arcane Comet is ready or where the enemy is already weakened enough for the poke to matter. |
| 03 — PLAY AROUND ENEMY COOLDOWNS | |
|
Against champions with dangerous abilities, your trading pattern should be reactive. Take Syndra as an example — don't immediately use Deceive aggressively.Instead, wait for Syndra to use an important ability. Once it is on cooldown, you have a much safer window to use Deceive and follow up with Two-Shiv Poison.
This is much safer than committing to a trade while the enemy still has every tool available to punish you. |
| 04 — DIFFERENT MATCHUPS, DIFFERENT TRADES | |
|
Not every champion should be traded with in the same way. Against champions such as Katarina, you can sometimes walk into range, throw Two-Shiv Poison and immediately use Deceive to disengage.The important part is that you are not committing to an extended fight.
Shaco wins many lanes by repeatedly taking small, favorable trades rather than trying to force one massive all-in. |
━━━━━━━━━━━━━━━━━━━━
THE GOLDEN RULE
"If you don't know where the jungler is, don't spend your escape."
Deceive is both your best offensive tool and your most
THE GOLDEN RULE
"If you don't know where the jungler is, don't spend your escape."
Deceive is both your best offensive tool and your most
Tower Mechanics
TOWER AGGRO
━━━━━━━━━━━━━━━━━━━━
UNDERSTAND THE TOWER • ABUSE THE AGGRO • DIVE SAFELY
|
01 — YOU TAKE AGGRO |
|
The tower always focuses you first if you damage enemy champions under tower. |
|
02 — BOXES TAKE AGGRO | |
|
If you are not damaging an enemy under tower, it focuses your boxes first.
|
|
03 — CLONE TOWER DIVES |
|
If your clone damages an enemy under tower, the tower focuses the clone. This is great for towerdiving because Hallucinate can take the tower's attention while you remain free to deal damage. |
|
IMPORTANT — CLONE AGGRO HAS A CONDITION
If you deal damage to the enemy while you are out of tower range and then walk your clone to hit the enemy champion under tower, it will not focus the clone. You cannot simply damage the enemy from outside tower range and then send your clone underneath to take aggro. |
TOWER AGGRO → KNOW WHO THE TOWER IS TARGETING
Understanding the aggro rules lets you use your boxes and clone to create much safer tower plays.
Understanding the aggro rules lets you use your boxes and clone to create much safer tower plays.
Summoner Spells
|
SUMMONER SPELLS -
|
|
Runes
RUNE OPTIONS
━━━━━━━━━━━━━━━━━━━━
Choose your secondary runes around the matchup and what you need from the game.
━━━━━━━━━━━━━━━━━━━━
Choose your secondary runes around the matchup and what you need from the game.
|
ARCANE COMET Two-Shiv Poison and Jack In The Box. Box damage reduces its cooldown, giving you repeated Comets in extended fights.NOTE → Can reveal you during Deceive / Hallucinate and may interfere with CS. |
MANAFLOW BAND Jack In The Box whenever possible and avoid wasting E purely for poke. |
TRANSCENDENCE Deceive, Two-Shiv Poison and Jack In The Box uptime. |
|
GATHERING STORM PREFER → You expect the game to scale. |
SCORCH PREFER → Kill pressure / aggressive lanes. |
PRESENCE OF MIND PREFER → Mana-hungry games. |
|
COUP DE GRACE Two-Shiv Poison. |
CUT DOWN |
LAST STAND |
SECOND WIND |
|
OVERGROWTH |
MAGICAL FOOTWEAR |
MATCHUP DEPENDENT
There is no single secondary page that is optimal every game. Pick the tools that solve the lane or team-composition problem in front of you. |
THE RULE →
Primary runes define your core game plan. Secondary runes should solve the problem the game gives you.
Primary runes define your core game plan. Secondary runes should solve the problem the game gives you.
Items
ITEMIZATION
━━━━━━━━━━━━━━━━━━━━
BUILD FOR THE GAME — NOT A FIXED SIX-ITEM TEMPLATE
|
01
| BOOTS |
|
|
IONIAN BOOTS OF LUCIDITY — DEFAULT, MOST GAMES Cheap, efficient and the standard choice for maximum ability uptime — more Qs, boxes and E poke. |
|
|
SORCERER'S SHOES — SWAP IN WHEN SNOWBALLING + LOW MR The aggressive alternative. Magic penetration is excellent when you're ahead against mostly squishy targets. |
|
02
| CORE DAMAGE |
|
|
LIANDRY'S TORMENT — STRONGEST IN EXTENDED FIGHTS / VS HIGH-HP One of AP Shaco's strongest damage options — the burn works extremely well with repeated Jack In The Box, Two-Shiv Poison and Hallucinate damage. |
|
|
IMPERIAL MANDATE — STRONGEST WHEN YOUR TEAM FOLLOWS UP Utility-damage that works naturally with Shaco's repeated CC and slows — your boxes, E and R all create opportunities for your team. |
|
03
| PENETRATION |
|
|
CRYPTBLOOM — PREFER: MODERATE MR + WANT ABILITY HASTE Balanced penetration with ability haste. |
|
|
VOID STAFF — PREFER: MULTIPLE HIGH-MR TARGETS Stronger against heavy magic resistance. |
|
|
SHADOWFLAME — PREFER: SQUISHY ENEMIES + SNOWBALL Aggressive penetration and burst option. |
|
04
| SNOWBALL |
|
|
MEJAI'S SOULSTEALER — BUY WHEN CONFIDENTLY SNOWBALLING Huge value when you're already ahead — the AP and movement speed are excellent, but losing stacks can be devastating. |
|
05
| SITUATIONAL & UTILITY |
|
|
COSMIC DRIVE — BUY WHEN MOBILITY MATTERS MORE THAN BURST Trades damage for ability haste and movement speed, making Shaco more slippery. |
|
|
ZHONYA'S HOURGLASS — BUY VS BURST, AD THREATS OR KEY ULTIMATES Defensive option for surviving burst and risky Hallucinate plays. |
|
|
MORELLONOMICON — BUY VS SIGNIFICANT ENEMY HEALING Only buy when anti-healing is genuinely needed — Oblivion Orb can be held while completing other items. |
|
|
SERPENT'S FANG — BUY VS HEAVY, REPEATED SHIELDING Extremely niche anti-shield option. |
|
|
RABADON'S DEATHCAP — LATE-GAME LUXURY SLOT Once your penetration and situational needs are covered. |
|
06
| NEVER BUY |
|
|
SERAPH'S EMBRACE ✦ NEVER BUY The defensive value isn't worth the damage you give up as AP Shaco. |
|
|
MALIGNANCE ✦ NEVER BUY Hallucinate has some synergy, but Shaco's pattern doesn't justify giving up stronger items. |
|
|
HORIZON FOCUS ✦ NEVER BUY Poor value once your boxes can no longer reliably trigger its effect. |
|
|
STORMSURGE ✦ NEVER BUY Shaco's damage spreads across boxes, poke and burns rather than one burst window. |
|
THE SHACO RULE
Don't ask "What is the strongest item?" ASK: "WHAT PROBLEM DOES THIS ITEM SOLVE?" Squishies → Shadowflame / Sorcerer's Shoes • MR → Void Staff / Cryptbloom • Healing → Morellonomicon Shields → Serpent's Fang • Burst → Zhonya • Mobility → Cosmic Drive • Snowball → Mejai • Team Utility → Imperial Mandate |
Why not these runes / items?
WHY NOT THESE RUNES / ITEMS?
━━━━━━━━━━━━━━━━━━━━
Common suggestions that don't make the cut — and why.
|
|
DARK HARVEST — AVOID Your early game is too weak to benefit. Great in the jungle, but in lane it offers little extra damage, making it even harder to snowball. |
|
|
DEATHFIRE TOUCH — ARCANE COMET IS BETTER Lower damage than Arcane Comet, which also synergises far better with your Two-Shiv Poison and Jack In The Box damage. |
|
|
HORIZON FOCUS — AVOID Not horrible, just not as strong as the alternatives. |
|
|
LICH BANE — AVOID AP Shaco doesn't want melee range. Reaching it means using Deceive as a gap-closer, which leaves you too exposed. |
|
|
BANSHEE'S VEIL — AVOID The spell shield and stats don't do much for Shaco — Zhonya's Hourglass massively outperforms it most of the time. |
|
|
NASHOR'S TOOTH — AVOID AP Shaco doesn't auto-attack much — usually just one hit off Deceive. If you want the auto-attack pattern, go AD Shaco instead; Nashor's won't give you the burst you're after here. |

Shaco Mid Lane
Shaco Guide
[26.18] Shaco_Mid_Lane| 10+ Million Mastery AP Shaco Lane Guide | Outplay & Tilt

