





 The Passionate Guide On How To Use Scissors!

 Build Guide By Artoria
40
0
Build Guide By Artoria
40
0
 89,739
Views
89,739
Views
 6
Comments
89,739
Views
6
Comments
Gwen Build Guide By Artoria
6
Comments
89,739
Views
6
Comments
Gwen Build Guide By Artoria

 Thank You!
Your votes and comments encourage our guide authors to continue
creating helpful guides for the League of Legends community.
Choose Champion Build:
-
Jungle Build
![LoL Champion: Gwen]()
-
Mid Lane Build
![LoL Champion: Gwen]()
-
Straight to Chapters
![LoL Champion: Gwen]()
Recommended Items


Runes: Standard










+10% Attack Speed
+9 Adaptive (5.4 AD or 9 AP)
+10-180 Bonus Health
Spells:

Ghost

Gustwalker Smite


Items



Ability Order Standard Jungle Order

Thousand Cuts (PASSIVE)
Gwen Passive Ability


Threats & Synergies
 Threats
 Synergies
 Show All
Extreme Threats
Ideal Synergies
Show All
Extreme Threats
Ideal Synergies
Gwen
Threats are those ones that limit your freedom to engage and punish your sweet over commitment.
High burst, crowd control, long-range poke, or champions who kite well will stop Gwen before she reaches her optimal range. When those threats are present, you must pick fights carefully.
Gwen
Engagers create space and pressure, letting you go in with confidence. Defenders, especially those who shield or heal, help you survive bursts of damage and keep fighting.
Whether it’s someone leading the charge or guarding your back, they give you the freedom to focus on what you do best diving deep and carrying the fight.
Synergies
Gwen
Engagers create space and pressure, letting you go in with confidence. Defenders, especially those who shield or heal, help you survive bursts of damage and keep fighting. Whether it’s someone leading the charge or guarding your back, they give you the freedom to focus on what you do best diving deep and carrying the fight.











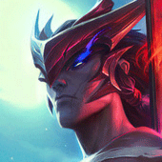



Champion Build Guide

🐸Why play Gwen? She is super fun and overpowered when played correctly!
🪷Why Gwen is super fun to play:
🪷Why does Gwen jungle works:
🐸Welcome to my Guide. My name is Artoria, and I am here to help you learn Gwen!
I have been a Gwen main since I first started playing League of Legends, and I do not see myself stopping anytime soon. To show my passion for the champion, I decided to create this guide to provide important information and share everything I have personally learned along the way. I have been playing League of Legends for around 2 years as of 2026, and I am currently a peak Emerald II player.
My goal with this guide is to help you truly understand Gwen, not just her mechanics, strengths, limits, and playstyle, but also understand how fun it is to play her.
🐸What are Gwen's Strengths and Weaknesses?
|
🌹Pros
|
+ Excellent sustained DPS + Strong dueling with Passive/E + High mobility through E + True damage from Q Center + Very strong against tanks + Self-sustain during long fights |
Gwen excels when fights last longer. Her kit allows her to constantly auto-attack while weaving abilities, converting ability power into sustained on-hit damage. With Nashor’s Tooth and Riftmaker, she becomes extremely difficult to outduel, while Hallowed Mist provides safety and zoning to apply consistent pressure. |
|
🥀Cons
|
- Weak early-game - Requires good aim with Q - Vulnerable to gap closers and CC - Struggles with mobile ranged - Limited engage tools - Needs core items for full function |
Gwen can struggle early and is punishable if mispositioned. She relies heavily on extended fights and item spikes, meaning she must play patiently until her core is completed. Champions with strong engage or disengage tools can shut her down before she scales. |
🐸What Summoner Spells should you use? Well...
🪷Ghost is the only one that you should use.
|
|
Ghost gives Gwen the sustained movement she needs to do what she does best: stick to targets, kite through fights, and finish off enemies after E resets. Gwen's kit rewards prolonged engagements (auto-attacks, Q stacking, and passive healing), and Ghost helps ensure those fights actually stay prolonged instead of the enemy kiting away. So thats why you should always use Ghost. |
🐸I'm sure that Ghost is the only option... So let me talk about the Jungle pets instead!
🪷Gustwalker Hatchling (Blue Smite)
|
|
Junglers already get some speed boost in the jungle, but its barely noticeable. So Blue Smite still stands a strong option. Improving Gwen's jungle by granting additional movement speed on bushes or killing jungle monsters, which helps you move between camps faster. It lets you chase enemies more effectively, very helpful because she needs to stick to targets but also disengage or escape. |
🪷Mosstomper Seedling (Green Smite)
|
|
Green Smite focuses on survivability. It grants a shield while fighting champions or jungle monsters. This helps Gwen against assassins and combo or burst focused champions, and it remains useful against all champions. A shield reduces damage taken and increases room for error. A shield is straightforward and easy to understand. |
🪷Scorchclaw Pup (Red Smite)
|
|
Red Smite is a strong choice for Gwen. Sticking to targets matters a lot for her damage output. This smite applies a slow in a 250 unit range, which makes it easier to stay on targets! Red Smite also adds percent health damage, increasing effectiveness against tanky/Bruiser champions. Overall it helps secure kills and win isolated skirmishes. |
🐸These are the standard Runes Options that you can pick for Gwen.
The Precision Runes that you should use on Gwen.
|
|
Conqueror works best on Gwen because she is strongest in long fights rather than quick burst trades. She stacks it very quickly with her auto attacks, E reset, and multi-hit Q, so she gets full value almost immediately when a fight starts. The bonus damage increases the power of her autos, Q, and ultimate, while the healing at full stacks synergizes extremely well with her passive sustain. As fights go on, Gwen becomes harder to kill and deals more consistent damage, which is exactly how she is meant to be played. Conqueror also scales well into mid and late game, making it far more reliable than other keystones that only provide short-term or early-game value. |
|
|
Triumph is great on Gwen because it heals her after takedowns, letting her stay in fights longer, survive risky skirmishes, secure multiple kills, and fully utilize her damage and sustain in extended fights. It works perfectly with her passive and playstyle, keeping her alive when diving into the enemy backline. |
|
|
Legend Alacrity gives Gwen bonus attack speed as fights go on. Since her kit relies on repeated auto attacks to stack her Q and passive, more attack speed means she deals damage faster, stacks her abilities quicker, and heals more from her passive. It's perfect for extended fights, helping her stay strong and consistent throughout skirmishes and teamfights. |
|
|
Since her core items now provide ample attack speed, Legend: Haste compensates by offering the Ability Haste needed to cycle her Q and W more frequently in extended fights. This choice is strongest for maintaining her "battle-mage" identity, ensuring she can consistently reposition with her dash and maintain her defensive mist while her auto-attacks shred through targets. |
|
|
Last Stand is great on Gwen because it increases her damage when she's low on health. Since Gwen often dives into fights and takes some damage while dealing sustained damage, Last Stand helps her hit harder in clutch moments, letting her turn fights around or finish off enemies when she's close to dying. |
|
|
Cut Down synergizes well with Conqueror. You start fights with bonus damage from Cut Down. This gives stronger damage at the beginning of the fight. As the fight continues, Conqueror stacks adaptive force, keeping your damage high in extended combat. Shadowflame when enemies are low on health, helping you deal consistent damage as the fight goes on.
|
|
|
Coup de Grace is another standard option for Gwen. This rune increases your damage against enemies below 40% health. When you build Riftmaker for example, the rune gains strong synergy with the item during extended fights. And as usual synergizes well with Conqueror.
|
The Inspiration Runes that you should use on Gwen.
|
|
Cash Back will be better for mid to late game because it gives or you can say save way more gold then Magical footwear, Its more worth just getting the boots early on, it will help you in the early game, then Cash back does it's thing in the mid to late game. |
|
|
Cosmic Insight is an excellent rune for Gwen because it significantly reduces the cooldowns of her Summoner Spells and her Smite, allowing for more frequent ganks, safer objective control, and better mobility. Even better with items like Zhonya's Hourglass.
|
|
|
Avarice gives a small 60 gold. Use it as soon as you get it. Force gives a timed damage spike at a key level. Use it to win short fights around level 6 or 9. Or to clear objectives a bit faster. The Skill is just strong overall because its an extra skill level for your E which is a really good thing. |
🐸The Recommended Boots Options that you can pick for Gwen.
🪷Gluttonous Greaves:BEST OVERALL OPTION
🪷Sorcerer's Shoes:GREAT OVERALL OPTION
🪷Boots of Lucidity:GOOD OVERALL OPTION
🪷Plated Steelcaps:ARMOR DEFENSIVE OPTION
🪷Mercury's Treads:MAGIC RESISTENCE DEFENSIVE OPTION
|
🐸The Recommended Legendary Items Options that you can pick for Gwen.
🪷Nashor's tooth:
🪷Riftmaker:
🪷Dusk & dawn:
🪷Shadowflame:
🪷Rabadon's deathcap:
🪷Zhonya's Hourglass:
🪷Void Staff:
|
🐸Gwen's Passive - Thousand Cuts |
|
🪷The Simple Explanation:
🪷The Detailed Explanation:
🐸Gwen's Q - Snip Snip! |
|
🪷The Simple Explanation:
🪷The Detailed Explanation:
Passive: Gwen gains 1 stack when she hits an enemy with an attack (max 4, lasts 6 seconds).
Active: Consumes stacks. Gwen snips once for 10 / 15 / 20 / 25 / 30 (+5% of ability power) magic damage, snips again for each ammo consumed, and then snips a final time for 60 / 85 / 110 / 135 / 160 (+35% of ability power) magic damage.
The center of each strikes deals true damage instead and applies A Thousand Cuts to enemies hit. This ability deals 75% damage towards minions above 20% health. Minions with less than 20% health get immediately executed upon taking damage.
🪷Important Tips & Tricks:
Enemies in the center of each snip take true damage, as well as the bonus magic damage from Thousand Cuts. So make sure that you always hit the center, it stacks per Enemy so if you can, also hit multiple enemies with it.
🐸Gwen's W - Hallowed Mist |
|
🪷The Simple Explanation:
🪷The Detailed Explanation:
Gwen summons the Hallowed Mist, making her untargetable to all enemies (except towers) outside the zone for 4 seconds or until she leaves it. While in the mist, Gwen gains 22 / 24 / 26 / 28 / 30 (+7% of ability power) armor and magic resist. Gwen can recast this ability once to call the mist to her. This will automatically recast the first time Gwen attempts to leave the zone.
🪷Important Tips & Tricks:
🐸Gwen's E - Skip 'n Slash |
|
🪷The Simple Explanation:
🪷The Detailed Explanation:
Gwen dashes and empowers her attacks for 4 seconds. Empowered attacks gain 20 / 35 / 50 / 65 / 80% attack speed, 15 (+20% of ability power) magic damage on-hit, 75 attack range, and the first one to hit an enemy refunds 25 / 35 / 45 / 55 / 65% of this ability's cooldown.
🪷Important Tips & Tricks:
Skip 'n Slash can be used as an auto-attack reset, always try to use it right after an auto-attack so that you can do a second one really quick for maximized poke.
🐸Gwen's R - Needlework |
|
🪷The Simple Explanation:
The first cast will fire one needle, the second will fire three, and the final cast will fire five, for a total of nine needles and nine applications of Thousand Cuts to enemies hit.
🪷The Detailed Explanation:
First Cast: Hurl a needle that deals 35 / 65 / 95 (+10% of ability power) plus 1% (+0.8% per 100 ability power) of the target's max health as magic damage, slows by 40 / 50 / 60% for 1.5 seconds, slows by 15 / 20 / 25% for subsequent hits, and applies A Thousand Cuts to all enemies hit. After 1 second, she can recast it (up to 2 additional times).
Second Cast: Fire three needles to deal 105 / 195 / 285 (+30% of ability power) plus 3% (+1.8% per 100 ability power) of the target's max health as magic damage.
Third Cast: Fire five needles to deal 175 / 325 / 475 (+50% of ability power) plus 5% (+3% per 100 ability power) of the target's max health as magic damage.
🪷Important Tips & Tricks:
🐸Let's learn how to do the most important Combos!
Difficulty: 🌕🌕🌑🌑🌑
🪷Why and how to do this Combo:
- >
- >
Difficulty: 🌕🌕🌕🌑🌑
🪷Why and how to do this Combo:
- >
🐸Here is a simple overview of Gwen’s and priorities during each stage of the Game.
🪷Summary of the Early Game
Your primary goal is to full clear. Gwen’s clear is good enough to reach Scuttle Crab right when he spawns, if pathing correctly. Start on the side where you receive the strongest leash. Gwen performs best with a full clear into Scuttle if safe, or a full clear into recall. Avoid early invades 99% of the time.
While clearing, always stack your Q before using it. This significantly speeds up your clear. Use E to reposition between camps. Smite should be used as usual,
Early ganks should be highly selective. Only gank lanes where the enemy is overextended or already fighting. Always check if the 2v1 is winnable before committing. If your teammate is about to die and the enemy still has high health, do not force the gank. Continue farming instead.
Gwen has no hard crowd control, so forced ganks often fail and waste time. Look for lanes with strong setup or low enemy mobility. If no reliable gank exists, continue farming and keep your tempo high.
If the enemy jungler shows on the opposite side of the map, you can safely take objectives. Gwen can solo early dragons with proper health management and Smite timing, but only do this when you are certain you will not be contested.
Before level 6, play defensively. Your job is to survive, scale, and prepare for your first major power spike.
🪷Summary of the Mid Game
With R available, Gwen can contest neutral objectives confidently. She excels in extended fights around Dragon, Herald, and jungle corridors. When possible, try to get your Q stacked before you enter fights with Q, you can do this by clearing vision for example, anything can stack it, but do not get out of position because of it, just when you can, and never waste your ultimate on targets you cannot reach.
In mid game, prioritize:
– Farming efficiently between fights
– Taking Objectives
– Fighting when your ultimate is available
– Punishing isolated enemies
Gwen is very strong specially in 1v1 scenarios at this stage, especially against bruisers and tanks. Look for opportunities to Gank or collapse on enemies who overextend. Do not front-to-back teamfight yet unless you are ahead.
Split pushing becomes a strong option only when you have a good team and when it's reasonable and once you complete core items. Gwen melts towers quickly and can win most side-lane duels. If your team can hold the enemy safely, applying side pressure is often the correct play.
Use Hallowed Mist intelligently. It allows you to ignore ranged threats and survive burst, but it does not make you immortal when someone is in.
If you fall behind in mid game, return to farming. Gwen scales extremely well, and forcing fights while behind is the fastest way to lose the game.
🪷Summary of the Late Game
In teamfights, Gwen should almost never be the first to engage. Let someone else start the fight, then enter from the side or after key enemy cooldowns are used. Your goal is to reach the backline or fight in the middle of the enemy team while protected by Hallowed Mist.
Always stack Q before committing. Your damage comes from repeated autos into empowered Q casts. Use your ultimate in sequence, not all at once. Each cast should help you stick to targets and continue dealing damage. A huge tip is remembering that it's an AOE Q and Ultimate, you can use on multiple targets.
Target priority depends on positioning:
– If you can safely reach carries, kill them
– If not, shred frontline while healing through passive damage
Late game split pushing remains viable if your team struggles in 5v5 fights. Gwen can force multiple enemies to respond, creating advantages elsewhere on the map. Always track enemy crowd control and teleport timers when splitting.
Vision control is critical. Gwen is extremely strong in fog of war but vulnerable when caught. Do not walk blindly into unwarded jungle without information.
Overall, late game Gwen wins through patience, positioning, and sustained damage. Do not rush fights. Wait for the correct moment, then overwhelm the enemy with constant pressure and healing.
🐸What is the first clear path Gwen should take?
🪷Starting with the Blue Side
- >
- >
- >
- >
- >
- >
🪷Ending with the Red Side
- >
- >
- >
- >
- >
- >
🪷A Clearing tip for Difficult Monsters:
|
|
When clearing Raptors, position Gwen’s Q so the big Raptor is in the center, where the true damage applies, while the smaller ones are just inside the cone to take the remaining hits. This maximizes damage efficiency and speeds up the clear. |
|
|
When clearing Krugs, target the large Krug with the center of Q so it receives the true damage, while the smaller Krug are hit by the cone. Time your Q cooldown so it lands just as the Krugs splits into mini Krugs. This way, the Q hits all mini Krugs efficiently, maximizing clear speed. |
|
|
Like your Raptors, position Gwen’s Q so the big Raptor is in the center, where the true damage applies, while the smaller ones are just inside the cone to take the remaining hits. This maximizes damage efficiency and speeds up the clear. |
🐸Let's talk about how Gwen should see the Jungle Objectives!
🪷Objectives Overview
🐸The Elemental Dragons
Individual drake buffs are small. The main goal is to reach four dragons and secure Dragon Soul, which gives a strong permanent team advantage. After a team claims Soul, Elder Dragon becomes the next objective and provides a powerful execute effect.
Gwen can start Dragon early after a full clear, recall, and item purchase, but you should avoid early objective fights unless the setup is good. She is not a strong early skirmisher, so early dragon fights without vision, priority, or jungle information are often a trap. Focus on farming and building toward your item spikes.
As you scale, you become much more dangerous around objectives. Your damage, sustain, and teamfight presence all increase. That is when you should start contesting objectives more confidently.
There are six elemental drake types, here is how they work.
🪷Chemtech Drake
|
|
The Chemtech Drake grants stacking buffs providing 5% Tenacity and 5% Healing/Shielding power per stack, making teams more resilient to crowd control and better at sustaining. Slaying the Chemtech Soul grants the team a buff where, while below 50% maximum health, champions gain 33% damage reduction and deal 50% increased damage. |
🪷Cloud Drake
|
|
The Cloud Drake grants stacking buffs providing 7% Slow Resistance and 7% Out-of-Combat Movement Speed per stack, increasing a team’s map mobility and ability to shrug off slows. Slaying the Cloud Soul grants the team a permanent 15% bonus movement speed, which increases to 50% for 6 seconds after casting an Ultimate ability. |
🪷Hextech Drake
|
|
The Hextech Drake grants stacking buffs providing 5 Ability Haste and 5% Attack Speed per stack, increasing a team’s overall combat throughput and spell frequency. Slaying the Hextech Soul grants the team a chain lightning effect on attacks and abilities that deals 25–75 true damage, bounces to 3 additional targets, and slows them by up to 45% for 2 seconds. |
🪷Infernal Drake
|
|
The Infernal Drake grants stacking buffs providing 3% Attack Damage and Ability Power per stack, directly increasing a team’s raw offensive power. Slaying the Infernal Soul grants the team an effect where basic attacks and abilities trigger an explosion around the target, dealing 80 (+22.5% bonus AD) (+13.5% AP) (+2.75% bonus health) adaptive damage to the target and nearby enemies. |
🪷Mountain Drake
|
|
The Mountain Drake grants stacking buffs providing 8% bonus Armor and Magic Resistance per stack, significantly increasing a team's durability against all damage types. Slaying the Mountain Soul grants the team a permanent shield for 220 (+20% bonus AD) (+12% AP) (+12% bonus health) after not taking damage for 5 seconds. |
🪷Ocean Drake
|
|
The Ocean Drake grants stacking buffs providing 2.5% missing health regeneration every 5 seconds per stack, significantly increasing a team’s sustain during laning and rotations. Slaying the Ocean Soul grants the team an effect where dealing damage to enemies restores 130 (+26% bonus AD) (+17% AP) (+12% bonus health) health and 80 (+3.5% maximum mana) mana over 4 seconds. |
After the Soul is claimed, one big guy appears.
🪷Elder Dragon
|
|
The Elder Dragon grants the Aspect of the Dragon buff for 150 seconds, causing all attacks and abilities to deal 75–225 true damage over 2.25 seconds. Damaging an enemy champion who is below 20% of their maximum health triggers an immediate execution, instantly killing the target after a 0.5-second delay. |
🐸The Void Grubs
|
|
Void Grubs are an early objective in the Baron pit. They spawn once at 8:00 and consist of a camp of three grubs. Killing Void Grubs grants stacks of Touch of the Void, which make your basic attacks against enemy turrets deal bonus true damage. Friendly Void Mites spawn to soak turret shots, which speeds up turret pushes. |
Take Void Grubs when you have time and the enemy jungler is not nearby, or when your laners, especially side laners, can rotate to help. If you clear them early, your teammates will appreciate it.
🐸The Rift Herald
|
|
The Rift Herald spawns in the Baron pit during mid-game in the Baron pit. It is a high-health monster with a key mechanic, an eye opens on its back. Hitting this eye deals bonus damage and speeds up the kill. Once killed, the Rift Herald drops the Eye of the Herald buff. Picking up the Eye replaces your trinket slot with a Herald summon item. Consuming this summons a controllable Rift Herald Mercenary that you can ride into an enemy turret for massive bonus damage. |
🐸Finaly... How Gwen Should Approach Objectives
The most reliable window is when the enemy jungler shows on the opposite side of the map. If they appear top while Dragon is bot, you have a free opportunity to take it without pressure. These are the safest and most consistent objective plays. Gwen benefits from this more than most junglers because she avoids early fights and prefers guaranteed value.
Lane priority is the next key factor. If the lane closest to the objective is pushed into the enemy tower, your laner can move first while the enemy is stuck clearing the wave. This gives you a numbers advantage before the fight even begins. Gwen performs best when enemies are forced to walk into her space rather than when she has to engage into them, so having priority makes objective fights much easier to control.
After a successful gank or skirmish, you should immediately look to convert that advantage into an objective. If the enemy jungler is dead, forced to recall, or far away, and your team is still healthy, move to Dragon or Rift Herald right away. Turning kills into objectives is one of the most reliable ways to build a lead and maintain tempo.
Smite usage is critical. It deals high true damage and should be saved to secure the objective at low health or to contest a steal. Do not waste Smite early unless needed for survival. Gwen provides strong sustained damage to objectives, so your goal is to create a stable situation where you can finish the objective cleanly rather than relying on risky 50/50 situations.
You should also understand that not every objective is worth taking. If you lack vision, lane priority, or information on the enemy jungler, it is often better to give up the objective instead of forcing a fight. Gwen is a scaling jungler, so losing an early dragon is acceptable. The real objective is Dragon Soul, which is obtained after securing four dragons and provides a strong permanent advantage. After Soul, Elder Dragon becomes the next major objective and grants a powerful execute effect.
As the game progresses, Gwen becomes much stronger around objectives. Her sustained damage, healing, and scaling allow her to win extended fights. Her W allows her to avoid damage from enemies outside its zone, which is especially valuable in tight areas like Dragon and Herald pits. This makes her much more effective in controlled teamfights rather than chaotic early skirmishes.
Communication and vision are essential. Always ping your team before starting an objective and make sure nearby lanes can rotate. Secure vision around the area so you are not forced into a blind fight. Objectives are not secured alone. The jungler provides Smite, but the team provides positioning, damage, and control needed to take them safely.
In short, play for safe windows, avoid early forced fights, and scale into stronger objective control. Gwen becomes a major threat around objectives once she reaches her item spikes, and that is when you should look to take control of the game.
🐸An explanation of the Matchups and what to do with them.
Play with spacing. Do not take early fights unless you have a clear advantage. Use your W to avoid/take less damage and disrupt his engage when possible. Plated Steelcaps help reduce his auto attack damage.
Zhonya’s Hourglass is strong in this matchup, as it can deny Bel’Veth’s burst and buy time during her engage. Plated Steelcaps also help reduce her auto attack damage and improve survivability in fights.
Your W is not very effective in this matchup since Lillia deals consistent damage over time and can play around its zone. Focus on timing and spacing rather than relying on W for protection.



You must be logged in to comment. Please login or register.