





 [26.18] 🦁Rengar 2026 Mastery🩸// In-Depth Jungle & Top Guide

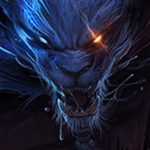 Build Guide By Oikaton
15
3
Build Guide By Oikaton
15
3
 52,835
Views
52,835
Views
 0
Comments
0
Comments
15
3
52,835
Views
0
Comments
Rengar Build Guide By Oikaton
52,835
Views
0
Comments
Rengar Build Guide By Oikaton
x
Did this guide help you? If so please give them a vote or leave a comment.
You can even win prizes by doing so!
Vote
Comment
I liked this Guide

I didn't like this Guide
 Thank You!
Your votes and comments encourage our guide authors to continue
creating helpful guides for the League of Legends community.
Recommended Items


Runes: FLEET FOOTWORK (BEST ATM)
1
2
3
4
5

Precision




Domination





+10% Attack Speed
+9 Adaptive (5.4 AD or 9 AP)
+10-180 Bonus Health












Spells:
1
2
3
JUNGLE
![LoL Summoner Spell: Flash]()
![LoL Summoner Spell: Gustwalker Smite]()

Flash

Gustwalker Smite


Items
EARLY ITEMS
![]()



CONQUEROR
![]()
MAIN CORE
![]()


CORE WHEN AHEAD
![]()


ITEMS AFTER CORE
![]()


FLEET - SITUATIONAL
![]()
BOOTS
![]()


Ability Order STANDARD

Unseen Predator (PASSIVE)
Rengar Passive Ability


Threats & Synergies
 Threats
 Synergies
Extreme
Major
Even
Minor
Tiny
 Show All
None
Low
Ok
Strong
Ideal
Extreme Threats
Ideal Synergies
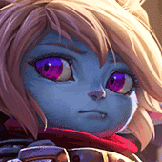
Poppy
GO TO MATCHUPS SECTION TO SEE MORE
Poppy is the ultimate no fun for Rengar because her W stops his leap mid-air, knocks him back, and grounds him. Since Rengar's entire kit relies on jumping from bushes or ultimate, a good Poppy just presses W to turn him into a sitting duck.
In teamfights, she can just sit on her ADC and wait for the mark to appear; as soon as Rengar jumps, she cancels his engage and slams him into a wall.


Ivern
❤️


 Synergies
Ideal
Strong
Ok
Low
None
Ivern
❤️



Champion Build Guide
JUNGLE
 RENGAR MASTERY GUIDE 2026
By a Rengar OTP | Updated 14 August 2026 | Patch 26.13
Rengar In 26.13
Rengar wins when you prep first and leap second. Not the other way around.
The stuff that actually matters: ferocity before fights, smart pathing, picking the right target, and converting the kill into something real.
Best for: Players who want wins that are repeatable, not coinflip montage plays.
+
+
+
What Actually Matters
| Stable | Still Relevant |
|---|---|
|
|
NAVIGATION
INTRODUCTION
Rengar is a tempo assassin. You win through repeatable setups, not random leaps.
|
Patch 26.13 TL;DR
|
Who This Guide Is For
|
Who This Guide Is Not For
- Players looking for one static build every game.
- Players who jump first in 5v5 and pray mechanics save them.
- Players who ignore vision, cooldowns, and wave state.
Challenger Mindset
|
LOW ELO TRAP
"R is up, I go." "Any target is fine." "I need to start fights." |
->
|
HIGH ELO RULE
R is for conversion. Check peel before jump. Clean up, don't front-line. |
Golden Rule: If your jump does not create map value in the next 20 seconds, it was the wrong jump.
QUICK START
Use this as your 60-second lock-in. Read once, lock in, play.
|
|
ASSASSIN / FIGHTER Role: Jungle primary, top secondary Difficulty: HIGH Identity: Prep-based burst assassin Win con: Farm -> Pick -> Objective Lose con: Blind engage into peel |
Champ Select Cheat Sheet
| If You Need Default | Take This |
|---|---|
| Rune page |
First Strike if access is clean,
Conqueror into bruisers |
| Jungle build |
Umbral Glaive ->
->
/
|
| Bruiser pivot | 2+ frontliners, long fights, hard peel |
| Utility pivot | You are behind or your team already has damage |
| Empowered rule | Emp Q for kill, Emp E for access, Emp W for survive-and-reset |
PROS & CONS
+
+
+
|
(+) PROS
|
(-) CONS
|
|---|---|
|
|
+
+
+
PATCH SNAPSHOT
Read the champ correctly before you copy any page or build.
Current Read
| Area | Current Read | What It Means |
|---|---|---|
| Jungle | Playable, not blind autopilot | You win when you control tempo and pick the right fights. |
| Top | Niche but dangerous | Lane is still strong if you control bush and wave state. |
| Power curve | Midgame focused | Level 6 and 2-item windows still decide most of your games. |
Base Stats (Level 1)
| HP | AD | Armor | AS | MS | Range |
|---|---|---|---|---|---|
| 590 | 68 | 34 | 0.667 | 345 | 125 |
Ability Ranges and Cooldowns
| Spell | Range | Cooldown | Why It Matters |
|---|---|---|---|
|
Q | Self / empowered attack | 6 / 5.5 / 5 / 4.5 / 4 | Main reset and DPS button. Max first. |
|
W | 450 | 16 / 14.5 / 13 / 11.5 / 10 | Emp W is your reset button into CC and burst. |
|
E | 1000 | 10 | Mid-air cast is how you secure clean first contact. |
|
R | 2500 / 3000 / 3500 | 100 / 90 / 80 | Best used to convert vision control into a kill or objective. |
RUNES
Pick your runes for the lobby, not because it's what you always run. First Strike when you can hit first, Conqueror when fights drag.
Keystone Selector
|
CONQUEROR Default Page |
Pick when: 2+ bruisers or tanks, or fights will last. Why: Best all-around page for skirmish and scaling. [OK] Stable [X] Less frontloaded burst |
FIRST STRIKE Live Greed |
Pick when: You can reliably hit first and punish weak early junglers. Why: Accelerates spikes when you already control tempo. [OK] Rich [X] Punishes bad entries |
26.13 read: First Strike when the kill is clean, Conqueror when the fight goes past one rotation. High elo data still leans FS in pure assassin games, Conqueror when you have to slug it out. No keystone or rune change in 26.11-26.13 changes the call — First Strike, Conqueror, Electrocute, Fleet, and Grasp are all untouched. The 26.10 Gluttonous and Voltaic item nerfs are still the only thing you need to remember from 26.10 (see Items section), but the keystone call is unchanged.
|
ELECTROCUTE Burst |
Pick when: Enemy comp is mostly squishy and you need 100-0 threat. Why: Best early-mid burst on clean pick comps. [OK] Lethal [X] Weak into frontlines |
FLEET Safety |
Pick when: You expect invade pressure or rough first clears. Why: Gives the healthiest opener when game one matters most. [OK] Safe [X] Lowest damage page |
Safe Blind Page
+
+
+
|
|
PRECISION
|
|
|
DOMINATION SECONDARY
|
+
+
+
ITEMIZATION
One core lethality framework, two openers. Everything else depends on the lobby.
Current Live Core (Jungle)
+
+
+
|
LIVE CORE DIRECTION
->
->
/
|
+
+
+
Situational Builds
|
AHEAD
Hubris: Lethality snowball. Stacks per kill, keeps you scaling. Ghostblade: Active MS for faster flanks and cleaner entry angles. Voltaic Cyclosword (nerfed 26.10, unchanged in 26.11-26.13): Energized burst + slow on first hit. Great when you need the pick stick to land and the extra upfront damage to finish. Still 3000g (up from 2900g) — the Ghostblade comparison is closer than it was in 26.9. Take when you own the map and want to close faster. |
EVEN
Edge of Night: Safer first contact. Mercs: Best anti-CC boot line. Gluttonous Greaves (nerfed 26.10, unchanged in 26.11-26.13): Attack speed + sustain on-hit. Still 1000g with 0.6% omnivamp per stack (max 10 stacks). Worth considering into extended skirmish comps where you auto more than once, but the sustain ramp is still slower than 26.9. Mercs and Steelcaps remain safer defaults. Take when entry is the hard part. |
BEHIND
Black Cleaver: Team value and uptime. Death's Dance: Lets you survive the first answer. Take when you are not the solo carry. |
Specific Counters
| Enemy Problem | Buy |
|---|---|
| Shield spam |
Serpent's Fang 2nd or 3rd |
| Heavy armor |
Black Cleaver if you need uptime,
LDR if you still burst |
| Kiting / spacing comps |
Ghostblade for entry speed |
ABILITIES
Rengar is simple until you waste the wrong empowered spell. That's where games are won or thrown.
+
+
+
|
Unseen Predator (Passive)
|
+
+
+
|
Q Burst / Reset |
Job: Main DPS reset. Emp: Best kill button. Rule: Pre-load before leap when you know you can commit. |
W Reset / Survive |
Job: Damage refund and sustain. Emp: Cleanse + big fight reset. Rule: Hold it into hard CC or burst mages. |
|
E Access / Lockdown |
Job: First contact control. Emp: Root for guaranteed reach. Rule: Cast mid-air, not after landing. |
R Pick Tool |
Job: Access and pressure. Rule: Use it when a kill can become dragon, grubs, tower, or reset tempo. |
SKILL ORDER
Max Q -> E -> W
| 1 | 2 | 3 | 4 | 5 | 6 |
|
|
|
|
|
|
|
Why this order? W level 2 keeps first clear cleaner. E max second gives better catch value the moment real pick fights start.
Ferocity Decision Box
| Use | When |
|---|---|
|
Emp Q | You already have access and can finish the kill before peel matters. |
|
Emp E | Target has mobility, cleanse is down, or first contact matters more than raw damage. |
|
Emp W | Enemy comp wins through burst, CC, or baiting you deep after entry. |
[Bang] COMBOS & EXECUTION
Learn the four core patterns. Everything else is a variation of these.
The OTP Micro-Syllabus
The patch did not kill Rengar combos. It punished loose inputs.
| Topic | What Matters Now |
|---|---|
| Triple Q | Your burst window starts at leap. No more sloppy pre-contact extras. Buffer cleanly. |
| Vision entry | Faelight and ward lines punish obvious river paths. Enter from angle, not habit. |
| Ferocity prep | Plants are not your setup tool anymore. Prep on camps, wards, or the previous fight state. |
COMBO #1: STANDARD BURST
Difficulty: Easy | Use against: Immobile carries and exposed mids
Setup: Start on 3 ferocity
+
+
+
| Step | Input | Result |
|---|---|---|
| 1 | Leap | Gap close and final ferocity setup. |
| 2 |
mid-air | First contact slow and stack timing stays clean. |
| 3 |
| Main burst hit lands immediately. |
| 4 |
| Refund damage and keep tempo. |
| 5 |
| Reset auto and finish. |
+
+
+
COMBO #2: ROOT COMBO
Difficulty: Medium | Use against: Dash champs and flash-holding carries
Setup: Start on 4 ferocity
+
+
+
| Step | Input | Result |
|---|---|---|
| 1 | Leap | Force first contact before they react. |
| 2 |
mid-air | Root lands before flash or dash value. |
| 3 |
| Free damage while target is locked. |
| 4 |
| Keeps the cycle moving. |
| 5 |
| Finish or force sums. |
+
+
+
COMBO #3: TRIPLE Q
Difficulty: Hard | Use against: Bruisers, tanks, and long skirmishes
Setup: Start on 4 ferocity with leap ferocity primed
+
+
+
| Step | Input | Result |
|---|---|---|
| 1 |
before leap | First Q and attack speed window start. |
| 2 | Leap | Free ferocity from contact. |
| 3 |
mid-air | Another stack without slowing the chain. |
| 4 |
Land
| You reach 3 stacks fast. |
| 5 |
| Back to 4 stacks. |
| 6 |
| Second empowered Q closes the window. |
+
+
+
Patch rule: You cannot fake the old melee-auto into leap rhythm anymore. The combo starts at leap. Respect the order.
COMBO #4: SURVIVAL COMBO
Difficulty: Medium | Use against: CC-heavy comps and burst peel lanes
Setup: Start on 4 ferocity
+
+
+
| Step | Input | Result |
|---|---|---|
| 1 |
Leap +
mid-air | You enter clean and force the answer. |
| 2 |
| Start damage without spending your bailout. |
| 3 | Wait for their return spell | Do not panic the empowered cast. |
| 4 |
| Cleanse, heal, and reset the fight. |
| 5 | Continue or exit | You either re-enter or leave with tempo intact. |
+
+
+
Common Combo Throws
| Mistake | Fix |
|---|---|
| Casting E after landing | Buffer it mid-air so first contact is immediate. |
| Greeding Emp Q into guaranteed peel | Swap to Emp W or Emp E when access or survival matters more. |
| Dropping ferocity count mid-chain | Practice the exact button rhythm. Do not improvise in real fights. |
| Flashing before escape is shown | Make them spend first unless the flash guarantees conversion. |
Combo Rules
- Enter with 3-4 ferocity whenever possible.
- Track peel cooldowns before you choose the empowered spell.
- Path your exit before you leap.
- If first contact fails, reset the fight. Do not stand and stat-check.
- Choose damage only when access is already solved.
Ward / Camp Prep
| Step | What To Do |
|---|---|
| 1 | Use Q, W, or E on a camp or ward before you commit. |
| 2 |
Spend
before leap if triple-Q is the line. |
| 3 | Enter the real fight with leap ferocity primed, not guessed. |
Practice Drills
| Drill | Goal |
|---|---|
| AA -> Q -> AA | No cancelled reset. |
| Bush leap -> E mid-air | Land bola 10/10 times. |
| Camp prep -> bush entry | Arrive on 3-4 stacks every rep. |
| Triple Q rhythm | No dead time between first and second empowered Q. |
Advanced Tech
| Tech | Use |
|---|---|
| E-Flash | Redirect bola angle or extend catch range when no normal line exists. |
| Hydra mid-leap | Compress burst into a smaller reaction window. |
| Brush grace hold | Delay follow for a fraction to match flash or side-step timing. |
JUNGLE PATHING
Read the map, then route. Never route first and hope the map agrees.
All timings below assume current 26.13 live timers and Rengar-specific clear discipline.
Start Paths
Faelight Entry Rule
River is always checked. Enter from lane, tri-bush, or raptor angles instead.
- If you cross a lit line, do it with 3-4 ferocity and an instant plan.
- Umbral + Sweeper turns a warded edge into a kill window.
- Most bad early Rengar ganks fail before leap because the path was obvious.
Red Side Standard
Best when bot can be played for or you want fast full-clear tempo.
| Camp | Rule |
|---|---|
| Red | Open stable. Ward over Krugs if you want the wall jump. |
| Krugs | Use wall access to save pathing time. |
| Raptors | Start from bush. Big raptor first. |
| Wolves -> Blue -> Gromp | Keep brush access and carry ferocity into river. |
| 2:55 | Be ready for Scuttle, gank, or trade. Do not arrive empty. |
Use this when: Bot is playable, enemy jungle is weak early, or you want the cleanest default route.
Blue Side Standard
Best when top is volatile or you want a fast top-side read before first river.
| Camp | Rule |
|---|---|
| Blue -> Gromp -> Wolves | Clean level 3 and early top read. |
| Top check | If top is not playable, do not force. Finish route. |
| Raptors -> Red -> Krugs | Stay on tempo for river or reset. |
| 2:55 | Contest only with stacks, lane help, or vision. |
Use this when: Top is snowballable, or enemy jungle is scaling and you want early map control.
3-Camp Cheese
Only good when the lane state already says yes. Never because you are bored.
or
GANK
| Checkpoint | Target |
|---|---|
| Level 3 | Around 1:55-2:10 depending on leash and clean pulls. |
| Lane arrival | Around 2:05-2:25. If the wave already broke, abort. |
| Hard rule | No flash, hard CC ally, or guaranteed angle. If not, full clear instead. |
Bush Pathing Variants
| Route | Use |
|---|---|
| Tri-bush -> lane bush | Best bot lane re-entry path when river is checked. |
| Top bush -> river pixel -> enemy raptors | Pressure mid from top-side control instead of front-door river. |
| Crab bush -> side lane brush | Lets you threaten mid without showing on standard ward lines. |
Tempo & Benchmarks
Fixed Timer Line
| Time | What Spawns / Opens | Rule |
|---|---|---|
| 0:55 | Blue / Red / Raptors / Wolves | Hide start when possible. Do not waste early reveal for nothing. |
| 1:07 | Krugs / Gromp | Commit to full clear or 3-camp based on lane state, not hope. |
| 2:55 | Scuttle | Reach river with stacks or trade it away. |
| 4:30-5:00 | First dragon setup window | Push lane priority before you touch the river. |
| 6:00+ | First ult conversions | Use R for value, not random fishing. |
| 7:30-8:00 | Void Grub setup -> spawn at 8:00 | Top prio first. No prio, no honest take. |
| 15:00 | Rift Herald replaces Grubs | If Grubs are gone, move the game state forward. Do not sit top for nothing. |
Your Benchmarks
| Checkpoint | Target | Meaning |
|---|---|---|
| Level 3 | 1:55-2:10 | Early lane impact is available if wave state agrees. |
| Level 4 | 2:25-2:45 | You are on time for river with tempo. |
| Full clear | 2:40-2:55 | Healthy clear and first river decision are both online. |
| First back | ~1000-1300g | Dirk or Pickaxe timing is realistic. |
Recovery Windows
| If You Miss | Do This |
|---|---|
| First 3 camps | Skip coinflip river and stabilize your camp tempo first. |
| First river window | Trade opposite crab, pressure lane, or reset vision instead of forcing blind contest. |
| First reset | Do not base into an objective timer you cannot cover. |
| First dragon or Grub setup | Take vision line first, then choose fight or trade. No line, no fight. |
| First ult window | Use R for info, lane pressure, or flash trade if kill is not clean. |
Map Reads
| You See | You Do |
|---|---|
| Enemy jungle shows top | Take bot camps, pressure bot, or start dragon line. |
| Enemy jungle shows bot | Counter-gank top or invade top quadrant. |
| No enemy info | Ward entrances, keep your cycle clean, and refuse ego contests. |
| Lane frozen in middle | Path toward it. That is real gankable space. |
| Lane shoved under enemy tower | Skip it. Farm, invade, or set vision instead. |
| Scuttle fight coming | Check ferocity first. Empty Rengar is fake Rengar. |
High-Elo Habits That Matter
- Leashless starts are worth it when you can still clear cleanly and hide pathing.
- Ask for an early raptor ward only if lane can do it safely.
- Reach river with ferocity already built. Do not try to improvise it there.
- Deep wards after first clear are how you earn the next invade, not lucky guesses.
- Lane ganks beat river ganks when the wave lets your laner hold the setup.
- Tier 2 side towers are huge gold swings. Do not ignore them when side pressure is free.
Conditional Jungle Plan Library (Challenger Cards)
Fast read flow: Trigger -> Call -> Failsafe. Decide the fallback before you move.
Pressure Cards (1-4)
+
+
+
| Case | Trigger Read | Primary Call | Failsafe |
|---|---|---|---|
| 1 |
Top slow-pushing to ally Enemy started top River lit | Path opposite side and force cross-map value. | If wave breaks, reset to camp cycle. |
| 2 |
Top frozen enemy side Enemy started bot River dark + sweep ready | Shadow likely counter-gank lane and hold leap angle. | If enemy shows opposite side, trade objective immediately. |
| 3 |
Mid neutral No prio Objective pit already controlled | Take nearest camp, then hover a punish window. | If no prio arrives, disengage and retake vision. |
| 4 |
Mid shoved by ally Enemy skipped a camp for early pressure No deep wards | Invade nearest quadrant with the priority lane. | If enemy sums are up, open with Emp E. |
+
+
+
Tempo Cards (5-8)
+
+
+
| Case | Trigger Read | Primary Call | Failsafe |
|---|---|---|---|
| 5 |
Bot bouncing to ally Enemy seen top Control ward ready | Full clear to item timer, then set objective first. | If fight is bad, protect shutdown and leave. |
| 6 |
Bot crashing enemy tower Enemy seen bot Faelight edge contested | Skip the low-odds gank and keep tempo. | Re-enter only on the next clean cooldown gap. |
| 7 |
Both side lanes pushing out Enemy on reset Tri-brush yours | Use R only if a conversion objective is ready. | If the objective dies, pressure opposite tower. |
| 8 |
No lane prio Enemy missing after river contest Brush controlled | Drop one camp to secure vision and prio first. | If behind, sync with your strongest lane. |
+
+
+
GAME PHASES
Know when you are strong, what your job is, and what loses the game.
EARLY GAME (0:00-14:00)
| Power Read: | Playable, not free |
You are not weak. You just do not get to waste time or ferocity.
|
YOUR JOB
|
DON'T DO THIS
|
| Situation | Rule |
|---|---|
| Lane is open and you have stacks | Go. Early value comes from clean first contact. |
| No lane is real | Full clear, ward, and play the next spawn instead of inventing action. |
| Enemy invades you | Call help if prio exists. Otherwise trade the opposite side instantly. |
| You get a kill before 6 | Turn it into camps, plates, dragon line, or a better reset. Never idle after it. |
MID GAME (14:00-28:00)
| Power Read: | Peak window |
This is where Rengar should decide the map. If you are ahead and nothing happens, you are wasting your champ.</i]
|
YOUR JOB
|
DON'T DO THIS
|
| Situation | Rule |
|---|---|
| Enemy carry alone | Ult, delete, leave. Do not overstay for style points. |
| Objective in 45s | Push vision first, then sit on the angle. Never arrive second and blind. |
| You are fed | Invade exits and camps. Make their support walk into your screen first. |
| You are behind | Farm to threshold, play for Emp E or Emp W value, and stop pretending you are still one-shotting everyone. |
LATE GAME (28:00+)
| Power Read: | Volatile |
You can still win the game with one pick. You can also lose it off one bad leap.
|
YOUR JOB
|
DON'T DO THIS
|
| Situation | Rule |
|---|---|
| Baron dance | Play flank and isolation only. Never front door five people. |
| Enemy has GA or Zhonya | Force it, reset, then re-enter. One cooldown cycle beats one ego all-in. |
| Enemy hard groups | Pull them side first or threaten opposite pressure. Straight 5v5 is usually their game, not yours. |
| You are the only fed member | Value your life like an objective. One death can end the map. |
Rengar Power Curve
| Phase | Read | Play Style |
|---|---|---|
| Levels 1-5 | Warm-up | Farm well, punish only real openings. |
| Level 6 | Online | Ult gives real map threat and off-angle access. |
| 1 item | Strong | You start controlling vision and tempo. |
| 2-3 items | Peak | Best point to force picks into major objectives. |
| Full build | Volatile | Still lethal, but error tolerance is tiny. |
Lose-State Protocol
- No blind face-check entries unless the information itself is worth your life.
- No first-engage jumps if allied follow-up is not visible.
- Keep camp cycles alive until level parity is secure.
- Contest only when at least two of three exist: vision, numbers, cooldown edge.
- If an objective is gone, convert instantly to camps, towers, or vision line. Do not grieve after it.
Shutdown Protection Protocol
- If bounty is high, never enter unseen river alone.
- Hold flash for guaranteed survival or guaranteed carry access.
- Track at least two enemy peel tools before you ult in late fights.
- Make them walk into your wards, not the other way around.
- If first combo fails, exit. Rengar dies when he hesitates after the first answer.
VOD REVIEW CHECKLIST
Use these after a ranked block. Short, sharp review beats fake analysis.
| Focus | Question | Fix |
|---|---|---|
| First clear | What info was missing before the first commit? | Check warding, lane state, and ferocity timing. |
| First reset | Did you reset on a real timer or just because the map felt quiet? | Sync reset with item, camp, and objective clocks. |
| First ult | Did you track peel and exit path before pressing R? | Write the missed cooldown or route down. |
| Objective setup | Could you have taken vision first or traded cross-map instead? | Mark the timer where you were late. |
| Shutdown / Baron | Did you force when preserving tempo was enough? | Identify the moment patience was higher EV. |
TOP LANE RENGAR
Top Rengar is lane control first, kill pressure second.
Why Top Rengar?
You pick it to own brush, punish CS windows, and snowball through lane control.
+
+
+
| Pros | Cons |
|---|---|
| Bush control gives you first move in trades. | Open lane with no bush makes the champ honest. |
| Levels 1-3 are still dangerous. | Bad wave states make you easy to punish. |
| Strong short-trade identity. | Falls off if lane goes neutral and you never move first. |
| Post-6 roam threat is real. | Ranged poke and anti-burst lanes can make you play small. |
+
+
+
Bush Rules
- Stand near a bush whenever the wave lets you.
- Fight around top-side lane bushes, not random river exposure.
- If they ward your bush, clear it. Do not fake pressure from dead ground.
- Freeze near your brush whenever possible. That is your real zone control.
Trading Pattern
| Step | Action | Why |
|---|---|---|
| 1 | Sit in bush | You control first move. |
| 2 | Wait for CS animation | They cannot answer cleanly while locked in. |
| 3 |
Leap -> AA ->
-> AA | Best short-trade pattern. |
| 4 | Walk back to brush | Reset pressure and refuse long trade. |
Rule: If you are trading outside your bush control, you are usually taking their fight, not yours.
Wave States
| Wave State | What To Do | Why |
|---|---|---|
| Level 1 | Let it come slightly toward you. | Gives safer bush access and less gank risk. |
| Slow push to you | Freeze near your bush. | They have to walk into your threat range. |
| Big allied wave | Hard shove and reset, plate, or move. | That is your safe tempo window. |
| Even wave in open lane | Pull it back if possible. | You do not want long trades in neutral space. |
| Pushed to enemy tower | Back off, ward, or roam. | You are the easy punish there. |
Golden rule: Keep the wave on your side when possible. Bush + short lane control is the whole point of top Rengar.
Lane Combo Variants
Prep ferocity first, then choose the empowered spell that actually wins the matchup.
| Matchup Type | Best Line | Rule |
|---|---|---|
| Bruiser |
Leap ->
->
-> back out | Short trade only. Never give them the long lane. |
| Ranged poke |
Bush leap ->
mid-air ->
| Punish on CS, not on random walk-up. |
| Shield / parry | Bait the answer first, then spend damage | Patience beats speed in these lanes. |
| Tank | Chip with short trades, hold sustain tools | You usually win map, not lane kills. |
| Dash spam |
Leap ->
->
| Root their mobility window, then exit. |
Ferocity Prep Tips
- Use
on the wave only when the lane lets you keep control after it.
- Arrive on 3-4 stacks before every real all-in.
- If jungle threat exists, keep the empowered spell for
, not greed damage.
Level 1 Cheese
Still strong, still matchup dependent, still troll if you force it into the wrong champs.
| Step | Action |
|---|---|
| 1 |
Start
and hold top bush. |
| 2 | Wait for first CS animation. |
| 3 |
Leap -> AA ->
-> AA. |
| 4 | Reset to brush and repeat if the lane still belongs to you. |
| 5 | All-in only if you kept HP lead and stack control. |
Do not force this into: Darius, Trundle, Warwick, or any lane that wins the long return trade level 1.
Top Lane Runes
| Rune | When |
|---|---|
|
Conqueror | Default. Best into most bruiser and extended trade lanes. |
|
Grasp | Short-trade tank lanes where lane sustain matters more than all-in damage. |
|
Fleet | Hard poke or range matchups where lane stability is the whole job. |
|
Electrocute | Squishy lanes you can punish hard and snowball fast. |
Starting Items
| Item | When |
|---|---|
|
| Greedy kill lane. Only when you expect control from level 1. |
|
| Standard start with stable lane threat. |
|
| Best into poke or ranged lanes. |
Top Lane Builds
Default is damage that keeps side pressure alive. Pivot tankier only when you cannot play clean one-shot fights.
Default Damage Core (Lethality)
| Core | Why |
|---|---|
|
Profane Hydra | Lethality + waveclear + active burst. Best first item for lane pressure and kill threat. |
|
Edge of Night /
Hubris | Edge when the lane has CC or gank threat. Hubris when you can snowball. |
|
LDR /
Serylda's | Armor pen when bruisers start stacking. LDR for tanks, Serylda's when slow and haste matter more. |
Tankier Top Build
| Order | Item | Why |
|---|---|---|
| 1st |
Sundered Sky | Better lane sustain and extended trade value. |
| 2nd |
Ravenous Hydra | Lets you hold side waves without bleeding tempo. |
| 3rd |
Sterak's Gage | Needed when burst answer is the main problem. |
| 4th |
Death's Dance | Best into AD-heavy skirmish games. |
| Boots |
Steelcaps,
Mercs, or
Gluttonous (nerfed 26.10, unchanged in 26.11-26.13) | Steelcaps vs heavy AD, Mercs vs CC, Gluttonous when you can auto freely and want the sustain edge — still 1000g with the slower 0.6% per stack (10 max) ramp. Tank boot options are still safer defaults in most lanes. |
Roaming From Top
Post-6, you are not married to lane. Move when the wave buys it.
| When To Move | Rule |
|---|---|
| Wave crashed fully | Ult mid or invade with your jungler. Do not stand top for no reason. |
| TP up + bot fight brewing | Look for flank, not front door TP. |
| Void Grubs at 8:00 or Herald at 15:00 | Move early if your lane can be crashed first. |
| Enemy top reset or died | Shove once, then leave. Free tempo is meant to be spent. |
TOP COMBOS
Short lane, short trades, clean exits.
| Combo | Use Case | Sequence | Check |
|---|---|---|---|
| Brush Trade | Default short trade |
Leap -> AA ->
-> AA -> back to bush | If you stay out, the trade is already getting worse. |
| Root Catch | Dash lanes |
Leap ->
->
-> exit | Do this after mobility is shown or when root wins the lane exchange by itself. |
| All-In Finish | Kill window |
Prep 4 stacks -> Leap ->
->
->
| If parry, shield, or jungle threat is still up, it is not your all-in. |
MATCHUPS
Know the interaction before you lock in. Matchups decide fights before the first leap.
Matchup Reading Rule
- First contact decides most jungle fights.
- Wave state decides whether a lane is actually playable.
- CC and peel decide whether Emp Q is legal.
- Mobility, cleanse, parry, and shields decide whether you need Emp E first.
- If the target wins the long fight, your whole job is to refuse the long fight.
JUNGLE MATCHUPS
Know the matchup before champ select. Everything changes based on who you're up against.
Hard Counter (Ban / Dodge)
| Champion | Threat | Rule |
|---|---|---|
|
Rammus | BAN | Reflects your damage, out-armors your burst. Never front-hit him. Cross-map kills only. |
|
Warwick | BAN | Wins extended fights, E fears your burst window, passive hunts you at low HP. Short trade and leave or don't fight at all. |
|
Poppy | BAN | W blocks your leap. R knocks you out of the fight. If she's locked in, play for map, not for her. |
Unfavorable (Respect / Cross-Map)
| Champion | Threat | Rule |
|---|---|---|
|
Rek'Sai | HIGH | Tremor sense spots you in stealth. Avoid river 1v1s. Path opposite and out-tempo her. |
|
Lee Sin | HIGH | Respect early burst and kick disengage. Out-value him later with better vision and picks. |
|
Graves | HIGH | Armor stacking, blind, burst. Fight only if you hit first from brush with ferocity ready. |
|
Kindred | HIGH | R saves her target and kites well. Kill before R range or bait it first, then re-engage. |
|
Bel'Veth | HIGH | Damage reduction + scaling. Shut her down early. Never take the extended fight. |
|
Volibear | HIGH | Tanky, E shield, tower disable. Hit and run. Don't stay for the second rotation. |
|
Elise | HIGH | Respect first burst and rappel dodge. Counter-gank better than you blind fight her. |
Skill Matchups
| Champion | Threat | Rule |
|---|---|---|
|
Kha'Zix | MEDIUM | Who hits first wins. Lane backup and brush control beat isolation. Deny passive resets. |
| jarvaniv Jarvan IV | MEDIUM | EQ knockup + R cage. Flash his combo, then it's your turn. Don't get trapped with no exit. |
| xinzhao Xin Zhao | MEDIUM | R makes him invuln to outside damage. Fight inside his circle or wait it out. |
|
Vi | MEDIUM | R locks you through stealth. Track her ult timer. Go in only when it's on cooldown. |
|
Nocturne | MEDIUM | Spell shield blocks one ability. Bait with E, then commit. His R vision denial counters yours. |
|
Hecarim | MEDIUM | CC and speed. Dodge his E charge or Emp E root him. Long fights are his game. |
|
Viego | MEDIUM | Resets off kills change fights. Kill him first or last, never in the middle of a messy skirmish. |
|
Kayn | MEDIUM | Red form lives through burst. Blue form dies fast. Pressure him before he gets form choice. |
|
Nidalee | MEDIUM | Spear range + mobility. Dodge the spear, close the gap, she's dead. Miss the dodge, she kites forever. |
|
Wukong | MEDIUM | Clone jukes + double R CC. Wait for clone, track R timer, go in when his tools are spent. |
|
Briar | MEDIUM | Berserk sustain beats long fights. E pushes you off. Hit hard, fast, get out. |
|
Skarner | MEDIUM | R suppresses through everything. Don't get grabbed. Kill carries not him. Track his ult. |
Even / Playable
| Champion | Threat | Rule |
|---|---|---|
|
Amumu | LOW | Sweep and flank. Front-door entry plays right into his R. Don't clump with your team. |
|
Sejuani | LOW | Wait out front-line cooldowns, hit carries from side fog. She can't peel everyone. |
|
Gragas | LOW | Dodge E and R. If he misses, he's free. If he lands, you're in a bad spot. Respect the displacement. |
|
Zac | LOW | Hard to kill, doesn't threaten you. Ignore him, kill his team. Don't stand on revive blobs. |
|
Maokai | LOW | CC-heavy tank, saplings give vision. Kill carries, he can't solo stop you if you path around him. |
|
Udyr | LOW | No gap close besides running. Emp E root beats his ram. Don't chase him, he wants you to. |
Tempo Abuse (You Should Win)
| Champion | Threat | Rule |
|---|---|---|
|
Karthus | FREE | Invade with prio and kill him in his own jungle. Squishy and immobile. Don't let him farm for free. |
|
Talon | FREE | Mirror his tempo. Hit first and he dies. He wants chaos, you want clean picks. Your pick is cleaner. |
|
Qiyana | FREE | Hit first, deny terrain setup. Your brush control beats her river control. Own the flank. |
| masteryi Master Yi | FREE | Squishy early, your burst kills him through meditate. Emp E root him mid-Q and he's done. |
|
Diana | FREE | Squishy until items. Catch her, she dies. Respect R if she's fed, otherwise just delete her. |
|
Ekko | FREE | Kill before R. If R is up, force it with Emp E root and re-engage after the trail follows him. |
|
Evelynn | FREE | Vision beats her. Umbral clears her wards. You out-duel her if you find her first. |
|
Fiddlesticks | FREE | Squishy, immobile, channel dependent. Kill before R channel. Vision control ruins his game. |
|
Lillia | FREE | Squishy, needs range. Leap, root, delete. Don't chase her in circles, that's what she wants. |
|
Nunu | FREE | Interrupt snowball with Emp E. He's tanky but can't kill you. Take his objectives. |
|
Shaco | FREE | Squishy but slippery. Sweeper for boxes. Hit the real one fast. Don't chase clone, that's the bait. |
|
Shyvana | FREE | Weak early. Invade first clear, deny farm, never let her hit form with full HP. |
|
Taliyah | FREE | Squishy mage. Dodge W, close the gap, she has nothing. Don't stand on worked ground. |
|
Ivern | FREE | Daisy is annoying but he's free. Kill him not the golem. Use his own brush for your leaps. |
|
Pantheon | FREE | E blocks damage from one direction. Flank or wait it out. Squishy once shield drops. |
|
Jayce (jg) | FREE | Fragile. Clean entry beats his poke every time. Don't let him poke you down pre-engage. |
Mage / Utility Junglers
| Champion | Threat | Rule |
|---|---|---|
|
Brand | FREE | Zero mobility, all damage. Dodge combo, jump in, he vanishes. Don't clump for R bounce. |
|
Zyra | FREE | Squishy as hell. Plants are annoying but you ignore them. Kill her before she roots you. |
|
Morgana | FREE | Black shield blocks Emp E. Bait it with a leap fake, jump once it's down. Free without it. |
|
Gwen | FREE | W makes her immune outside mist. Wait it out, re-enter. Squishy without it. |
|
Sylas | FREE | Steals your R but uses it worse. Dodge E2 and he has nothing left. |
TOP MATCHUPS
Wave state and bush control matter more than the champ label. Top is about lane control, not pure 1v1.
Favorable (With Bush + Wave Control)
| Champion | Rule |
|---|---|
|
Nasus | Deny stacks early, freeze long. If he scales for free you misplayed lane. Zone him off every CS. |
|
Kayle | Abuse pre-6 hard. Track her R timer. She's a minion until 6, still squishy until 11. Don't let her breathe. |
|
Gangplank | Kill barrels or bait them. Bait orange, then commit. Don't stand in barrel chains like a bot. |
|
Sion | Sidestep Q, chip him, don't int into passive. He's a health sponge but can't stop your farm. |
|
Aatrox | Dodge sweet spots. Short trade inside his Q so he can't hit back. Bush resets ruin his rhythm entirely. |
|
Garen | Short trade and leave before his E spins you down. Silence is annoying but his damage is telegraphed. |
|
Cho'Gath | Dodge Q. He's a massive hitbox, easy to jump. Don't get R-executed when low. You win short trades hard. |
|
Shen | Dodge taunt, trade when W is down. Punish his R roams by taking plates. Your bush controls trade timing. |
|
Yorick | Kill maiden and ghouls first. Cage traps you but he's useless without maiden. Short trade, don't get walled. |
Skill Matchups
| Champion | Rule |
|---|---|
|
Fiora | Bait Riposte first. If you give her the parry, the trade is lost. Move unpredictably to deny vitals. |
|
Camille | Track shield side and Hookshot timer. Don't fight when passive shield is up. Emp W her R all-in. |
|
Irelia | Never fight with passive stacked. Wait for stacks to fall. Don't stand in minion waves she can Q through. |
|
Gwen | Wait out mist, re-enter the second it ends. Short trades win, long trades in her mist lose. |
|
Jax | Bait E, then trade. If counter-strike is up, back off. If it's down, you own the lane. Emp E root when he jumps. |
|
Renekton | Track fury bar. Never fight at 50+ fury. Short trade when cooldowns are down. Respect level 3 all-in. |
|
Urgot | Dodge E flip. Trade when shotgun knees are on CD. Don't go below 25% HP or R executes you. |
|
Sett | Never give him a full W. Short trade, exit before he cashes grit. R uses your HP, don't get close when you're big. |
|
K'Sante | Respect W damage reduction. Fight when cooldowns cycle. All-Out form is squishier, pick your window there. |
|
Olaf | Respect axes and R CC immunity. Don't Emp E when R is active. Short trade, kite. He wins all-ins. |
|
Mordekaiser | Dodge E. Short trade only. If he ults, stall and survive. He wins extended. QSS if you're struggling. |
High-Risk (Bush Helps But It's Rough)
| Champion | Rule |
|---|---|
|
Volibear | Don't ego-duel. E shield + sustain outlasts you. Farm, survive, beat him with map timing. |
|
Darius | Short trades only. Never let passive hit 5 stacks or lane is over. Bush control is non-negotiable here. |
|
Trundle | Avoid all-in zone. R steals your stats. Don't fight in his W. Cross-map or wait for jungle. |
|
Malphite | Don't tunnel on killing him. Build for side pressure. Can't burst him, but he can't match your push. Play for map. |
|
Illaoi | Dodge E at all costs. If she lands it, just walk away. Never fight in R. Bait tentacles, trade the gap. |
|
Kennen | Ranged poke is rough. Farm safe, force him to push, call jungle. Lvl 6 all-in beats his if Emp E lands before stun. |
|
Quinn | Blinds autos, kites forever. Bush camp her when she goes for CS. Don't leap until her E is down. |
|
Rumble | Overheat hurts. Short trade when heat is low. Don't stand in R. Your all-in beats his if you get on him clean. |
CLIMBING TIPS
Most Rengar losses are not mechanics. They are bad reads with high confidence.
Rank-Specific Focus
| Rank | Main Fix |
|---|---|
| Iron-Bronze | Stop skipping camps for fake ganks. Basic farm alone wins games here. |
| Silver | Track enemy jungle start and stop pathing blind. |
| Gold | Turn every kill into dragon, camps, plates, or reset. Kills without conversion are fake leads. |
| Platinum | Read wave state before every lane visit. |
| Diamond+ | Your mistakes are punished instantly. Entry quality and vision control are the whole game. |
Common Mistakes
- Entering with no ferocity. Empty bar, fake champ.
- Greeding Emp Q into obvious peel. Damage is not always the best empowered spell.
- Forcing shoved lanes. If the lane is dead, leave it dead.
- Dropping farm for constant action. No items means no threat.
- Building one page every lobby. Adapt to comp, not comfort.
- Playing bruiser fights like you are still ahead. Rengar loses fast when he stays too long.
Good Habits
- Prep ferocity on camps before every gank.
- Track the enemy jungle every time they show.
- Clear vision before you hunt.
- Commit fully or leave early. Half-commit deaths are self-inflicted.
- Play around your ult timer honestly.
- Review deaths by asking what read was wrong, not what mechanic failed.
HIGH-ELO RENGAR PLAYERS
Watch POVs for patterns, not for highlight clips alone.
POVs Worth Watching
| Player | Platform | What To Watch For |
|---|---|---|
| ScrubNoob | Twitch | Fast execution, ruthless punish windows, and very clean ferocity planning. |
| NattyNatt | Twitch | Aggressive tempo, invade flow, and snowball conversion. |
| Dekar173 | Twitch | Top lane bush control, wave reads, and matchup pacing. |
| Pusi Puu | Twitch | Creative jungle routing and smart re-entry fights. |
Macro Education
| Creator | Platform | Best Use |
|---|---|---|
| Virkayu | YouTube | Objective setup, jungle pacing, and role-wide map reads. |
| Coach Kirei | YouTube | Decision quality, pathing discipline, and cleaner early game logic. |
Synergy Picks That Lift Rengar
| Champion | Tier | Why |
|---|---|---|
|
Ivern | S+ | Brush creation gives you lines other comps cannot check honestly. |
|
Nautilus | S | Reliable lockdown turns your first contact into guaranteed follow-up. |
|
Leona | S | Stable engage windows and chain CC make pick fights easy to read. |
|
Thresh | A | Lantern gives you better exits after aggressive entry lines. |
|
Orianna | A | Ball delivery turns your access into instant teamfight threat. |
FINAL WORDS
Rengar rewards discipline far more than flashy hands.
If you fix only three things, fix these:
ferocity prep, commit timing, and pick conversion.
You do not need perfect games.
You need clean, repeatable value.
Guide focus: Rengar Jungle (primary) + Top Lane (secondary)



You must be logged in to comment. Please login or register.