


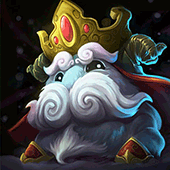
Lissandra
Build Guide by Navn
 [13.24] SUPPORT Lissandra (14.3 WIP) + 14.3 TIER LIST + WARDING GUIDE Part 1 + 2
[13.24] SUPPORT Lissandra (14.3 WIP) + 14.3 TIER LIST + WARDING GUIDE Part 1 + 2
Follow


6
2
 15,681
Views
15,681
Views
 0
Comments
0
Comments
6
2
15,681
Views
0
Comments
 Lissandra Build Guide By Navn
15,681
Views
0
Comments
Follow
x
Did this guide help you? If so please give them a vote or leave a comment.
You can even win prizes by doing so!
Vote
Comment
I liked this Guide

I didn't like this Guide
 Thank You!
Your votes and comments encourage our guide authors to continue
creating helpful guides for the League of Legends community.
Recommended Items


Runes: Vs all-in
1
2
Resolve


Domination


+10% Attack Speed
+6 Armor
+10% Tenacity/Slow Resist


Spells:
1
2
Standard
![LoL Summoner Spell: Flash]()
![LoL Summoner Spell: Ignite]()

Flash

Ignite

Items
Ability Order W > E > Q > Max W > E > Q

Iceborn Subjugation (PASSIVE)
Lissandra Passive Ability


Champion Build Guide
About Me and other Guides
Main account Profile: Navcan
Smurf: Navn
Twitch Stream: twitch.tv/navcan
Tiktok: @navcan
Youtube: navcans
Hi there! I've been trying out Lissadra support after hearing it showed up in pro play recently, and I've come to really like it! I think she is definitely viable, and can excel in certain situations and team compositions.
If you're interested in my other guides:
Enchanters:
 Lulu -> Support Lulu
Nami -> Support Nami
Karma -> Support Karma
Sona -> Support Sona
Yuumi -> Support Yuumi
Milio -> Support Milio
Soraka -> Support Soraka
Mage/Tank/Utility:
Zyra -> Support Zyra
Ashe -> Support Ashe
Amumu -> Support Amumu
Heimerdinger -> Support Heimerdinger
Lissandra -> Support Lissandra
Off-Meta/Fun stuff
Miss Fortune -> Support Miss Fortune
Veigar -> Support Veigar
Trundle -> Support Trundle
Jarvan IV -> Support Jarvan
Pantheon -> Support Pantheon
Why Lissandra? Pros/Cons
PROS:
- Offers a lot of lockdown potential on almost anyone.
- Can act as another carry.
- Flexible builds.
- Can be flexed to mid lane.
- Strong roaming potential.
CONS:
- If the enemy team build has any tenacity, then it will be a bit harder to be useful.
- Not very good against tanks. (They also tend to have tenacity as well)
- No sustain or damage blocking for laning phase.
- Hard to deal with Cleanse.
- Offers a lot of lockdown potential on almost anyone.
- Can act as another carry.
- Flexible builds.
- Can be flexed to mid lane.
- Strong roaming potential.
CONS:
- If the enemy team build has any tenacity, then it will be a bit harder to be useful.
- Not very good against tanks. (They also tend to have tenacity as well)
- No sustain or damage blocking for laning phase.
- Hard to deal with
Itemization
TLDR; Build to lock people down and/or survive
There's 2 main mythics to buy, both build out of Ruby Crystal, so that if you haven't decided by your first back to base on which one to get, then at least you can keep your options open. Amplifying Tome also turns into Zhonya's Hourglass but this will eat up inventory space, so keep that in mind.
Reasons to get Evenshroud
- The safest option overall. Can't go wrong with tankiness and damage amplication for your team.
- Its very cheap.
- Enemy team also has a decent amount of cc.
Reasons to get Everfrost
- Enemy team comp is almost all short ranged.
- Your team is missing a bit of AP damage.
- You want to snowball your bot lane lead.
Boots/Shoes Choice
- Get Ionian Boots of Lucidity. Cheap, efficient ability haste, and more up time on Flash. All other boots are not worth it,
Zhonya's Hourglass
- It may be possible to rush this item too, to snowball a lead you have in lane, since you can build some AP early, and also maintain your lead through the safety of the active.
- In almost all cases, if not bought first, buy it second. It is almost mandatory.
Knight's Vow
- Fantastic item, a safe third item option in most games. Gives almost all desirable stats, and pretty cheap.
Abyssal Mask
- If you have AP threats on your team, AND the enemy team has fed AP threats.
Anathema's Chains
- If there's 1 particularly strong enemy, then this will do wonders. Especially if you plan on putting Frozen Tomb and Ring of Frost on them, then extending the CC on that target will be high value.
Demonic Embrace
- This is mostly to extend the duration of Heal Cut if you have an Oblivion Orb item. Otherwise, as a standalone item, it will not be worth it.
Morellonomicon
- Only as a final item because there's nothing better to turn your Oblivion Orb into.
There's 2 main mythics to buy, both build out of
Mythics
Reasons to get
- The safest option overall. Can't go wrong with tankiness and damage amplication for your team.
- Its very cheap.
- Enemy team also has a decent amount of cc.
Reasons to get
- Enemy team comp is almost all short ranged.
- Your team is missing a bit of AP damage.
- You want to snowball your bot lane lead.
Boots/Shoes Choice
- Get
Legendaries
- It may be possible to rush this item too, to snowball a lead you have in lane, since you can build some AP early, and also maintain your lead through the safety of the active.
- In almost all cases, if not bought first, buy it second. It is almost mandatory.
- Fantastic item, a safe third item option in most games. Gives almost all desirable stats, and pretty cheap.
- If you have AP threats on your team, AND the enemy team has fed AP threats.
- If there's 1 particularly strong enemy, then this will do wonders. Especially if you plan on putting
- This is mostly to extend the duration of Heal Cut if you have an
- Only as a final item because there's nothing better to turn your
How to use your abilities
TLDR; Lockdown enemies and stall them as long as possible.
Iceborn Subjugation
- You can just be simply nearby and not even get assists, and you will proc your passive, which is great for team fights.
- You must be alive for this to proc, so being tanky from Evenshroud, using Frozen Tomb on yourself and Zhonya's Hourglass will greatly increase your chances of proc-ing and winning the team fight.
- This is extremely strong against team comps that have no tank, because enemies will be squishier, which will also increase chances of proc-ing.
Ice Shard
- This will be mostly used as an additional poke tool once you're level 3, and to help push waves.
- To push a wave as fast as you can, you will need the splash damage to hit as many minions as possible. To do this: tank the Melee minions and move into melee range of the Ranged minions. This should clump up all the minions into one small area, then walk away from that area, and then use Ice Shard. This should hit most, if not all of the minions.
Ring of Frost
- This does NOT stop dashes already in motion.
- When you hard CC enemies, there is a white bar under their name (if you have them visible) that will show the remaining duration of the CC. Your main goal is to make that white bar last as long as possible. This will only show on YOUR CC, and no one else's. Usually, you can use Ring of Frost to start, then use Frozen Tomb or Everfrost, then the other (if you have it), then, if you have enough Ability Haste, you can use Ring of Frost again. If done perfectly, you can lock someone down for 5.8 seconds. If you have Anathema's Chains on that target, that time can be increased by 20%, to 6.96 seconds.
Glacial Path
- The damage part of this actually extends farther than the cast range indicator. The damage matches the visual of how far the claw goes. HOWEVER, the spot which you can Blink to, also matches the claw, UNTIL THE END, then the spot you Blink to is at the base of the palm of the indicator.
- You can cast this into walls and traverse much longer distances if done optimally. The thickest walls would be the top/bot river walls.
- If you want to know where along the wall you will "pop" out of, you can use Wards with range indicators to show where you would appear.
- In the fountain, you can cast this into your own Nexus, and then "pop" out of it, and extend the duration of your homeguards movement speed to get out onto the map faster, and also fountain regen the mana spent to cast Glacial Path.
- Be very wary of things stopping you from re-casting this, as you may think you have escaped or get an amazing engage, but then awkwardly not blink and either die or bait your team and getting them killed.
- This is a very good bluffing tool as well, as you can use it in the direction of your enemies, but not Blink, and in some cases, your opponents will use important cooldowns at your claw thinking you will come in. Mid/Late game when you have Glacial Path maxed, this will be a huge tool, but early game, this will have a long cooldown, and either to engage, cancel recalls, or finish pushing a wave to recall.
- Highly recommend not using this as a poke tool, as it has a long cooldown, AND, it is the threat of having it almost always available that will make your opponents scared of you and your potential to close the gap and lock them down. If your opponents see you don't have Glacial Path ready, they will very likely try to attack you and chase you down.
Frozen Tomb
- To decide which option to use, if you need to stall your enemies, then use it on yourself. If you're locking someone down, then use it on that enemy. Having Zhonya's Hourglass will also stall for an extremely long time if you self cast Frozen Tomb.
- This will knock-down dashing targets.
- If you plan on self-casting this, then use Ring of Frost first. If you have Aftershock active, then you might be able to wait until Aftershock wears off before self-casting Frozen Tomb, to maximize the amount of time you can stall your enemies.
- The more enemies that are around, the more likely you will self-cast this as to not instantly die. In skirmishes, much more likely to cast this on an enemy.
- If enemies dash at you a lot, and you can see them before they do it, you can actually buffer this by casting it on them, and the INSTANT they are in range, you will stop their dash entirely, and lock them down.
- You can just be simply nearby and not even get assists, and you will proc your passive, which is great for team fights.
- You must be alive for this to proc, so being tanky from
- This is extremely strong against team comps that have no tank, because enemies will be squishier, which will also increase chances of proc-ing.
- This will be mostly used as an additional poke tool once you're level 3, and to help push waves.
- To push a wave as fast as you can, you will need the splash damage to hit as many minions as possible. To do this: tank the Melee minions and move into melee range of the Ranged minions. This should clump up all the minions into one small area, then walk away from that area, and then use
- This does NOT stop dashes already in motion.
- When you hard CC enemies, there is a white bar under their name (if you have them visible) that will show the remaining duration of the CC. Your main goal is to make that white bar last as long as possible. This will only show on YOUR CC, and no one else's. Usually, you can use
- The damage part of this actually extends farther than the cast range indicator. The damage matches the visual of how far the claw goes. HOWEVER, the spot which you can Blink to, also matches the claw, UNTIL THE END, then the spot you Blink to is at the base of the palm of the indicator.
- You can cast this into walls and traverse much longer distances if done optimally. The thickest walls would be the top/bot river walls.
- If you want to know where along the wall you will "pop" out of, you can use Wards with range indicators to show where you would appear.
- In the fountain, you can cast this into your own Nexus, and then "pop" out of it, and extend the duration of your homeguards movement speed to get out onto the map faster, and also fountain regen the mana spent to cast
- Be very wary of things stopping you from re-casting this, as you may think you have escaped or get an amazing engage, but then awkwardly not blink and either die or bait your team and getting them killed.
- This is a very good bluffing tool as well, as you can use it in the direction of your enemies, but not Blink, and in some cases, your opponents will use important cooldowns at your claw thinking you will come in. Mid/Late game when you have
- Highly recommend not using this as a poke tool, as it has a long cooldown, AND, it is the threat of having it almost always available that will make your opponents scared of you and your potential to close the gap and lock them down. If your opponents see you don't have
- To decide which option to use, if you need to stall your enemies, then use it on yourself. If you're locking someone down, then use it on that enemy. Having
- This will knock-down dashing targets.
- If you plan on self-casting this, then use
- The more enemies that are around, the more likely you will self-cast this as to not instantly die. In skirmishes, much more likely to cast this on an enemy.
- If enemies dash at you a lot, and you can see them before they do it, you can actually buffer this by casting it on them, and the INSTANT they are in range, you will stop their dash entirely, and lock them down.
Runes
TLDR; Go Aftershock if you don't wanna think about it
Aftershock
- Standard, can't go wrong with this rune.
Glacial Augment
- If the enemy bot lane has no mobility at all, this will be amazing for gank setups and all-ins. Not only will they be rooted from Ring of Frost, they'll be slowed additionally afterwards. You will be VERY squishy however.
Font of Life
- This is amazing. This only gets better the more auto-attack based champions your team has.
Bone Plating
- Generally a very good rune, especially against assassins and all-in lanes.
Second Wind
- Only worth taking if both enemy bot laners have a lot of range, so that you can still stay healthy enough that you have all-in potential when you decide to go in.
Unflinching
- Good against cc, and might even save you incase someone tries to inturrupt you while you use Glacial Path.
Overgrowth
- If they have no cc, then this is your other option.
Only be in this tree if you are going Glacial Augment
Perfect Timing
- You're buying Zhonya's Hourglass almost every game, so this is just great.
Biscuit Delivery
- You may have mana problems in lane, so this'll help alleviate some of those issues.
Future's Market
- If there won't be mana issues, then get this instead.
Cosmic Insight
- Amazing rune in this row, more Flash uptime, more Zhonya's Hourglass/ Everfrost uptime.
Approach Velocity
- I don't think this rune is worth it, but it's worth mentioning why.
- While this rune may initially sound great, it actually mostly becomes redundant. Lissandra doesn't have the range to apply any slows, and once she is in range, enemies likely won't be able to move anyways, so it's more about locking them down, rather than chasing them.
Ghost Poro
- This is incredibily helpful for dropping at choke points/ramps/jungle entrances. But it will take a relatively long time to stack.
- Would recommend against Junglers that tend to run at you very quickly, such as Nunu & Willump Hecarim Rammus
Zombie Ward
- Having extra vision is nice, and swapping for sweeper level 1, after dropping a ward somewhere can get you a head start on this to controlling the lane/map.
- As long as you hit any ward once, the ward will spawn, you do not have to score the killing blow on the ward.
Ultimate Hunter
- This is the whole reason to be in this tree. Frozen Tomb is insanely good.
Keystones
- Standard, can't go wrong with this rune.
- If the enemy bot lane has no mobility at all, this will be amazing for gank setups and all-ins. Not only will they be rooted from
Resolve
- This is amazing. This only gets better the more auto-attack based champions your team has.
- Generally a very good rune, especially against assassins and all-in lanes.
- Only worth taking if both enemy bot laners have a lot of range, so that you can still stay healthy enough that you have all-in potential when you decide to go in.
- Good against cc, and might even save you incase someone tries to inturrupt you while you use
- If they have no cc, then this is your other option.
Inspiration
Only be in this tree if you are going
- You're buying
- You may have mana problems in lane, so this'll help alleviate some of those issues.
- If there won't be mana issues, then get this instead.
- Amazing rune in this row, more
- I don't think this rune is worth it, but it's worth mentioning why.
- While this rune may initially sound great, it actually mostly becomes redundant.
Domination
- This is incredibily helpful for dropping at choke points/ramps/jungle entrances. But it will take a relatively long time to stack.
- Would recommend against Junglers that tend to run at you very quickly, such as
- Having extra vision is nice, and swapping for sweeper level 1, after dropping a ward somewhere can get you a head start on this to controlling the lane/map.
- As long as you hit any ward once, the ward will spawn, you do not have to score the killing blow on the ward.
- This is the whole reason to be in this tree.
Early/Mid/Late game
Early Game
This will be divided into Offensive and Defensive, because it'll be very situational.
Reasons to go offensive:
- You have Spellthief's Edge, which usually means you will be able to auto-attack your enemies fairly safely.
- You have an easy laning phase.
- Your enemies have very little mobility.
- Your lane partner is a strong laner and has good all-in potential.
- Stack your support quest as fast as possible, or at the very least, faster than your opponent, most of this will come from your auto-attacks, and occasional Ice Shard cast. Be careful of running out of mana.
Reasons to go Defensive:
- You have Relic Shield, which likely means you have a hard lane match-up, or you can't auto-attack your enemies easily.
- You have a scaling lane partner.
- You can't reach your enemies without Glacial Path.
Don't force any trades and just wait until your jungler comes.
In general:
- You have great gank setup potential with Glacial Path and Ring of Frost. Try to target squishies, and targets that don't have Flash available.
- Once you reach level 2, you have amazing roam potential since Glacial Path covers a lot of distance, and you can come from a lot of different angles, which makes it difficult to prevent for your enemies.
Mid/Late game
- Look to lock down any high priority targets, and make sure your team mates can follow up to kill them.
- If the high priority targets are hard to reach or never around, then just look for multi-man Ring of Frost moments, and stalling as many enemies with self-cast Frozen Tomb and Zhonya's Hourglass.
- Always try to hover around, even if you're low, because you don't need to get assists to proc Iceborn Subjugation. You just have to be alive and close enough, and that can help you win team fights.
This will be divided into Offensive and Defensive, because it'll be very situational.
Reasons to go offensive:
- You have
- You have an easy laning phase.
- Your enemies have very little mobility.
- Your lane partner is a strong laner and has good all-in potential.
- Stack your support quest as fast as possible, or at the very least, faster than your opponent, most of this will come from your auto-attacks, and occasional
Reasons to go Defensive:
- You have
- You have a scaling lane partner.
- You can't reach your enemies without
Don't force any trades and just wait until your jungler comes.
In general:
- You have great gank setup potential with
- Once you reach level 2, you have amazing roam potential since
Mid/Late game
- Look to lock down any high priority targets, and make sure your team mates can follow up to kill them.
- If the high priority targets are hard to reach or never around, then just look for multi-man
- Always try to hover around, even if you're low, because you don't need to get assists to proc
WARDING GUIDE + ITEMS CHANGES
HOW TO WARD IN SEASON 14 PART ONE!
HOW TO WARD IN SEASON 14 PART TWO!
SEASON 14 SUPPORT ITEM CHANGES
14.3 TIER LIST
Grading Explanation below the lists! Check the RANK too!
- Lissandra Support is viable, and can really strong and oppressive if picked against the right team comps.
Tier List Grading Points
- Winrates
- Champion Difficulty (more relevant in Emerald and below)
- Counter-play (more relevant in Emerald and below)
- Flex pick for draft (more relevant in diamond+)
- Early game (more relevant in diamond+)
- Late game/scaling (more relevant in Emerald and below)
- Anything in the (_Letter_+) row, means it's better the higher in elo you go. Anything in (_Letter_-) row, means it's better the lower in elo you go.
Overall Points:
- Games last longer the lower in elo you go. Therefore, mage supports tend to do much better since you can buy your items, and you basically become another carry threat. This leads to enchanters/engage being weaker in lower level play since you would rely on your teammtes more often.
- Champions that are fundamentally easier to execute on will have higher win rates. Since it is more unlikely players are pilot-ing their champion runes/builds/kit efficiently, the easier the champion, the more likely to maximize their kits. This is especially apparent in Platinum and below.
- I would recommend playing any of the champs in S+, S, or A. However you can climb on almost anything, provided you always look to maximize your champion kit, mechanics, and impact on the game. Winning is the result of improving.
- Lissandra Support is viable, and can really strong and oppressive if picked against the right team comps.
14.3 Emerald and Below
14.3 Diamond+
Tier List Grading Points
- Winrates
- Champion Difficulty (more relevant in Emerald and below)
- Counter-play (more relevant in Emerald and below)
- Flex pick for draft (more relevant in diamond+)
- Early game (more relevant in diamond+)
- Late game/scaling (more relevant in Emerald and below)
- Anything in the (_Letter_+) row, means it's better the higher in elo you go. Anything in (_Letter_-) row, means it's better the lower in elo you go.
Overall Points:
- Games last longer the lower in elo you go. Therefore, mage supports tend to do much better since you can buy your items, and you basically become another carry threat. This leads to enchanters/engage being weaker in lower level play since you would rely on your teammtes more often.
- Champions that are fundamentally easier to execute on will have higher win rates. Since it is more unlikely players are pilot-ing their champion runes/builds/kit efficiently, the easier the champion, the more likely to maximize their kits. This is especially apparent in Platinum and below.
- I would recommend playing any of the champs in S+, S, or A. However you can climb on almost anything, provided you always look to maximize your champion kit, mechanics, and impact on the game. Winning is the result of improving.
Want to know more?
If you have any questions, leave a comment below! I'll be editing this as I go and be sure to let you know once I have more updates. Or if you'd like to ask me a question directly, you can go to my twitch stream! twitch.tv/navcan
There's also my tiktok
And my youtube!
Cheers and thank you for reading! Good luck on the rift
There's also my tiktok
And my youtube!
Cheers and thank you for reading! Good luck on the rift


 Twitter
 YouTube
 Twitch
[13.24] SUPPORT Lissandra (14.3 WIP) + 14.3 TIER LIST + WARDING GUIDE Part 1 + 2
You must be logged in to comment. Please login or register.