Rek’Sai is one of Briar’s hardest matchups if played well. Her Burrow + Knock-Up cancels your engage, and her R completely shuts down your healing window. The key is reacting fast and forcing fights on your terms — you can win only if you time your abilities perfectly.
🧠 Gameplan Summary
⚠️ Avoid isolated 1v1s — she outtrades and outcontrols you early.
✅ When she Burrows into your team, W in instantly — that’s her weakest state.
✅ Buffer E during her knock-up to slam her into a wall and heal safely.
✅ After level 6, always W near allies or monsters so her ult can’t cancel your frenzy.
⚠️ Misplay once and she kills you instantly — precision and reaction timing decide this matchup
Morgana
Morgana is one of Briar’s absolute hard counters. She’s a full-clear jungler so she can fall apart if you pressure her early. The only danger is if her first gank succeeds; then she can snowball tempo and out-clear you. Her entire kit dismantles your playstyle: point-and-click lockdown, Spell Shield denying your E, and permanent CC uptime that stops every engage you have. She doesn’t even need to outplay you — one Q hit and you’re stuck watching your screen for three seconds while her team deletes you.
🧠 Gameplan Summary
✅ Invade early — her first clear is slow and predictable.
✅ Sideways-W to dodge Q and punish instantly.
✅ If she ever wastes Black Shield, you win every fight.
⚠️ Don’t let her first gank succeed — tempo snowball is her only win con.
⚠️ Her Q cooldown is short — missing one doesn’t mean she’s vulnerable.
⚠️ Black Shield makes her and her carry untouchable — don’t waste your combo into it.
⚠️ Her R + Zhonya combo makes teamfights unwinnable if you dive her.
✅ Control early river fights and objectives; once ahead, she’s just a cannon minion
✅ Higher chance to win: play the map, avoid grouped fights, and pick off stragglers.
Jax
Perma bann! Jax outscales you in literally every phase of the game. His kit denies your burst and punishes your engage — his E (Counter Strike) dodges your autos and blocks your healing window. Even when you try to scream him away mid-E, he’ll still out-DPS you once he gets a few items. His R gives bonus resistances, making him tankier the longer the fight goes.
Optional: Frozen Heart or Randuin’s if he’s fed
Runes: Conditioning + Unflinching
❌ Don’t duel him.
✅ Play map, gank other lanes, and avoid matching pathing.
❗ If he’s top, warn your top-laner early — Jax > Briar in every state
Trundle
Trundle hard-counters Briar’s kit — his R steals your tank stats, and his Q + W make him unkillable in extended fights. He wins every early duel and can pillar you off objectives or out of ganks.
🧠 Gameplan Summary
❌ Don’t fight early — he always wins 1v1s.
✅ Path opposite side and play for tempo, not combat.
✅ Build anti-heal and Eclipse + Cleaver for kiting.
⚠️ Avoid tower dives — his ult and sustain make them suicide.
Olaf
Olaf is back in the meta — and he’s a serious problem for Briar. Between his absurd early dueling power, sustain, and unstoppable ultimate, this matchup punishes every single mechanical mistake you make. The only saving grace is that Olaf falls off in coordinated teamfights, while Briar scales well with frontline and CC setups.
🧠 Gameplan Summary
⚠️ Do NOT fight him early. Olaf wins every skirmish levels 1–6. He gets low clearing camps, which gives him bonus attack speed and damage — you can’t check him in river or jungle.
✅ Outscale him. Once you get 2–3 items, you can start fighting him if your team is nearby or if you play off his cooldowns.
⚠️ Be patient with W-2. This is the key to the matchup. If you use W-2 too early, you just give him attack speed and he shreds you faster. Wait until the very last moment before he heals or finishes his W animation — that’s when you bite for maximum heal and damage.
❌ Don’t rely on E. Once he presses R, your fear and knockback mean nothing. Use E before his ult if you can, or just disengage and wait it out.
✅ Teamfight advantage. Olaf can’t function well in long teamfights once CCs and spacing come into play. If your frontline or CC lanes exist, you can collapse on him safely after he burns R.
Olaf is one of the few junglers who completely controls early tempo against Briar. Be okay with sacrificing early plays — if you live through the first 10 minutes and avoid giving him tempo, you’ll outvalue him in fights later
Hecarim
A good Hecarim is one of Briar’s hardest matchups — his speed, CC, and unstoppable ult make it nearly impossible to stick to him or trade evenly. You can punish bad Hecarims easily, but against good ones, it’s all about picking your fights carefully.
🧠 Gameplan Summary
⚠️ Never E into his R — he goes unstoppable and turns the fight instantly.
✅ Build BORK or Voltaic to slow and match his movement speed.
✅ Choose your engages wisely — commit only when he has no R or E stacks.
✅ Fight near your team — force him to panic-ult into multiple people.
⚠️ Don’t chase solo — he wins isolated duels through mobility.
✅ Invade early — his first clear is punishable before he scales up.
If he plays perfectly, you just have to outplay with timing and map tempo — punish bad engages, track his ult, and never overcommit first.
Shaco
Shaco is one of the most frustrating and volatile matchups for Briar. Even if you play perfectly, his invisibility, traps, and clone bait constantly break your tempo. He dictates the map, invades freely, and can appear anywhere — making it impossible to track him properly. Whether AD or AP, he always finds a way to punish your aggression.
🧠 Gameplan Summary
⚠️ Don’t chase him blind — boxes and clone explosions will delete you.
✅ Hydras aare huge — it instantly clears boxes and breaks his traps.
⚠️ Never ult without confirming the real Shaco — his clone can waste your engage.
✅ Invade carefully — track him with deep wards, not face-checks.
⚠️ Expect constant map pressure — he’s always ahead in tempo through cheese paths and perma-ganks.
✅ In fights, save Q or E for when he reappears out of stealth; that’s your only real punish window.
✅ Protect ur ADC at all costs
Elise
Elise is one of Briar’s hardest matchups. Her cocoon (E) and repel completely counter your engage and reset patterns — she dictates every early fight. She clears faster, ganks better, and can dive safely, while you struggle to itemize MR early. If she plays perfectly, you can’t touch her.
🧠 Gameplan Summary
⚠️ Never W–Q blindly — she’ll E you mid-air or repel to safety.
✅ Punish her only when she’s close enough for W–Q range — force panic repels.
✅ If she rappels away, ult where she’s landing for a guaranteed kill.
⚠️ Avoid early duels — her burst wins every fight before items.
✅ Look for counterganks — if she fails one dive, she falls behind hard.
✅ Outscale and teamfight — if she doesn’t snowball early, she becomes useless
Ekko
Early game is all yours — Ekko can’t fight you 1v1 before level 7. The problem is when he snowballs off your lanes; once he’s fed, the matchup becomes unplayable. He won’t duel you early, he’ll just farm kills elsewhere until he’s too strong to catch.
🧠 Gameplan Summary
✅ Invade early — punish him before he scales or gets passive stacks.
✅ Play around your lanes — don’t let him snowball through ganks.
⚠️ If he gets ahead, stop fighting him alone — he’ll just reset with R.
✅ Q him right before he ults to lock him down and punish his greed.
✅ You win if you stay even or ahead in tempo — fall behind, and it’s doomed.
Karthus
Karthus is one of Briar’s hardest matchups. He full-clears faster, hits 6 first, and never has to interact with you. Once he’s ahead, he perma-farms and outdamages you everywhere. His Exhaust shuts down your engage, and even if you kill him, his passive + R will still wipe your team.
🧠 Gameplan Summary
⚠️ Don’t let him full clear uncontested — invade or force early fights.
✅ Play for early tempo — punish his weak first clears before level 6.
⚠️ Respect his Exhaust — bait it, then re-engage with E.
✅ Ping and move with your team — you can’t solo-pressure this champ.
⚠️ Edge of Night or Zhonya-like options (team) help survive his R burst.
✅ Once grouped, look to hard engage and delete him first — he’s useless if you kill him before casting spells
Gwen
Gwen’s true damage and scaling make her tough, but her early game is weak — that’s your window. She shreds you later if you let her farm and scale, but early invades or skirmishes are heavily Briar-favored. The key is dodging the center of her Q, since that’s where the true damage hits.
🧠 Gameplan Summary
✅ Invade early — she’s weak and low HP on first clear.
✅ Dodge the Q center — step sideways when she winds it up.
✅ If she ults, E over her during the animation to outplay the burst.
⚠️ Don’t let her scale - 2-item Gwen is KO. 10x
✅ End games fast or snowball lanes — she outscales you hard late.
Lillia
Lillia can be tricky if well played, but most players can’t pilot her cleanly. You have the stronger engage tools — your point-and-click stun stops her kiting if timed right. Her sleep is the only real threat, but both your E and R can buffer through it and turn fights instantly.
🧠 Gameplan Summary
✅ W–Q combo as she runs in — she can’t kite if you connect first.
✅ Buffer E or R when she tries to sleep you — it breaks her setup.
✅ Build BORK or Voltaic to stick to her through movement speed.
⚠️ Don’t chase endlessly — she wins if you whiff and let her kite.
✅ Play around her cooldowns; once sleep is down, she’s free kill
Talon
Talon can’t fight you early — your first six levels are completely free. He relies on roaming and picking off your teammates, but in direct combat, you’re way stronger. Most Talons try to outplay with mobility, yet your sustain and CC punish him every time he missteps.
🧠 Gameplan Summary
✅ Invade or duel early — he’s weak before items.
✅ E instantly if he Q-jumps on you to shut down his combo.
✅ Track his roams; he wins only if he snowballs side lanes.
⚠️ Don’t chase him over walls — that’s his only win angle.
✅ Use your tempo lead to invade and control objectives — this matchup is free if you stay proactive.
Volibear
Volibear is one of those matchups that looks scary because of how hard he hits early, but in reality, you control the pace if you play around his cooldowns. His whole kit revolves around the W heal reset and his shield windows — if you avoid trading during those, he runs out of gas fast.
🧠 Gameplan Summary
✅ WQ–Auto–W2 is your bread-and-butter. If you hit that clean, take the chunk and reset — don’t overchase.
⚠️ Never fight on his W timer — that ability lets him heal endlessly if you let him chain it.
✅ If you predict his R, you can counter with your own R as he lands for a clean punish.
⚠️ He’ll try to E → W → Q → W you while kiting around. Don’t fall for it — once those are down, you win every fight.
✅ If you force him to panic-ult defensively, he’s basically out of the fight.
The only way you lose this matchup is by playing on his rhythm instead of your own.
Make him waste cooldowns, re-engage after his W and E, and you’ll shred him every single time.
Sejuani
Sejuani is rough — she deals surprising damage early, has heavy CC, and tanks through your burst. If you engage first, she can lock you down and kill you before you lifesteal. The only way to win is by reacting perfectly and punishing her cooldowns.
🧠 Gameplan Summary
⚠️ Don’t engage first — her CC chain will delete you instantly.
✅ Buffer E into her Q or R to cancel her engage.
✅ BORK helps you shred her once she’s alone or out of cooldowns.
✅ If she ever whiffs abilities, full-commit with W–Q and punish hard.
⚠️ Avoid fighting around her team — she’s strongest in group fights.
✅ Once you break her initial CC rotation, she’s just a tanky minion.
Udyr
Udyr outscales you fast — whether he’s AD Tiger or AP Phoenix, he becomes unkillable if the game drags on. He clears faster, duels harder mid-game, and can run you down if you don’t build tempo early. You only win by forcing early skirmishes and playing with your team.
🧠 Gameplan Summary
⚠️ Don’t let him farm freely — he’ll outpace you in CS and tempo.
✅ Fight early — you win first clears and early skirmishes.
✅ Coordinate with your team — you can’t solo kill him after items.
⚠️ E-buffer when he Tiger Qs to avoid full burst.
✅ Once he commits and burns cooldowns, turn with W–Q for max damage.
⚠️ If you don’t snowball early, he’ll outscale and stat-check you out of the game
Skarner
Skarner won’t fight you 1v1 — he just plays for team picks and objective control. Once he has two items, he outdamages you in extended fights and becomes too tanky to burst. The matchup’s less about dueling him and more about how you play around his engages.
🧠 Gameplan Summary
⚠️ Avoid isolated fights — he wins once he scales and groups.
✅ Buffer E when he ults — you can knock him into a wall mid-pull.
✅ Use W–Q combo as he engages; punish him if he commits too deep.
✅ BORK + Titanic works best — BORK first if your team can follow up.
⚠️ Don’t chase him; focus on map pressure and tempo instead
Amumu
Amumu looks scary in teamfights, but smart Briar play makes this matchup free. His only real threat is landing Q on your engage — if you W forward blindly, you’ll get CC-chained and deleted. But if you bait his Q first, you win every fight and outtempo him easily.
🧠 Gameplan Summary
✅ U can Invade early — you clear faster and outfarm him hard.
✅ Dodge his Q with W — force him to panic-ult and punish the cooldown.
✅ Buffer E when he R to avoid the stun
⚠️ Don’t dive or W-forward into his CC — that’s the only way you lose.
✅ If he fails an early gank, he’s permanently behind - keep the pressure on.
Zac
You get some room early, but once teamfights start, it’s hopeless — he’s tanky, heals endlessly, and his R completely cancels your engage. You can’t burst him, can’t stick to him, and he’ll always outvalue you in fights with massive AoE CC and healing.
🧠 Gameplan Summary
⚠️ Avoid direct fights after level 6 — his ult breaks your combo every time.
✅ Play around early tempo — invade or punish before he gets items.
✅ Force skirmishes instead of full teamfights — he thrives in 5v5s.
⚠️ Once he builds tank + AP, you can’t itemize well against him.
✅ If he engages on your team, counter-engage right after his knock-up ends — that’s your only real window.
⚠️ Respect every Slingshot — one catch and he turns the whole fight.
Ivern
Ivern is one of Briar’s most unfair matchups. His shields, Q root, and Daisy completely shut down your engage and sustain. You can’t smite-fight him, and once Daisy’s out, you’re forced to back off or get CC-chained to death. The matchup only feels playable because most Iverns misplay positioning — good ones make your champion useless.
🧠 Gameplan Summary
⚠️ Never fight front-to-front — his shield and Daisy always win the trade.
✅ If he’s ever in W–Q range, go early and commit — late W means he roots you and escapes.
✅ Don’t waste E early — save it for after Daisy or Q hits.
✅ Build Serpent’s Fang third, no matter the setup — deletes his shields.
⚠️ Focus Ivern first in fights — if you kill the enchanter, the rest of his team falls apart.
✅ Abuse bad Iverns who walk too close — one clean combo and he’s gone
Ivern is a Canon Minon without Daisy! So focus her - but u cant smite her anymore!
Warwick
This matchup is pure stat-check — whoever messes up first dies instantly. Warwick punishes every bad E with fear cancel and healing through your burst, but if you bait out his fear and damage reduction, you completely turn the fight. It’s all about timing and reading his engage.
🧠 Gameplan Summary
⚠️ Don’t waste E early — if he fears through it, you lose.
✅ W out right as his fear ends to dodge his sustain window.
✅ Once he uses damage reduction, all-in with W–Auto–Q and melt him.
✅ E before his Q follow-up — that’s your winning trade.
✅ You can buffer R into his R to go unstoppable and flip the fight.
⚠️ Whoever misuses cooldowns first dies — patience and timing decide everything.
Bel'Veth
Bel’Veth can match your tempo and punish your weak early levels. She has better level 1–2 dueling and can invade early if you’re not ready. The matchup often feels coin-flippy — if she wins the first fight or steals a camp, you’re stuck behind; if not, she falls apart quickly.
🧠 Gameplan Summary
⚠️ Respect early invades — she outduels you before level 3.
✅ Track her pathing and punish failed plays; she falls behind easily.
✅ Fight with teammates — her auto-based kit struggles vs CC comps.
✅ Ward your raptors and red early; never give her free tempo.
⚠️ If she gets early Void Form, slow the game and play around teamfights — she scales harder, but you out-impact her when even
Kindred
Kindred is one of those matchups that looks even early but becomes brutal once she scales. She outdamages you in extended fights and can completely nullify your all-in with Lamb’s Respite. The matchup is all about timing — if you misplay her ult window, you lose everything.
🧠 Gameplan Summary
⚠️ Don’t front-to-back — she shreds you and your frontline.
✅ Flank or dive from unexpected angles to force her ult early.
✅ If she ults, hold your E until the exact moment it ends — the instant fear kills her team as they exit.
✅ Titanic + W2 burst right before or after her ult can one-shot her.
⚠️ Track marks and pathing — she’ll outscale fast if you give her space.
✅ Fight early, deny marks, and play for creative angles — timing beats Kindred, not brute force
Graves
Graves is tough mainly because of tempo — he clears faster, pokes you out from range, and his Smokescreen messes with your decision-making and vision mid-fight. If he gets ahead, you can’t touch him, but the matchup is playable if you manage cooldowns well and don’t overcommit.
🧠 Gameplan Summary
⚠️ Don’t take full-on duels early — short trades only.
✅ W–Auto–Q–Auto–W2 combo fast, then disengage before his rotation resets.
✅ If you trade cleanly, he ends half HP while you stay full.
⚠️ Avoid fighting inside Smokescreen — it breaks your targeting and timing.
✅ Flash engage with team follow-up if he’s fed; alone he’ll kite you out.
✅ Keep tempo even — Graves only wins if he snowballs off early clears.
Naafiri
Naafiri can’t match your early brawling power. She relies on clean Q trades and tempo through skirmishes, but you simply outstat and outgank her. As long as you don’t eat full Q1–Q2 chains, she can’t burst you down. You scale faster, clear faster, and punish harder.
🧠 Gameplan Summary
✅ Fight early and invade — you win every 1v1 before she gets items.
✅ Sidestep Q1–Q2 — her only real damage combo.
✅ Play with CC lanes — she can’t peel or fight grouped.
⚠️ If she gets a big farm lead, she can poke you out; play for tempo, not trades.
✅ Stay ahead and she becomes completely useless past mid game.
Kayn
Base Kayn can’t touch you early — the first 10–15 minutes are completely yours. If you ever die to him before form, it’s purely a misplay. The matchup flips only once he gets his transformation, so punish him hard before that.
🧠 Gameplan Summary
✅ Invade early — pre-form Kayn loses every fight.
✅ If he tries to E through a wall, Q him to cancel it, then E him back into it.
✅ Always dodge or buffer against his W — it’s his key spell in every form.
⚠️ If he ults, buffer E as he comes out to knock him into a wall.
✅ Play around form timer — deny early tempo, and he can’t scale or snowball.
Viego
Viego’s kit perfectly punishes overcommits — his resets make every mistake fatal. You can outburst him if you start clean, but once he gets a reset or lands W, the fight is lost. In low elo he’s manageable, but high elo Viegos will punish every mistimed E or overstay.
🧠 Gameplan Summary
✅ Engage first — quick W–Q–auto–W2 combo before he reacts.
⚠️ After he retreats, hold E to dodge his returning W — that’s the fight decider.
✅ Outmove or buffer his stun; if you dodge it, you win instantly.
⚠️ Never fight after he gets a soul reset — disengage immediately.
✅ Focus on early tempo and skirmishes before resets matter — once he chains kills, the fight’s over
Master Yi
The matchup is pure contrast — Yi wins 1v1s, Briar wins teamfights. If you fight him alone, he’ll outscale and out-DPS you, but in grouped fights, your CC and burst shut him down completely. The outcome depends entirely on whether you play for picks or for team setups.
🧠 Gameplan Summary
⚠️ Avoid pure 1v1s — he wins extended duels.
✅ Play for teamfights — your CC and burst beat him easily there.
✅ If he Q’s on you, E or Q him the moment he lands to break his rhythm.
✅ Punish every misplay — when his Q is down, he’s a free kill.
⚠️ Track invades and side lanes — he loves to split and snowball tempo
Lee Sin
Lee Sin is one of Briar’s hardest matchups in higher elos — His kick cancels your W every time if he positions correctly, and his mobility lets him disengage before you can heal. Even if you outplay early, he can always turn fights with Insec setups or peel for his team.
🧠 Gameplan Summary
⚠️ Never overcommit — he’ll kick you mid-W and reset the fight.
✅ Buffer R right as he casts R to cancel the knockback if timed perfectly.
✅ E-buffer when he lands Q2 — slam him into a wall before he executes.
✅ Sideways-W to dodge his first Q; missing Q is your best punish window.
⚠️ Don’t chase too deep — he’ll just peel you into his team.
✅ Best plan: fight around your team, punish failed Insecs, and never give solo angles — grouped, you can actually shut him down
Jarvan IV
Jarvan can’t match your sustained damage or tempo. Even if he plays perfectly, it comes down to team comp — you win almost every 1v1. His only real threat is displacing you with his combo and forcing you into awkward fights.
🧠 Gameplan Summary
✅ Always fight him head-on — your trades outscale his burst.
✅ Sideways-W dodges his EQ engage completely.
⚠️ Don’t E blindly — he becomes unstoppable during his ult animation.
✅ If he whiffs Cataclysm, knock him into his own wall and finish him.
✅ Outfarm, outduel, and control tempo — this matchup is basically free
Wukong
On paper, Wukong should win — he can disrupt your engage, clone-dodge your W, and CC-chain you with ult. But most Wukongs misplay their combos, making the matchup much more forgiving. If he wastes W–E–R early, you get 20 seconds of free pressure to run him down.
🧠 Gameplan Summary
✅ Track his W cooldown — once it’s used, he’s completely vulnerable.
✅ Punish after his engage — you can full-combo him twice before his abilities return.
⚠️ Avoid diving blind — his clone and ult can turn fights instantly.
✅ Catch him in bad positions — force fights when W is down or misused.
⚠️ Against perfect Wukongs, play slow and reactively — one good ult and he wins
Darius
Darius is brutal if he times his E right — if you ever W–Q into his pull, you instantly lose the trade. His kit punishes every mis-timed engage, and his ult deletes you once he stacks passive. The key is baiting out his E first, then going in when he’s vulnerable.
🧠 Gameplan Summary
⚠️ Never W–Q first — he’ll pull you mid-cast and win instantly.
✅ Wait for his E, then W–Q to punish his cooldown.
✅ Disengage before 5 stacks — once he hits max passive, you’re dead.
✅ Swifties help a lot for spacing and kiting.
⚠️ Don’t ego-duel him — only fight when he wastes pull or gets kited by your team
Teemo
Teemo Jungle is rare and inconsistent — bad ones get crushed early, but smart Teemos can sneak farm, scale, and punish you once they get items. His blind can stall your healing and DPS, and you don’t build early MR, so he can hurt more than expected if you let him breathe. Still, if you ever reach him first, he’s instantly dead.
🧠 Gameplan Summary
✅ Invade early — he can’t contest you pre-item.
✅ If you find him, Q–Auto, wait out his Blind, then W–Q to finish.
✅ E to chase or finish as he runs — he has no real escape tools.
⚠️ Avoid face-checking shroom areas — he plays around vision traps.
✅ Build light MR midgame if he scales (MR boots or Hexdrinker).
✅ Once you’re on top of him, the fight’s already over.
Zyra
Both Zyra and Brand are AP full-clear mages who win through zone control and poke — but they crumble if you ever reach them. Their CC and burst can hurt, yet one clean engage deletes them instantly. Treat them like squishy Karthus-types: they clear fast, but you out-duel them everywhere on the map.
🧠 Gameplan Summary
✅ Look for catches — if you find them in jungle or river, it’s a free kill every time.
✅ E them into a wall the moment they misstep; they can’t survive your combo.
✅ Use W or Flash to dodge key CC (Zyra root / Brand stun).
⚠️ Don’t run into their spells blind — play around vision and angles.
✅ In teamfights, wait out their first rotation, then re-engage — they have no escape tools.
✅ Buffer E during Zyras’s R to survive the Burst;
Brand
Both Zyra and Brand are AP full-clear mages who win through zone control and poke — but they crumble if you ever reach them. Their CC and burst can hurt, yet one clean engage deletes them instantly. Treat them like squishy Karthus-types: they clear fast, but you out-duel them everywhere on the map.
🧠 Gameplan Summary
✅ Look for catches — if you find them in jungle or river, it’s a free kill every time.
✅ E them into a wall the moment they misstep; they can’t survive your combo.
✅ Use W or Flash to dodge key CC (Zyra root / Brand stun).
⚠️ Don’t run into their spells blind — play around vision and angles.
✅ In teamfights, wait out their first rotation, then re-engage — they have no escape tools.
✅ Buffer E during Brand’s passive to survive the burn
Taliyah
Taliyah’s burst looks scary, but she’s squishy and can’t handle your engage. Since she builds full AP with no HP scaling, you delete her the moment you land W–Flash–Q. The only danger is getting caught by her E + W combo in tight terrain — that’s her only win angle.
🧠 Gameplan Summary
✅ Engage fast and clean — she can’t survive your full combo.
✅ If you expect her W, start with E to dodge her burst and counter right after.
⚠️ Don’t fight in narrow/tight spaces — her rocks shred you there.
✅ Flash-Q or W–Q always kills her early.
✅ If she walls off a fight, ignore and take tempo elsewhere — she can’t contest your pressure head-on.
Sylas
Sylas Jungle can’t clear efficiently and relies on early ganks to stay relevant. His first path is always three camps into a forced gank, because his full clear is too slow and leaves him low HP. If you match or punish that first move, the game is instantly yours — he never recovers tempo.
🧠 Gameplan Summary
✅ Ward and track early — expect 3-camp gank or invade at 2:30.
✅ Mirror his path and punish his first failed gank; he’ll be useless after.
✅ Fight him early — you outstat and outclear him easily.
⚠️ If he steals your R later, just wait it out; he can’t survive your burst.
✅ Once you get tempo lead, invade freely — Sylas Jungle can’t play from behind.
Nocturne
Nocturne’s early duels are dangerous because of Fear + Spell Shield, but you can completely outplay him if you time your abilities right. Smite or bait his shield, then use your full combo — once it’s down, he can’t fight you. The matchup comes down to execution and timing, not stats.
🧠 Gameplan Summary
✅ Smite or Q to break his Spell Shield, then full-combo immediately.
✅ W over walls when he fears you — it breaks his CC chain.
✅ E-buffer when he walks up for trades; punish if he commits too deep.
✅ Q–Smite–E or Q–Smite–W combo works best for guaranteed damage.
⚠️ Don’t ego his 1v1 — if you give him lethal tempo uptime, you’re dead.
✅ Play smart, bait cooldowns, and the fight is always yours.
Kha'Zix
Kha’Zix can destroy you if you fall for his isolation pattern, but the matchup is playable if you respect his windows. He’s stronger in short, spaced trades — if you force full engages and track his cooldowns, he crumbles fast. Lower elo Kha’Zix players overfight; good ones only strike on power spikes.
🧠 Gameplan Summary
⚠️ Never fight isolated — his Q spam will melt you.
✅ Force grouped fights or skirmishes around objectives.
✅ W–Auto–Q–Auto–W2–R combo bursts him before he can reset.
✅ If he ults or jumps away, R to chase and finish him mid-air.
⚠️ Respect his spikes (Dirk, Level 6) — that’s when he’s lethal.
✅ Outthink his patterns, not outbrawl — one clean engage and he’s free gold
Rengar
Rengar punishes bad positioning but struggles if you play disciplined. You have the stronger early game and better teamfighting — he only wins when you hand him free bush fights or overextend alone. His double W can undo your burst, so don’t overcommit early.
🧠 Gameplan Summary
✅ Avoid bushes — never run there for safety; that’s his zone.
✅ Buffer E when he ults to cancel his leap.
✅ WQ him instantly when he jumps your teammate.
⚠️ Respect his double W heal — don’t dump all damage at once.
✅ Focus on teamfights and objectives — your kit scales better and wins grouped fights
Qiyana
Qiyana Jungle only wins when she snowballs off chaotic lanes. In equal games, she can’t match your sustain or consistency. Her burst and CC are scary if she hits everything, but once you survive her first rotation, she’s free. The matchup is all about timing your W and punishing her cooldowns.
🧠 Gameplan Summary
✅ Time W carefully — use it early to bait her combo, then re-engage.
✅ If she jumps in, E during her W animation to knock her off tempo.
✅ Titanic helps you survive her burst and win trades on re-entry.
⚠️ Don’t give her free resets — play around fog and avoid fighting near walls.
✅ Stay close-range when her cooldowns are down — she can’t DPS you after the initial combo.
✅ Good Qiyanas are rare; play smart and it’s always your matchup to win
Rammus
Rammus can’t really play against Briar. If he ever Q’s into you, just E him into a wall and walk out — even if he taunts, you can reset and go again. He has no real follow-up once his CC is down, and you shred him once you have a few items. Only the ultra-late game gets annoying if he’s stacked full armor.
🧠 Gameplan Summary
✅ E him mid-Q or right after he taunts — you always win the reset trade.
✅ W–Q onto his teammates; don’t waste everything on the tank.
✅ R the moment he ults or bounces in — he can’t stop it.
✅ Titanic + W2 combo chunks him even through armor.
⚠️ Don’t overcommit early 2v2s — he’s tanky but has no damage later.
✅ Once you get 3 items, he’s just a wall to farm cooldowns on.
Nautilus
Pantheon
Pantheon’s early skirmish is strong, but the matchup is entirely about E timing. If you buffer your E the moment he Ws, you completely shut him down — his combo disappears and you win the reset. Outside of that, he struggles to clear and can’t match your sustain.
🧠 Gameplan Summary
✅ Buffer E instantly when he Ws — that’s the whole matchup.
✅ After blocking his combo, re-engage with W–Q for free trades.
⚠️ Respect early fights if you misplay E — he’ll snowball hard off one kill.
✅ If he ults to gank, you can R at his landing spot to counter.
✅ Once you survive early pressure, you completely outscale him
Xin Zhao
Xin Zhao can completely take over the early game — he wins almost every early skirmish if you walk into his range carelessly. His Q3 knock-up + R zone can shut down your engage, so you need to play reactive and precise. You outscale him in teamfights, but early tempo is dangerous.
🧠 Gameplan Summary
⚠️ Don’t fight early 1v1s — his base stats and sustain win trades.
✅ Buffer E into his Q3 knock-up to break his combo and turn it.
✅ W–Q him once he burns his dash; he has no escape afterward.
⚠️ Respect his R zone — wait it out, then re-engage.
✅ You win later fights easily — just survive the early aggression.
Diana
Diana is one of Briar’s easiest matchups — she simply can’t contest your early power. You outdamage, outskirmish, and outtempo her from level 3 onward. Unless she lands a massive AOE ult in a 5v5, she’s never really a threat.
🧠 Gameplan Summary
✅ Invade early. Her first clear is weak and she can’t fight you 1v1. You can always win early skirmishes.
⚠️ Respect her R in grouped fights. If your team stacks and she hits a multi-man ult, you might lose the fight before you can react.
✅ Play around her Q. Sideways-W her Q every time. If she misses it, she loses all pressure — that’s her entire kit.
✅ Bork completely breaks her — she can’t burst you down through your healing and stats.
⚠️ Don’t get baited into her team after she ults. Her follow-up damage is lethal only if she has setup.
Diana without Q is a minion. Abuse her early, deny her resets, and you’ll always win
Evelynn
#1 Tell laners to buy Pinks
Evelynn can’t play the game early — you win every invade and skirmish before she hits level 6. Her only threat is landing Charm + ally follow-up, so as long as you track her path and pressure early, she never scales. Once she’s behind, she’s permanently useless.
🧠 Gameplan Summary
✅ Invade early — her first clears are weak and predictable.
✅ Camp her jungle entrances and punish her on respawns.
⚠️ Respect Charm setups — don’t walk in blind without vision.
✅ Buffer E when she charms to reduce the gap she gains.
✅ If she ults, R behind her — you’ll catch her on her landing spot for a guaranteed kill.
✅ Stay proactive — the matchup is completely free if you control tempo early
Nunu & Willump
Nunu can’t 1v1 you at any stage — his kit doesn’t work against Briar’s sustain and burst. Every time he tries to snowball in, you can dodge or counter instantly. The only reason this matchup feels tricky is his solo queue impact through ganks and map play, not actual combat strength.
🧠 Gameplan Summary
✅ Invade early — he can’t fight you and loses tempo fast.
✅ Sideways-W to dodge his snowball, then re-engage.
✅ Q or E during his ult channel to interrupt it.
✅ W–Q him if he’s snowballing at an ally — free punish.
⚠️ Respect his gank tempo — he wins games through map pressure, not duels.
✅ If you play aggressive and control pace, he’s completely useless.
Gragas
Gragas’s clear is slow, and most players don’t pilot him well enough to punish you. You win early tempo easily — just don’t throw it by W-ing directly into his E. If you force him to engage first, you destroy him. Phase Rush Gragas can kite, but you still outdamage him hard if you play it clean.
🧠 Gameplan Summary
✅ Play close without committing W first — bait his E, then punish with W–Q.
✅ Invade early — his first clear is one of the slowest in the game.
⚠️ Don’t E randomly — he’ll knock you into his team and peel out.
✅ BORK works well for sticking power, but don’t overbuild damage.
✅ Merc Treads are a safe, consistent pick versus his CC and magic burst.
Vi
Vi can’t match Briar’s dueling pressure. Her kit relies on setup and teamfights, but most players can’t pilot her perfectly. You win every early 1v1 if you play around her Q timing — she only wins when she gets a free engage.
🧠 Gameplan Summary
✅ Fight her directly — you outtrade hard in close combat.
✅ If she Q’s at you, sidestep with W and punish instantly.
✅ Use E to interrupt her Q or knock her into a wall.
⚠️ Don’t waste E early — keep it to cancel her engage.
✅ If she misses Q, she’s useless for ~3s — all-in and take tempo.
Zed
Zed clears fast but can’t match your sustain or tempo. Without ult, he’s completely free — just stick to him and he melts. Only danger is when he’s ahead and lands his full triple-shadow combo; otherwise, you outfight him every time.
🧠 Gameplan Summary
✅ Invade or fight early — you beat him before he gets items.
✅ If he ults, walk behind him to punish his return position.
✅ Stay grouped — he can’t burst through multiple targets.
⚠️ Don’t ego-duel fed Zeds; if he hits full combo, you’re dead.
✅ Farm steady, punish his downtime, and he can’t keep up long-term.
Shyvana
Shyvana’s early game is yours — she wants to full clear and stack dragons while you want to fight. You outstat her completely before she scales, and if you deny her early objectives, she never really comes online. Just play smart around her dragon form engages.
🧠 Gameplan Summary
✅ Invade early — her first clears are slow and predictable.
✅ Stat-check her any time before level 6 — she can’t fight back.
✅ Sideways-W to dodge her E (fireball) in dragon form.
✅ If she ults in, buffer E to knock her into a wall and punish instantly.
⚠️ Don’t let her freely stack dragons — contest everything early.
✅ If you stop her scaling, she’s permanently irrelevant.
Dr. Mundo
Mundo can’t stop your engage or match your tempo. Only hyper-optimized EW Mundos make the matchup tricky — everyone else just gets run over. You outdamage and outheal him every time, no matter your build. As long as you Sideways-W his cleavers, he can’t touch you.
🧠 Gameplan Summary
✅ Sideways-W to dodge Q — that’s the entire matchup.
✅ Any build works — Lethality, Titanic, or BORK if you want extra shred.
✅ Invade or skirmish early — he can’t fight back before items.
⚠️ Don’t waste cooldowns on his passive — wait, then re-engage.
✅ Once you get on top of him, he’s a stat check you always win.
Yorick
Yorick can match your clear and scale just as fast, but his cage and ghouls make extended fights awkward. He wins slow, controlled fights and teamfights if you get trapped — your goal is to break his setup fast and keep the tempo high.
🧠 Gameplan Summary
⚠️ Avoid fighting inside his cage — you’ll get locked and shredded.
✅ Use W or Q on a ghoul or Yorick himself to break out immediately.
✅ Fight him early before Maiden pressure comes online.
✅ Keep tempo high — invade or force skirmishes while he’s scaling.
⚠️ In teamfights, never dive through Maiden; kill her first or disengage.
✅ The matchup’s winnable if you stay creative and don’t let him control terrain
Fiddlesticks
Fiddle is all about positioning — early game is fine for you, but once teamfights start, one good ult from him can end everything. You outduel him if you find him first, but if he gets to channel from fog, it’s doomed. The matchup is about awareness, timing, and using your tools to interrupt his setup.
🧠 Gameplan Summary
✅ Invade early — punish his weak first clear and stop passive stacking.
✅ Q or E to cancel his drain (W) — never let him channel freely.
✅ If he fears you, buffer E to knock him away and reset.
⚠️ Don’t facecheck dark areas — his ult from fog wins every fight.
✅ Once he ults, turn and burst him — he’s fragile if caught mid-cast.
⚠️ Always track his position — awareness beats Fiddle more than mechanics
Nidalee
Nidalee is a nightmare if well played — she’ll kite you endlessly, jump over walls, and never give you a clean engage. You can’t chase her, and she’ll poke your team down before fights. But if she ever jumps in recklessly or gets caught near walls, you can punish her instantly with your combo.
🧠 Gameplan Summary
⚠️ Don’t chase through jungle walls — she’ll reset and kite you forever.
✅ Force grouped fights — she’s useless when she can’t move freely.
✅ W2 early before she starts kiting; quick combos beat her tempo.
✅ If she dives your team, W–Q instantly to burst her mid-air.
⚠️ Avoid extended chases — play around objectives where she can’t disengage.
✅ Outscale with teamfights; she wins the map, but you win grouped combat.
Rumble
Rumble can’t contest you early — he loses every duel and has no sustain. His only threat is a well-placed Equalizer in teamfights, but if you pressure him early or catch him off cooldown, he’s useless. Once he falls behind, he has no way to recover.
🧠 Gameplan Summary
✅ Invade early — his first clear is weak and slow.
✅ Stat-check him in any 1v1 — he can’t handle your sustain.
✅ Gank and CC him before he overheats — he’s free every time.
⚠️ Respect his ult only in teamfights; that’s his one comeback tool.
✅ If he misses Equalizer or falls behind early, the game’s already over for him.
Maokai
Maokai is one of the freest matchups you’ll ever have as Briar. He’s tanky, sure — but completely harmless to you in a direct fight. As long as you don’t let him set up a sapling minefield around objectives, he can’t stop your engage or your burst.
🧠 Gameplan Summary
✅ Itemization wins the matchup: Bork alone melts him. Add Titanic + Black Cleaver, and he’s basically a tree stump.
⚠️ Don’t let him set up saplings before an objective — clear vision early or you’ll lose space for free.
✅ If he W–Ults you, you can buffer E into a wall to break it, or just wait and WQ him afterward — it doesn’t matter, he can’t kill you.
⚠️ Respect his team CC, not his damage — he’s only dangerous when chaining with others.
✅ When Maokai’s frontline CC is down, just run him over.
He’s pure setup and utility — you’re pure violence. Once you build your first item, Maokai’s entire existence in the fight becomes “root and pray.
Mordekaiser
Mordekaiser is one of the easiest melee matchups for Briar. He has no real way to stop your engage, and your early game completely outclasses his. The only way he wins is if you overcommit into his damage or get trapped in his ult without cooldowns. As long as you manage your W and E properly, you dictate the fight from start to finish.
🧠 Gameplan Summary
✅ Early game is all yours. You clear faster, duel harder, and can invade him safely. He can’t stop you pre-6.
⚠️ Play smart around his R. Once he ults you, your only goal is to survive the duration — not to out-DPS him.
• When he pulls you into Realm of Death, buffer E to reposition as soon as he reappears.
• If he goes for Q inside his ult, Sideways-W to dodge it — that’s his main damage.
• Every second you dodge in his ult is value: surviving 5–6 seconds of the 7-second ult means he wasted everything.
✅ Punish after his R ends. Once he’s out, he’s cooldown-starved and you can WQ → Titanic → E him into a wall for a free kill.
✅ Items: Bork, Titanic, or Cleaver all work perfectly — he has no mobility and you stat-check him easily.
Unless you grief into his ultimate or let him scale uncontested, Mordekaiser can’t play the game. He’s a bruiser with no tools against Briar’s damage, sustain, and mobility
Twitch
Twitch Jungle used to pop up in cheesy metas, but it’s completely gone for a reason — he just doesn’t function anymore. His clear is painfully slow, he’s hyper squishy, and he relies on early cheese or stealth ganks to get anything done. Against Briar, that simply doesn’t work.
🧠 Gameplan Summary
✅ Invade him early. You’ll find him half HP on camps — free kill every time.
✅ Force fights. He can’t duel you at any stage; your sustain and damage outscale him instantly.
⚠️ Respect stealth ganks only if your lanes are low. He’ll try to sneak behind with red buff + passive stacks, but if you’re ready to collapse, he dies instantly.
✅ Build normally. You don’t need to itemize differently. Even bruiser builds like Titanic or Bork make him irrelevant.
Unless he gets 10 kills from off-screen cheese, Twitch Jungle is free LP. One good invade or early fight and his entire game collapses
Ambessa
At the moment, Ambessa is a free jungle matchup for Briar — punish her early, invade her rhythm, and she’ll never get the chance to scale. Future patches or higher-level play might change that, but for now, she’s free LP
Tryndamere
Kayle
Surprisingly strong synergy. Kayle scales safely while Briar controls early tempo, and her ultimate perfectly saves Briar during dives or Frenzy misplays. In late fights, Kayle’s R lets Briar go fully berserk with zero risk — a rare combo of safety and scaling power
Kled
Kled’s hard engage and speed boost from his ultimate make him one of Briar’s best partners this patch. His early skirmish power, CC chain, and fearless dives sync perfectly with Briar’s aggression. Both thrive in extended fights, and together they can snowball lanes and force unstoppable teamfights
Kennen
Kennen’s flash–ult combo perfectly amplifies Briar’s dives, locking enemies in place for her to shred. Their AoE engage and CC layering can instantly wipe teamfights, and Kennen’s lane priority helps Briar secure early objectives. A near-perfect duo for coordinated engages
Quinn
A good Quinn makes Briar’s game insanely fast-paced. Her roaming power and map control let her collapse on jungle skirmishes instantly, and her vision control from W + mobility from R helps track and hunt targets — perfect for Briar’s chase-heavy playstyle. She lacks CC, but her burst and follow-up damage clean up fights quickly. With a competent Quinn, the duo snowballs maps brutally fast; with a bad one, it falls apart just as hard
Urgot
Urgot’s suppression and displacement perfectly complement Briar’s aggression. His fear zone and execute create brutal follow-ups for Briar’s engages, while his frontline presence allows her to dive freely. Together they form a deadly juggernaut duo that dominates skirmishes and objective fights
Malphite
Perfect frontliner and engage setup for Briar. His R guarantees free WQ access, letting Briar instantly follow up with Fear and finish the target. Both scale well into teamfights — Malphite starts the fight, Briar cleans it up. He also provides tankiness and peel that Briar naturally lacks. Simple, reliable, and deadly in coordinated engages
Shen
Shen is one of Briar’s best partners. His R (Stand United) perfectly covers Briar’s all-ins, giving her a shield and global follow-up whenever she dives. His taunt (E) sets up Briar’s WQ combos flawlessly, and his CC + peel tools ensure Briar survives even the most reckless engages. Together, they create unmatched dive pressure from early game to late — a near-perfect duo for coordinated fights
Yorick
Yorick’s split-push pressure and frontline durability give Briar the freedom to dominate skirmishes and objectives. His ghouls and Maiden force the enemy team to respond, letting Briar dictate tempo and pick isolated fights. Together they overwhelm the map — unstoppable in side lanes, lethal in 2v2s
Gwen
Gwen and Briar share excellent mid-game tempo and thrive in close-range brawls. Gwen’s zone control with W and sustain-heavy dueling let her follow Briar’s engages safely, while Briar’s CC and disruption give Gwen time to shred tanks. Both scale well and can frontline through healing, making them deadly in coordinated dives. The pairing works best when Gwen uses her mist to deny peel for Briar — overall, a strong and cohesive synergy
Olaf
Olaf’s early brawling power and frontline presence complement Briar’s aggression well, especially in skirmishes around objectives. Both excel in extended fights and can run down squishy comps. However, their lack of CC and engage tools means they rely heavily on team follow-up, making this duo strong but composition-dependent
Fiora
Fiora and Briar excel in duel-heavy, split-push focused comps. Briar’s early pressure buys Fiora time to scale, and in teamfights, Briar’s engage can force enemies into Fiora’s vitals, letting her clean up with Grand Challenge. Both struggle against heavy CC and coordinated peel, but if fights stay extended and chaotic, they shred through any frontline with ease
Camille
Camille’s Hextech Ultimatum perfectly traps targets for Briar to land guaranteed WQ combos. Their dive potential is insane — once Camille locks someone down, Briar can follow with fear and burst. Both scale well and thrive in isolated skirmishes, but they rely on clean coordination; if Camille misses her engage or Briar ults too early, enemies can kite them out easily
Sett
Sett’s frontline power and crowd control pair well with Briar’s all-in playstyle. His E pull and R displacement can set up perfect WQ engages for Briar, and both champions excel in bruiser-style extended fights. However, since both want to dive and lack ranged pressure, they can struggle if the team needs peel or disengage tools
Illaoi
Illaoi’s zone control and tentacle pressure complement Briar’s all-in fights perfectly. When Briar forces enemies to stand and fight, Illaoi’s E + R combo turns the area into a death zone. They both thrive in skirmishes and objective setups, but since neither has strong engage tools beyond Briar, this duo works best when enemies are forced into them rather than chasing
Darius
Darius and Briar form a high-pressure, brawling duo that dominates early fights. Briar’s fear and engage tools let Darius stack his passive freely, while Darius’s pull (E) punishes anyone trying to peel Briar off. Both are vulnerable to kiting and heavy CC, but when ahead, they snowball fights brutally fast and can easily take over side lanes and river skirmishes
Ornn
Ornn provides exactly what Briar needs — frontline, engage, and CC setup. His Call of the Forge God guarantees an easy WQ or ult connection for Briar, and his tankiness lets Briar dive without fear. They work best in front-to-back teamfights, where Ornn absorbs cooldowns and Briar follows up to clean house. The only downside is Ornn’s slower early game tempo, which can limit Briar’s early invade potential
Sion
Sion pairs extremely well with Briar’s dive-heavy style. His long-range engage and massive frontline presence create perfect space for Briar to follow up and lock down carries. Post-engage, Sion soaks cooldowns and zones the backline while Briar cleans up the chaos. Even if Sion dies early in a fight, his passive lets him keep brawling, which fits Briar’s nonstop aggression perfectly. A reliable, high-pressure combo for front-to-back or dive comps alike
Rumble
Rumble’s AoE damage and zone control perfectly enhance Briar’s engages. When Briar locks enemies in place, Rumble’s Equalizer can melt entire teams. Their early skirmish power is great, but both fall off if fights are poorly timed — they thrive in coordinated dives and objective fights, not drawn-out front-to-backs
Singed
Singed can work decently with Briar thanks to his disruption and chase potential. His W glue and fling (E) can set up Briar’s WQ engages, and his poison trail helps zone and apply pressure in skirmishes. However, he offers no real peel or burst follow-up, and his chaotic playstyle can make coordinated fights messy. Overall, a functional but volatile pairing — good if both play aggressive and sync their engages
Warwick
Warwick pairs decently with Briar thanks to his point-and-click suppression and sustain-heavy dueling, creating strong 2v2s early. Both thrive in extended fights and can chase targets relentlessly. However, the duo lacks burst or disengage, and their kits overlap heavily — two melee sustain fighters with no real peel or ranged threat. Great for brawling comps, but struggles hard into kite or poke. Overall, solid but situational synergy
Gnar
Gnar offers solid teamfight tools for Briar, especially with Mega Gnar’s AoE stun that sets up her W → Q engages perfectly. However, in Mini form he’s too fragile and kites away from Briar’s dives, creating inconsistent synergy. When timed well, their combo can chain CC and delete teams, but outside of that, Gnar often plays too independently to consistently enable Briar. Decent synergy overall, but heavily timing-dependent on his rage bar and transformation
Jax
Jax and Briar have overlapping win conditions — both want extended fights and duels — but they don’t enable each other well. Jax often plays for side-lane pressure while Briar prefers group fights and skirmishes, leading to a lack of coordination. His E can stall fights, but it doesn’t directly help Briar engage or survive. When Jax is strong, he can clean up after Briar’s chaos, but otherwise, the duo often feels disconnected. Overall, very average synergy, leaning weak unless both snowball early.
Volibear
Volibear brings strong engage and frontline presence, which can open space for Briar to dive safely. His tower-dive potential and CC combo well with Briar’s early skirmish power. However, both champs rely on short cooldown brawls and can overlap in purpose — if one fails the engage, both often die. Works well if coordinated, but without timing or backup, fights become messy fast. Solid synergy, high risk, high reward
Cho'Gath
Cho’Gath provides solid frontline and reliable CC that can help Briar land her WQ and secure picks. His knock-up and silence give Briar room to dive safely, and his Feast helps secure objectives she sets up. However, Cho’s slow pace and lack of follow-up mobility can sometimes desync with Briar’s faster, dive-oriented tempo. The pairing works best in front-to-back teamfights where Cho starts and Briar follows — functional but not perfect synergy
Dr. Mundo
Mundo can frontline forever and soak pressure, giving Briar space to dive, but their synergy is limited. He offers no reliable CC or setup, and both prefer to brawl rather than peel or engage smartly. While their sustain makes them hard to kill in long fights, fights can become disjointed — Mundo soaks while Briar dives deep. Works fine in stat-check comps but lacks coordination potential.
Garen
Garen’s simplicity works perfectly with Briar’s aggression — he’s durable, has silence, and executes low targets. His Q silence prevents enemies from flashing or dashing away when Briar dives in, and his R finishes what Briar starts. Both champs thrive in extended skirmishes and can snowball hard, but they lack CC chaining, so coordination and target focus are key
Ambessa
Ambessa brings solid frontline presence and good follow-up burst, which can complement Briar’s aggressive dives. Both champions thrive in scrappy fights and skirmishes, but Ambessa often plays for herself rather than enabling Briar. Her ultimate can disrupt fights in ways that sometimes separate Briar from key targets, making coordination important. Overall, they can work well together if both dive the same targets — otherwise, the synergy feels average and situational
Irelia
Both Briar and Irelia thrive in chaos. They’re skirmish-heavy duelists with huge midgame spikes and excellent dive potential. Their CC chains (Fear → Stun) can delete targets instantly, and both sustain through extended fights. However, the duo lacks peel and relies on clean coordination — if either falls behind early, the comp collapses. High-risk, high-reward pairing that can 1v9 when ahead
Riven
Riven and Briar both excel in skirmish-heavy, brawl-style fights, where they can chain CC and burst targets quickly. However, their synergy is mechanically demanding — if Riven misplays or desyncs her combo with Briar’s engage, fights can fall apart fast. When timed well, her stun → Briar WQ combo can delete carries, but both champions lack peel and rely on perfect coordination. Strong if executed cleanly, but otherwise inconsistent and risky
Akali
Akali and Briar can work together decently in mid-game skirmishes, where both excel at punishing isolated targets. She follows up on Briar’s dives well and capitalizes on the chaos her engages create. However, early game there’s no real CC or frontline, making coordinated plays risky. If Akali gets ahead, the duo snowballs hard — but if not, no peel, no engage layering, and both get kited easily. Fun combo, volatile but playable
Teemo
No setup, no peel, awkward map control overlap
Mordekaiser
While both champions are strong duelists, their kits clash heavily. Mordekaiser’s R (Realm of Death) isolates a single target, often removing Briar’s focus or healing source during her frenzy. He offers no peel or setup and can accidentally ruin Briar’s engages by pulling enemies out of her E or R range. Both want to fight front-to-back but compete for the same role, making this duo awkward and inefficient despite individual strength
Nasus
Doesn’t help you early, no CC follow-up outside of W
Tryndamere
Tryndamere plays entirely for side-lane pressure and split pushing, while Briar thrives on team skirmishes and objective fights. He offers no CC, no peel, and no real engage, leaving Briar to do all the setup alone. Even though both are strong duelists, their win conditions don’t align — Tryndamere ignores fights while Briar needs them. Good in 1v1 isolation, but in coordinated play, this duo barely interacts or supports each other’s goals
Renekton
Renekton and Briar want to play early and aggressively, but their synergy falls apart fast. Both champs spike early and need resources, so they compete for gold and lane pressure instead of complementing each other. Renekton’s short trades and stun windows don’t fully sync with Briar’s longer all-ins, and he falls off hard, leaving her without a reliable frontliner later on. They can snowball early if perfectly coordinated, but outside of that, this duo lacks scaling, CC chaining, and teamfight structure
K'Sante
K’Sante and Briar completely desync in playstyle. He’s a defensive, slow-scaling tank who wants long, controlled fights, while Briar thrives on fast, all-in aggression. His R (All Out) can actually ruin Briar’s engages by displacing or isolating her target mid-fight. He offers little damage follow-up and no consistent peel once he commits. The result is constant mismatch — when Briar dives, K’Sante peels; when he dives, Briar’s frenzy misfires. Strong individually, but terrible synergy as a duo
Gangplank
Zero CC, zero peel, zero setup. You go in, they farm side lane
Aatrox
On paper, Aatrox and Briar should work — both are sustain-heavy bruisers who thrive in extended fights. But in reality, they don’t complement each other at all. They both need long, front-loaded fights and compete for the same engage timing and frontline space, leaving your team with no real utility or CC chain. Briar’s E often disrupts Aatrox’s combos, and his knock-ups can misalign with her frenzy timing. Despite solid individual kits, their synergy is awkward, overlapping, and unreliable — one of the lowest-performing duos statistically and in practice
Vladimir
Zero CC, zero peel, zero setup. You go in, they farm side lane
Jayce
Zero CC, zero peel, zero setup. You go in, they farm side lane
Lane bully, but no synergy in fights
Vayne
Zero CC, zero peel, zero setup. You go in, they farm side lane
Anivia
Insane wall synergy for E, AoE slow zones, peel, CC chain, and survives long fights (egg)
Kayle
Surprisingly strong synergy. Kayle scales safely while Briar controls early tempo, and her ultimate perfectly saves Briar during dives or Frenzy misplays. In late fights, Kayle’s R lets Briar go fully berserk with zero risk — a rare combo of safety and scaling power
Naafiri
Naafiri’s roaming power and early map pressure perfectly complement Briar’s aggression. She pushes mid fast, moves with her pack, and follows Briar’s dives easily. Their combined chase potential and burst make them a nightmare for immobile junglers. Strong duo for tempo and early skirmishes
Syndra
Syndra provides reliable pick and zone control, setting up perfect W-Q engages for Briar. Her E stun and long-range burst help lock down targets Briar dives on, and she can peel well when Briar overcommits. High control + burst makes them a strong mid-jungle pairing
Swain
Pulls enemies in as Briar fears them; huge AoE fight synergy
Orianna
Orianna’s ball control and Shockwave create ideal setups for Briar’s dives. She can shield Briar mid-fight, amplify his engage with her ult, and follow up perfectly on his AoE fear. While she doesn’t dominate early, her teamfight synergy is excellent once both hit mid game
Galio
Global peel, knockup, and follow-up CC = one of the best partners for dives
Cassiopeia
Cassiopeia thrives in the extended fights Briar creates. Her Miasma traps enemies Briar chases, and her ultimate punishes anyone turning on Briar. Both deal sustained DPS and scale hard — together they melt teams if Cass can stay safe behind Briar’s engage.
Katarina
When played well, Katarina thrives off Briar’s chaos, cleaning up fights with resets while Briar locks enemies in place. Both dive hard and snowball fast. However, one CC and she’s done, making the duo high risk, high reward — great if she’s skilled, disastrous if not
Malzahar
Malzahar’s point-and-click suppress gives Briar guaranteed engages and makes it impossible for enemies to escape her frenzy. His consistent DPS and wave control also let Briar roam freely. Simple, reliable, and very effective in coordinated fights
Kassadin
Kassadin scales into a late-game monster, and Briar’s early pressure helps buy him the time he needs. Once he’s online, his R mobility and burst let him follow Briar’s dives effortlessly. Weak early combo, but insane mid–late synergy
Veigar
Veigar’s cage (E) gives Briar the perfect setup for safe engages and easy walls to pin enemies with her E. His burst and scaling AP damage complement Briar’s frontline pressure. Strong synergy — simple, reliable, and brutally effective
Vex
Vex’s fear and instant burst perfectly complement Briar’s all-ins — she punishes dives against Briar and chains CC for guaranteed kills. Both thrive in fast, explosive fights, making them a deadly engage duo when timed together
Viktor
Viktor’s gravity field and burst combo create ideal zones for Briar to engage safely, locking enemies in place for her frenzy. His consistent mid-game DPS and wave control also help Briar secure objectives. Excellent in front-to-back teamfights.
Diana
Both thrive in bruiser-heavy brawls and AoE teamfights. Diana’s E–R combo groups enemies perfectly for Briar’s W–Q engage, and Briar’s follow-up keeps targets locked down through the chaos. Their early skirmish power and dive potential snowball hard if coordinated
Fizz
Fizz’s burst and dive pattern aligns perfectly with Briar’s engages — both want to jump on the same squishy target. His R sets up easy all-ins, and his mobility lets him follow Briar deep without dying instantly. High kill pressure, great skirmish synergy
Lux
Lux’s long-range snare sets up easy Briar engages, and her burst follow-up deletes targets before they can react. Her shields also give Briar some survivability on dives. Great pick potential and clean one-shot synergy in coordinated fights
Aurora
Aurora brings solid CC and zone control, giving Briar windows to engage safely. Their burst patterns align well in mid-game skirmishes, but her setup is slower and she prefers poke or kiting fights, which can desync from Briar’s all-in style. Decent synergy, not perfect
Taliyah
Taliyah’s seismic shove and wall can perfectly trap enemies for Briar’s engage, and her burst combo follows up fast. She also controls terrain well, letting Briar dictate fights safely. Excellent setup and follow-through — great coordination = free kills
Zoe
Zoe’s early burst and bubble setup can let Briar secure easy kills and snowball early fights. But if she falls behind, she becomes a poke bot with no follow-up, leaving Briar without mid-pressure. Great early synergy, nonexistent if she loses lane
Mel
Mel provides strong mid-game burst and CC chains that Briar can easily follow up on. However, her cooldown reliance and lack of peel make her inconsistent if Briar dives too early. Works best when Mel can initiate or counter-engage with setup already in place
Hwei
Hwei offers great zone control and poke before Briar engages, and his root or slow combos can set up perfect entries. But his immobility and delayed damage mean he often can’t follow Briar’s instant dives, making the duo functional but not explosive
LeBlanc
LeBlanc’s burst and mobility pair well with Briar’s fast engages — she can follow up instantly or soften targets before Briar dives. However, her hit-and-run playstyle often clashes with Briar’s full-commit fights, so coordination is key. Strong if she roams early, average if she stays mid
Ekko
Ekko and Briar share a skirmish-heavy early style and can overwhelm isolated targets together. However, both rely on resets and dives, meaning fights can collapse fast if mistimed. Strong early and mid synergy, but redundant engage tools make it inconsistent
Lissandra
Solid synergy but not game-breaking. Her instant CC helps Briar reach targets safely, yet her burst window is short and she often wants to engage the same way Briar does, leading to overlap. Works well in coordinated fights, but less consistent in solo queue
Ahri
Ahri’s Charm into Briar engage combo can easily secure picks, and her mobility lets her follow dives safely. However, her burst is often spread out, and she doesn’t provide much peel or sustained damage, making the synergy solid but not standout
Sylas
Can steal CC/utility ults and dive with you — chaotic synergy, but volatile
Morgana
Morgana’s Black Shield can protect Briar during her berserk dives, and Q root gives a reliable setup for Briar’s engage. Still, her immobility and slow tempo can leave her behind in fast skirmishes — good in coordinated fights, but average overall synergy
Annie
Annie’s point-and-click stun gives Briar easy engage windows, and Tibbers adds strong follow-up damage. However, her short range and immobility make her vulnerable when Briar dives deep, so the combo works best when she plays reactively instead of forcing fights
Twisted Fate
Twisted Fate’s gold card setup gives Briar reliable pick potential, but his low early damage and map-focused playstyle mean he often isn’t there to follow Briar’s dives. Great for macro pressure and setup, but limited direct synergy in skirmishes
Akshan
Akshan can follow Briar’s dives with strong single-target damage and cleanup potential, and his revive passive can clutch lost fights. Still, he offers no real CC or peel, and his playstyle often drifts to side lanes — making the synergy decent but inconsistent
Talon
Talon and Briar both love fast-paced skirmishes and invading early, but they offer little CC or peel for each other. Great if you snowball together, but if one falls behind, the map pressure collapses. High-risk, high-reward pairing with limited safety
Corki
Objective pressure overlap, but little fight coordination
Zed
Zed can match Briar’s aggression early and follow up on her engages, but their win conditions rarely align. He bursts and leaves while Briar needs extended trades. No peel, no setup CC, and his shadow play often splits focus. Can work if both snowball, but coordination has to be perfect
Qiyana
Qiyana can occasionally follow Briar’s engages with her R terrain burst, creating flashy wombo combos — but that’s about it. Her burst-and-dash style doesn’t support Briar’s need for extended, sustained fights, and she rarely peels or stays to follow up. Works only with perfect timing
Yasuo
Can theoretically follow up your E, but realistically both grief each other’s tempo
Aurelion Sol
Aurelion Sol needs space and time to scale, while Briar forces early fights and dives. Their win conditions rarely align — Briar wants chaos; Aurelion wants farm. His CC and zoning can help later, but early game offers almost nothing to support Briar’s tempo
Ryze
Zero (Mid): no engage setup, no peel, play for scaling and poke.
They sit 2 screens behind while you 1v9 → worst possible partners
Yone
Yone’s disjointed engage and delayed damage make him a terrible fit for Briar. He dives in, resets, and disappears while Briar is still mid-frenzy. No peel, no reliable CC, and his R often drags enemies out of Briar’s range. Both want to go in — just never together
Tristana
Terrible pairing. Her R literally cancels Briar’s engage, knocking enemies out of range right as Briar dives in. Both want to go forward, but Trist’s burst and self-peel disrupt Briar’s flow instead of supporting it. Pure anti-synergy
Ziggs
Zero engage setup, no peel, play for scaling and poke.
They sit 2 screens behind while you 1v9 → worst possible partners
Azir
Zero engage setup, no peel, play for scaling and poke.
They sit 2 screens behind while you 1v9 → worst possible partners
Ashe
God-tier synergy Supp or ADC: perma slow, vision, engage setup, arrow follow-up → the dream
Miss Fortune
Miss Fortune and Briar form one of the most explosive engage–follow-up duos in the game. Briar dives in, locking enemies with fear, and MF instantly drops Bullet Time across the entire fight. The combo deletes grouped teams before they can react. MF also loves Briar’s chaos — her passive and ultimate thrive when enemies are locked down or panicking. With proper timing, this pairing can win 5v5s outright off one WQ engage
Nilah
Perfect pairing. Both thrive in chaotic melee fights; Nilah loves Briar’s engages since she can safely follow up with her AoE ult. Their ultimates chain perfectly, and Nilah’s healing/shielding from allies lets Briar stay in fights forever. Insane scaling and skirmish potential
Zeri
Perfect tempo pairing. Briar’s hard engage gives Zeri all the space she needs to kite and stack her passive. Their fights naturally sync — Briar dives and draws attention while Zeri charges up and mows everyone down. Both scale hard and thrive in extended skirmishes with tons of mobility and sustain
Kog'Maw
Briar is the perfect frontline for Kog’Maw. She absorbs pressure and locks targets in place, letting Kog freely melt them from safety. Briar’s fear + dive combo buys the exact space Kog needs to shred tanks. If you pair this with an enchanter (Lulu, Janna, Milio), it becomes one of the strongest hyper-carry comps in the game
Jinx
Jinx and Briar complement each other’s mid-to-late game teamfight power perfectly. Briar’s fearless dives and fear chain create chaos and lockdown, giving Jinx the room to free-fire and stack her passive. Once she gets a reset, the fight is over. The only issue is early game — Briar wants to scrap constantly while Jinx needs time and peel. With a bit of coordination, though, this pairing can snowball fights into full team wipes
Kai'Sa
Kai’Sa works very well with Briar’s engage tempo. Briar dives first, forcing enemy flashes or isolating a carry — perfect for Kai’Sa to R in and clean up. Their burst patterns overlap nicely, and both scale into mid–late fights with high damage. The only downside is that if Kai’Sa ults too early or Briar overdives without setup, they can desync and die together. Still, when coordinated, this duo melts backlines instantly
Samira
Samira thrives in the brawling chaos Briar creates. Briar’s WQ engages and fear chains set up Samira’s passive and S-tier ultimates perfectly, letting her dive in safely for massive AoE damage. Both champions love close-range fights and resets, making them deadly in skirmishes. The risk is that if Briar goes in too deep without Samira ready, they can both get blown up — but when timed right, it’s an unstoppable snowball combo
Xayah
Xayah pairs well with Briar because she can follow up safely on dives while keeping herself alive with her ultimate disengage. Briar’s CC and chaos let Xayah set up her feathers perfectly for root chains, turning fights around fast. Their styles complement each other — Briar dives and draws aggro, Xayah punishes anyone who overcommits. The synergy is strong, though it requires careful timing so Xayah doesn’t ult too early and leave Briar stranded
Vayne
Vayne looks amazing on paper — her Condemn (E) can set up your Fear (E) for a brutal CC chain, and her mobility + true damage should perfectly complement Briar’s dives. But in practice, the duo rarely clicks. Vayne’s late-scaling, defensive playstyle clashes with Briar’s early skirmish aggression. She often kites back while you dive forward, leaving you isolated. In SoloQ, most Vaynes can’t follow your all-ins, and you can’t reliably peel for her either.
When both of you are ahead, it’s flashy and fun — but most games, it’s pure chaos
Twitch
Twitch and Briar can work, but it’s a bit awkward. Briar wants to dive in headfirst, while Twitch prefers long, drawn-out fights where he can reposition and shred from stealth. If Briar’s engage creates enough chaos, Twitch can spray down the enemy team freely, but if she dives too early, he can’t follow without dying. They shine in ambush plays and jungle skirmishes, yet lack consistent synergy in standard fights
Caitlyn
coordinate early pressure — Briar’s ganks set up easy headshots and trap combos for quick kills. Her fear into trap chain can be deadly in lane or jungle dives. Still, once mid-game hits, their styles drift apart — Caitlyn plays for range and sieging, while Briar dives too deep for her to follow. Decent early synergy, but falls off if they can’t snowball together
Sivir
Sivir works decently with Briar thanks to her On the Hunt (R), which can boost your engages and help you stick to priority targets. Her waveclear and mid-game utility also make it easier for you to control tempo and play around objectives. However, her short range and lack of burst follow-up mean she can’t always capitalize on your dives. She prefers extended, front-to-back fights — the opposite of your chaotic all-ins. Solid synergy if coordinated, but rarely game-breaking
Tristana
Jhin
Jhin’s follow-up burst and CC pair decently with Briar’s engages — her fear sets up his W root and guarantees fourth shots. However, his immobility and long reload windows make it hard to match her relentless tempo. Briar dives in while Jhin plays far back, so they rarely fight on the same rhythm. Strong pick potential and burst synergy, but not the most reliable duo in extended skirmishes
Varus
Varus offers strong poke and follow-up CC, which can help Briar lock down targets, but their playstyles don’t fully align. Briar dives deep while Varus prefers standing at range, especially in poke or lethality builds. However, his ult chain-CC can perfectly follow Briar’s fear for clean picks. Works best if Varus goes on-hit or hybrid so he can follow extended fights — otherwise, he struggles to keep up with Briar’s fast, chaotic engages
Aphelios
Aphelios pairs decently with Briar when fights come to him — her fear and chaos give him time to unleash his full weapon rotation safely. With the right guns (Gravitum or Severum), he can lock down targets Briar dives on or sustain through skirmishes. However, he lacks mobility and can’t always follow her hard engages, making their coordination timing-sensitive. Good if they’re on the same page — average if not
Draven
Smolder
Smolder is one of the worst partners possible for Briar across any role. He’s hyper-scaling, passive early, and needs time and space to farm — the complete opposite of Briar’s early aggression and dive-heavy tempo. He offers no CC, no peel, and no follow-up. Their playstyles hard-grief each other
Nami
S+ Tier insane - A near-perfect partner for Briar. Nami’s kit amplifies everything Briar wants — movement speed, sustain, and CC chaining. Her E empowers Briar’s frenzied autos, her Q and R provide long-range engage or peel, and her healing keeps Briar alive through risky dives. Together they can dominate both skirmishes and extended teamfights. The combination of control, sustain, and burst makes Nami one of Briar’s absolute best supports.
Milio
One of Briar’s strongest support partners. Milio’s W gives Briar bonus attack range and healing during her frenzy, letting her stick to targets safely. His E shields and buffs her damage mid-fight, and his R cleanses CC — perfect for freeing Briar from stuns or roots that would otherwise end her engage. Together, they create a hyper-aggressive but safe frontline duo. Milio keeps Briar alive and unstoppable, turning her all-ins into guaranteed wins
Maokai
One of Briar’s absolute best supports. Maokai provides everything she needs — point-and-click CC, reliable peel, and incredible objective control through saplings and vision denial. His W root guarantees Briar’s WQ lands, and his ultimate perfectly locks down teamfights for her to clean up. He frontlines, peels, and zones all at once, letting Briar dive safely. Their engage and follow-up timing naturally align — textbook synergy
Taric
Absolute god-tier duo with Briar. Taric’s E (stun) sets up Briar’s WQ perfectly, and his R (Cosmic Radiance) makes her unkillable during frenzy dives. His W tether gives her bonus armor and healing, and Q sustain keeps her topped off mid-fight. They scale incredibly well together — Taric covers Briar’s biggest weakness (no safety or CC immunity), while Briar gives Taric the perfect engage vessel. When played properly, this combo feels unfair: Briar dives, Taric presses R, and the enemy team simply can’t fight back
Braum
Your fear guarantees his passive proc, and he peels you from counterengages
Nautilus
Point-and-click CC, great peel and engage layering with Briar’s WQ/E
Leona
Instant engage + tanky frontliner; her CC chain = free fear combo every time
Thresh
Excellent CC chain and utility. Hook → Flay → WQ is perfect engage setup, and Lantern can pull Briar out mid-frenzy or after a bad dive. Gives vision, peel, and pick potential — everything Briar needs to thrive in chaotic fights
Tahm Kench
Great peel and protection for Briar. Can Devour (R) to save her during frenzy or re-engage fights. His Q slow and W knock-up set up easy WQ hits. Strong frontline synergy — both love extended brawls. Lacks engage range, but in coordinated fights this duo is nearly unkillable
Lulu
Peel + ult saves you, but zero engage synergy — purely defensive
Janna
Janna works surprisingly well with Briar despite her defensive playstyle. Her E shield synergizes perfectly with Eclipse, Revitalize, Shield Bash, and Sterak’s, giving Briar massive burst protection and bonus damage when diving. Her disengage tools (Q and R) can reset bad fights or peel Briar after her frenzy ends. While she can’t always follow Briar’s deep engages, her utility and shield value make her a strong, consistent enabler for aggressive builds
Vel'Koz
Vel’Koz’s long-range poke and knock-up soften targets for Briar’s engages, and his ultimate melts anyone Briar locks down. The combo offers strong front-to-back and objective control, though Vel’Koz must stay safe while Briar dives deep. Great synergy when coordinated
Morgana
Morgana (Support): Q root gives guaranteed WQ engage window; Black Shield protects you from CC while diving
Blitzcrank
One of Briar’s best engage partners — a single hook can instantly start a fight that Briar can chain into with W-Q-E for a guaranteed kill. Both thrive on picks and chaotic skirmishes. Falls off if hooks miss or into peel-heavy comps, but when Blitz hits, Briar feasts
Brand
Damage follow-up, but no setup or peel → pure coinflip synergy
Renata Glasc
Her ult can punish dives you start; W can reset you — high skill synergy
Poppy
Poppy actually pairs surprisingly well with Briar. Her W (“Steadfast Presence”) stops enemy dashes — perfect for locking targets inside Briar’s engage — while her E can pin enemies to walls, setting up Briar’s E stun combo for free. She also provides great frontline peel once Briar dives deep.
The only drawback is her R — it can accidentally knock away Briar’s targets if mistimed. But when coordinated, Poppy’s CC layering and anti-dash control give Briar perfect teamfight setups. Definitely on the higher end of “Strong Synergy,” and with good coordination she can feel Ideal
Rakan
Mobile engage with you; can peel or follow, depending on tempo
Seraphine
Good AoE CC follow-up and sustain; helps stabilize your chaotic fights + shields
Karma
Shields and speed for your engages, but lacks CC follow-up.
Zyra
Strong objective Prio. Roots for setup, plants help during your frenzy sustain windows
Pantheon
Pantheon has strong early pressure and reliable CC that can help Briar snowball in lane skirmishes, but the synergy falls off hard later. His stun can set up her WQ perfectly, yet both champions want to dive at the same time — which often leaves no one peeling or frontlining. Good for early fights and invades, mediocre in teamfights. Works if you dominate early; otherwise, the pairing runs out of gas fast
Rell
Rell wants to dive with her ADC, but Briar’s frenzy often pulls her too deep or out of sync. Their CC overlaps poorly — she engages, Briar follows late or overcommits. Both lack disengage, and if Rell’s combo misses, Briar is stranded. Strong conceptually, but in practice it’s chaotic and unreliable
Bard
Bard can set up engages with Q stuns and R zones, but his roaming style often leaves Briar alone when she needs follow-up. His magical journey can sometimes help Briar escape frenzy dives — or send her to her death. Works if coordinated, but inconsistent without strong communication
Elise
Good early pressure pairing. Cocoon → WQ combo gives strong picks and dive potential. Falls off later since Elise offers no peel or frontline. Works only if Elise plays for tempo and sets up Briar, not the other way around
Xerath
Damage follow-up, but no setup or peel → pure coinflip synergy
Zilean
Ult can bail you out, but he doesn’t help you start fights at all.
Soraka
Heals good, but she plays opposite of you — hates chaos, hates dives. Pure sustain; she wants calm, you want blood
Sona
Only good in late game, zero early follow-up or tempo. Ult can be good but thats it.
Senna
Senna’s long-range poke and passive playstyle don’t fit Briar’s all-in nature. Her W root can help occasionally, but she often stays too far back to follow Briar’s engages. Offers sustain and global support, yet lacks the immediate peel or CC chain Briar needs. Feels disconnected in most fights
Shaco
Easily one of Briar’s worst partners. Shaco plays for deception, split pressure, and picks — the exact opposite of Briar’s straightforward, all-in teamfight style. His boxes and clone add chaos, but offer zero peel or follow-up for Briar’s engages. He can’t protect her, can’t front line, and his clone often baits her frenzy onto the wrong target. Completely disconnected win conditions — a nightmare pairing
Pyke
Pyke thrives on quick picks and resets, while Briar needs extended fights to heal and sustain. His E and R often steal kills that fuel Briar’s frenzy, and his lack of peel or durability leaves her exposed. In theory, coordinated picks could work — in practice, it’s chaos. Very low synergy
Alistar
Alistar’s headbutt (W) often knocks enemies away from Briar’s engage or interrupts her combos. His peel and displacement tools clash with Briar’s need to stick and sustain through fights. Unless perfectly coordinated, he ends up saving enemies instead of setting up kills. Very anti-synergistic overall
Yuumi
Can’t help you before 3 items; you die alone
Senna
Yunara
Ezreal
Lucian
Corki
Kalista
Smolder
Synergies
IdealStrongOkLowNone
Kayle
Surprisingly strong synergy. Kayle scales safely while Briar controls early tempo, and her ultimate perfectly saves Briar during dives or Frenzy misplays. In late fights, Kayle’s R lets Briar go fully berserk with zero risk — a rare combo of safety and scaling power
Kled
Kled’s hard engage and speed boost from his ultimate make him one of Briar’s best partners this patch. His early skirmish power, CC chain, and fearless dives sync perfectly with Briar’s aggression. Both thrive in extended fights, and together they can snowball lanes and force unstoppable teamfights
Kennen
Kennen’s flash–ult combo perfectly amplifies Briar’s dives, locking enemies in place for her to shred. Their AoE engage and CC layering can instantly wipe teamfights, and Kennen’s lane priority helps Briar secure early objectives. A near-perfect duo for coordinated engages
Quinn
A good Quinn makes Briar’s game insanely fast-paced. Her roaming power and map control let her collapse on jungle skirmishes instantly, and her vision control from W + mobility from R helps track and hunt targets — perfect for Briar’s chase-heavy playstyle. She lacks CC, but her burst and follow-up damage clean up fights quickly. With a competent Quinn, the duo snowballs maps brutally fast; with a bad one, it falls apart just as hard
Urgot
Urgot’s suppression and displacement perfectly complement Briar’s aggression. His fear zone and execute create brutal follow-ups for Briar’s engages, while his frontline presence allows her to dive freely. Together they form a deadly juggernaut duo that dominates skirmishes and objective fights
Malphite
Perfect frontliner and engage setup for Briar. His R guarantees free WQ access, letting Briar instantly follow up with Fear and finish the target. Both scale well into teamfights — Malphite starts the fight, Briar cleans it up. He also provides tankiness and peel that Briar naturally lacks. Simple, reliable, and deadly in coordinated engages
Shen
Shen is one of Briar’s best partners. His R (Stand United) perfectly covers Briar’s all-ins, giving her a shield and global follow-up whenever she dives. His taunt (E) sets up Briar’s WQ combos flawlessly, and his CC + peel tools ensure Briar survives even the most reckless engages. Together, they create unmatched dive pressure from early game to late — a near-perfect duo for coordinated fights
Yorick
Yorick’s split-push pressure and frontline durability give Briar the freedom to dominate skirmishes and objectives. His ghouls and Maiden force the enemy team to respond, letting Briar dictate tempo and pick isolated fights. Together they overwhelm the map — unstoppable in side lanes, lethal in 2v2s
Gwen
Gwen and Briar share excellent mid-game tempo and thrive in close-range brawls. Gwen’s zone control with W and sustain-heavy dueling let her follow Briar’s engages safely, while Briar’s CC and disruption give Gwen time to shred tanks. Both scale well and can frontline through healing, making them deadly in coordinated dives. The pairing works best when Gwen uses her mist to deny peel for Briar — overall, a strong and cohesive synergy
Olaf
Olaf’s early brawling power and frontline presence complement Briar’s aggression well, especially in skirmishes around objectives. Both excel in extended fights and can run down squishy comps. However, their lack of CC and engage tools means they rely heavily on team follow-up, making this duo strong but composition-dependent
Fiora
Fiora and Briar excel in duel-heavy, split-push focused comps. Briar’s early pressure buys Fiora time to scale, and in teamfights, Briar’s engage can force enemies into Fiora’s vitals, letting her clean up with Grand Challenge. Both struggle against heavy CC and coordinated peel, but if fights stay extended and chaotic, they shred through any frontline with ease
Camille
Camille’s Hextech Ultimatum perfectly traps targets for Briar to land guaranteed WQ combos. Their dive potential is insane — once Camille locks someone down, Briar can follow with fear and burst. Both scale well and thrive in isolated skirmishes, but they rely on clean coordination; if Camille misses her engage or Briar ults too early, enemies can kite them out easily
Sett
Sett’s frontline power and crowd control pair well with Briar’s all-in playstyle. His E pull and R displacement can set up perfect WQ engages for Briar, and both champions excel in bruiser-style extended fights. However, since both want to dive and lack ranged pressure, they can struggle if the team needs peel or disengage tools
Illaoi
Illaoi’s zone control and tentacle pressure complement Briar’s all-in fights perfectly. When Briar forces enemies to stand and fight, Illaoi’s E + R combo turns the area into a death zone. They both thrive in skirmishes and objective setups, but since neither has strong engage tools beyond Briar, this duo works best when enemies are forced into them rather than chasing
Darius
Darius and Briar form a high-pressure, brawling duo that dominates early fights. Briar’s fear and engage tools let Darius stack his passive freely, while Darius’s pull (E) punishes anyone trying to peel Briar off. Both are vulnerable to kiting and heavy CC, but when ahead, they snowball fights brutally fast and can easily take over side lanes and river skirmishes
Ornn
Ornn provides exactly what Briar needs — frontline, engage, and CC setup. His Call of the Forge God guarantees an easy WQ or ult connection for Briar, and his tankiness lets Briar dive without fear. They work best in front-to-back teamfights, where Ornn absorbs cooldowns and Briar follows up to clean house. The only downside is Ornn’s slower early game tempo, which can limit Briar’s early invade potential
Sion
Sion pairs extremely well with Briar’s dive-heavy style. His long-range engage and massive frontline presence create perfect space for Briar to follow up and lock down carries. Post-engage, Sion soaks cooldowns and zones the backline while Briar cleans up the chaos. Even if Sion dies early in a fight, his passive lets him keep brawling, which fits Briar’s nonstop aggression perfectly. A reliable, high-pressure combo for front-to-back or dive comps alike
Rumble
Rumble’s AoE damage and zone control perfectly enhance Briar’s engages. When Briar locks enemies in place, Rumble’s Equalizer can melt entire teams. Their early skirmish power is great, but both fall off if fights are poorly timed — they thrive in coordinated dives and objective fights, not drawn-out front-to-backs
Singed
Singed can work decently with Briar thanks to his disruption and chase potential. His W glue and fling (E) can set up Briar’s WQ engages, and his poison trail helps zone and apply pressure in skirmishes. However, he offers no real peel or burst follow-up, and his chaotic playstyle can make coordinated fights messy. Overall, a functional but volatile pairing — good if both play aggressive and sync their engages
Warwick
Warwick pairs decently with Briar thanks to his point-and-click suppression and sustain-heavy dueling, creating strong 2v2s early. Both thrive in extended fights and can chase targets relentlessly. However, the duo lacks burst or disengage, and their kits overlap heavily — two melee sustain fighters with no real peel or ranged threat. Great for brawling comps, but struggles hard into kite or poke. Overall, solid but situational synergy
Gnar
Gnar offers solid teamfight tools for Briar, especially with Mega Gnar’s AoE stun that sets up her W → Q engages perfectly. However, in Mini form he’s too fragile and kites away from Briar’s dives, creating inconsistent synergy. When timed well, their combo can chain CC and delete teams, but outside of that, Gnar often plays too independently to consistently enable Briar. Decent synergy overall, but heavily timing-dependent on his rage bar and transformation
Jax
Jax and Briar have overlapping win conditions — both want extended fights and duels — but they don’t enable each other well. Jax often plays for side-lane pressure while Briar prefers group fights and skirmishes, leading to a lack of coordination. His E can stall fights, but it doesn’t directly help Briar engage or survive. When Jax is strong, he can clean up after Briar’s chaos, but otherwise, the duo often feels disconnected. Overall, very average synergy, leaning weak unless both snowball early.
Volibear
Volibear brings strong engage and frontline presence, which can open space for Briar to dive safely. His tower-dive potential and CC combo well with Briar’s early skirmish power. However, both champs rely on short cooldown brawls and can overlap in purpose — if one fails the engage, both often die. Works well if coordinated, but without timing or backup, fights become messy fast. Solid synergy, high risk, high reward
Cho'Gath
Cho’Gath provides solid frontline and reliable CC that can help Briar land her WQ and secure picks. His knock-up and silence give Briar room to dive safely, and his Feast helps secure objectives she sets up. However, Cho’s slow pace and lack of follow-up mobility can sometimes desync with Briar’s faster, dive-oriented tempo. The pairing works best in front-to-back teamfights where Cho starts and Briar follows — functional but not perfect synergy
Dr. Mundo
Mundo can frontline forever and soak pressure, giving Briar space to dive, but their synergy is limited. He offers no reliable CC or setup, and both prefer to brawl rather than peel or engage smartly. While their sustain makes them hard to kill in long fights, fights can become disjointed — Mundo soaks while Briar dives deep. Works fine in stat-check comps but lacks coordination potential.
Garen
Garen’s simplicity works perfectly with Briar’s aggression — he’s durable, has silence, and executes low targets. His Q silence prevents enemies from flashing or dashing away when Briar dives in, and his R finishes what Briar starts. Both champs thrive in extended skirmishes and can snowball hard, but they lack CC chaining, so coordination and target focus are key
Ambessa
Ambessa brings solid frontline presence and good follow-up burst, which can complement Briar’s aggressive dives. Both champions thrive in scrappy fights and skirmishes, but Ambessa often plays for herself rather than enabling Briar. Her ultimate can disrupt fights in ways that sometimes separate Briar from key targets, making coordination important. Overall, they can work well together if both dive the same targets — otherwise, the synergy feels average and situational
Irelia
Both Briar and Irelia thrive in chaos. They’re skirmish-heavy duelists with huge midgame spikes and excellent dive potential. Their CC chains (Fear → Stun) can delete targets instantly, and both sustain through extended fights. However, the duo lacks peel and relies on clean coordination — if either falls behind early, the comp collapses. High-risk, high-reward pairing that can 1v9 when ahead
Riven
Riven and Briar both excel in skirmish-heavy, brawl-style fights, where they can chain CC and burst targets quickly. However, their synergy is mechanically demanding — if Riven misplays or desyncs her combo with Briar’s engage, fights can fall apart fast. When timed well, her stun → Briar WQ combo can delete carries, but both champions lack peel and rely on perfect coordination. Strong if executed cleanly, but otherwise inconsistent and risky
Akali
Akali and Briar can work together decently in mid-game skirmishes, where both excel at punishing isolated targets. She follows up on Briar’s dives well and capitalizes on the chaos her engages create. However, early game there’s no real CC or frontline, making coordinated plays risky. If Akali gets ahead, the duo snowballs hard — but if not, no peel, no engage layering, and both get kited easily. Fun combo, volatile but playable
Teemo
No setup, no peel, awkward map control overlap
Mordekaiser
While both champions are strong duelists, their kits clash heavily. Mordekaiser’s R (Realm of Death) isolates a single target, often removing Briar’s focus or healing source during her frenzy. He offers no peel or setup and can accidentally ruin Briar’s engages by pulling enemies out of her E or R range. Both want to fight front-to-back but compete for the same role, making this duo awkward and inefficient despite individual strength
Nasus
Doesn’t help you early, no CC follow-up outside of W
Tryndamere
Tryndamere plays entirely for side-lane pressure and split pushing, while Briar thrives on team skirmishes and objective fights. He offers no CC, no peel, and no real engage, leaving Briar to do all the setup alone. Even though both are strong duelists, their win conditions don’t align — Tryndamere ignores fights while Briar needs them. Good in 1v1 isolation, but in coordinated play, this duo barely interacts or supports each other’s goals
Renekton
Renekton and Briar want to play early and aggressively, but their synergy falls apart fast. Both champs spike early and need resources, so they compete for gold and lane pressure instead of complementing each other. Renekton’s short trades and stun windows don’t fully sync with Briar’s longer all-ins, and he falls off hard, leaving her without a reliable frontliner later on. They can snowball early if perfectly coordinated, but outside of that, this duo lacks scaling, CC chaining, and teamfight structure
K'Sante
K’Sante and Briar completely desync in playstyle. He’s a defensive, slow-scaling tank who wants long, controlled fights, while Briar thrives on fast, all-in aggression. His R (All Out) can actually ruin Briar’s engages by displacing or isolating her target mid-fight. He offers little damage follow-up and no consistent peel once he commits. The result is constant mismatch — when Briar dives, K’Sante peels; when he dives, Briar’s frenzy misfires. Strong individually, but terrible synergy as a duo
Gangplank
Zero CC, zero peel, zero setup. You go in, they farm side lane
Aatrox
On paper, Aatrox and Briar should work — both are sustain-heavy bruisers who thrive in extended fights. But in reality, they don’t complement each other at all. They both need long, front-loaded fights and compete for the same engage timing and frontline space, leaving your team with no real utility or CC chain. Briar’s E often disrupts Aatrox’s combos, and his knock-ups can misalign with her frenzy timing. Despite solid individual kits, their synergy is awkward, overlapping, and unreliable — one of the lowest-performing duos statistically and in practice
Vladimir
Zero CC, zero peel, zero setup. You go in, they farm side lane
Jayce
Zero CC, zero peel, zero setup. You go in, they farm side lane
Lane bully, but no synergy in fights
Vayne
Zero CC, zero peel, zero setup. You go in, they farm side lane
Anivia
Insane wall synergy for E, AoE slow zones, peel, CC chain, and survives long fights (egg)
Kayle
Surprisingly strong synergy. Kayle scales safely while Briar controls early tempo, and her ultimate perfectly saves Briar during dives or Frenzy misplays. In late fights, Kayle’s R lets Briar go fully berserk with zero risk — a rare combo of safety and scaling power
Naafiri
Naafiri’s roaming power and early map pressure perfectly complement Briar’s aggression. She pushes mid fast, moves with her pack, and follows Briar’s dives easily. Their combined chase potential and burst make them a nightmare for immobile junglers. Strong duo for tempo and early skirmishes
Syndra
Syndra provides reliable pick and zone control, setting up perfect W-Q engages for Briar. Her E stun and long-range burst help lock down targets Briar dives on, and she can peel well when Briar overcommits. High control + burst makes them a strong mid-jungle pairing
Swain
Pulls enemies in as Briar fears them; huge AoE fight synergy
Orianna
Orianna’s ball control and Shockwave create ideal setups for Briar’s dives. She can shield Briar mid-fight, amplify his engage with her ult, and follow up perfectly on his AoE fear. While she doesn’t dominate early, her teamfight synergy is excellent once both hit mid game
Galio
Global peel, knockup, and follow-up CC = one of the best partners for dives
Cassiopeia
Cassiopeia thrives in the extended fights Briar creates. Her Miasma traps enemies Briar chases, and her ultimate punishes anyone turning on Briar. Both deal sustained DPS and scale hard — together they melt teams if Cass can stay safe behind Briar’s engage.
Katarina
When played well, Katarina thrives off Briar’s chaos, cleaning up fights with resets while Briar locks enemies in place. Both dive hard and snowball fast. However, one CC and she’s done, making the duo high risk, high reward — great if she’s skilled, disastrous if not
Malzahar
Malzahar’s point-and-click suppress gives Briar guaranteed engages and makes it impossible for enemies to escape her frenzy. His consistent DPS and wave control also let Briar roam freely. Simple, reliable, and very effective in coordinated fights
Kassadin
Kassadin scales into a late-game monster, and Briar’s early pressure helps buy him the time he needs. Once he’s online, his R mobility and burst let him follow Briar’s dives effortlessly. Weak early combo, but insane mid–late synergy
Veigar
Veigar’s cage (E) gives Briar the perfect setup for safe engages and easy walls to pin enemies with her E. His burst and scaling AP damage complement Briar’s frontline pressure. Strong synergy — simple, reliable, and brutally effective
Vex
Vex’s fear and instant burst perfectly complement Briar’s all-ins — she punishes dives against Briar and chains CC for guaranteed kills. Both thrive in fast, explosive fights, making them a deadly engage duo when timed together
Viktor
Viktor’s gravity field and burst combo create ideal zones for Briar to engage safely, locking enemies in place for her frenzy. His consistent mid-game DPS and wave control also help Briar secure objectives. Excellent in front-to-back teamfights.
Diana
Both thrive in bruiser-heavy brawls and AoE teamfights. Diana’s E–R combo groups enemies perfectly for Briar’s W–Q engage, and Briar’s follow-up keeps targets locked down through the chaos. Their early skirmish power and dive potential snowball hard if coordinated
Fizz
Fizz’s burst and dive pattern aligns perfectly with Briar’s engages — both want to jump on the same squishy target. His R sets up easy all-ins, and his mobility lets him follow Briar deep without dying instantly. High kill pressure, great skirmish synergy
Lux
Lux’s long-range snare sets up easy Briar engages, and her burst follow-up deletes targets before they can react. Her shields also give Briar some survivability on dives. Great pick potential and clean one-shot synergy in coordinated fights
Aurora
Aurora brings solid CC and zone control, giving Briar windows to engage safely. Their burst patterns align well in mid-game skirmishes, but her setup is slower and she prefers poke or kiting fights, which can desync from Briar’s all-in style. Decent synergy, not perfect
Taliyah
Taliyah’s seismic shove and wall can perfectly trap enemies for Briar’s engage, and her burst combo follows up fast. She also controls terrain well, letting Briar dictate fights safely. Excellent setup and follow-through — great coordination = free kills
Zoe
Zoe’s early burst and bubble setup can let Briar secure easy kills and snowball early fights. But if she falls behind, she becomes a poke bot with no follow-up, leaving Briar without mid-pressure. Great early synergy, nonexistent if she loses lane
Mel
Mel provides strong mid-game burst and CC chains that Briar can easily follow up on. However, her cooldown reliance and lack of peel make her inconsistent if Briar dives too early. Works best when Mel can initiate or counter-engage with setup already in place
Hwei
Hwei offers great zone control and poke before Briar engages, and his root or slow combos can set up perfect entries. But his immobility and delayed damage mean he often can’t follow Briar’s instant dives, making the duo functional but not explosive
LeBlanc
LeBlanc’s burst and mobility pair well with Briar’s fast engages — she can follow up instantly or soften targets before Briar dives. However, her hit-and-run playstyle often clashes with Briar’s full-commit fights, so coordination is key. Strong if she roams early, average if she stays mid
Ekko
Ekko and Briar share a skirmish-heavy early style and can overwhelm isolated targets together. However, both rely on resets and dives, meaning fights can collapse fast if mistimed. Strong early and mid synergy, but redundant engage tools make it inconsistent
Lissandra
Solid synergy but not game-breaking. Her instant CC helps Briar reach targets safely, yet her burst window is short and she often wants to engage the same way Briar does, leading to overlap. Works well in coordinated fights, but less consistent in solo queue
Ahri
Ahri’s Charm into Briar engage combo can easily secure picks, and her mobility lets her follow dives safely. However, her burst is often spread out, and she doesn’t provide much peel or sustained damage, making the synergy solid but not standout
Sylas
Can steal CC/utility ults and dive with you — chaotic synergy, but volatile
Morgana
Morgana’s Black Shield can protect Briar during her berserk dives, and Q root gives a reliable setup for Briar’s engage. Still, her immobility and slow tempo can leave her behind in fast skirmishes — good in coordinated fights, but average overall synergy
Annie
Annie’s point-and-click stun gives Briar easy engage windows, and Tibbers adds strong follow-up damage. However, her short range and immobility make her vulnerable when Briar dives deep, so the combo works best when she plays reactively instead of forcing fights
Twisted Fate
Twisted Fate’s gold card setup gives Briar reliable pick potential, but his low early damage and map-focused playstyle mean he often isn’t there to follow Briar’s dives. Great for macro pressure and setup, but limited direct synergy in skirmishes
Akshan
Akshan can follow Briar’s dives with strong single-target damage and cleanup potential, and his revive passive can clutch lost fights. Still, he offers no real CC or peel, and his playstyle often drifts to side lanes — making the synergy decent but inconsistent
Talon
Talon and Briar both love fast-paced skirmishes and invading early, but they offer little CC or peel for each other. Great if you snowball together, but if one falls behind, the map pressure collapses. High-risk, high-reward pairing with limited safety
Corki
Objective pressure overlap, but little fight coordination
Zed
Zed can match Briar’s aggression early and follow up on her engages, but their win conditions rarely align. He bursts and leaves while Briar needs extended trades. No peel, no setup CC, and his shadow play often splits focus. Can work if both snowball, but coordination has to be perfect
Qiyana
Qiyana can occasionally follow Briar’s engages with her R terrain burst, creating flashy wombo combos — but that’s about it. Her burst-and-dash style doesn’t support Briar’s need for extended, sustained fights, and she rarely peels or stays to follow up. Works only with perfect timing
Yasuo
Can theoretically follow up your E, but realistically both grief each other’s tempo
Aurelion Sol
Aurelion Sol needs space and time to scale, while Briar forces early fights and dives. Their win conditions rarely align — Briar wants chaos; Aurelion wants farm. His CC and zoning can help later, but early game offers almost nothing to support Briar’s tempo
Ryze
Zero (Mid): no engage setup, no peel, play for scaling and poke.
They sit 2 screens behind while you 1v9 → worst possible partners
Yone
Yone’s disjointed engage and delayed damage make him a terrible fit for Briar. He dives in, resets, and disappears while Briar is still mid-frenzy. No peel, no reliable CC, and his R often drags enemies out of Briar’s range. Both want to go in — just never together
Tristana
Terrible pairing. Her R literally cancels Briar’s engage, knocking enemies out of range right as Briar dives in. Both want to go forward, but Trist’s burst and self-peel disrupt Briar’s flow instead of supporting it. Pure anti-synergy
Ziggs
Zero engage setup, no peel, play for scaling and poke.
They sit 2 screens behind while you 1v9 → worst possible partners
Azir
Zero engage setup, no peel, play for scaling and poke.
They sit 2 screens behind while you 1v9 → worst possible partners
Ashe
God-tier synergy Supp or ADC: perma slow, vision, engage setup, arrow follow-up → the dream
Miss Fortune
Miss Fortune and Briar form one of the most explosive engage–follow-up duos in the game. Briar dives in, locking enemies with fear, and MF instantly drops Bullet Time across the entire fight. The combo deletes grouped teams before they can react. MF also loves Briar’s chaos — her passive and ultimate thrive when enemies are locked down or panicking. With proper timing, this pairing can win 5v5s outright off one WQ engage
Nilah
Perfect pairing. Both thrive in chaotic melee fights; Nilah loves Briar’s engages since she can safely follow up with her AoE ult. Their ultimates chain perfectly, and Nilah’s healing/shielding from allies lets Briar stay in fights forever. Insane scaling and skirmish potential
Zeri
Perfect tempo pairing. Briar’s hard engage gives Zeri all the space she needs to kite and stack her passive. Their fights naturally sync — Briar dives and draws attention while Zeri charges up and mows everyone down. Both scale hard and thrive in extended skirmishes with tons of mobility and sustain
Kog'Maw
Briar is the perfect frontline for Kog’Maw. She absorbs pressure and locks targets in place, letting Kog freely melt them from safety. Briar’s fear + dive combo buys the exact space Kog needs to shred tanks. If you pair this with an enchanter (Lulu, Janna, Milio), it becomes one of the strongest hyper-carry comps in the game
Jinx
Jinx and Briar complement each other’s mid-to-late game teamfight power perfectly. Briar’s fearless dives and fear chain create chaos and lockdown, giving Jinx the room to free-fire and stack her passive. Once she gets a reset, the fight is over. The only issue is early game — Briar wants to scrap constantly while Jinx needs time and peel. With a bit of coordination, though, this pairing can snowball fights into full team wipes
Kai'Sa
Kai’Sa works very well with Briar’s engage tempo. Briar dives first, forcing enemy flashes or isolating a carry — perfect for Kai’Sa to R in and clean up. Their burst patterns overlap nicely, and both scale into mid–late fights with high damage. The only downside is that if Kai’Sa ults too early or Briar overdives without setup, they can desync and die together. Still, when coordinated, this duo melts backlines instantly
Samira
Samira thrives in the brawling chaos Briar creates. Briar’s WQ engages and fear chains set up Samira’s passive and S-tier ultimates perfectly, letting her dive in safely for massive AoE damage. Both champions love close-range fights and resets, making them deadly in skirmishes. The risk is that if Briar goes in too deep without Samira ready, they can both get blown up — but when timed right, it’s an unstoppable snowball combo
Xayah
Xayah pairs well with Briar because she can follow up safely on dives while keeping herself alive with her ultimate disengage. Briar’s CC and chaos let Xayah set up her feathers perfectly for root chains, turning fights around fast. Their styles complement each other — Briar dives and draws aggro, Xayah punishes anyone who overcommits. The synergy is strong, though it requires careful timing so Xayah doesn’t ult too early and leave Briar stranded
Vayne
Vayne looks amazing on paper — her Condemn (E) can set up your Fear (E) for a brutal CC chain, and her mobility + true damage should perfectly complement Briar’s dives. But in practice, the duo rarely clicks. Vayne’s late-scaling, defensive playstyle clashes with Briar’s early skirmish aggression. She often kites back while you dive forward, leaving you isolated. In SoloQ, most Vaynes can’t follow your all-ins, and you can’t reliably peel for her either.
When both of you are ahead, it’s flashy and fun — but most games, it’s pure chaos
Twitch
Twitch and Briar can work, but it’s a bit awkward. Briar wants to dive in headfirst, while Twitch prefers long, drawn-out fights where he can reposition and shred from stealth. If Briar’s engage creates enough chaos, Twitch can spray down the enemy team freely, but if she dives too early, he can’t follow without dying. They shine in ambush plays and jungle skirmishes, yet lack consistent synergy in standard fights
Caitlyn
coordinate early pressure — Briar’s ganks set up easy headshots and trap combos for quick kills. Her fear into trap chain can be deadly in lane or jungle dives. Still, once mid-game hits, their styles drift apart — Caitlyn plays for range and sieging, while Briar dives too deep for her to follow. Decent early synergy, but falls off if they can’t snowball together
Sivir
Sivir works decently with Briar thanks to her On the Hunt (R), which can boost your engages and help you stick to priority targets. Her waveclear and mid-game utility also make it easier for you to control tempo and play around objectives. However, her short range and lack of burst follow-up mean she can’t always capitalize on your dives. She prefers extended, front-to-back fights — the opposite of your chaotic all-ins. Solid synergy if coordinated, but rarely game-breaking
Tristana
Jhin
Jhin’s follow-up burst and CC pair decently with Briar’s engages — her fear sets up his W root and guarantees fourth shots. However, his immobility and long reload windows make it hard to match her relentless tempo. Briar dives in while Jhin plays far back, so they rarely fight on the same rhythm. Strong pick potential and burst synergy, but not the most reliable duo in extended skirmishes
Varus
Varus offers strong poke and follow-up CC, which can help Briar lock down targets, but their playstyles don’t fully align. Briar dives deep while Varus prefers standing at range, especially in poke or lethality builds. However, his ult chain-CC can perfectly follow Briar’s fear for clean picks. Works best if Varus goes on-hit or hybrid so he can follow extended fights — otherwise, he struggles to keep up with Briar’s fast, chaotic engages
Aphelios
Aphelios pairs decently with Briar when fights come to him — her fear and chaos give him time to unleash his full weapon rotation safely. With the right guns (Gravitum or Severum), he can lock down targets Briar dives on or sustain through skirmishes. However, he lacks mobility and can’t always follow her hard engages, making their coordination timing-sensitive. Good if they’re on the same page — average if not
Draven
Smolder
Smolder is one of the worst partners possible for Briar across any role. He’s hyper-scaling, passive early, and needs time and space to farm — the complete opposite of Briar’s early aggression and dive-heavy tempo. He offers no CC, no peel, and no follow-up. Their playstyles hard-grief each other
Nami
S+ Tier insane - A near-perfect partner for Briar. Nami’s kit amplifies everything Briar wants — movement speed, sustain, and CC chaining. Her E empowers Briar’s frenzied autos, her Q and R provide long-range engage or peel, and her healing keeps Briar alive through risky dives. Together they can dominate both skirmishes and extended teamfights. The combination of control, sustain, and burst makes Nami one of Briar’s absolute best supports.
Milio
One of Briar’s strongest support partners. Milio’s W gives Briar bonus attack range and healing during her frenzy, letting her stick to targets safely. His E shields and buffs her damage mid-fight, and his R cleanses CC — perfect for freeing Briar from stuns or roots that would otherwise end her engage. Together, they create a hyper-aggressive but safe frontline duo. Milio keeps Briar alive and unstoppable, turning her all-ins into guaranteed wins
Maokai
One of Briar’s absolute best supports. Maokai provides everything she needs — point-and-click CC, reliable peel, and incredible objective control through saplings and vision denial. His W root guarantees Briar’s WQ lands, and his ultimate perfectly locks down teamfights for her to clean up. He frontlines, peels, and zones all at once, letting Briar dive safely. Their engage and follow-up timing naturally align — textbook synergy
Taric
Absolute god-tier duo with Briar. Taric’s E (stun) sets up Briar’s WQ perfectly, and his R (Cosmic Radiance) makes her unkillable during frenzy dives. His W tether gives her bonus armor and healing, and Q sustain keeps her topped off mid-fight. They scale incredibly well together — Taric covers Briar’s biggest weakness (no safety or CC immunity), while Briar gives Taric the perfect engage vessel. When played properly, this combo feels unfair: Briar dives, Taric presses R, and the enemy team simply can’t fight back
Braum
Your fear guarantees his passive proc, and he peels you from counterengages
Nautilus
Point-and-click CC, great peel and engage layering with Briar’s WQ/E
Leona
Instant engage + tanky frontliner; her CC chain = free fear combo every time
Thresh
Excellent CC chain and utility. Hook → Flay → WQ is perfect engage setup, and Lantern can pull Briar out mid-frenzy or after a bad dive. Gives vision, peel, and pick potential — everything Briar needs to thrive in chaotic fights
Tahm Kench
Great peel and protection for Briar. Can Devour (R) to save her during frenzy or re-engage fights. His Q slow and W knock-up set up easy WQ hits. Strong frontline synergy — both love extended brawls. Lacks engage range, but in coordinated fights this duo is nearly unkillable
Lulu
Peel + ult saves you, but zero engage synergy — purely defensive
Janna
Janna works surprisingly well with Briar despite her defensive playstyle. Her E shield synergizes perfectly with Eclipse, Revitalize, Shield Bash, and Sterak’s, giving Briar massive burst protection and bonus damage when diving. Her disengage tools (Q and R) can reset bad fights or peel Briar after her frenzy ends. While she can’t always follow Briar’s deep engages, her utility and shield value make her a strong, consistent enabler for aggressive builds
Vel'Koz
Vel’Koz’s long-range poke and knock-up soften targets for Briar’s engages, and his ultimate melts anyone Briar locks down. The combo offers strong front-to-back and objective control, though Vel’Koz must stay safe while Briar dives deep. Great synergy when coordinated
Morgana
Morgana (Support): Q root gives guaranteed WQ engage window; Black Shield protects you from CC while diving
Blitzcrank
One of Briar’s best engage partners — a single hook can instantly start a fight that Briar can chain into with W-Q-E for a guaranteed kill. Both thrive on picks and chaotic skirmishes. Falls off if hooks miss or into peel-heavy comps, but when Blitz hits, Briar feasts
Brand
Damage follow-up, but no setup or peel → pure coinflip synergy
Renata Glasc
Her ult can punish dives you start; W can reset you — high skill synergy
Poppy
Poppy actually pairs surprisingly well with Briar. Her W (“Steadfast Presence”) stops enemy dashes — perfect for locking targets inside Briar’s engage — while her E can pin enemies to walls, setting up Briar’s E stun combo for free. She also provides great frontline peel once Briar dives deep.
The only drawback is her R — it can accidentally knock away Briar’s targets if mistimed. But when coordinated, Poppy’s CC layering and anti-dash control give Briar perfect teamfight setups. Definitely on the higher end of “Strong Synergy,” and with good coordination she can feel Ideal
Rakan
Mobile engage with you; can peel or follow, depending on tempo
Seraphine
Good AoE CC follow-up and sustain; helps stabilize your chaotic fights + shields
Karma
Shields and speed for your engages, but lacks CC follow-up.
Zyra
Strong objective Prio. Roots for setup, plants help during your frenzy sustain windows
Pantheon
Pantheon has strong early pressure and reliable CC that can help Briar snowball in lane skirmishes, but the synergy falls off hard later. His stun can set up her WQ perfectly, yet both champions want to dive at the same time — which often leaves no one peeling or frontlining. Good for early fights and invades, mediocre in teamfights. Works if you dominate early; otherwise, the pairing runs out of gas fast
Rell
Rell wants to dive with her ADC, but Briar’s frenzy often pulls her too deep or out of sync. Their CC overlaps poorly — she engages, Briar follows late or overcommits. Both lack disengage, and if Rell’s combo misses, Briar is stranded. Strong conceptually, but in practice it’s chaotic and unreliable
Bard
Bard can set up engages with Q stuns and R zones, but his roaming style often leaves Briar alone when she needs follow-up. His magical journey can sometimes help Briar escape frenzy dives — or send her to her death. Works if coordinated, but inconsistent without strong communication
Elise
Good early pressure pairing. Cocoon → WQ combo gives strong picks and dive potential. Falls off later since Elise offers no peel or frontline. Works only if Elise plays for tempo and sets up Briar, not the other way around
Xerath
Damage follow-up, but no setup or peel → pure coinflip synergy
Zilean
Ult can bail you out, but he doesn’t help you start fights at all.
Soraka
Heals good, but she plays opposite of you — hates chaos, hates dives. Pure sustain; she wants calm, you want blood
Sona
Only good in late game, zero early follow-up or tempo. Ult can be good but thats it.
Senna
Senna’s long-range poke and passive playstyle don’t fit Briar’s all-in nature. Her W root can help occasionally, but she often stays too far back to follow Briar’s engages. Offers sustain and global support, yet lacks the immediate peel or CC chain Briar needs. Feels disconnected in most fights
Shaco
Easily one of Briar’s worst partners. Shaco plays for deception, split pressure, and picks — the exact opposite of Briar’s straightforward, all-in teamfight style. His boxes and clone add chaos, but offer zero peel or follow-up for Briar’s engages. He can’t protect her, can’t front line, and his clone often baits her frenzy onto the wrong target. Completely disconnected win conditions — a nightmare pairing
Pyke
Pyke thrives on quick picks and resets, while Briar needs extended fights to heal and sustain. His E and R often steal kills that fuel Briar’s frenzy, and his lack of peel or durability leaves her exposed. In theory, coordinated picks could work — in practice, it’s chaos. Very low synergy
Alistar
Alistar’s headbutt (W) often knocks enemies away from Briar’s engage or interrupts her combos. His peel and displacement tools clash with Briar’s need to stick and sustain through fights. Unless perfectly coordinated, he ends up saving enemies instead of setting up kills. Very anti-synergistic overall







 Ultimate Briar Jng Guide - 25.21
 Build Guide By Arctic Arrow
 5,750
Views
5,750
Views
 1
Comments
1
Comments

 Thank You!































 Threats
 Synergies
 Show All


























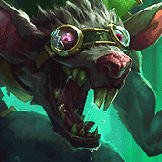
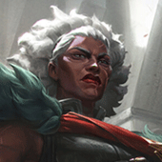

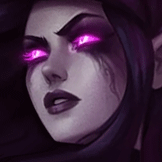
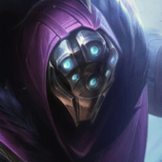
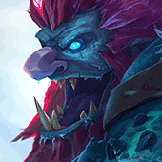

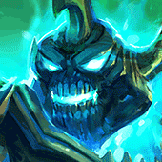

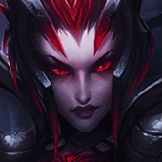
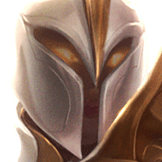

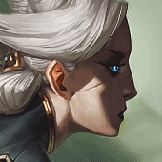
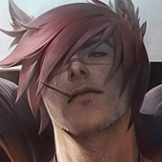

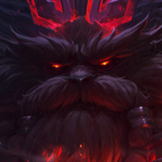
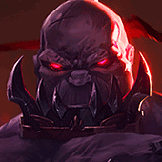
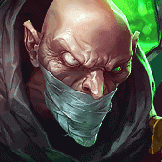
































































You must be logged in to comment. Please login or register.