Click to open network menu
Join or Log In
Mobafire logo

Join the leading League of Legends community. Create and share Champion Guides and Builds.

Create an MFN Account


Or

Braum Build Guide by Aerenax

Support [14.17] First we fight, then we eat! - A comprehensive Braum guide.

Support [14.17] First we fight, then we eat! - A comprehensive Braum guide.

Updated on September 2, 2024
9.8
72
Votes
3
Vote Vote
diamond
League of Legends Build Guide Author Aerenax Build Guide By Aerenax 72 3 187,854 Views 13 Comments
72 3 187,854 Views 13 Comments League of Legends Build Guide Author Aerenax Braum Build Guide By Aerenax Updated on September 2, 2024
x
Did this guide help you? If so please give them a vote or leave a comment. You can even win prizes by doing so!
Vote
Comment

You must be logged in to comment. Please login or register.

I liked this Guide
I didn't like this Guide
Commenting is required to vote!
Would you like to add a comment to your vote?

Your votes and comments encourage our guide authors to continue
creating helpful guides for the League of Legends community.

Runes: Guardian page

Resolve
Guardian
Font of Life
Bone Plating
Unflinching

Inspiration
Biscuit Delivery
Cosmic Insight
Bonus:

+10% Attack Speed
+2% Movement Speed
+65 Base Health

Spells:

1 2
Standard
LoL Summoner Spell: Flash

Flash

LoL Summoner Spell: Ignite

Ignite

Threats & Synergies

Threats Synergies
Extreme Major Even Minor Tiny
Show All
None Low Ok Strong Ideal
Extreme Threats
Ideal Synergies
Synergies
Ideal Strong Ok Low None

Champion Build Guide

[14.17] First we fight, then we eat! - A comprehensive Braum guide.

By Aerenax
Greetings fellow support players, welcome to my Braum guide! My summoner name is Aerenax on EUW. Since Braum’s release in season 4 he has always been in my champion pool as a good pick into heavy engage lanes. At the moment I have around 400k mastery points in Braum and I would like to share my knowledge and experience with you guys! I really appreciate some constructive feedback and I do want to know what you guys think of the information or the guide layout itself. If you have any personal questions feel free to ask them aswell!

This guide has been written and checked by me. If you have any additions feel free to contact me. I am planning to update the guide every patch to keep you guys up to date on the newest builds, strategies and matchups. This guide is still work in progress and I am also looking for someone that can help me make some fancy banners for the headers for the guide, if you are or know someone who wants to help me upgrade the guide, please send me a message! For other Braum questions check out the BraumMains reddit!

I hope this guide will make you play Braum with the same enthusiasm as me, so let’s jump right into it!
PROS
+ Strong disengage tools
+ Strong peeling options
+ Has the options to be played offensive
+ Strongest level 1 for invades

Braum is one of the best disengage champions in the support role that has flexibility in his playstyle to be played offensively as well. His E Unbreakable is a niche ability in the support champion pool and has some strong interactions into certain champions.
CONS
- Suffers into ranged matchups.
- Hard to successfully roam.
- Hard to engage on your own.
- Lacks depth in itemization.

Braum’s ability to peel and disengage in teamfights is super strong, but that comes at the cost of laning and roaming. Don’t expect to win a lot of lane matchups, but look to neutralize a lane. Don’t lose lane and try to impact lanes with good setup such as an Ahri with her charm or a Renekton that can quickly stack your passive.
Concussive Blows

Braum’s basic attacks and Winter’s Bite each apply a stack of Concussive Blows to their target for 4 seconds, refreshing on subsequent applications and stacking up to 4 times. Once the first stack has been applied, any allied champion's basic attack applies an additional stack to the target on-hit.

The fourth stack against a target consumes them all to deal 26 − 196 (based on level) magic damage and stun them for 1.25 − 1.75 (based on level) seconds.

This effect cannot apply to the same target more than once every few seconds. During this immunity period, affected targets take bonus magic damage equal to 20% of the trigger damage from Braum’s basic attacks.

Braum’s passive will help you lock down target in fights. Your Q also applies a stack of Concussive Blows.


Winter's Bite

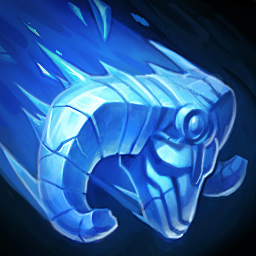
Braum propels ice from his shield in the target direction, dealing magic damage to the first enemy hit and slowing them by 70% decaying over 2 seconds.


This is Braum’s main ability to start off a fight from a small distance. Using Flash >> Winter’s Bite will animation cancel and catch your enemies off guard. This ability does not pass through minions.


Stand Behind Me

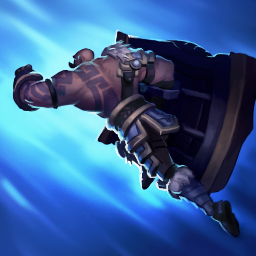
Braum dashes to put himself between the target ally and the closest visible enemy champion within 1500 units, and upon arrival grants himself and the ally bonus armor and bonus magic resistance for 3 seconds.

Stand Behind Me can be self cast to instantly grant Braum the bonus resistances and Unbreakable can be cast during the dash.


This ability helps Braum get on top of his allies to peel them. Putting Braum between his ally and the closest enemy is a really strong addition to this ability which makes casting Unbreakable easier as you know where you will land.


Unbreakable

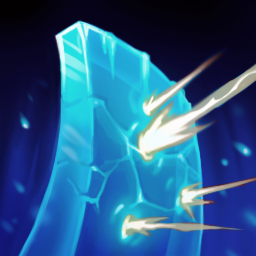
Braum sets his shield in the target direction for a few seconds, creating a barrier that intercepts all incoming hostile projectiles and reduces the damage Braum takes through it. The first instance of damage dealt by a champion from this direction is reduced by 100%. Unbreakable does not affect turrets.

While his shield is raised, Braum also gains 10% bonus movement speed and ghosting.

Braum’s signature ability that helps him peel from big AoE spells or just simple basic attacks. A fun trick to tilt your enemies is to stand in front of your own turret and block their auto attacks. This way enemies will get turret agro! Another fun thing to do is blocking auto attacks that would last hit minions.


Glacial fissure

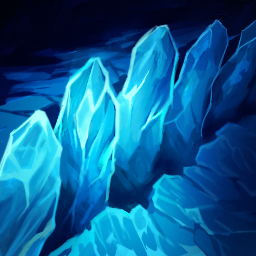
Braum leaps into the air and slams his shield into the ground, creating a fissure that travels forth in the target direction, dealing magic damage to enemies within its path as well as those around Braum.

The first target hit is knocked up for at least 0.6 seconds, increased if they are further away from Braum. All other enemies hit are knocked up for 0.6 seconds.

A field of ice is created along the fissure's path, lasting for 4 seconds and slowing enemies within the area every 0.25 seconds. The field disappears after the duration ends in the same order and speed it was created with.

Braum’s ultimate will help you a lot in teamfights as it is a great tool for zone control. Moreover this ability will also help you make picks and disrupt enemy channels (for example Fiddlesticks charge up for ult). This ability can also be used defensively to peel your team from enemies that dive on top of them.


The most common leveling sequence for Braum is the one I am using in this guide which follow R>Q>E>W. There are some variants to this skill sequence such as people maxing E first instead of Q. The levelling of your abilities can change from time to time and is dependent on your needs in game.
1
2
3
4
5
6
7
8
9
10
11
12
13
14
15
16
17
18


Q
E
W
Q
Q
R
Q
E
Q
E
R
E
E
W
W
R
W
W

FLASH: You take Flash in all your games as you can use it to close the distance between you and your ADC to use Stand Behind Me or Unbreakable. Flash is also a good offensive option as you can WINTER’S BITE >> Flash to animation cancel. Works for Glacial Fissure >> Flash aswell.
IGNITE: You take Ignite in about 95% of your games to add some all in threat at level 2. Furthermore it’s a good tool to use in early fights when up versus some healing supports to reduce healing.
EXHAUST: You only take exhaust if the enemy team is stacked with assassins and one-shot potential. You want to peel your ADC from all this damage and you can reduce their damage by 40%. It also works to slow down enemies to catch them when they are alone, because Exhaust also applies a 30% slow.


RESOLVE
Guardian is the only go to rune for Braum playstyle. Guardian is the only keystone in this tree you can consistently proc and it helps with your ability to peel your team. This rune is important as it will shield your ally you try to peel, it ain’t much but it can be just enough to keep someone alive or buy enough time. I would not recommend Grasp of the Undying and Aftershock as these are less optimal for the playstyle Braum likes to go for.
This row has 2 good options. I find myself having the most succes playing with Font of Life. As Braum you have a lot of ways to proc Font of Life and when an ally procs it they heal for a percentage of your maximum health, which is good as you will be building some HP. Demolish is also a good option in melee matchups as you are building HP and Demolish damage scale off of that . The last rune in this row is Shield Bash. This rune is a no go as the only way you will get a shield is by buying a Locket of the Iron Solari and you will not get any value out of this rune before minute 15-20.
Bone Plating is also one of 3 runes in its row that depends on your lane a lot. Bone Plating is overall just a solid rune when in a melee matchup such as Leona as the burst from her engage will be mitigated quite a bit. If you are looking into a more teamfight/skirmish oriented rune Conditioning is a solid rune. Second Wind is great into heavy poke lanes, which is also really good for Braum as you tend to suffer in these matchups quite a bit.
Unflinching is a great rune for Braum as you want to be cc’ed the least possible to be proactive in teamfights and continue peeling your carries. Another great option is Overgrowth. The extra HP will leave you to survive longer, which is very important to play as a front line for you team. I would not recommend taking Revitalize as Braum because you don’t have healing in your kit and for the shielding part you only have a Locket of the Iron Solari which only start to get value from minute 15-20.


Inspiration
Some people don’t fancy going Guardian so they pick a more creative option: Unsealed Spellbook. Unsealed Spellbook gives you the option to swap summoner spells which can be useful for certain situations. A teamfight on toplane? Switch to Teleport and join in. Doing dragon? Switch to Smite and help your jungler out. I only recommend using this keystone if you know how to use it. Glacial Augment and First Strike are no goes as you can’t get the maximum value out of them.
In my opinion these minor runes are all not optimal for Braum. The best option you have is Magical Footwear, which I'm not a big fan of as I don’t see the use for as much. Getting free boots is nice, but it limits your roaming potential even more as you have to wait for the boots to arrive. I don’t like Hextech Flashtraption on Braum is a no go for me as it has no benefit for the playstyle you play. Cash Back is not really recommended as you don't get as much value because our items are cheaper.
This row has 2 valid options. I recommend taking Biscuit Delivery which will help you sustain in lane better. Laning phase can be difficult as Braum so this is a pretty helpful tool. Time Warp Tonic is not recommended as I value Biscuit Delivery for sustain in lane. The last option, Triple Tonic is not recommended as I see this as a solo lane rune or for champions that spike on certain ability points.
Cosmic Insight is the best option in this row as the item haste benefits your high cooldowns and the summoner spell haste will lower the cooldown of your Flash which results in more playmaking potential. Approach Velocity can be a strong option as Winter's Bite’s and Glacial Fissure’s slowing effects helps you get closer to targets. Jack of all Trades is not ideal as you are not looking into buying a lot of different stats.

Since season 14 we got a huge overhaul on the support item section. Everyone will be starting with a World Atlas. This item will grant 20 gold for last hitting any minion (so no boosting with canon minions) and either 30 gold (melee) or 28 gold (ranged) for hitting a champion with attack or ability. These stacks are on an 18 second cooldown. Don't worry about the minion gold, your nearby ally will receive the full amount as if they last hit the minion themselves .

After finishing the first quest at 500 gold the World Atlas will upgrade into the Runic Compass.
The Runic Compass will also generate stacks every 18 seconds but differs in the amount of gold you recieve. Killing a minion grants you 28 gold and attack a champion will grant 34 gold (melee) and 32 gold (ranged).

When finishing the second quest at a 1000 gold you receive a Bounty of Worlds. It's the same as the Runic Compass but you will get to choose 1 of 5 upgrades for you support item. Below are the most valid options for Braum.

Celestial Opposition
Celestial Opposition is the best option for Braum. You will be the person on the frontline and getting reduced damage for the first hit will definitly help you. When this shield breaks after receiving damage from a champion you release a shockwave around you that slows enemies for 50% for 1.5 seconds. This will help you peeling for your carries as it will be harder for enemies to come near them.

Solstice Sleigh
Solstice Sleigh is another option you can go for. When slowing or immobilizing an enemy the Sleigh will provide you and the lowest health nearby ally bonus health and movement speed for 4 seconds. If an enemy dives on your carry and you cc them your carry has more chances of getting out alive. As Braum you have a lot of slows and CC in your kit so this can also be a valuable pickup.
The following section will describe the viable boots options for Braum. Right now Plated Steelcaps or Mercury treads feel like the strongest option as they give you a lot of resistances which are pretty cheap.

Plated Steelcaps
Plated Steelcaps are the obvious choice versus a full AD comp. Also if the enemy composition has a lot of champions that are auto attack heavy ( Kindred jungle, Tristana mid and an ADC for example).

Mercury's Treads
If the enemy team has a lot of CC or magic damage, Mercury's Treads are the ideal boots for Braum as they provide tenacity. As there is a limited pool to good magic resistance items, this is a good and cheap pick up.

The following section will describe the other items you might want to include into your build. These are my commonly used items and are the best in my opinion:

Locket of the Iron Solari
Locket of the Iron Solari will be the rush item for Braum as it helps you peeling your teammates. It is one of the few items that nearly didn't receive any changes besides the passive armor and magic resist for allies.

Zeke's Convergence
Zeke's Convergence is a good item for Braum. With it's new passive, creating the glacial storm, peeling can be easier. When you are holding the frontline for your team, people will get slowed getting near you. This is a good pickup if the enemy team has strong AD carries and diving potential.

Knight's Vow
Knight's Vow is one of the stronger items on Braum as it does increase the tankiness of your carry as the item mitigates some damage to you. In return, the damage your carry deals heals you for a small amount. This items is a good choice as a second, third or fourth item in your build. Be careful though as damage dealt to you through Knight's Vow and will cancel out of combat stats.

Redemption
Redemption is a solid item in your build as it will help out during teamfights or during the time in between teamfights. It increases your healing and shielding by 20% which is a pretty good amount for Locket of the Iron Solari. The active heals your allies and damages your enemies for a small amount which can turn the tides of battle in your favour by keeping your key carries alive. I recommend going this item later into the game, around your fourth or fifth item.

Force of Nature
Force of Nature is one of the only items that build magic resist besides your mythic. I highly recommend building this item when going up against a lot of overtime AP damage. This item slots in your build after your mythic item or maybe one item later, that highly depends on the game state and if the AP damage dealers are fed.

Abyssal Mask
Abyssal Mask is the other good option to magic resist. I highly recommend building this item when going up against a lot of AP damage and you have strong AP damage champions on your team. This item slots in your build after your mythic item or maybe one item later, that highly depends on the game state and if the AP damage dealers are fed.

Frozen Heart
Frozen Heart is a good item when playing into multiple auto attack oriented champions. For example a team compositions with a standard adc, Kindred jungle and a Sett toplane. These champion rely on auto attacking and you slow their auto attack speed for a solid amount. Furthermore the armor will also help you out a lot. Go for this item as a second or third item after your mythic.

Randuin’s Omen
Randuin's Omen is a lot like Frozen Heart however the time you build these items is different. You want to buy a Randuin's Omen when the enemy has a lot critical strike damage in their team, for example a Jinx adc and a Yasuo midlane. If these 2 get fed you can use the 10% critical strike damage reduction a lot. Go for this item when you feel like you need to build it, probably the second item after your mythic.

Thornmail
When in need of some anti-healing Thornmail is the way to go. By taking any damage you inflict grievious wounds on your enemy which will reduce their healing. A very useful item for champions building a lot of lifesteal like Immortal Shieldbow or enchanters such as Soraka who like to heal their ally a lot. When in need of this item, build it immediately after your mythic.

Vigilant Wardstone
Vigilant Wardstone is the warding support item that helps you a lot in the late game. The struggle of being full build and not being able to buy control wards is gone as this item gives you great stats in the form of ability haste and health and it gives you bonusses towards warding. The 40 ability haste when fully upgraded is a lot. Also the extra movement speed helps when warding. I recommend going for this item when you are one item away from full build as it will only be available around level 13 and you won’t get this far in most of the games as games tend to last around 30-35 minutes in this meta.


Moderate
ALISTAR

Easy
AMUMU

Hard
ASHE

Moderate
BARD

Very Easy
BLITZCRANK

Hard
BRAND

Very Hard
HEIMERDINGER

Moderate
JANNA

Hard
KARMA

Very Easy
LEONA

Hard
LULU

Hard
LUX

Moderate
MAOKAI

Moderate
MORGANA

Hard
NAMI

Very Easy
NAUTILUS

Moderate
PANTHEON


Moderate
POPPY

Easy
PYKE

Hard
RAKAN

Easy
RELL

Moderate
RENATA GLASC

Hard
SENNA

Moderate
SERAPHINE

Easy
SETT

Very Hard
SHACO

Moderate
SONA

Hard
SORAKA

Hard
SWAIN

Easy
TAHM KENCH

Moderate
TARIC

Moderate
THRESH

Hard
VEL'KOZ

Very Hard
XERATH

Easy
YUUMI

Hard
ZILEAN

Hard
ZYRA
Braum’s laning phase is all about surviving and getting as much farm for your ADC as possible. You don’t have a lot of kill threat and want to neutralize lane. Make sure to have good wave management in the form of freezes so your ADC can farm freely and you have the option to roam for kills in other lanes or setup vision for objectives.

You have to be wary of lane state no matter the matchup you are in. There are 3 important wave states that you should acknowledge:
Freeze – Freezing is manipulating your minion wave to stay in the same place for a given amount of time. This is the hardest form of wave management, especially in the botlane as you are dependent on your ADC and your own ability of wave management. Freezing is done by only last hitting the minions and matching minions damage with your opponent.
The way you setup a freeze is linked to how close you are to your tower. The closer to your tower the more ranged minions you need, this is because your minions arrive quicker to lane then the enemy minions. The picture shows in what area you need a certain amount of ranged minions to freeze. Learning to freeze effectively requires some practice so don’t give up after the first one doesn’t work out. You want to freeze your wave when you are ahead or when you are in a difficult matchup and your ADC can farm safely so you can roam.

Slow push – Slow pushing already says what is does, it slowly pushes the wave. This one is easier than a Freeze as you don’t have to be focussing on what the enemy does. All you want to do is killing the caster minions in the wave and there you have it, a slow push. Slow pushing is something you want to avoid during laning phase in botlane. When you leave lane and the enemies have based you almost always want to be fast pushing the wave. The only time slow pushing is applied is in the later stages of the game where you want to prepare waves by slow pushing them in the side lane. This either draws attention of at least one enemy so you can make a play across the map or it builds towards a massive minion wave which helps you siege or denies your opponents a lot of experience and gold.

Fast push – Fast pushing is important during the laning phase. Fast pushing is done by killing all the melee minions of a wave and even clearing a complete wave in such a way that the wave crashes into the tower and starts slow pushing back to you. Fast pushing when the enemy botlane has backed denies them a lot of gold and experience while you get a good timing to base and get some items and catch the wave that bounced back from the tower.
Another viable reason to do so, is to roam. While the wave is under the enemy tower try to get some deep vision in the enemy jungle or look for a roam midlane. The last thing you can do with a fast push is setting up a dive. If the enemy botlane decides to stay you can have a free kill, if they back off they lose gold and experience. I only recommend diving when you know you can get a free kill and don’t risk the fact that you can fall behind because of a misplayed dive.
Another important part of the laning phase is to help out your jungler when he is invading or fighting for scuttle crab. Try to fast push the wave and follow him into the jungle to help him fight. By fast pushing you will force the enemy botlane to either miss the wave or leave their jungler for dead.

Level 2 is a fundamental in botlane that you should know as a support and be able to play around. When getting all the exp from minions you get level 2 from the third melee minion in the second wave. For Braum this isn’t the most important tool as you don’t get extra strong at level 2. Most of the times you level E on level 2 which gives you a good defensive ability, however levelling W second can surprise your enemies (only do this when you see a minion you can jump to, to get close and force something.) Make sure you don’t fall behind as you will be caught out because the enemy has 2 abilities more effectively.

In the video you can see Braum is helping his Ashe to secure level 2 faster than his opponents. When Braum and Ashe tick over to level 2, Braum already has bush control and can walk up because of the level advantage forcing out Sivir’s flash in the process. Braum keeps positioning aggressively and punishes the next mistake of Sivir resulting in a lead. This clip shows the advantage you can get when playing correctly around level 2.
Positioning is an important aspect of laning phase. As Braum you want to put pressure on the enemy ADC while staying close to your own ADC to protect them. You will put pressure on the enemy ADC by positioning yourself in the lane bushes. Keep walking in and out of the bushes to pressure the enemy when they want to go for a last hit.

In the example on the right you see Braum and Ashe freezing the wave and putting pressure on the Sivir and Fiddlesticks so they have to give up farm. Once they decide to walk up, Braum punishes them given the Sivir is still flashless.
As said earlier, your positioning is important because it can make your leads bigger when ahead or even let you catchup when behind when played correctly. To know what positioning fits you well, you will have to play a lot and get to know matchups and how you feel about them.
Recalling is an important aspect of laning in general, but especially in botlane you have to time it correctly. As a support you always want to try and synchronize your recall with your ADC. When you want to Recall you are looking to push the minion wave under the enemy tower, as this gives you enough time to recall and come back to lane to catch the enemy wave pushing in.

In the example on the right you see Kalista and Rakan pushing the wave, getting 2 towerplates and recalling after that.
During the Mid-Game you want to group up with your teammates and try to collapse on 2v1 or 2v2 situations and get them ahead of their opponent. Braum has one powerspike at level 6 which makes his engaging and disengaging easier because of your ult Glacial Fissure. As Braum you are more focussed on grouping with your jungler and doing the setup for objectives such as Dragon, Rift Herald and Baron.

Tempo is a term used to indicate the pace of the game. A high tempo is a tempo that will snowball your leads into bigger leads and closing out the game. This is a tempo you want to adopt into your playstyle when ahead. A slower tempo on the other hand can be important when your team composition is behind or looking to scale into the late game.

Champions like Kassadin and Sivir enjoy low tempo games as they can farm up and reach their respective power spikes. Tempo control and knowledge is important as support and it should impact your decision making. Tempo is dependent on your vision on the map and your team’s power spikes. You want to manage the tempo of a game in such a way that champion power spikes can be achieved faster and they can start snowballing their power.

During the Late Game your only objective is to keep your carry alive or find a good engage to win your team the fight. Protecting your carry can be done by using your items, using Unbreakable and Stand Behind Me and even your ult Glacial Fissure can be a good peeling tool (see chapter teamfighting). Finding the engage can be done by using your ult Glacial Fissure and maybe even surprising the enemy with a Stand Behind Me >> Flash >> Glacial Fissure.
Teamfighting can be really hard as Braum because you are the one who needs to make sure to keep your carry alive. When the enemy team has a lot of assassins like Talon and Zed you need to be on top of your protection game to keep your carries going. Make sure to prioritize peeling over engaging when playing Braum.

In the video you can see Braum is helping his Ashe to stay alive in a teamfight when the enemy Talon tries to delete her before the teamfight. By using Glacial Fissure he buys enough time for his Ashe to get out of the fight, kill the honeyfruit and get back. Meanwhile Braum reengages with Zac to win the fight.
As Braum’s roaming can be more difficult than other supports. But if you manage to find a roam, there are some rules linked to roaming:
    1. Only roam when your minion wave is under the enemy tower or your ADC can farm safely in botlane.
    2. Only roam when the enemy midlaner isn’t pushed under his tower so you can make something happen.
If one of these requirements is not met do NOT roam as this will put you or your ADC in a bad spot. You can roam from two different situations; you either roam from botlane after pushing in the wave or when you pushed the wave and come back from base instantly look to make something happen in the river area. The following pictures are coming from the site of mobalytics. For any further information on roaming have a look here.

Roaming from base
The first situation we are looking at is roaming from base. On the right is shown with roam pathings when coming from base. Alistar and his adc pushed the wave on botlane and based. Now he is looking for a roam on mid. He will use the blue dotted path to get behind the enemy midlaner. The same case for Blitzcrank on red side, he will follow the red dotted line to get behind the enemy midlaner. You don't necessarily have to go for a mid gank, as you can also look for a gank top or vision control in the river (check out the warding chapters).


Roaming from botlane (Blue side)
The second situation is when you are roaming from botlane. In this example we look at Alistar again. First you take one of the green paths, when you are pushed under enemy tower you take the path through the river, when your adc is farming under your tower you take the other path. From there on you can choose each of the purple paths. You decide to go through the enemy jungle when the enemy controls rift scutler, otherwise path straight to midlane. From there on you have to choose the best angle for a gank and that totally depends on the position of the enemy midlaner. I always favor wrapping around the longest route as you get more value out of this.


Roaming from botlane (red side)
The same goes for mr. Blitzcrank on the otherside of the map. When your wave is pushed in look to path through the river, if the wave is under your tower and there is no threat of a dive, path through your own jungle following the green paths. As for Alistar in the other example you can also choose the purple path you like from here. I do favor the longest route as this gives the highest reward most of the times as the enemy has to walk into you. When pathing through the enemy jungle beware of the possibility of a jungler that is clearing one of his camps, so be sure you are safe to go there!

In these examples I only talk about setting up a gank on midlane. When following these green and purple paths it can also just be as valuable to place down wards so you can see the opposing team path along these routes! See the warding chapters for more info on that.
Vision is one of the key things a support player has to do within his team. You are responsible for vison setup around objectives; this means clearing enemy vision and establishing your own. Not only around objectives but also inside the enemy jungle to spot enemies walking around or around your lane to spot out ganks or roams from enemies.
In the examples below the red circles indicate Control Wards and the green circles indicate Stealth Wards, these are interchangeable but I personally mostly use them this way. When using your Oracle Lens you also want to sweep these spots as they are commonly used warding spots. If you want to know how to setup vision in the topside of the map just flip the images, because Summoners Rift is mirrored in midlane.


Early Game
1. This ward is a standard ward when you are on your side of the lane. It spots out jungle ganks and it gives your jungler a free option to gank when you have been pushed under tower.

2. This ward is a standard ward when you are on the enemy side of the lane. This gives you as Rakan windows to roam or create deep vision because the enemy won’t know where you go. The difference with ward 1 has to do with your line of vision. On this side of the map it’s important to keep spot 1 warded aswell as midlaners can still roam through the river as it is the most common route for midlane roams.

3. This ward is good when someone else used his Control Ward in the botside so you can spot out enemy invades or tower dives.
4. This ward is a strong ward around minute 3. It gives a lot of information on the position of the enemy jungler. You can spot him doing Scuttler or you can see in which direction he is pathing.

5. This ward is good to see when the enemy jungler moves into the river and you can maybe collapse on him with your mid/jungler. It also gives midlane information if the enemy jungler is ganking mid.

6. This ward can spot out the enemy jungler when he is clearing his Raptors. This ward gives information on the enemy jungler moving into the river or continues clearing his jungle towards Krugs.

7. This ward can spot out the enemy jungler doing his red buff and pathing either botside, towards Krugs or towards raptors.

8. This ward will spot out the enemy jungler doing Krugs and if he is pathing towards the botlane through lane, through tribush or he is heading towards his Red buff/ Raptors.

9. This ward is useful to spot out lane ganks or for an ally to tp on as it perfectly cuts off the escape path of the enemy botlane.

10. You can ward the lane bushes when you think you need a ward in here. Fiddlesticks is a matchup in which these wards are of high importance.


Mid Game
1. This ward is the standard ward when you have just destroyed the first botlane tower and start pushing towards the second tower. It spots out midlane roams and creates safety for your jungler to invade the botside.

2. This ward is a good ward when sieging either botlane or midlane as it will spot out enemy flanks when sieging mid or roams towards botlane when sieging there.

3. This ward is good when you are pushing onto the second botlane tower. It spots out enemies coming from the enemy base through the jungle and it gives you enough time to react according to the situation.

4. This ward is good when pushing the wave from your midlane tower and try to scout for flanks being setup here.

5. This ward is generally good when you have destroyed either the first midlane tower or the first botlane tower. It shows everyone entering and leaving this part of the jungle and you can setup a play with a numbers advantage with this information.

6. This ward shows everyone entering the jungle straight out of the enemy base. Off the back of this you can setup a play with a numbers advantage.

7. When you have removed ward 1, I highly recommend placing this ward as it can spot midlane roams and people trying to walk around to attack you from behind when you have pushed your botlane wave.

8. This ward is mostly used when you have just destroyed the first botlane tower and want to spot out enemies waiting to collapse on you if you overextend to crash the wave.


Dragon Setup
1. This ward is a good ward to deny enemy vision inside the Dragon pit. Be sure to place it inside the pit so it covers the full area of the pit.

2. If there is already a ward in the pit, this ward is very helpful because it shows the enemy pathing from midlane towards you if that is the case and it gives your carries time to position correctly in fights. This can either be a Control Ward or just a normal ward.

3. A ward behind the pit will give you a lot of information. It shows potential long range engages or a steal attempt by your enemies.
4. This ward comes in handy when the enemy just pushed out their wave from the first botlane tower or closer to their base. This way you can see them coming your way when they take the safe route. Try to have either this ward, ward 3 or ward 5 in position (can be a Control Ward).

5. This ward has the same effect as ward 3. The difference is that is positioned more towards the midlane and it shows enemies entering the river.

6. This ward is good when your opponent is pushing in mid and you try to sneak a dragon. Placing this ward will give you enough space to adept according to the situation. Try to have either this ward or ward 2 in position (can be a Stealth Ward).

7. This ward is good when your opponent just pushed/are trying to push the wave away from their first botlane tower. You can see if they want to check the Dragon pit and it allows your team to adapt to the situation.

8. This ward is good when your opponent just pushed botlane past the midway point. If you notice an enemy is pushing botlane try to have this ward in place so you know if they join the fight or not.

9. This ward is worth it when the enemy is hard pushing botlane and you try to sneak a Dragon attempt. This way you will see the enemy botlane coming your way and your carries can adapt accordingly.


Baron setup
1. This ward is a good ward to deny enemy vision inside the Baron pit. Be sure to place it inside the pit so it covers the full area of the pit.

2. If there is already a ward in the pit, this ward is very helpful because it shows the enemy pathing from midlane towards you if that is the case and it gives your carries time to position correctly in fights.

3. If there is already a ward in the pit, this ward is very helpful because it shows the enemy pathing from base/toplane towards you if that is the case and it gives your carries time to position correctly in fights.
4. This ward shows the enemy entering the river and it fulfils the same function as ward 2, it only gives your team more time to adapt. Have either ward 2 or ward 4 placed when doing baron.

5. This ward is good when your opponent just resets from a cross map play and you try to rush/sneak a Baron. Placing this ward will give you enough space to adept according to the situation. Try to have either this ward or ward 3 in position.

6. This ward is good when your opponent is pushing toplane and you try to rush/sneak a dragon. Placing this ward will give you enough space to adept according to the situation. Try to have either this ward or ward 3 in position.

7. This ward comes in handy when the enemy just pushed out their wave from the first toplane tower towards your first toplane tower. Warding this spot is beneficial when you do not have a hard pushed toplane wave.

8. This ward is worth it when the enemy is hard pushing toplane and you try to sneak a Baron attempt. This way you will see the enemy coming your way and your carries can adapt accordingly.

9. This ward shows enemies that try to sneak around your vision line and attempt a steal from the back of the pit. This ward does not have to be in the bush and only needs to be placed when afraid of an enemy hiding in your jungle.
Vision is one of the key things a support player has to do within his team. You are responsible for vison setup around objectives; this means clearing enemy vision and establishing your own. Not only around objectives but also inside the enemy jungle to spot enemies walking around or around your lane to spot out ganks or roams from enemies.
In the examples below the red circles indicate Control Wards and the green circles indicate Stealth Wards, these are interchangeable but I personally mostly use them this way. When using your Oracle Lens you also want to sweep these spots as they are commonly used warding spots. If you want to know how to setup vision in the topside of the map just flip the images, because Summoners Rift is mirrored in midlane.


Early Game
1. This ward is a standard ward when you are on your side of the lane. It spots out jungle ganks and it gives your jungler safety to roam into the river to gank or go for an invade.

2. This ward is a standard ward when you are on the enemy side of the lane. This gives you as Rakan windows to roam or create deep vision because the enemy won’t know where you go. The difference with ward 1 has to do with your line of vision. The enemy won’t path around to tribush (location of ward 1) when you are under the enemy tower, the jungler takes the shortest route through the river bush.

3. This ward is good when someone else used his Control Ward in the botside so you can spot out enemy invades or midlane ganks.
4. This ward is a strong ward around minute 3. It gives a lot of information on the position of the enemy jungler. You can spot him doing scuttle or you can see in which direction he is pathing.

5. This ward is good to see when the enemy jungler moves into the river and you can maybe collapse on him with your mid/jungler. This ward can also be a Control Ward

6. This ward can spot out the enemy jungler when he is clearing his botside. If placed correctly it spots all 4 entrances of this point.

7. This ward can spot out the enemy jungler entering or leaving the river and if he ganks midlane, this ward is helpful for you midlaner.

8. This ward is useful to spot out lane ganks or for an ally to Teleport on as it perfectly cuts of the escape path of the enemy botlane.

9. You can ward the lane bushes when you think you need a ward in here. Fiddlesticks is a matchup in which these wards are of high importance.


Mid Game
1. This ward is useful when you are sieging botlane. When you are not attacking the second botlane tower this ward can spot out enemies looking for a flank through tribush (location ward 4).

2. This ward is useful when you are sieging botlane aswell. The difference is that you have pushed your wave under the enemy tower and you want to see enemies coming through the jungle from their base or midlane. The difference with ward 1 is that you are moving up your line of vision because enemies will take the shortest route towards you as you are in a vulnerable position.

3. This ward is strong when sieging the first midlane tower. It shows potential flanks and, when placed correctly, who enters or leaves the jungle. This spot can also be used for a Stealth Ward.
4. When you have pushed your botlane wave, this ward comes in handy in combination with ward 2. It shows if enemies are approaching from the tribush and it effects your decision making on what to do.

5. This ward is an all round solid choice as it provides the information of who is pathing where through the jungle. You can also create flanks yourself by closing in enemies in the jungle, based on the information gathered from this ward.

6. This is a good ward to spot out enemies leaving their base or pathing the safe way from bot to midlane. This ward comes in handy when trying to setup a dive and decide if you want to go for it or not.

7. This ward does have the same effect as ward number 3, I recommend using this ward when you did not place ward 3.

8. This ward comes in handy when pushing your midlane wave around the middle of the lane to spot out possible flank setups from your enemies.

9. This ward is a good ward to spot out enemies in the river or spot out a sneaky Dragon attempt by your enemies.


Dragon Setup
1. This ward is a good ward to deny enemy vision inside the Dragon pit. Be sure to place it inside the pit so it covers the full area of the pit.

2. If there is already a ward in the pit, this ward is very helpful because it shows the enemy pathing from midlane towards you if that is the case and it gives your carries time to position correctly in fights.

3. If there is already a ward in the pit, this ward is very helpful because it shows the enemy pathing from base/botlane towards you if that is the case and it gives your carries time to position correctly in fights. Having a Stealth Ward here is very helpful aswell!
4. This ward is good when your opponent is pushing in mid and you try to sneak a Dragon. Placing this ward will give you enough space to adept according to the situation. Try to have either this ward or ward 2 in position.

5. This ward is good when your opponent just resets from a cross map play and you try to rush/sneak a dragon. Placing this ward will give you enough space to adept according to the situation. Try to have either this ward or ward 2 in position (can be a Control Ward).

6. This ward is good when your opponent just resets from a cross map play and you try to rush/sneak a dragon. Placing this ward will give you enough space to adept according to the situation. Try to have either this ward or ward 3 in position (can be a Control Ward).

7. This ward comes in handy when the enemy just pushed out their wave from the first botlane tower or closer to their base. This way you can see them coming your way and if they attempt to use a Blast Cone when present. Try to have either this ward or ward 3 in position.

8. This ward is worth it when the enemy is hard pushing botlane and you try to sneak a Dragon attempt. This way you will see the enemy botlane coming your way and your carries can adapt accordingly.


Baron setup
1. This ward is a good ward to deny enemy vision inside the Baron pit. Be sure to place it inside the pit so it covers the full area of the pit.

2. When there is a Control Ward in the baron pit already, this bush is a good alternative to place a control ward in. You will spot out enemies trying to fight you in the pit and your allies can react accordingly.

3. This ward is good because it can show you enemies trying to flank you from your own jungle. This ward will also help your carries to position accordingly. You either have to place ward 2 or 3.
4. This ward comes in handy when the enemy just pushed out midlane and are taking the safe route from midlane. This alerts your carries and gives them a lot of time to reposition.

5. This ward is important as it spots out enemies trying to steal the Baron or enemies setting up a long range engage. Your jungler will benefit from this ward a lot as he can focus on his Smite timing.

6. This ward will spot out enemies that just came from base and are pathing through topside (can also be a Control Ward).

7. This ward will help your carries position correctly if the enemy decides to engage from the topside if they just pushed out their toplane wave from their first tower or closer to their base.

8. This ward is important when trying to sneak a Baron attempt when they are hard pushing your toplane wave. This occurs rarely as you want to have a pushing wave toplane when attempting a Baron.
Thank you for reaching the end of my Braum guide! I hope I gave you some insights and new knowledge to apply in your games and become a Braum enjoyer just like me. Don’t forget to leave a comment with some feedback so I can update the guide! The best way to learn Braum is by playing and applying tips you found in guides or on the reddit. Below you will find the Changelog and I will be updating it so you can see what changed in my guide without completely reading it over again every patch. I hope you enjoy your time playing Braum and hopefully I will see you on the rift sometime!


Changelog
Download the Porofessor App for Windows

League of Legends Champions:

Teamfight Tactics Guide