Click to open network menu
Join or Log In
Mobafire logo

Join the leading League of Legends community. Create and share Champion Guides and Builds.

Create an MFN Account


Or

Not Updated For Current Season

This guide has not yet been updated for the current season. Please keep this in mind while reading. You can see the most recently updated guides on the browse guides page

x
Braum Build Guide by Knightro

Support Braum Support ~ The Heart of the Bot Lane

Support Braum Support ~ The Heart of the Bot Lane

Updated on November 30, 2014
New Guide
Vote Vote
League of Legends Build Guide Author Knightro Build Guide By Knightro 47,575 Views 7 Comments
47,575 Views 7 Comments League of Legends Build Guide Author Knightro Braum Build Guide By Knightro Updated on November 30, 2014
x
Did this guide help you? If so please give them a vote or leave a comment. You can even win prizes by doing so!
Vote
Comment

You must be logged in to comment. Please login or register.

I liked this Guide
I didn't like this Guide
Commenting is required to vote!
Would you like to add a comment to your vote?

Your votes and comments encourage our guide authors to continue
creating helpful guides for the League of Legends community.

Introduction


Hello, I'm Knightro, and welcome to my guide as Braum. Ever since I saw the Trials of the Poro video, I was stoked. I didn't know what kind of champion Braum was going to be, but I knew that I wanted to play him.

When he was finally revealed and that he was a tank support, I was even more psyched. Tanks and supports are 2 of my favorite roles, so this was perfect for me. As soon as I could, I went onto my PBE account and started play testing him with a few friends. I picked up on his game play very quickly, as he is not that difficult of a champion to play.

Champion Spotlight


Below are some matches from my match history to show for.


Yes these are old, but I haven't been playing a ton of league recently, so please bear with me!


What about Braum in other roles?
Back to Top

Pros/Cons


Pros

+ Tanky
+ Great at keeping carries alive
+ Good CC (Crowd Control)
+ Strong Chasing/Disengaging
+ Very Mobile
Braum is a tanky support who can literally save his allies by blocking unfriendly projectiles and intercept them himself. In addition to his tankiness, he also has an abundance of CC (Crowd Control) to lock down opponents and set up easy kills for his team. With his strong poke and slow, he is adept at either chasing down fleeing enemies, or slowing his pursuers. He is also a very mobile support, being able to instantly jump to the aid of an ally or re-position himself in a team fight.

Cons

- Is Melee
- No enemy gap closer
- Weak Pre-6
- No sustain for allies
Braum is melee, which can be a problem against enemy ranged supports who can harass him constantly, or long-ranged marksmen who can poke him freely. Since his gap closer only works on allies, you will need to be very clever to make the most out of it when you wish to engage onto an enemy. Until he gets his ultimate, he has rather low kill potential, and his only poke tool is a skill shot which can be blocked by minions. Despite his great CC and defense, he offers no sustain for his allies, meaning no heals, shields, etc.
Back to Top

Summoner Spells


Flash


Flash is the best spell in the game. Instant re-position, escape, gap closer, anything you can think of, Flash can do it. Especially useful when you need to re-position yourself and Stand Behind Me is on cooldown.

Exhaust is a great summoner spell for supports. It massively reduces an opponents damage and speed for a few seconds. Using this on the enemy adc can win you trades, or you can use it on the enemy assassin should they jump onto your own adc. If your ADC is running Heal then this spell is your go-to spell 95% of the time.

Exhaust


Heal

Since the buffs to Heal, it has risen to become an extremely strong spell to take in the bot lane. Healing yourself and an ally and increasing their movement speed is fantastic and can help your allies to escape tough situations. However, if your ADC is already taking Heal, then you might wish to choose another spell since multiple heals in rapid succession have diminishing effects and therefore becomes less effective.

Ignite can be taken if you want more damage in your lane, however since Heal and Barrier can effectively counter this spell, it becomes less useful and much more situational. If you take this and the enemy has a Heal or Barrier, then you need to bait it out before casting Ignite or else they will just use their spells and counter it.

Ignite


Back to Top

Runes


greater mark of hybrid penetration

Marks: Hybrid penetration marks are great because Braum deals a mix between physical and magic damage, so taking either armor or magic penetration runes but not both would be a waste. If you do not own hybrid marks, then you should take Greater Mark of Armor for more durability.

Seals: Ever since flat armor seals have been nerfed, flat health seals have stepped up and become very viable standard runes for supports. They offer almost as much health as flat health quints, and actually offer more damage reduction early on then armor seals. Another reason you don't need flat armor anymore is not only does Braum have a nice high base armor, but with the Hardiness mastery, you will be starting off the game with an extra 5 armor.

Glyphs: Magic resistance glyphs will help to negate damage taken from the enemy support. Most supports deal magic damage, so these will help to shrug off some damage and keep you healthier. Flat magic resist glyphs will make your early game extremely strong, but the scaling magic resist glyphs will male your late game stronger because they offer 3 times as much magic resist at level 18 as the flat ones. If you do not own/need magic resist glyphs, then you should consider Greater Glyph of Cooldown Reduction for more early game poking power with Winter's Bite.

Quintessences: Flat armor quintessences are extremely potent, since they offer more armor then their seal counter parts, and they will help immensely against the opposing marksman and any additional physical damage you will encounter throughout the game.


For some of you are are confused to the changes to armor seals and how this affects which runes you should choose, here is a good explanation on which runes are better:

Vynertje wrote:

Armor seals = 9 armor
Hp quints = 78 health

hp seals = 72 health
armor quints = 12.78 armor

You can even run 7 hp, 2 armor seals and 1 hp quint with 2 armor quints with higher total gain on BOTH stats.

7 hp seals = 56 health
2 armor seals = 2 armor
2 armor quints = 8.52 armor
1 hp quint = 26 health

so total you get
82 health
10.52 armor


(Credit to Psiguard for this approach)
Back to Top

Masteries


This is the First mastery Page I tend to use on Braum. It focuses heavily on the defense tree for additional armor and magic resist through Hardiness , Resistance , Legendary Guardian , and Enchanted Armor . These all scale very well with Stand Behind Me, since the more armor and magic resist you build on Braum the more he can grant to his team mates.

You can swap around some points as you see fit. If you against a strong AP-focused team, then you could put a point into Evasive , especially against certain champions like Teemo and Ziggs where most of their damage is AOE. Since all of braum's damaging spells have some form of CC attached to them, Oppression is a very strong mastery choice.


This is the second page I would use. I would take this page if I was against a ranged enemy support who was very poke-heavy, such as Sona or Zyra. Another good time to take this page is if you have another tank on your team, such as Malphite or Shen. This page sacrifices some tankiness in exchange for more utility, such as gold income and very useful CDR (cooldown reduction). This page lets you maintain your gold income even if you cannot cash in Spoils of War stacks because going into melee range means taking too much damage.

I don't take Inspiration because it sucks hard, and is a waste come level 18. If you don't want Wanderer then I suggest putting a point into Bandit instead for further gold income.
Back to Top

Abilities


|| Concussive Blows
"Braum adds stacks of Concussive Blows to enemies with basic attacks or Winter's Bite. He and his allies continue to add stacks with basic attacks, at 4 stacks their target will be stunned."

This ability is great! You get a free stun and magic damage just from auto attacking an enemy a few times. Once the first stack is applied, allies can apply further stacks with their own basic attacks, or spell that apply on-hit effects like Mystic Shot. After the stun they cannot receive stacks for 8 seconds. While they won't receive stacks, they will still take bonus magic damage from your basic attacks until they can receive stacks again. This works well with allies that can land stacks very easily like Master Yi with Double Strike and Lucian with Lightslinger.


|| Winter's Bite
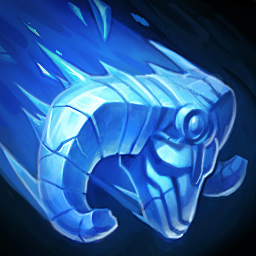
"Braum propels freezing ice from his shield in a straight line skillshot, dealing magic damage (based on Braum’s max health), slowing and applying a stack of Concussive Blows to the first target hit."

A 70% slow at rank 1? Amazing. Damage based off maximum health when you are a tank? Even better! A long-range slow that can apply a stack of Concussive Blows is great for catching up to enemies, and also for slowing enemy pursuers. Make sure you have a clean shot with this, since it will only slow the first target hit. Be wary about spamming this is lane though, since the mana cost will quickly leave you starved of mana.


|| Stand Behind Me
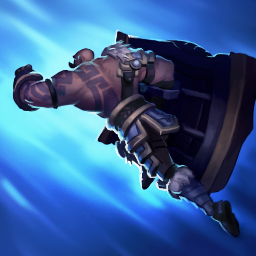
"Braum leaps to the aid of a nearby ally, positioning himself between his target and their nearest enemy champion, and granting both Braum and his target bonus armor and magic resist based on his total armor and magic resist."

A short range dash similar to Safeguard where you jump to a nearby ally. Upon arrival, both you and your ally gain bonus armor and magic resist equal to a combination of a flat amount plus a percentage of Braum's bonus armor and magic resist. This ability lets you re-position yourself in-between the enemy team and your target, from which you can either cast Unbreakable or engage a fight. This ability can jump to targets over walls, so an ally can go over a wall and you can follow them so you can both escape!

Tips & Tricks


|| Unbreakable
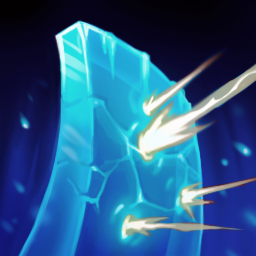
"Braum raises his shield in a target direction, negating the damage from the first attack from the shield’s direction and reducing the damage of all subsequent attacks as long as the shield is raised. Braum intercepts projectiles with Unbreakable, causing them to hit him and then be destroyed. He also gains a minor speed boost until he lowers his shield."

Braum's signature ability. He raises his shield and will completely block all damage from the first projectile that hits his shield. Afterwards, he will take damage from any additional projectiles, but they will deal reduced damage based on the spells current rank. This spell can completely block enemy skill shots like Whirling Death and Trueshot Barrage. However, if the spell has some CC attached to it (IE Dazzle, Dark Binding, etc) then the CC will still be fully applied. Braum also gains a small movement speed boost while the shield is active. Unlike Wind Wall, Braum will still take damage from blocked projectiles, so building a ton of defensive items is a huge priority.

Tips & Tricks


|| Glacial Fissure
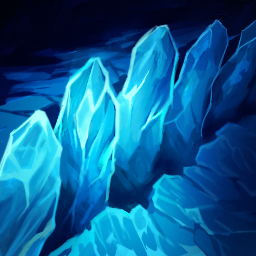
"Braum slams the ground, knocking up enemies nearby and in a line in front of him. A fissure is left along the line that slows enemies."

This ability is amazing in a team fight. Jump to a nearby ally with Stand Behind Me after they jump into the middle of the enemy team, and then cast this. It's like a combination of The Equalizer and Unstoppable Force! Combine this with other AOE spells like The Equalizer and Curse of the Sad Mummy and your team will destroy in team fights!


Skill Order


This has to be the most asked question: Which Spell should I max first?

Max Winter's Bite first. It is Braum's only damage spell and is your primary poke tool. It scales with Braum's maximum health, so the damage will increase as you build tankier. You also want this spell on the lowest CD as possible for poke, peel, and ganks. You can easily poke down enemies with this spell with it on a short 6 second cooldown, letting you slow multiple enemies over the course of a team fight. And by the time you have this spell maxed, you should have at least 10% - 20% CDR, if not more, so this spell will be on a very short cooldown of around 5 or less seconds.

Second you should max Unbreakable, for the lower cooldown and increased duration. The damage reduction from intercepted projectiles also increases with each rank. At rank one, it lasts for 3 seconds and has an 18 second cooldown, giving your enemies a 15 second window to take advantage of your long cooldown by killing you or your allies, meaning that you will need to be very choosey when casting it. At max rank, it has a 4 second duration with a 10 second cooldown, reducing that window down to a lowly 6 seconds. This means you can be more hasty with this spell, and not have to worry about not having it up in time to intercept vitally important projectiles like Trueshot Barrage.

Since Stand Behind Me grants armor and magic resist based off Braum's bonus armor and magic resist, this spell will become more effective come late game when he has more bonus armor and magic resist from items. It also has a much lower mana cost at earlier ranks, so you can use it quite freely without having to worry too much about mana problems. As such, max this spell last.

Take points in Glacial Fissure at levels 6, 11, and 16.
Back to Top

Items


Early Items


|| Relic Shield

This is a great item to start with for a tank like Braum. It offers health and sustain, and the Spoils of war passive is useful for healing your wounded allies. Note that you should try to save the spoils of war stacks for when your ally needs the health, but you should also cash them in to make sure you are maintaining your gold income. The best way to do this is to always have one stack ready, while the other recharges.


|| Ancient Coin

This is another good item to start with on many supports. This offers mana regeneration so you can use your abilities more freely, and heals you a small amount every time a nearby enemy minion dies. This is the safer gold item to start with if you are against a very pokey enemy support and you cannot get close enough to enemy minions to last hit them with the Relic Shield because you will take damage.


|| Sightstone

Sightstone is a great item for any support. It will save you a ton of money on wards, and even gives a little bit of health. Once you get the sighstone, you can trade out your trinkets since the 60 second ward will become rather redundant.


Face of the mountain || Face of the Mountain

Such a strong item for a tank support like Braum. It grants health regeneration, a huge chunk of health, and cooldown reduction. The shield active is amazing, and can give either yourself or your allies the little bit of health they need to win a trade or survive a gank. The shield amount increases with your maximum health, so this synergizes perfectly with a tanky support build.


talisman of ascension || Talisman of Ascension

The other good gold item to choose from. It offers considerably less survivability then the face of the mountain, but it does offer a good engage/escape active, and is especially useful if your team does not have any other means of hard engage handy.


|| Mercury's Treads

A very strong pair of boots for Braum. The tenacity is the main reason to buy these boots, but the magic resist is nice too. These boots are essential to countering a team with with heavy amounts of crowd control and magic damage. These won't be a huge priority until you have completed your gold item and Ruby Sightstone.


Other Good Items


|| Locket of the Iron Solari

A good item to take when your team needs a ton of magic resist. The active shield is great for soaking up damage that you and your team will take, and helps to dive turrets and save allies from DOTs (Damage-over-time) like Ignite. It also gives some nice CDR.


|| Randuin's Omen

A great item that grants armor and health. This makes it very difficult for enemy marksmen to kite you and kill you, since you will be reducing their damage dealt and also their movement and attack speeds. The AOE slow active will help to keep your team stuck to the enemy team, or slow the enemy team for a disengage.


|| Frozen Heart

This is a great tanky item that gives a ton of armor and mana, as well as some much-needed CDR. This item is usually my go-to armor item because the build components are relatively cheap and it is one of few armor items that also grants CDR. The mana will let you stay out in the field noticeably longer, and the aura is good for dealing with the enemy ADC's or auto attack champions like Master Yi and Tryndamere.


|| Banshee's Veil

Health and magic resist makes you tankier. The spell shield is also amazing, which can act as a second shield when Unbreakable is on cooldown. I like this item over Spirit Visage because even though spirit visage gives CDR, this full build should give you roughly 30-40% CDR, and Braum has no innate healing to benefit from the 20% increased healing passive. I prefer a spell shield over some less-then-useful healing.


Back to Top

Laning Phase


Early Game


During this time, you are generally laning against an enemy marksman and their support. The marksman will be aiming to farm and get as many last hits as possible, while the supports looks to poke down the enemy team. Your goal as a support is to protect your marksman. Stay near your marksman so that you can quickly block enemy projectiles with Unbreakable. This is especially important if it is a projectile such as Dark Binding or Dazzle that might place your marksman in danger.

If you or your marksman gets low on health, then make sure that you are cashing in stacks of Spoils of War from your Relic Shield. This will increase your gold income while healing you, and even counts towards your marksman's creep score. If either of you are in danger of dying, then make sure that you back and heal. It is better to lose a little gold and CS then give the enemy team a kill.

You should generally play passively until you hit level 6. Braum doesn't have a strong engage until he gets his ultimate. Generally, you should poke down the enemy team with Winter's Bite until you hit level 6. I'm not saying that you should avoid engages all together, but your chances of getting an early kill are easily 10 times better once you and your marksman have your ultimates. This works wonders in addition to your jungler, as the knock-up and slow will almost guarantee your team a kill.


Mid Game


Mid game is when turrets have been destroyed and lanes have started roaming. You need to make absolutely sure that you are keeping the surrounding area warded during this time. The enemy jungler will be more prone to gank, and if any turrets have been destroyed, so will their lanes. You do not want to get ganked by the enemy jungler and his mid laner because you couldn't be bothered to ward.

You need to keep eyes out in case Dragon becomes contestable. If the enemy team attempts to take Dragon, you need to make sure that you and your team go to stop them. Losing Dragon is a very bad thing, since it will give the entire enemy team gold and experience. If your team wants to secure dragon, ward the surrounding area and help them take it. If your jungler gets caught in his own jungle, then go and help him. You need to have a ton of map awareness to be wherever you are needed. If your enemy bot lane has lost their turret and are pushing your mid turret, then leave bot and go defend the mid turret.

You also should start warding the enemy jungle, and be sweeping for enemy wards, denying the enemy team vision. Denying the enemy vision of objectives like Dragon and Baron puts your team at a huge advantage.
Back to Top

Team Fights


Where should Braum be in a team fight? Protecting his squishy carries. You should not leave their side for almost any reason, but instead stay near them and poke down enemies with Winter's Bite. If enemies jump onto your allies, tag them with Concussive Blows and stun them, giving your allies time to escape. If the opportunity presents itself, then try to land Glacial Fissure so that it will knock up most of the enemy team, and so that the slow zone left over will keep the rest of the enemy team slowed.

Make sure that during the team fight, you never chase fleeing enemies or leave to go secure a kill onto a low-health target if it means leaving your allies vulnerable. You need to stay with your allies to protect them and make sure that you are helping to secure kills with Concussive Blows.


Engaging Team Fights


If your team wants to engage a team fight, then you should be poking at the enemy team with Winter's Bite until the fight begins. This way the slow will make it easier for your team to pick off slowed targets and thus take an advantage in the fight. When the time is right, then you can use Glacial Fissure to knock up the enemy team and leave them slowed. If you need to, you can use Stand Behind Me and jump to an ally or minion near your target, and then engage onto them with Winter's Bite or Glacial Fissure to lock them down. Make sure to protect yourself with Unbreakable!

If the enemy team engages a team fight, then you need to make sure that you keep your squishies alive. Pay attention to who is getting focused. If your ADC is fine, but your mid laner is getting focused, then go help your mid laner, and don't waste time protecting an ADC who doesn't need protection. Use whatever you can to keep allies alive. face of the mountain, Heal, Locket of the Iron Solari, whatever it takes to make sure that your allies stay alive! You can also Exhaust targets to make sure that they cannot kill your allies. Make sure that you are using Unbreakable to block any unfriendly poke from those pesky long range enemies during the fight. Remember that you can move and attack freely while Unbreakable is active, so all you need to do it activate it and then get on with the fighting.


Disengaging team fights


Your ally gets picked off. Your team is low. You need to go back and heal. Guess what? The enemy team ain't gonna let that happen. They are chasing. How do you escape?

You can slow your pursuers with Winter's Bite, and if you are truly desperate, then you can knock them up with Glacial Fissure. Also, the AOE slow on Randuin's Omen can help to escape. You could also use the active from talisman of ascension to speed your team up long enough to escape.

If you need to escape over a wall, don't forget that Stand Behind Me can jump over walls to allies. This technique can and will save your life!
Back to Top

Warding


During the laning phase, you will need to ward your surrounding area to watch our for ganks. This includes the nearby tribush, and generally the bush at the top of the river. You should also place a ward near the dragon area in case the enemy team tries to steal it without your knowledge. If you need to ward the bushes in your lane, I advise you use your trinket to gain temporary vision of that bush, so that you won't be wasting a full ward.


Ward Locations (Outlined)

The green wards are areas where you should place Stealth Wards to keep track of the enemy team. The locations in the brush in the bottom lane are only for the laning phase, when you need vision of the enemy support in the bush. This is vitally important in that support is Thresh, or Leona, so you will know where they are and can avoid getting caught by them.

The purple circles are locations for Vision Wards, to make sure that the enemy hasn't warded this area themselves. These areas are vitally important and you should keep vision of them at all times. While you can only have 1 pink ward out at once, your allies can each place one, allowing for up to 5 vision wards on the map at once. You should also check these areas frequently in case the enemy team has these areas warded as well.
Back to Top

Matchups


ALLY MARKSMEN


Lucian
Very Good

Caitlyn
Good

Ashe
Average


Kog'Maw
Average

Draven
Poor

Sivir
Average


Jinx
Average

Twitch
Good

Corki
Good

ENEMY SUPPORTS


Morgana
Extremely Tough

Leona
Average

Zyra
Tough


Galio
Very Easy

Alistar
Tough

Lulu
Tough


Taric
Easy

Thresh
Average

Blitzcrank
Easy
Back to Top

Summary


I would like to thank you all for taking the time to read my guide to Braum, the heart of the Freljord. I will continue to update this guide as I gain more experience with Braum, including more information on match ups with enemy supports and adc's. Please leave your comments and thoughts, as I enjoy reading your feedback. If you liked my guide, then check my profile for some more of my work.
Back to Top

Special Thanks

  • Myself, for writing this guide
  • GrandmasterD and Vynertje for Rune discussion
  • Everyone who votes or leaves constructive feedback, so that this guide will continue to improve.
Download the Porofessor App for Windows
League of Legends Build Guide Author Knightro
Knightro Braum Guide
Vote Vote
Braum Support ~ The Heart of the Bot Lane

League of Legends Champions:

Teamfight Tactics Guide