





 16.18 One With The Tides
 Build Guide By Demonsedge90
11
2
Build Guide By Demonsedge90
11
2
 34,115
Views
34,115
Views
 0
Comments
34,115
Views
0
Comments
Nami Build Guide By Demonsedge90
0
Comments
34,115
Views
0
Comments
Nami Build Guide By Demonsedge90

 Thank You!
Your votes and comments encourage our guide authors to continue
creating helpful guides for the League of Legends community.
Choose Champion Build:
-
Healer
![LoL Champion: Nami]()
-
Mage (Off Meta)
![LoL Champion: Nami]()
Recommended Items


Runes: Summon Aery












+8 Ability Haste
+9 Adaptive (5.4 AD or 9 AP)
+10-180 Bonus Health






Spells:

Exhaust

Flash


Items



Ability Order Standard

Surging Tides (PASSIVE)
Nami Passive Ability


Threats & Synergies
 Threats
 Synergies
 Show All
Extreme Threats
Ideal Synergies
Show All
Extreme Threats
Ideal Synergies


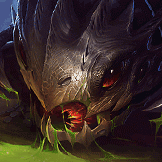
Amumu
He carries two bandage charges, meaning if you dodge the first one, he will have a second to pull himself in and lock you down with his massive ultimate.









































Draven
When she puts her E buff on his spinning axes, every single hit heavily slows the enemy, preventing them from running away from his high physical damage while her bouncing Ebb and Flow (W) keeps his health full during aggressive trades.

















 Synergies
Draven
When she puts her E buff on his spinning axes, every single hit heavily slows the enemy, preventing them from running away from his high physical damage while her bouncing Ebb and Flow (W) keeps his health full during aggressive trades.











When playing
 support, choosing Nami is really enjoyable because I'm familiar with her setups and combos. In this guide, you'll get a closer look at Nami's synergies/threats and itemization while also sharing some tips and tricks to help you get the most out of playing her.
Hopefully, you'll find this helpful guide and follow my suggestions to improve your
Nami gameplay. So, without further ado, let's dive into my guide on playing as Nami - The Tidecaller!|
|
Why choose Nami?:• While not the easiest champion to learn, the payout for the practice is well worth it. • She has strong poke potential during short trades and is effective at providing sustain for her team, prepping them for upcoming fights. She is also effective at pressuring the enemy on objectives such as Baron nashor, Dragons or when looking to take down turrets.• Can setup nice catch plays or picks for her team, making her an excellent asset to her team. I enjoy playing Nami, and I hope you will too.
|
|
|
|
|
|
Surging Tides helps to speed up any of her allies or herself. The added mobility can help when chasing the enemy, escaping combat, and increasing map rotation. Just make sure to avoid spamming skills too often, so you'll have mana for upcoming fights.
|
|
| Cost: 60 Mana | Cooldown: 12 / 11 / 10 / 9 / 8 | Cast Time: 0.25 | Target Range: 850 | Effect Radius: 200 (targeting enemies) / 225 (targeting allies) | Aqua Prison helps to isolate targets, initiate fights, or create opportunities for your team to engage. Also helps protect your allies from divers, assassins, or other heavy threats. You can also cast Aqua Prison on yourself or your allies, triggering Surging Tides.
|
|
| Cost: 70 / 75 / 80 / 85 / 90 Mana | Cooldown: 10 | Cast Time: 0.25 | Target Range: 725 | Effect Radius: 800 | Speed: 2,500 (initial) / 1,500 (bounce) | Ebb and Flow heals your allies and also acts as a form of poke in short trades. While the damage and healing per bounce are low early on, they can be modified with more ability power, increasing their effectiveness. Paired with items such as Moonstone Renewer, Redemption and Dawncore, will help to amplify the amount of healing you provide during team fights and skirmishes.
|
|
| Cost: 55 / 60 / 65 / 70 / 75 Mana | Cooldown: 11 | Cast Time: None | Target Range: 800 | Tidecaller's Blessing imbues an ally's or her own basic attacks/abilities with additional damage, slowing the target(s) they hit. While they are slowed, this can help Nami land Aqua Prison on them. A great way to engage, chase down, or disengage with her allies in combat. While underrated, it offers additional burst potential and utility, and helps her or her allies stick to their targets. |
|
| Cost: 100 Mana | Cooldown: 120 / 110 / 100 | Target Range: 2,750 | Effect Radius: 750 | Width: 500 | Speed: 850 | Tidal Wave acts as a great way to start a fight from a safe distance, forcing enemies to scatter and making follow-up abilities such as Aqua Prison easier to land. Not only does it help to zone the enemy but also provides a way to peel teammates who need to escape combat. Pairs nicely with Yasuo's Last Breath or Malphite's Unstoppable Force.It can disrupt abilities with channelling effects such as Katarina's Death Lotus, Lucian's The Culling, Miss Fortune's Bullet Time, Samira's Inferno Trigger or Warwick's Infinite Duress.
|
I will share practical and straightforward combinations while playing
Nami in Summoners Rift games, whether in draft or ranked modes. These combos could require some patience and timing to land efficiently.|
| > |
| > |
| > |
|
|
| > |
| > |
|
|
| > |
| > |
| > |
| > |
| > |
|
Playing As
Nami:• Be mindful of your mana and spell usage as
Nami in the early game, as most of her abilities have lengthy cooldowns and high mana costs.• Using
Tidal Wave and Aqua Prison helps to isolate or trap your targets.•
Nami's ultimate can come in very handy for cutting off escapes.Playing Against
Nami:•
Aqua Prison is a powerful ability, but it has a long cooldown. Take advantage of the situation if Nami misses this ability•
Tidal Wave has a very long range but travels slowly; it is easy to juke if you see it coming.• When you see an opponent affected by
Tidecaller's Blessing, hang back a bit. Since it has a short duration, waiting it out before trading with them can help you immensely.|
|
As a Nami player, it's crucial to have a solid understanding of the primary objectives for each game stage. Keeping this in mind can make all the difference in your performance. Here are some key notes for each stage of the game.
|
In the game's early stages, your primary goal should be to gather as much gold (with the aid of your
support item ( World Atlas) and experience, while still providing as much vision possible to keep you and your team safe. Doing this will enable you to purchase your essential items, giving you a competitive edge over your opponents.Other tactics you can perform to help deny resources from your opponents include the following:
• Freezing the wave
• Open trade/lane fights
Additionally, keep setting up wards around the enemy
jungle and your own (if necessary), to avoid any surprise ganks from enemy champions.During the mid-game, it's important to group with your team, making sure they are all healed up for upcoming team fights or when looking to secure objectives such as
Baron Nashor, Dragons or Rift Herald.Continue to place wards around the river/lane bushes or
jungle camps when you can. This can be helpful before sieging turrets or preparing for objectives.You must make strategic decisions to secure victory in the late game. Staying with your carries, making sure they are healthy at all times and you're ready to heal them should they get close to dying. Another good thing to consider is capturing late game objectives such as
Dragon soul, Elder Dragon & Baron Nashor that can help to close out games. Staying focused is essential, as a single mistake can be costly at this stage.Before prioritizing objectives like
Dragons or Rift Herald, one must consider the potential dangers of wandering around the map:• How much could I gain/lose when roaming compared to staying in my lane?
• What are the risks to me?
• Will I get ahead from roaming, or will I need to catch up?
As
support it pays to be present on the map when upcoming objectives are spawining and to make sure vision is prepped so that your team won't walk into the area blind.To maximize your chances of victory as
Nami, only engage with Tidal Wave, Aqua Prison, Ebb and Flow or Tidecaller's Blessing once your team is an a position where they can siege or you can create a diversion that can pincer the enemy. Always try to remain in the backline as long as you can while still maintaining good vision of your allies just in case they need healing or mobility to catch a fleeing enemy.|
Below is a detailed overview of the summoner spells you can choose from that can improve your success in lane as Nami. It is crucial to assess the enemy team's composition during the champ select phase.By understanding your opponents, you can choose the best spells to counter potential threats. |
|
|
|
Nami that you should have in every game. Since you don't have access to any form of self-peel apart from landing a clutch Aqua Prison or Tidal Wave. Flash helps to escape rough situations, allowing you to get out safely, dodging any crucial abilities.|
|
Nami that helps to deal with threatening foes ( Fizz, Katarina, LeBlanc, Master Yi, Zaahen or Zed) in team fights, skirmishes or duels.It can give you and your team a chance to isolate or to subdue a fleeing or high-value target.
Be mindful that
Exhaust can't reduce sources of true damage dealt from the following abilities:•
Camille's Precision Protocol (recast)•
Darius's Noxian Guillotine•
Fiora's Duelist's Dance•
Garen's Demacian Justice•
Vayne's Silver Bolts (3rd hit)|
|
Ebb and Flow, it gives added sustain and mobility to the ally affected by Heal. It can give you the boost needed to dodge skill shots or help you and a teammate escape a tricky situation.Remember that subsequent uses of
Heal within a short period will reduce its effectiveness. Therefore, if both you and your adc have it, coordinate your use of the spell for optimal results.|
|
|
Below are vision trinkets and consumables that can assist Nami in detecting potential invades or in preparing for the next objective to secure or deny on the rift. |
|
|
|
Stealth Ward is your main trinket in all games as Nami, revealing units within a target location. With the ability to place a max of three Stealth Wards on the map at any given time, you can create sightlines on essential regions of the map.It is helpful when setting up vision while split pushing or when establishing deep vision in enemy territory or objectives (
Baron Nashor & dragons).|
|
Oracle Lens is your best choice for Nami, allowing you to deny enemy vision around the rift, making it much easier for your team to traverse the rift.Also effective against champions who plants traps (
Jhin, Nidalee, Shaco & Teemo) and revealing units that use stealth/invisibility ( Qiyana, Pyke, Shaco, Twitch or Wukong).|
|
Control Wards help deny enemy vision and reveal champions with camouflage ( Evelynn, Rengar, Senna and Twitch). Just note that champions with invisibility effects ( Akali, Kha'Zix, Shaco, Talon, Teemo and Vayne) aren't able to be detected by them.If you can afford to purchase one or two, that will help your team.
Upon acquiring the final upgrade to your
support item ( Dream Maker, Solstice Sleigh or Zaz'Zak's Realmspike), you're granted four Stealth Wards, along with a slot for two additional Control Wards. You'll have more freedom to place vision in key areas and to make sure you and your team are protected.|
|
In this section, I will highlight key attributes (stats) that can enhance Nami's effectiveness in battle. It is crucial to consider these during the champion selection phase, as they can significantly impact your performance and strategy.
|
• Ability Power: It's an essential stat for
Nami to acquire in every game, increasing the damage dealt with her abilities. Since she has excellent late-game scaling, it's a must-have stat to acquire.• Heal & Shield Power: It's one of the best stats to acquire for
Nami, increasing the healing efficiency of not only Ebb and Flow but all other sources of healing & shielding you apply to allies. Always look to spec this into your build when you can.• Ability Haste: It's a powerful stat to have in every game as
Nami. Provides constant uptime on your abilities, allowing you to poke the enemy or to heal/peel for your teammates. Always spec this for an efficient teamfight presence.• Health: Having extra health in theory helps to make us more durable in combat; however, since
Nami is immobile (not a tank), though this might not serve us in the grand scheme, as the loss of damage doesn't give us much impact in team fights.Health options like
Seraph's Embrace, Redemption, Echoes of Helia, Moonstone Renewer or Bloodletter's Curse are what we'd want to spec into since they act as damage options as well.• Movement Speed: Increases your ability to roam around the map and dodge incoming skill shots. While not the most prioritized stat on
Nami, there are ways to acquire it from our item pool.• Armor/Magic Resistance: While the added resistances are viable on
Nami, you'd only consider this when against assassins or burst threats. If you have any additional health from items/runes paired with this, you'll be harder to kill in combat.Similar to prioritizing health,
tanks are going this route as compared to Nami; therefore, we'll skip this.• Attack Speed: Even though we can gain
attack speed from Ardent Censer or from the
attack speed shard, it's generally a stat we wouldn't consider as Nami; therefore, we will skip this.
With roaming being a key factor as
support, Boots of Swiftness becomes an excellent choice for Nami. Also consider them when dealing with slow effects such as Ashe's Frost Shot/ Volley, Rylai's Crystal Scepter, Serylda's Grudge or Voltaic Cyclosword. Swiftmarch
Since
Nami loves to cast abilities in combat, this makes Ionian Boots of Lucidity a solid pick up for her. Also helps by reducing her equipped summoner spells, granting more uptime on Flash or other spells at your disposal. Always consider them to create more impact plays during the game.Crimson Lucidity
When going with a damage build on
Nami, Sorcerer's Shoes are your best choice. The flat magic penetration gained from these Boots is very effective when dealing with targets with little or no magic resistance in combat.Spellslinger's ShoesBe mindful that none of the tier 3
Boots upgrades are accessible to us as support, as now if we want them, we'll have to role queue to mid lane and earn them through their specific role quest.
support, World Atlas grants Nami extra sustain, along with added gold income throughout the match. As time progresses, it will upgrade into three other unique items and increase your warding capabilities.|
| > |
| > |
|
melee minion units perish.When charges are available, use them whenever possible, as they increase your gold gain and your teammates'.
When executing
cannon minion, melee minion or a caster minion, you'll gain a fixed amount of gold with each charge. At the same time, your nearby teammate will earn the total value of the executed minion.Damaging champions will yield higher gold values (compared to executing
minions), allowing you to complete your support item quickly.Either strategy is effective for completing your
support item.
Dream Maker is Nami's best friend for shielding and protecting her carries from incoming damage while also giving them a little extra boost of damage in team fights and skirmishes. Great against burst heavy opponents you'll face.
Solstice Sleigh is a great way for Nami to provide some sustain to herself and a nearby ally in combat. It's an effective option to consider, as she has multiple ways to achieve its effect. It can be triggered either through the effect of Tidecaller's Blessing or if sheimmobilizes an enemy with either Aqua Prison or Tidal Wave.
Zaz'Zak's Realmspike. A great lane bully option if you and your team are more poke-heavy and want to wear down your opponents faster during short trades.While it's more ideal/correct to build
Nami as a support healer, there are times where having mage item options can prove effective in certain matchups.Below, I will go over itemization options for both potential build paths you can consider on
Nami.
Nami being efficient at poking down the enemy, having Echoes of Helia can be an excellent option for her. If you are damaging champions in combat, you can easily apply the effect.Champions that tend to keep you at a distance, such as
Lux or Caitlyn, procing the effect might not be as easy; therefore, being cautious would be the game plan here.
Nami that makes her healing more efficient in combat. Moonstone Renewer also allows each bounce of Nami's Ebb and Flow to have individual heal instances, triggering their own chain. When paired with Echoes of Helia you'll significantly increase her teamfight sustain for all her allies.
Redemption is an excellent core purchase and helps to improve her own healing and can be applied on her allies in a small area. It can also be activated on your enemies dealing damage to all those within it's radius.
Ardent Censer, when paired with carries such as Jinx, Kog'Maw, Twitch or Zeri, can make them highly effective in lane. While not limited to ADCs, other champions, such as Master Yi, Tryndamere, Yasuo, or Yone, can also benefit from the boosted attack speed as well.
Cryptbloom can be very useful when looking to apply healing to your allies upon killing a target. While the heal effect might be lower at first, once you acquire some heal and shield power, it should have a bigger impact. It also doubles as an excellent % magic penetration to increase your damage in combat.
Dawncore is a great option to finish your build. Helps increase damage and healing strength in combat.When paired with other heal and shield power options such as
Ardent Censer, Moonstone Renewer, Diadem of Songs, this will improve Nami's teamfight and sustain capabilities.
Moonstone Renewer, Staff of Flowing Water, and Ardent Censer, allowing Nami to buff her entire team more consistently through simple auto-attacks or single spells. When paired with Dawncore, she provides way more healing for her allies.
crowd control effects, be sure to pick up Mikael's Blessing. While it won't be able to deal with airborne, blind, nearsight, stasis or suppression, it can help to save your selected teammate and even provide a small heal once cleansed.
Nami. With the increased mana, you can constantly apply Ebb and Flow (w) to keep your team topped up during long fights.The shielding (at low health) is helpful when trying to escape combat, or to survive heavy burst damage.
Nami good burst and magic penetration that synergizes with her E ( Tidecaller's Blessing), making it a great way to deal with squishier targets quickly. If paired with other magic penetration options such as Sorcerer's Shoes, Void Staff or Cryptbloom, it improves her damage against tanks.
Stormsurge, you'll increase Nami's Ebb and Flow (W) and Aqua Prison (Q) damage while in team fights and skirmishes. The magic penetration is helpful against squishier champions and against tanks/bruisers.
Bloodletter's Curse allows Nami to deal with squisher targets or tanks when damaging them with any of her abilities. It's an excellent option to consider if you have multiple magic damage sources on your team.
Nami, since Tidal Wave and a long-range Aqua Prison can trigger the revealing effect. Allies who are affected by Tidecaller's Blessing can apply it when striking at long distances.The reveal effect is efficient against champions such as
Shaco, Rengar, or Teemo who hide in bushes.
Aqua Prison or Tidal Wave are the only ways to apply the effect in combat, granting more power for your team in fights. While its passive is hard to trigger reliably, its base stats can still be valuable.
Malignance increases how often Nami's can use Tidal Wave, which boosts the damage dealt to enemy champions upon contact. This allows Nami to become a powerful force on the battlefield, enabling her to turn the tide of battle for her team.
Mejai's Soulstealer is a niche pick up for Nami, but one that you can make good use of if you maintain the stacks. This item is very situational and can be game-changing against the right champions (preferably squishier targets).
Banshee's Veil spell shield grants Nami protection from the next single-target orcrowd-control effect sent her way. If you're against Nocturne (using Paranoia) or Graves (using Smoke Screen), the shield will be consumed and give you complete vision of your surroundings, allowing you to save yourself or an ally.
Morellonomicon is your grievous wounds option when playing Nami. While it's not a rush option, you can sit on Oblivion Orb until you have built your core items and then finish it up later on in the game.It's best used to counter healers like
Briar, Dr. Mundo, Sona, and Soraka, as well as items like Bloodthirster, Riftmaker and Sundered Sky.
Elixir of Sorcery grants extramana regeneration while also increasing the strength of all Nami's abilities during team fights and skirmishes.If at any point you no longer require your support item (
Dream Maker, Solstice Sleigh or Zaz'Zak's Realmspike) in your match, sell it and buy a situational item from the list above to complete your build path. Nami and will complement her in combat. Always pay attention to the enemy team comp, plus your item builds when selecting your runes to get the most value in each game.
Nami can trigger Summon Aery from either casting Ebb and Flow or Tidecaller's Blessing. Aery's shield, when cast on an ally, provides shielding for the next few seconds or until broken. It is very reliable during short trades in the laning phase.With
Tidecaller's Blessing, this allows you to apply item buffs like Ardent Censer or Staff of Flowing Water without using your Ebb and Flow.Due to
Summon Aery being ready more often, you'll have a very poke heavy lane.
Arcane Comet synergizes with Nami's lane bully play style by applying additional poke to enemies. It's a great way to wear them down during short trades, making them easier to kill for your allies.It's also great to pressure foes who don't prioritize healing or shielding effects in their kits, such as
Caitlyn, Ezreal, Xayah, or Zeri.
Domination Runes:
Cheap Shot grants extra damage against targets who've been affected bycrowd-control effects (except airborne). Since Nami has plenty of ways to trigger this rune, we stand to gain excellent value during team fights and skirmishes.It's a solid option when paired with champions such as
Amumu, Ashe, Malphite, Maokai, Morgana or Neeko.
support will focus on setting up vision for their team, Grisly Mementos can help improve that. It will allow Nami to place more wards in a shorter time frame, giving her team more information on where enemies will be coming from or hiding. It will enable us to spot enemy flanks or ambushes earlier.While in
aram queues (or other non-rift game modes), Grisly Mementos will help improve the uptime on all equipped summoner spells she possesses.
Relentless Hunter makes it much easier to rotate to objectives or to regroup with your team. Do note that Relentless Hunter's effect will be removed once you begin fighting the enemy, and will not be active until you disengage from the enemy.
Ultimate Hunter, you'll have more access to Tidal Wave, giving you more chances to set up picks or isolate enemies during team fights and skirmishes. When paired with Malignance, this will help provide more uptime.
Inspiration Runes:
Magical Footwear delays Boots to focus on getting your core items sooner. Once added, you'll gain extra mobility in the pair of Boots you purchase. Takedowns will expedite the process by a slight margin.
Biscuit Delivery can be very helpful when looking to recover health after short trades and skirmishes. As Nami, this can be a great help when looking to survive difficult matchups.
Cosmic Insight lets you use your summoner spells ( Exhaust, Flash, Ignite), and any equipped item effects ( Shurelya's Battlesong, Redemption) more often in combat. The extra cooldown on ward trinkets lets you increase vision on the rift.
Precision Runes:
Presence of Mind is a great way for Nami to maintain enough mana so that you can damages enemies with your abilities. You can also gain back a portion of mana when acquiring takedowns. It's a great way to ensure you always have mana.
Legend: Haste is a great way to have increased ability uptime. When paired with Ionian Boots of Lucidity, you'll have more access to Ebb and Flow and Tidecaller's Blessing in fights.
Resolve Runes:
immobilizing your target(s) with either Aqua Prison, Tidecaller's Blessing or Tidal Wave, Font of Life will grant healing to you and a nearby ally. While the sustain is small, it can be the difference maker if you are fighting tooth and nail with the enemy.
Bone Plating is a solid option for Nami, reducing the next three sources of damage from the first champon that hits you.When against teams that consist of
Assassin
or other heavy burst comps it would be adventageous to pick this up.
Ebb and Flow, and also improving the strength of all shields you apply. Revitalize also gains more effectiveness when paired with:•
Ardent Censer•
Dawncore•
Diadem of Songs•
Echoes of Helia•
Moonstone Renewer•
Mikael's Blessing•
RedemptionYou'll also gain increased shielding from the
Mountain Dragon soul.
Sorcery Runes:
Manaflow Band is a must have rune for Nami for additional mana. When paired with Diadem of Songs/ Seraph's Embrace, you'll receive extra value from the mana gained. Once stacked out, you'll gain increasedmana regeneration.
Transcendence ensures you'll have access to Ebb and Flow, while also being able to have her other abilities at the ready.It is an excellent choice when looking to apply pressure with your kit from a safe distance.
Celerity is an excellent option for Nami. It gives you faster rotation speeds for fights or objectives on the map. It improves the effectiveness of Surging Tides along with any buffs from cloud dragon soul, items ( Shurelya's Battlesong) or summoner spells ( Heal).
Absolute Focus is a great way to increase Nami's all-around pressure in fights and duels, so long as you remain healthy by casting Ebb and Flow on yourself or restoring your health with honeyfruit around the map. The extra damage will definitely help improve Aqua Prison and Tidal Wave in combat.
Gathering Storm gives us a great way to improve our damage output against targets, scaling based on game time. Very helpful at increasing the healing strength of Ebb and Flow.|
|
When choosing between offensive or defensive rune shards for Nami, you need to keep in mind certain factors to make the right decision.
|
• Do you require extra
attack speed? Since we aren't worried about farming, we'll skip this option.• Do you need additional
adaptive force? Since
adaptive force shards convert into extra ability power, it is appealing for Nami in most games, so ensure you have at least one at all times. Consider grabbing a second shard should you need more.• Do you require
ability haste? As Nami, it's a fantastic shard to obtain, as then you can cast any of your abilities whenever you need them. Ensuring your healing and damage spells are always up and ready for combat. Since we don't value the attack speed shard, this should be our next priority pick.
• Do you need more
movement speed? Having extra mobility can be very effective for Nami. It can help her dodge skill shots or reposition during team fights.• Do you need
tenacity & slow resist? Since Nami is very squishy, if acrowd control effect strikes her, there is a good chance it will lead to certain death; therefore, even a minor resistance boost to crowd control effects doesn't benefit her in the long run.In short, she's better off taking another shard that will provide more lasting value.
• Do you need
health? With two health options to choose from as Nami, knowing which one to take is crucial to your survivability. For longer games, the scaling
health shard is a good choice. On the other hand, if you are looking for a more early or mid game option, the flat
health shard is more suitable.Both options are effective on
Nami, helping her survive and deal with mixed-damage enemy teams.Always pay attention to the team compositions you are fighting when mixing and matching the rune shards listed above with your
Boots and items. It's a sure way to improve your overall survivability in games. Nami. By explaining which abilities, items, and runes work well together, you should now be able to make the most of her kit. If you found this helpful guide, please share it with your friends and fellow gamers.If you have any questions or thoughts you wish to share, feel free to contact me in the discussion section. I'll be happy to discuss anything with you and help you find the answers you need to the best of my ability.
I want to thank Katasandra and all the mods on Mobafire for their suggestions and awesome templates; without them, I couldn't have made this guide the way it is today.
support guide click on the following link below:
|
|



You must be logged in to comment. Please login or register.