





 Aqua Dragon's AD Malzahar Jungle [Classic, 26.18]
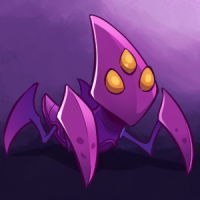 Build Guide By Aqua Dragon
22
0
Build Guide By Aqua Dragon
22
0
 13,307
Views
13,307
Views
 5
Comments
5
Comments
22
0
13,307
Views
5
Comments
Malzahar Build Guide By Aqua Dragon
13,307
Views
5
Comments
Malzahar Build Guide By Aqua Dragon
Follow


x
Did this guide help you? If so please give them a vote or leave a comment.
You can even win prizes by doing so!
Vote
Comment
I liked this Guide

I didn't like this Guide
 Thank You!
Your votes and comments encourage our guide authors to continue
creating helpful guides for the League of Legends community.
Recommended Items


Spells:

Flash

Smite
Items


Ability Order

Void Shift (PASSIVE)
Malzahar Passive Ability


Champion Build Guide
START

Crystalline Flask
Sight Ward
|
THREE MINUTE DRAGON
|
Long Sword spacer |
CORE
|
Chalice of Harmony
Ionian Boots of Lucidity
The Bloodthirster |
FINAL, GENERAL
|
Last Whisper
Maw of Malmortius
Mercurial Scimitar
Thornmail
The Bloodthirster |
FINAL, BEHIND
|
Ruby Sightstone
Twin Shadows
Shurelya's Reverie
Mikael's Crucible |
EXAMPLE FINISHED BUILD
|
The Bloodthirster
Ionian Boots of Lucidity
Maw of Malmortius
Last Whisper
Thornmail
Mikael's Crucible |
|
|
|
|
| ||||||||||||||||||||||||||||||||||||||||||||||||||||||||||||||||||||||||||||||||||||||||||||||||||||||||||||||||||||||||||||||||||||||||||||||||||||||||
| ||||||||||||||||||||||||||||||||||||||||||||||||||||||||||||||||||||||||||||||||||||||||||||||||||||||||||||||||||||||||||||||||||||||||||||||||||||||||||||
| ||||||||||||||||||||||||||||||||||||||||||||||||||||||||||||||||||||||||||||||||||||||||||||||||||||||||||||||||||||||||||||||||||||||||||||||||||||||||||||
Hi! I’m Aqua Dragon. I’ve spent many seasons hovering around Diamond with a wide variety of off-meta builds. Back in Season 4, I reached Master tier with AD Malzahar Jungle. Classic has given a chance to run it back! These days, I live in Korea, where I teach English and play in Korean solo queue.
-
AD Malzahar Jungle (Classic)
-
Malzahar Jungle (Modern)
-
Top Jinx
-
AP Kog'maw
-
Tank Karthus
-
Support Orianna
-
APC-Bot Vel'koz
Also, check out these off-meta creations by community members!
-
Support Kayle by Kalakaua
-
Support Sion by Apos
A special thanks to all the community members who helped me collect data and refine the guide, including Vimby, Demo, Divine Azir, KeepVogel, Kalakaua, PenguinExtravagant, and KrossRoads!
Jung-ling
The crux of AD Malzahar Jungle is simple: the Voidlings created by
Summon Voidling have a 100% bonus AD ratio on every attack, increasing to 150% after 7 seconds. With three Voidlings, the dream swarm can reach 600 + 550% bonus AD damage per second! The Voidlings themselves are no slouches. Unlike modern Voidlings, these last for 21 seconds and eventually reach around 1,000 health, allowing them to survive far more than an autoattack or two. They are fickle little creatures, though, so their absurd damage is most reliable against targets that stay in one place. How does killing a dragon at level 3 in 30 seconds sound to you? Or unfortunate victims of a blinking contest.
And that is before accounting for
Call of the Void becoming an AOE 3-second silence on a 6-second cooldown, incredibly fast and healthy clears, or Nether Grasp making ganks as easy as pressing R.
From Prophet to Profit
Of course, if all of that sounds too good to be true, it's because this much power comes with some expensive demands. Every Voidling requires four casts, meaning each one effectively costs at least 320 mana, so Malzahar is guzzling mana like a champ. Producing them quickly also demands an early rush toward the cooldown-reduction cap.
Cooldown reduction is especially valuable in Classic because it scales exponentially*: the first 10% CDR is roughly equivalent to 10 ability haste, while the final 10% is closer to 25 ability haste. But building pure offense/utility, only to explode before the swarm gets rolling, defeats the entire point. So enough durability is needed to survive the chaos and keep casting.
*Technically, it scales hyperbolically, but that makes me sound like I'm pushing glasses up my face.
The build therefore revolves around four needs:
- Mana: enough to not go oom.
- Cooldown Reduction: a fast route to 40% CDR to swarm quickly.
- Attack Damage: to make voidlings hit super hard.
- Durability: so the swarm can rip and tear until it is done.
Ideally, every purchase supplies one or more of those needs without wasting gold on extraneous stats. Nearly every decision in the guide comes back to these four needs.
✔ Pros
- Powerful objective taker; Voidlings tank and shred exceptionally well.
- Nether Grasp makes ganking as easy as pressing R.
- Enormous burst potential when several Voidlings surround one champion.
- Call of the Void becomes an AOE 3-second silence.
- Fast, healthy clears without needing a jungle-item start.
✘ Cons
- Weak ganker until level 6.
- Proper clearing requires careful Voidling management.
- Easy to overexert on mana and leave yourself defenseless.
- Susceptible to being dove before the swarm gets rolling.
- Quicksilver Sash begins limiting reliable ult targets.
- Ranged harass leaves much to be desired.
Customizlings
Before we can even talk about items or Voidlings, the build needs enough mana and cooldown reduction to rush straight into relevant, powerful AD items. The rune page is a fantastic place to quietly solve both problems.
|
 Scaling Attack Damage Marks
Attack damage is strictly better than lethality, and scaling rapidly overtakes flat.
|
Mana Regeneration Seals
|
Scaling Cooldown Reduction GlyphsScaling glyphs finish the climb to 40% at level 15. After that, item slots can stay focused on actual AD.
|
Cooldown Reduction QuintessencesThe final piece of the puzzle to reach 40% CDR at level 15. This makes it possible to go 21 offense and still reach the CDR cap.
Offense 21
|
|
|
|
|
|
|
|
|
The Offense tree directly contributes toward AD Malzahar's goals: turning champions and objectives into fun-sized bites. Voidlings can't critically strike and are unaffected by attack speed or ability power, so after stripping those choices out, nearly every remaining point improves clearing, objectives, towers, or kills. The rune setup still reaches 40% CDR with only 4% from masteries, leaving the rest of the tree free for damage.
Utility 9
|
|
|
|
|
The two biggest value dips from Utility are
Meditation
and
Expanded Mind
, both of which feed delicious mana to our mana-hungry bugs.
Summoner's Insight
gives Flash a 15-second reduction, and the point in
Mastermind
trims it by another 12 seconds (plus a few on Smite). From there, the point in Runic Affinity simply makes ample sense for having extra mana for clearing, especially after the first dragon.The unfortunate thing is that there are no points left for
Summoner's Resolve
in the Defense tree, which would give 10gp on every smite. Ultimately, though, the extra money you get from extra mana more than offsets it; even one or two extra camps is enough.
What About 9/0/21?
Intelligence seems worth dipping many points into to get 6% CDR, clearing up two quints for non-CDR use. I actually do think 21 Utility is legitimately viable as well, only barely less-good than the Offense-focused tree. Going that far down into Utility offers life steal, movement speed, summoner spell cooldown reduction, and 75gp (Explorer Ward), which is quite good.
The tradeoff is giving up the Offense tree, which offers 3 AD, 6 lethality, 2% universal damage, 5% bonus damage to towers, and another bonus 5% damage to low-health targets (which works on objectives). Both pages solve the build; 21 Offense puts the points directly into Malzahar's win condition, while 21 Utility puts it indirectly.
If you do go deep Utility, I suggest either 2 Life Steal or 2 Movement Speed quints, further accentuating what the tree is providing. I don't suggest getting the gold masteries at all; they are not "free gold". Each point competes against other mastery slots, and pretty much every alternative provides more gold directly (like raw stats) or provides more gold indirectly through more opportunities.
A Void Order
Early Skill Order
Level 1
W
W
→
Level 2
Q
Q
→
Level 3
E
E
Null Zone deals significantly more damage to the first camp than the alternatives.Then,
Call of the Void’s AOE damage outpaces Malefic Visions against camps.
Max Order
Q
﹥
E
﹥
W
Max
Call of the Void (Q) first because the silence scales with rank, going up to a whopping 3 seconds of silence!Max
Malefic Visions (E) second because its cooldown gets lower with ranks, helping redirect and summon Voidlings more reliably.
Malzabilites
P - Summon Voidling
Every four spell casts, Malzahar summons a loveable Voidling.
Every four spell casts, Malzahar summons a loveable Voidling.
|
Classic Differences
|
Any four spell casts count, so go around with one or two charges ready at all times. Casting twice in the fountain before leaving is therefore wise.
Voidlings contain enough strange behavior to deserve their own chapter. Their targeting, aggro, and item interactions are covered in Understanding Voidlings.
Q - Call of the Void
After a short delay, two portals form a damaging line that silences enemies caught inside.
After a short delay, two portals form a damaging line that silences enemies caught inside.
|
Classic Differences
|
The silence duration scales with rank, eventually reaching 3 seconds of silence per cast!
Call of the Void provides vision, but the vision strip is thinner than the spell itself. Aim carefully when checking a bush or corner.Silenced targets are unable to use summoner spells except
Smite. Silence is practically hard crowd control against some champions, though it is not nearly as impactful against others.The range, area, and lingering hitbox are all more generous than they look. Use them.
W - Null Zone
Summons a pool of energy that deals percentage maximum-health damage.
Summons a pool of energy that deals percentage maximum-health damage.
|
Classic Differences
|
Null Zone is the black sheep of AD Malzahar’s kit, mostly used for getting Voidling stacks. It has no cast time!It gives some chip damage in fights, but is generally not worth playing around.
The damage-to-mana ratio against Dragon and Baron is pretty good, though!
E - Malefic Visions
Afflicts a target with damage over time. When it dies, Malz gets a little mana and the visions bounce to a nearby enemy.
Afflicts a target with damage over time. When it dies, Malz gets a little mana and the visions bounce to a nearby enemy.
|
Classic Differences
|
During early clears, AD Malzahar does not cast E often due to its lower damage.
It is mainly used to build passive stacks, direct Voidlings, bounce through Wraiths, or push a minion wave.
R - Nether Grasp
Channels void energy to suppress one target. Moving or casting cancels the channel early.
Channels void energy to suppress one target. Moving or casting cancels the channel early.
|
Classic Differences
|
Suppression is one of the strongest crowd control types in the game. Suppressed targets cannot do anything, not even
Smite!Against mobile champions such as Katarina, click
Nether Grasp before they enter range. Malzahar will cast the moment they get close.The spell interrupts movement already in progress, making it excellent for stopping dashes or locking down flashy champs.
When an enemy is particularly fed, keep an eye on their inventory to see if they bought
Quicksilver Sash. If not, they will learn the price of tax evasion.
Null Set
The ward watches the opposite side of the jungle during the first clear.
Hunter's Machete is not needed; Malzahar's clear is fast enough without it, and Flask solves the mana issues way more cheaply than Spirit Stone.
↓
Three-Minute Dragon
Grab one Long Sword on the first back if you are taking the early Dragon.
If the route is not available, begin working toward Chalice of Harmony instead.
Grab one
Long Sword on the first back if you are taking the early Dragon.If the route is not available, begin working toward
Chalice of Harmony instead.
↓
Core
→
→
↓
General Choices
The normal path when gold is on pace.
Raw damage to tear apart objectives and champions alike.
Raw damage to tear apart objectives and champions alike.
When Behind
If the rest of the team is doing well and you're behind,
you can focus on some utility to catalyze your teammates.
you can focus on some utility to catalyze your teammates.
Universal Core
This is the key which pushes Malzahar's mana past "barely not enough", and so you should avoid selling it until inventory runs out. Don't be fooled by the cost; it may be 345gp, but it saves ~6 potions that would have been needed for the first clear and the dragon, very rapidly paying itself off. What really makes Flask so busted is its synergy with Chalice of Harmony. Because Riot loves spaghetti, Flask's mana gain is actually treated as mana regeneration, meaning Chalice can nearly double the amount of mana given back by Flask. Thus, it's wise to flask up any time you're around the quarter-mana mark.
Chalice of Harmony. Because Riot loves spaghetti, Flask's mana gain is actually treated as mana regeneration, meaning Chalice can nearly double the amount of mana given back by Flask. Thus, it's wise to flask up any time you're around the quarter-mana mark.
Chalice multiplies Malzahar's ordinary mana regeneration as he gets lower. Once Flask + Chalice are together, mana is largely solved. Chalice also eventually turns into Mikael's, which is handy late game.
Boots of Lucidity are the only CDR purchase the build needs. The rune and mastery pages supply the rest, bringing Malzahar to the 40% cap at level 15. No second cooldown item needs to delay the actual AD build.
Bloodthirster is the damage engine and an outrageous statstick for Voidlings. Fully stacked, it can provide 100 AD, and Voidling attacks actually trigger life steal. That means the same stat that turns the swarm into a wood chipper also supplies a huge amount of sustain. Damage and healing scale together, which is exactly what this build wants.
General Choices
Last Whisper is raw damage for Voidlings to tear objectives to shreds. It's damage. Lots of it.
Maw of Malmortius and Mercurial Scimitar are the functional magic-defense choices that still provide AD. Maw against burst; Mercurial against heavy CC.
There is no great Armor/AD item for Malzahar; options such as Atma's Impaler simply don't synergize well. So instead, Thornmail substitutes damage through the ancient technique of "stop hitting yourself, stop hitting yourself." The defensive choice against physical damage comps.
Atma's Impaler simply don't synergize well. So instead, Thornmail substitutes damage through the ancient technique of "stop hitting yourself, stop hitting yourself." The defensive choice against physical damage comps.
Another fully stacked copy is another 100 AD and 18% life steal, which is a disgusting amount of extra Voidling damage and sustain. If there's no better item to build, it's hard to go wrong with raw power. The generic "nothing better" purchase, for thirsty lings.
When Behind
Sometimes, you just have a bad game, and next thing you know you're on a support budget. May as well do some more supportey things then.
Sightstone is more vision, and there is no such thing as enough vision. Against champions such as Fiddlesticks, proper sight is the difference between anticipation and sure death.
Fiddlesticks, proper sight is the difference between anticipation and sure death.
Twin Shadows supplies Spooky Ghosts: another vision tool that doubles as a catch button, especially against split-pushers. Scouting and catching at a cheap price.
When the team lacks a good way to engage, the game can become a matter of slowly being squeezed to death. Shurelya's Reverie breaks those deadlocks and makes the Voidlings a bit speedier too. For when the team needs engage power.
Mikael's Crucible is the natural late upgrade from Chalice. When you're defending a fed teammate from a telegraphed hard CC.
Why Not These?
Muramana
One of the items people most associate with AD Malzahar is simply in one of its worst iterations. During extensive testing,
Tear of the Goddess alone was not nearly enough mana, but Chalice of Harmony alone was enough mana. And so if you buy Chalice, and therefore have enough mana... then what are we doing here?Justifying Muramana from there requires it to be amazing. But it's not. The Voidlings do not proc the Shock passive, and neither do any of Malzahar's spells. This means literally only autoattacks can apply its mana burn, turning hidden potential into just a delayed AD statstick, trying to solve an already-solved mana problem, competing against the 100 AD behemoth that is
Bloodthirster
Spirit of the Elder Lizard
Another item that, at a glance, seems like it should have amazing synergy with AD Malzahar. But it has a twofold issue. The first is that the 30% bonus clear speed is deceptive; Malzahar's clear speed is already extraordinarily fast and healthy, and changing a camp clear from 3 seconds to 2.3 seconds is not worth the price unless the item's other benefits are amazing.
That leads to the second issue: the item's other benefits are not amazing. The burn from Elder Lizard can only be applied by
Call of the Void and Voidling attacks, and even then it deals just a pitiful 5–10 DPS. Neither the clear speed nor this DPS bonus (and 'bonus' is a strong word for it) is game-changing. It's just an alright statstick competing against Bloodthirster. And that statstick increases your clear speed anyway!
The Black Cleaver
Voidlings apply The Black Cleaver's armor shred extremely quickly, so the synergy is real. The problem is that the rest of the item sits in an awkward middle ground. Its CDR is mostly wasted once the rune page, masteries, and Lucidity Boots have already solved the cooldown cap.
If armor is the problem,
Last Whisper is usually the cleaner damage answer. Cleaver's shred also does nothing to objectives, and if durability is what the slot needs, there are better tanky AD choices. It does several useful things, but not quite enough of any one thing to earn the slot.
Hextech Gunblade
Gunblade is a lot of clever interactions wrapped around a surprisingly mediocre statline for AD Malzahar. It offers roughly half the AD of a fully stacked
Bloodthirster, and ordinary spell vamp is poor sustain here because Malzahar's spell damage is heavily punished by the AoE spell-vamp penalty. The Hextech Revolver build path is awkward too.The active is hilarious: Voidling attacks,
Malefic Visions ticks, and Nether Grasp ticks chew through its cooldown at absurd speed. The problem is actually using the slow well in combat, which runs into the same reliability problem as slowing items in general. Bloodthirster simply gives far more of the damage and sustain the build wants all the time.
Slowing Items
If Voidlings can catch up to enemies and prevent them from escaping, then theoretically the target should easily get adorably mauled. Voidlings can even apply
Rylai's Crystal Scepter's 35% slow, which is nasty! And they also apply Sheen items, which includes Iceborn Gauntlet... for some reason... Riot, what in the unholy spaghetti...On paper, then, these kinds of slowing items should be amazing. And so I tested them. And they just... were not working well. Across many situations and stages of the game, the slow simply failed to activate reliably enough to make the difference, with enemies escaping without much issue for any number of reasons. I wanted these choices to work, but the fieldwork suggests it remains a dream.
Aura Items
Aura items interact with Voidlings inconsistently.
Runic Bulwark is the standout, affecting them at the stronger +50% minion value. Effects that specifically say "nearby champions," however, still do not apply to Voidlings; Zeke's Harbinger, for example, does nothing for them.And
Banner of Command only gives them health regeneration, not bonus damage (even if it did, you know what else gives them bonus damage? A B. F. Sword) Aura effects are welcome bonuses when they happen to be present, not a reason to derail the core build.
On-Hit Items
Contrary to popular belief, Voidlings have never been capable of applying on-hit effects.* Unfortunately, that largely kills the viability of any on-hit itemization.
*but they apply Sheen items for some reason?????
The Lings of War
Understanding all the nuances of the Voidlings is critical to maximizing their potential. Their damage should not be underestimated.
Fun Voidling Facts!
- Voidlings last for 21 seconds, deal physical damage, and have a 100% bonus AD ratio.
- After 7 seconds, the Voidling grows tankier and its bonus AD ratio increases to 150%. After 14 seconds, the Voidling attacks almost twice as fast.
- Malzahar gains experience from Voidling kills, regardless of distance.
- Their base AD is snapshotted when Malzahar summons them.
|
Important Classic Systems Differences
|
Voidlings are a little dumb and sometimes get minion blocked. Also, after killing a monster, they may just space out for a second. You kind of have to accept that they are a little derpy.
Towers prioritize Voidlings over other minions. It is often wise to wait for a cannon minion or a
Promote minion to begin tanking before trying to swarm a tower.
Voidling Targeting Priority
Voidlings are normally bloodthirsty, adorable, and mindless, aggroing anything close by. However, Malzahar can exert some control over what they target.
1.
Targets hit by Nether Grasp.
Nether Grasp.
2.
The nearest target afflicted by Malefic Visions.
Malefic Visions.
3.
Whatever non-structure target Malzahar last autoattacked.
This priority is unique to Classic, though they're little derps that don't always listen.
This priority is unique to Classic, though they're little derps that don't always listen.
4.
Whatever enemy is nearest to the Voidlings.
They won't automatically fight non-aggroed monsters though.
They won't automatically fight non-aggroed monsters though.
Voidlings will not chase targets they cannot see or that they lose vision of through stealth or brush.
Voidlings also have a hard leash range. While Malzahar remains within it, they keep fighting whatever is nearby. Move too far away, though, and the leash immediately tugs them to stop fighting and waddle back toward Malzahar.
Malefic Visions temporarily lets them leave that range to fight, but once it ends, they try to return. If Malzahar moves really far away fast enough (recall, etc.) then the Voidlings will teleport to Malz instantly.
Ling-ering Effects
Voidlings have a weird mix of effects they do and do not apply.
Voidlings Proc on Each Hit...
- Life steal, healing Malzahar.
(I still haven't emotionally recovered from this knowledge) - Black Cleaver's armor shred.
- Sheen items, including Iceborn Gauntlet (but why though).
- Rylai's Crystal Scepter's 35% slow.
- Spirit of the Elder Lizard's burn damage.
- Liandry's Torment's burn.
Voidlings Are Affected By...
- Armor penetration, as they deal physical damage.
- Shurelya's Battlesong's movement-speed active.
- Runic Bulwark's aura. Voidlings count as minions here, so they receive the 50%-stronger minion version of the bonus.
- Rally's aura and an improved Promote minion's AD aura bonus.
Fun interaction: if Malzahar is standing in one of these auras when he summons a Voidling, the boosted AD is snapshotted into the Voidling's base AD. The Voidling can then receive the aura itself too, allowing it to effectively double dip on the AD bonus! - The Offense Tree's various damage bonuses.
Voidlings Do Not Proc / Are Not Affected By...
- On-hit effects such as Muramana, Frozen Mallet, and Wit's End.
- Auras which say "nearby champions" (e.g. Zeke's Harbinger).
- Ordinary spell vamp.
- Promote itself. Voidlings cannot be selected as the minion to Promote; they can only benefit from the AD aura of a nearby improved Promoted minion.
The Path Is Clear
The opening route is Blue → Wolves → Red.
The First Clear
0.
Place the starting Sight Ward in the red-side jungle to watch for an early invade. At Blue, face away from its spawn location.
1.
The moment Blue Sentinel spawns, cast Null Zone and use Smite. The cast summons the first Voidling. Tank three attacks from Blue yourself before letting the Voidling take over.
Blue Sentinel spawns, cast Null Zone and use Smite. The cast summons the first Voidling. Tank three attacks from Blue yourself before letting the Voidling take over.
2.
At Greater Murk Wolf, cast twice to summon another Voidling.
Advanced tip: Instead of wolves, killing wraiths with 3 swarm stacks is slightly healthier, but it requires some trickier aggro juggles!
Advanced tip: Instead of wolves, killing wraiths with 3 swarm stacks is slightly healthier, but it requires some trickier aggro juggles!
3.
Cast one extra spell on the way to Lizard Elder so you arrive at Red with two passive stacks ready.
Lizard Elder so you arrive at Red with two passive stacks ready.
4.
At Lizard Elder, cast Call of the Void and Null Zone to summon the next Voidling. Tank three Red attacks yourself before shifting the camp onto the ling.
Lizard Elder, cast Call of the Void and Null Zone to summon the next Voidling. Tank three Red attacks yourself before shifting the camp onto the ling. Crystalline Flask keeps the extra tanking comfortable and refills when you recall. If you plan to kill Dragon at level 3, buy a single Long Sword. If not, start working toward Chalice of Harmony instead.
Three-Minute Dragon
The only purchase needed is a Long Sword; Flask handles the sustain.
Level 3 Dragon
1.
Approach Dragon with the Long Sword, Crystalline Flask, and three passive stacks ready.
Dragon with the Long Sword, Crystalline Flask, and three passive stacks ready.
2.
About ten seconds away from Dragon, cast Call of the Void and Null Zone.
Call of the Void and Null Zone.
3.
On the walk over, use all three Flask charges in succession. There is a short lockout between activations, so keep pressing it as each use becomes available.
4.
Bring the Voidling near Dragon, but stand closer to Dragon than the Voidling does.
5.
When Null Zone comes off cooldown, remember your ABCs: Always Be Casting!
Null Zone comes off cooldown, remember your ABCs: Always Be Casting!
6.
Take Dragon's first hit yourself, then let the Voidlings eat the rest while Flask's restoration keeps working.
7.
If you summon a third Voidling just as the second one dies, 600 team gold is yours!
After Dragon dies, clear three more camps before recalling. This keeps the remaining Blue Buff tempo rolling and folds the objective naturally into the rest of the clear.
Further dragons are likely to be defended, and you still need to pre-summon a Voidling before approaching dragons unless you want an embarrassing "EXECUTED" to flash across the screen.
Keeping Swarm While Clearing
The main trick is keeping Voidlings pointed at the large monster while spending as little mana as possible.
Clearing Camps
1.
Q and W are your bread and butter for killing camps, ideally summoning a Voidling. Q's base damage is shockingly high in Classic.
2.
Avoid using Malefic Visions! It's often more mana than it's worth unless it gets you within two more casts of summoning another Voidling.
Malefic Visions! It's often more mana than it's worth unless it gets you within two more casts of summoning another Voidling.
3.
Position the Voidling so it swarms the large monster.
4.
Hit every monster with every Call of the Void cast.
Call of the Void cast.
5.
Keep autoattacking the large monster.
Clear top-to-bottom or bottom-to-top based on whether Dragon or Blue Buff is going to spawn at a useful time. The first two full clears should start at the golem camp, as the blue spawns around the end of that second clear.
Don't worry too much about counterjungled camps; monsters respawn every 50 seconds, which is barely any time at all. Though a camp won't respawn if there's a small monster left over, so kill the babies as you walk by.
Be mindful of the Voidling's leash range! Voidlings keep fighting after Malzahar walks away, but only to a point. Move too far and they abandon the fight to waddle back toward him.
Malefic Visions temporarily overrides the leash and keeps them attacking.Be mindful of the camp's aggro switch range! Classic monsters are way more committed to focusing on one target. They won't switch targets at all until you walk far enough out of their attack reach, so don't be afraid to create some distance to force them to focus a Voidling instead.
Ganks for the Memories
After the first clear, the goal is to powerfarm to level 6 and then start looking for ganks.
- Call of the Void disables Flash while the target is silenced.
- Q reveals the portion of a bush that it crosses.
- The range is much longer than it looks.
- Voidlings stop chasing targets they cannot see.
- Malefic Visions directs the Voidlings toward the champion.
A fully empowered Voidling deals more damage than two fresh ones and is much more likely to survive long enough to reach the target. When walking toward something important, summon a Voidling in advance with W and/or Q.
Dragon and towers are the win condition, so be careful about committing Flash or Nether Grasp unless the gank can create one of those. Ideally, the kill lets the team rotate.
Suppressing Your Luck
Ganking with
Nether Grasp is much easier, but pressing R instantly is not always the best sequence.- Do not suppress immediately. Silence first, then suppress. A silence can often be followed by an ult, but not vice versa.
- If an ally adds reliable crowd control during the channel, release R early and prepare the next Q.
- Voidlings prioritize the suppressed target above everything else.
- E is only rank one. Silencing takes priority.
- Malzahar is an excellent counterganker. Anticipate rather than arrive late.
Tower Before Me
Malzahar's Voidlings are absolutely relentless tower-destroying machines, but they can be a little unwieldy.
- Towers always prioritize Voidlings.
- Malzahar's autoattack "eat this!" command does not work on structures.
- Ideally, a siege minion begins tanking before the Voidlings move in or spawn.
- Voidlings can still get distracted by enemy minions, so position them away from the enemy wave.
Do it right, though, and AD Malzahar is the fastest tower taker in the whole game, absolutely no contest.
The Stage is Set
Early
In the early game, the goals are to:
- Complete the Blue-start clear.
- Take the early Dragon with Blue Buff when the level-3 route is available.
- Route later clears around the next useful Dragon or Blue Buff timer.
- Powerfarm to level 6.
Objectives Are the Win Condition: Kills are cool and all, but Malzahar is most likely to win the games where he secures dragons and towers. All thoughts should be focused on how to secure objectives, often through securing a lane kill first.
Avoid Using Malefic Visions on Most Camps: Until later in the game, Malefic Visions costs too much mana and deals too little damage to be worthwhile on most camps. Its only real value is prepping swarm stacks.
Flask Nicely:
Crystalline Flask keeps your mana buttery, but it is best used when you're around quarter-mana so Chalice can boost the regen. It's okay to use it just for mana; don't try to min-max the healing or you might drink it too late.Clear Toward Timers: Work top-to-bottom when finishing near Dragon is useful, and bottom-to-top when Blue Buff is the timer that matters. After the early Dragon, repeated Golems-to-Blue clears naturally line up well with Blue's return.
Gank Wisely: The question to ask is: “If I gank now, will I have resources for the next major objective?” If the answer is no, consider whether the time and summoner spells are worth saving for later.
Use Call of the Void to Scout: Many unscrupulous fellows will try to kill Malzahar in the jungle. Since Call of the Void provides strong vision from long range, use it regularly to check bushes, corners, and objective approaches before walking into them.
Cast Q and W While in the Fountain: While your mana regenerates, it is the perfect chance to cast Q and W to prepare the swarm. There is no reason to leave base without at least two stacks ready.
Mid
As the laning phase ends, the raw damage in the build shines:
- Disrupt at critical moments.
- Tear objectives to shreds.
- Look for easy kills.
Look for Good Swarm Surrounds: Keep track of your Voidlings: if you can get two of them around an enemy before using
Nether Grasp, they will be torn to shreds.Baron Starts Early: Around 20 minutes,
Bloodthirster plus any meaningful AD component and Blue Buff is often enough damage for Malzahar to duo Baron with a teammate. The exact partner and map state still matter, but Baron becomes a real two-person objective far earlier than most teams expect.Keep Stacks Ready: Before the CDR engine is fully online, try to keep enough passive stacks ready to summon a Voidling at a moment’s notice. At 40% CDR, do not burn useful abilities just to sit on a perfect stack count; having the spells available often matters more.
Preemptively Summon: If you’re walking over to a lane or fight and still a fair distance away, it is often wise to summon a Voidling in advance. The travel time gives it a chance to reach its first empowerment before the engagement begins.
Silence, Then Suppress: It is often preferable to start with a silence instead of ulting immediately. A silence can always be followed by an ult, but not the other way around.
Let Voidlings Finish Off Monsters: Where possible, let the Voidlings clean up the camp while Malzahar keeps moving; there is no need to overkill monsters. This takes practice, especially because the leash range can be deceptively short, and sometimes blue buff survives with one health. Not that I’d know...
Late
In the late game, it is more of the same, but better:
- Make wise use of the 3-second Q silence.
- Dance around the outskirts of teamfights.
- Save Flash-R for a play that wins an inhibitor, Baron, Dragon, or Nexus. Avoid spending it just to add one more kill.
Stay on the Outskirts: Malzahar is not a frontliner. Cast Q through critical targets, as some champions are as good as dead while silenced for so long.
Do Not Be Afraid to Let Go of the Ult: It is on a relatively short cooldown, and survival is more important than the remaining damage. Let go early when danger arrives or when a teammate has already chained reliable hard crowd control.
Check Regularly for QSS: If the same carry has been suppressed a few times, inspect the inventory. It feels awful to ult someone only to suddenly be punched in the face anyway. QSS does not solve the silence nearly as cleanly, so Call of the Void still has work to do.
Thanks!
Header Image URL
https://i.imgur.com/SvaPSSg.png
Title Show Hide
Bold
Italic
Underline
Heading
Color
Embed Video
Link
Image
Bulleted list
Numeric list
List item
Quotes
Code
Preview




Aqua Dragon
Malzahar Guide
Aqua Dragon's AD Malzahar Jungle [Classic, 26.18]


You must be logged in to comment. Please login or register.