This build has been archived by the author. They are no longer supporting nor updating this build and it may have become outdated. As such, voting and commenting have been disabled and it no longer appears in regular search results.
We recommend you take a look at this author's other builds.
This guide has not yet been updated for the current season. Please keep this in mind while reading. You can see the most recently updated guides on the browse guides page
 Thank You!
Your votes and comments encourage our guide authors to continue
creating helpful guides for the League of Legends community.
Choose Champion Build:
-
Tank Build #1
-
Tank Build #2
Recommended Items
Spells:

Exhaust

Flash
Items
Ability Order

Concussive Blows (PASSIVE)
Braum Passive Ability
Introduction
Hello and welcome to my very first guide featuring
I am currently a S2 Player aspiring to continuously improve and rank up. I main top lane and support with some capability in jungle and mid lane, but struggle as an adc. I began playing not too long ago in November 2013. As expected when I finally got to ranked, I had been placed in B4. Through a lot of research and a positive attitude, I have improved immensely as the months went on even shooting straight from B4 to S5 in a matter of a month.
When
- Praise the Mustache for it is our Savior!
- Very Tanky
- Plenty of CC
- Master of Getting Assists (20+ consistant)
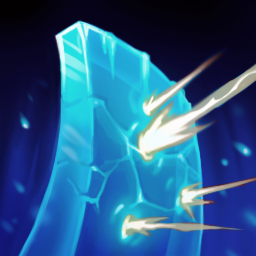
- Amazing Defensive Shield that can even Negate a Projectile Ult
- Good Early Game, Scales Very Well into Late Game
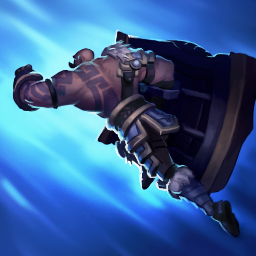
 Stand Behind Me can allow for Wall Jumping if an Ally is Present
- Dragon Shield!
- Very Dependent on ADC and Team Mates to Capitalize on your Plays
- Will take a lot of CC Effects Sometimes putting Him in a Bad Position
- Generally Slow Champion
- Damage is Insignificant unless you Build a lot of Health or Pure Damage
- Messing up on
 Unbreakable's Direction can be Incredibly Costly

Primary Masteries
Secondary Masteries
The leftover 6 points can be used to preference. Recommended would be between
Runes


|
These are the seals I prefer to run with |

|
If you are not as confident during the laning phase or perhaps have a tougher matchup, you can run |

|
With the recent changes to runes, I would not recommend running |

|
As |

|
If you want to go with a more aggressive mark, |

|
|

|
The only acceptable replacement to |

|
|

|
A huge weakness that |

|
These are an acceptable replacement for |
- Easily the strongest spell in the game
- Can be used offensively and defensively
- Wall jump with ease when in danger
 Flash combined with
  Stand Behind Me can cover a great distance for surprise attacks
- Will usually be your go to spell
- When called for, can assist
 Braum with his movement problem
 - Covers a greater distance than
 Flash with the drawback/advantage of potentially staying in opponents range
 - Shorter cooldown than
 Flash
Flash
- At least one player on the team should have this spell
- Can assist your adc when going all in on the opposing adc
- Good to use when chasing or being chased
- Scales better than other spells when dealing with late game champions such as
 Jax and
  Zed
Zed
- Take if lane is a sustain lane such as
 Soraka and
  Sona
Sona - Can potentially help in finishing off an opponent that otherwise got away
- Needed against high sustain champions such as
 Dr. Mundo and Vladamir
- If adc does not have this spell, take it
- Usually meant to help with tough lanes
- Can be used offensively thanks to the addition of speed boost

- Once the first stack is applied, your allies can assist in adding stacks by auto attacking or on hit skills such as
 Ezreal's
  Mystic Shot.
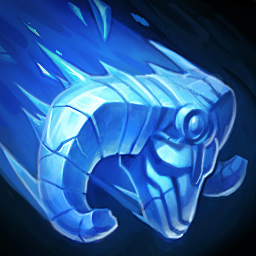
 - The stun will last for 1.25 secs up to lvl 6, 1.5 secs up to lvl 11, and 1.75 secs beyond that.
- Be sure to do an auto attack or two once an enemy is stunned as this will be one of the few times you can do decent damage thanks to the additional magic damage.
- Multiple enemies can have a stack of
 Concussive Blows on them at the same time. This means you should probably auto attack as many enemies in a team fight as possible.

- Minions can be hit by this skill, so it is important to have a clear shot at your desired target.
- Damage scales further with Braum's maximum health.
- Can be used after
 Stand Behind Me is cast on a minion or ally for a surprise attack.
 - If possible, use
 Winter's Bite after
  Concussive Blows stun has been applied for even more damage on a single target.

- Using this skill will instantly place you in between your ally and nearest enemy. If desired you can use
 Unbreakable before jumping to your ally which could save them from that nasty
  Jinx ult.
 - If the opportunity is present, this skill can be used to jump over walls when an ally is present to do so. Communication could be your best friend in dire situations.
- The skill can be used without jumping to an ally nor minion. It will just apply the armor and mr bonus to yourself.
- Feel free to use
 Stand Behind Me on the ally tanking dragon or baron.

- Whenever possible, try to use while
 Stand Behind Me is active to take absolute minimal damage.
 - You can still cast skills and spells while
 Unbreakable is active.
 - The shield will not block skills that are placed area of effect such as
 Cho'Gath's
  Rupture and
  Zyra's
  Stranglethorns.
 - Since
 Unbreakable can completely block the damage of the first projectile to hit it. It would be wise to plan when to use it while against champion ults such as
  Jinx's
  Super Mega Death Rocket! and
  Ezreal's
  Trueshot Barrage.
 - SUPER DUPER IMPORTANT!!! Do not use this to block turret shots. It does not work, no matter how godly your mustache may be!

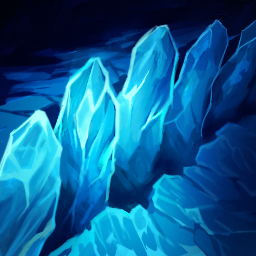
- First enemy knocked up remains in the air longer than those that follow. Timing could be important in key situations.
- Enemies will still remain slowed for a short period of time after leaving the area affected.
- If possible, encourage your team mates to force a team fight in the jungle as his ult works well in enclosed spaces.
- Like
 Winter's Bite, using
  Glacial Fissure after
  Stand Behind Me could be quite surprising to the enemies.
You will lastly cap
Build #1:

|
|
| face of the mountain |
Another big difference for |

|
With feedback and testing, this item is easily a must have with |

|
|
Build #2:

|
These are an option if your team is well ahead in the game. I would probably still recommend going with either |

|
If your team manages to stay far ahead in the game, you could take this item. It has the second highest amount of health on any item in the game and will give you a permanent slow to keep applying stacks of |
 Build Order Reference Sheet

|
This will usually be your go to last item. It has health and armor which are always great to have. The active applies yet another form of cc for |

|
If the opposing team is mostly magic damage or has a dangerous mage such as |

|
|

|
After quite a bit of testing, I found myself drawn more to |

|
|

|
Best used against a team with a high amount of cc or a spell combo that can 100 to 0 you (as unlikely as that is). Same as |

|
When the opposing team has a lot of cc or a strong cc that can ignore your shield (i.e. |
| zeke's herald |
Only take this item if your team is heavy on AD champions. Would most likely replace |

|
Only recommended if against 3 or more auto attacking AD champions. Does have a lot of armor as well which is never a bad thing. (At the moment I have no idea if this works with |

|
These will be your go to boots in majority of games. One huge weakness |

|
This will generally be your go to boots for heavy cc/magic teams. Since |

|
When ahead in the game, this enchantment will likely be your best choice in which you can set up a fight and your team can quickly follow up. |

|
If you decided to go without
|

|
If you find yourself having trouble keeping in range of your opponents, this is a great option to take over |

|
If anything within your base could be put at risk to fall, this is your go to enchantment. Majority of games you will likely be taking this over the others. |
Best Synergy
 Ezreal
 Lucian
Great Synergy
 Graves
 Jinx
Jinx Miss Fortune (Primarily theory at the moment, subject to change)
 Sivir
Sivir Twitch
 Varus
Varus Vayne
VayneGood Synergy
 Ashe
Ashe Caitlyn
 Corki (Primarily theory at the moment, subject to change)
 kog'maw
 tristana (Primarily theory at the moment, subject to change)
Lacking Synergy
 Draven
 Quinn
Quinn
- White Dots: Early warding locations
- Red Dots: Mid/Late warding locations
- Red arrows: Walls that can be jumped with
 Flash or
  Stand Behind Me


 56,034
 14
14


You must be logged in to comment. Please login or register.