


This build has been archived by the author. They are no longer supporting nor updating this build and it may have become outdated. As such, voting and commenting have been disabled and it no longer appears in regular search results.
We recommend you take a look at this author's other builds.
 [14.24] The truth lies in darkness|In Depth Zed Guide
 Build Guide By GreenReapers
88
3
Build Guide By GreenReapers
88
3
 269,452
Views
269,452
Views
 14
Comments
269,452
Views
14
Comments
Zed Build Guide By GreenReapers
14
Comments
269,452
Views
14
Comments
Zed Build Guide By GreenReapers
 Thank You!
Your votes and comments encourage our guide authors to continue
creating helpful guides for the League of Legends community.
Recommended Items


Runes: Lane pressure


+9 Adaptive (5.4 AD or 9 AP)
+9 Adaptive (5.4 AD or 9 AP)
+10-180 Bonus Health


Spells:

Flash

Teleport


Items

Ability Order R-Q-E-W

Contempt for the Weak (PASSIVE)
Zed Passive Ability


Threats & Synergies
 Threats
 Synergies
 Show All
Extreme Threats
Ideal Synergies
Show All
Extreme Threats
Ideal Synergies


Akali
Any page viable, d shield or resolve second can help if you struggle to survive early.
Akali can pressure you very hard early game. Stay safe and poke, get minions/xp where possible.
Your short trades past lvl4 are very favorable for you, try to dodge her e as much as possible.
Her shroud makes it hard for you to hit your q's, as she goes invisible. If you're bad at predicting her movement or she's just too good get a sweeper.
Her high mobility makes landing your combo very difficult.
You can use backwards combos if she marks you with your E to avoid a long trade.
If you throw your combo in line with the dash direction of her R you can chunk her very easily.


Elise
Any AP jungler is good with Zed. High Damage AP jungler are even better, since itemizing against their burst/constant damage makes the enemies more vulnerable to you and the other way around.
(AP Junglers with CC are heavenly, due to the ease of setting up your combos and their burst additionally)


 Synergies
Elise
Any AP jungler is good with Zed. High Damage AP jungler are even better, since itemizing against their burst/constant damage makes the enemies more vulnerable to you and the other way around. (AP Junglers with CC are heavenly, due to the ease of setting up your combos and their burst additionally)


I started writing this guide because I wanted to help others learn a bit about
I will primarily be focusing on Assassin Zed, since thats what I have the most experience with, but will also give information on bruiser Zed, albeit not quite as detailed.
I'll galdly respond to comments and questions, if you have any.
HF and shoot me a message if you need something :D
Against monsters, Contempt for the Weak deals 200% damage, capped at 300.
Contempt for the Weak cannot occur on the same Champion more than once every 10 seconds.
- Makes lasthitting very easy
- Deals damage based on maximum HP
-> helps against high hp targets - Your best damage for objectives, as no CD against monsters
- You can use the cooldown mark to differentiate between clones, e.g.
 Shaco's Hallucinate or
LeBlanc's Mirror Image, provided you get off the empowered AA before they clone themselves.
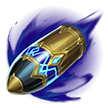
Range: 925
Zed and his Shadows throw their shurikens, each dealing 80 / 120 / 160 / 200 / 240 (+1.0 per bonus attack damage) physical damage to the first enemy they pass through, and 60% damage equal to 48 / 72 / 96 / 120 / 144 (+0.6 per bonus attack damage) physical damage to each additional enemy.
- Main farming ability
- Main damage and poke
- Try to take targets between your main target and your position into account to avoid the damage reduction
- Razor Shuriken redirects itself if you use Flash during the cast animation to cast from your new position. Click here for a demonstration.
- Razor Shuriken into Flash is always faster than casting it the other way around, as you start the cast animation earlier.
- You can use Razor Shuriken to check bushes! It's a different sound depending on wether you hit something or you don't.
Range: 650
Passive: Zed gains 30 / 35 / 40 / 45 / 50 energy whenever he and his shadows strike an enemy with the same ability. Energy can only be gained once per cast ability.
Active: Zed's shadow dashes forward, remaining in place for a few seconds. Reactivating Living Shadow will cause Zed to switch positions with this shadow.
- Needed for trades and mobility
- If this ability is on CD you are very vulnerable
- Energy management depends on this ability
- Placing your W before going for a short AAEQ trade allows you to get to safety quickly
- You can cancel Camille's R Hextech Ultimatum by swapping out of her ultimate zones range while she is still in the air. [Demonstration TBA]
Range: 315
Zed and his Shadows slash, dealing 70 / 90 / 110 / 130 / 150 (+0.65 per bonus attack damage) physical damage to nearby enemies.
Each enemy champion hit by Zed's slash reduces Living Shadow's cooldown by 3 seconds.
Enemies hit by a Shadow's slash are
- Mostly used to help lasthit, slow for Q Razor Shuriken's and resetting W Living Shadow's CD
- Doesn't deal much damage unless fed
- Can be used as an alternative to Q when running down an enemy, as it's almost undodgable in melee.
- [TBA]
Range: 625
Zed becomes untargetable and dashes to an enemy champion, marking them. After 3 seconds, the mark triggers, dealing 65% attack damage and repeating 25 / 40 / 55% as physical damage of all damage dealt to the target by Zed while the mark was active.
The dash leaves a Shadow behind for 9 seconds. Zed can recast this ability to switch positions with this Shadow.
- Casting Ignite during your cast Animation will reduce any healing the enemy get's for 5 seconds, which includes the 3 seconds on your Death Mark is active, while also counting towards the Ult's damage calculation.
- You can cancel Camille's R Hextech Ultimatum by swapping out of her ultimate zones range while she is still in the air. [Demonstration TBA]
Overall
I recommend
Keep in mind that it can be used to negate debuffs like
NOTE that in lower elo you might have more success with
Ultimately it's a preference thing, wether you play with our without
As already discussed
When deciding wether to use Flash or not, you'll want to look out for CC in the enemies team composition.
When the enemy doesn't have much of it you can swap out
Alternatively you can play
I reiterate: this is preference.
See this chapter as a framework. Runes can be used in a variety of ways and experimenting can be quite a lot of fun.
Just because I didn't list a particular combination at the beginning of the guide, doesn't mean its bad! If you think you can make it work or the situation calls for it, try it! Though I won't take responsibility if it doesn't work out xD.
In the following I will highlight the strengths and weaknesses of the runes and when I find it best to use them. Furthermore I have presets which I think are the best at the very top (the cheatsheet) of the guide.
+ Good against squishies and for single target elimination
+ Makes snowballing easier
- Bad against tankier and/or multiple opponents
- Falls off harder if you don't snowball
+ Decent against squishies aswell as tanks
+ Good lategame value with true damage
- Less early agency
- If it get's procc'd you loose your keystone
+ Incredible staying power in teamfights against tanks and squishies
+ Enables bruiser Zed
- Bad against tankier and/or multiple opponents
First, decide for your matchup, which rune you'd want against that champion in particular.
After that look at the team.
When fighting against more tanky/fighter opponents
When fighting against more squishy opponents
After that you can think about the individual strengths of the runes and choose based on that.
There is a exception to this rule! Running
1. Your team has enough anti tank damage, so you won't need to worry.
2. The enemy has a squishy, high priority target that you can take out.
3. Your lane permits taking
R
Recently I've warmed up more to
Some matchups like
However only take
Additionally it enables bruiser
Some
I will keep myself short on the
 precision detailsSorcery detailsResolve detailsShard details
This is best bought first against squishy teams, the less dashs they have, the more of an impact your slow will make, as they can't use something like
This Item is especially good against champions with high burst potential, such as other assassins, melee champions and tankier targets, however it's currently the lowest Damage option. I only advise going eclipse into non tanky targets if you feel you really need the survivability.
Also this is your goto when playing bruiser Zed.
Assassin SituationalsAssassin ItemizationBruiser SituationalsBruiser ItemizationThe best description I've seen yet was in a comment section, unfortunately I don't remember by who:
"Zed is a control mage, and his brand of control is murder."
- some random commenter
You want to play methodically, picking at the enemy and waiting for your opportunity to strike. That's true for laning aswell as teamfighting. When starting out, I encourage you to go for riskier plays. It helps you find your limits and let's you get a sense of what you can and can't do!
When you think you've got a good grasp on that, don't worry about your team pinging you and saying "just go in!", when you feel it won't be worth it. That's a misconception that many players have. Trust your instincts, as following calls like that usually gets you killed! I'm also guilty for falling for this rather often, haha.
Level 1-2
The first 2 levels are very similar in most matchups.
When playing against ranged characters, you have to respect their early pressure, as they can wear you down with their autoattacks easily.
Let yourself get pushed, while trying to get as many cs for as little health lost as possible. You can do this by lasthitting with your Q
"But GreenReapers, you just said to respect their autoattacks!?"
Yes, and that's why you walk up, when they need to choose between hitting you and last hitting a minion. So keep their aswell as your minions health in check.
If one of them walks up far enough out of their champions range you can of course take it.
When playing against melees you can look for short trades, but most melee champs will be stronger than you if you overextend. Respect their trading power but don't be afraid to trade and lasthit, unless they completely outmatch you (e.g. an
Playing around your Keystones for early trades is essential, as they can make or brake a trade, aswell as influence your trading behaiviour. You're much more likely to win a extended trade using
If you get pushed under tower at level 2 or you're actively fighting a melee champion taking E
Otherwise, when you can take W
Level 3-5
At level 3 you can actually start playing the game a bit! You've got your main combo WEQ unlocked. WEQ is great as it hits exactly 3 times, granting you the ability to proc
Generally you can start playing more aggressively around these levels, chunking the enemies with your combos but note, that your W
Level 6+
With your lvl 6 you have finally unlocked your strongest ability, R
This gives you a huge powerspike. You should be looking to kill even more proactively now, as you're starting to reliably be able to punish overextends with a kill and a lvl 6 advantage. Commiting right when you get your level up while your enemy is still lvl 5 can oftentimes lead to an easy kill.
The additional pressure also makes it easier for you to commit to all ins, jungle skirmishes or roams. In some scenarios it's also worth it to commit your R
Trading Patterns and general tipsIf you're ahead you want to actively pressure sidelanes, as the enemy either has to send a relatively strong tank or more than one person to rival you on the sidelane.
Note that picking
If you're behind, you want to catch sidewaves when it's safe and try not to overextend, as you'll get picked off rather easily.
In your downtime, when you can't push a sidelane or you notice a teamfight is starting to brew on the map you want to do something called shadowing.
This simply means that you try to stay out of the enemies vision while being close enough to your team to look for assassinations or help out in teamfights.
Even if you don't get anything while shadowing your team, if you've done it in your downtime you have used your time effectively. Look to get back to a sidelane if there isn't a fight thats about to happen, when you can either farm again or if you have to catch a wave thats about to crash into your tower. The latter scenario is a more urgent case than the former, as you'll lose way more expierience and gold.
When objectives are up, you have to decide, wether you should put pressure on a sidelane to force someone to contest you or help your team at the objective fight. I generally recommend helping out your team, but if you don't think you can win the fight anyways, pushing a sidelane will probably get your team more value.
I recommend taking the
After a certain point your jungler, unless they're a farming jungler, probably won't be able to clear all their camps anyways.
Before doing something, taking a look at the map and your team can help you make the decision, wether you should group up or push a sidelane.
Catching side waves is s till important, so if you get the opportunity, you should still look to farm them.
As such you generally don't want to be the one engaging a fight. If you're fed enough to do so, great, get 'em, but if you aren't you don't want to do that.
If your tank gets a good engage and you can find an opportunity to kill the carry, that's good.
If people that should peel for the carry are kept busy elsewhere that's also a big plus.
And if you can find a carry who's currently being
Another scenario that happens quite often is you, throwing your combo into a group of enemies to get damage off, but not being ready to commit. Let your team fight for a few seconds, while you assess the situation from a few feet away and wait for the moment you can safely shut down a key player of their team.
When playing
Wave Control
Wave control is the process of manipulating the minion wave in such a way, that it gets you the most amount of expierience and gold, while giving as little to your opponent.
There are 3 basic concepts:
slow push, fast push and freeze/hold
When slow pushing you aim to push your minion wave slowly towards the enemy tower. You achieve this by stacking a waves, meaning you last hit and kill a minion once in a while, as you're pressuring your opponent away from the wave. This leads to your minions slowly gaining a numbers advantage over those of your opponent.
Slow pushing is generally used to generate lane priority. This means your opponent is now forced to stay under his tower and last hit the minions, otherwise he loses a ton of expierience and gold, while you are free to do something other than concentrate on your lane.
This might be roaming, warding, backing or being the first to move for jungle skirmishes. It can also be used to pressure a tower more easily or setting up a dive.
However, while in the process of slow pushing, you'll be longer farther away from your turret than when using other methods of pushing, resulting in you being vulnerable to ganks. You can use this fact to your advantage by baiting the gank when you're confident you can escape or 2v1.
You can also force an opponent to slow push towards you around you can force your opponents wave to slow push towards you, by pushing your wave under their turret, making it so your wave next wave ends up near their tower, which in turn causes their wave to push. The same effect can be achieved by pushing slower than your opponent when you are both csing.
This in turn forces them to step farther away from their tower, making them vulnerable to ganks aswell as extended engages by you!
When fast pushing, which also called shoving, you want your wave to get as fast as possible under the turret of your enemy, to deny them minions when they are not there or force them to make the choice between sacrificing minions to back and staying in lane.
This is can be used as an alternative to a slow push, when you have had no time to set one up, but still have to move for a fight, as a fast push also creates lane priority, although not one as strong as a slow push.
Another use case is as already said, forcing an opponent to stay in lane. This can be useful for stopping them from spending their gold or when you want to constantly put pressure on them, preventing them from moving themselves.
Holding and freezing a wave are 2 very similar, yet different concepts.
Holding a wave usually takes place right before a freeze.
When you hold a wave you sacrifice your own health by walking into a minion wave, preferably a small one of 3, to prevent them from crashing into your own turret. This leads to a slow push - like scenario on the opponents side, as they'll have to either step forward to pressure you under your turret, preventing the hold, or accept it and try to push the next wave under your tower, if they aren't in a position to pressure you enough. Alternatively they can also back, but will have to sacrifice a lot of minions for that.
Freezing starts if you manage to hold preferably 3 minions in front of your tower, while not letting your opponent push you, nor the minions under your turret. When the next wave comes, by simply last hitting and in the best scenario pressuring your opponent away from the wave, you can hold it outside your tower.
This has multiple effects:
- If your enemy wishes to push the wave, they will have to walk far away from their tower, putting them at risk of being all inned by you or ganked by your jungler.
- By keeping them away from the wave, if you have enough pressure to do so, you deny them exp and gold, putting them behind.
- If you're good at this you can keep it up indefinetly, until your enemy finally manages to pressure you away, or the enemy jungler helps them push the wave.
At 3, if no other possibility 4, minions you should be able to hold the freeze. In the latter case look to last hit a bit more proactively until the numbers are more optimal.
Roaming
Roaming is at it's core the act of walking around the map to put pressure elsewhere on the enemy team. Sounds rather simple, right?
However, when roaming, be that to gank botlane, help your jungler invade or moving for a skirmish, you will always want to look at your wave state.
This is called roam timing. When you have lane priority you have to possibility to roam without losing too many minions, while getting gold and exp elsewhere and helping your team.
When doing this, you always want to try to get at least a bit more value than your lane opponent. If you don't, but your team gets good value, that's also fine, but be a bit more careful when fighting, considering the gold balance between you and your enemy laner.
Not getting any value from a roam is possibly the worst scenario, especially if you've sacrificed one or two waves to do so.
Yes, if you spot a very good roam, it can be worth it to miss out on waves for it! But it becomes very risky. If it doesn't work out you give your opponent a huge lead!
Warding
Warding is a very useful skill to have. It allows you and your team to gather information on the enemies positions to keep you safe.
Generally speaking this is how wards are used:
- Wards inside your own jungle or at the river border of your jungle are considered defensive wards. They protect your jungler from getting counterjungled and spot the enemy when they try to wrap around through your jungle to gank a lane. Additionally they provide some vision along the river, while being rather unlikely to be cleared themselves, however they ususally take at least some time to get set up.
- Wards at your lane brushes in comparison don't take much time to set up, but only protect you from being ganked. There is a exception to this, when going for a ward infront of the enemy turret. This prevents your opponent from leaving lane without you having info on which direction he went. Great when you're freezing the wave or the enemy likes to roam a lot.
- Wards inside the enemy jungle or at the river border to their jungle are considered agressive wards. These give you a lot of information on the enemies jungler and rotations, but due to the positioning in enemy territory they are more likely to be cleared when possible.
Ward timing is another rather important aspect to your lane. The enemy jungler will have full cleared around 2:30, so placing a ward around that time or having one ready is considered very good.
After that you should aim to place a stealth ward every 90 seconds on the side you think the enemy jungler is most likely to be at that time. Be that because of jungle tracking, having spotted them or simply intuition. Consider, that when following this strategy you always try to keep a ward in reserve, so you can use it as needed, while using your other ward for active vision.
If you feel you need more wards control wards can be a good option, as you always look to place control wards around the map to deny vision.
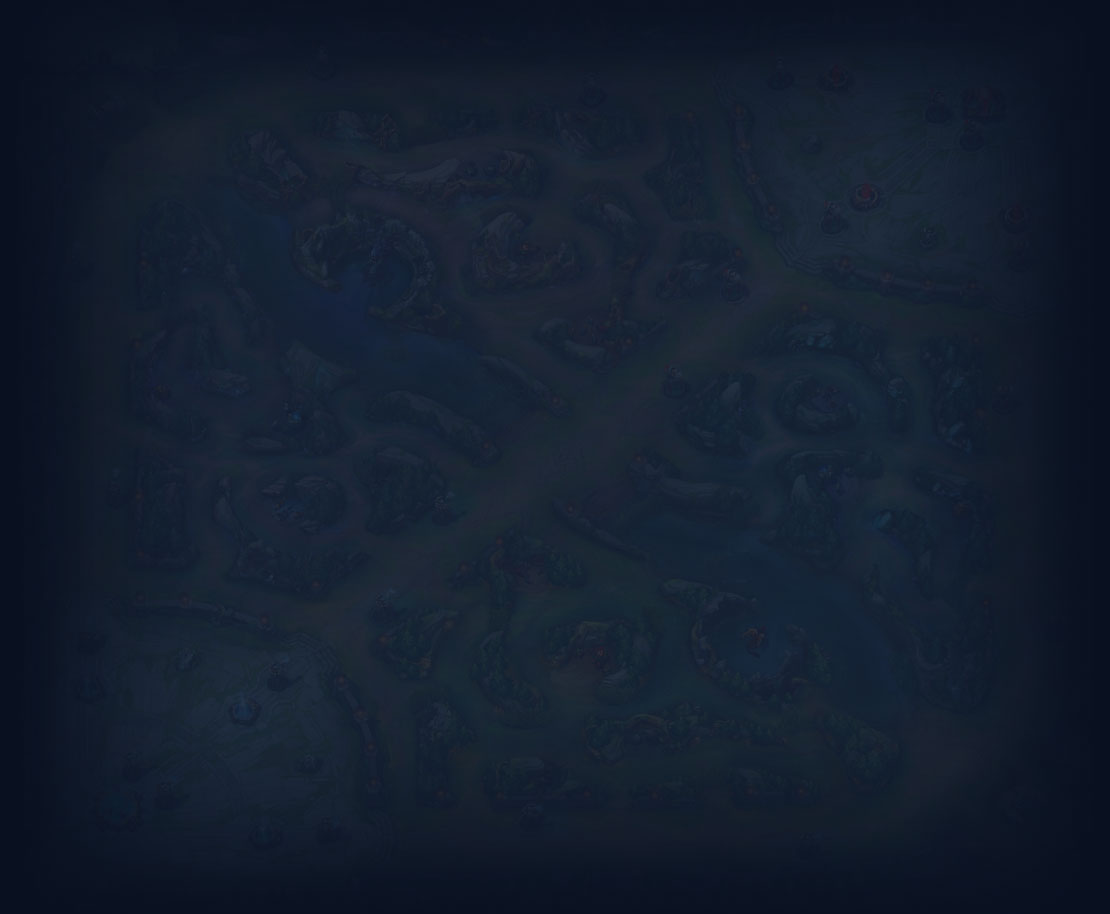
The ward map below shows you some good warding spots. The map assumes you to be playing from blue side. For the notes to make sense on red side, you have to mentally flip it.
Any of the wards are interchangable with a control ward, however keep in mind that if you decide to place a control ward in the open you should be able to contest it actively. Otherwise it will be cleared rather fast and you gifted your enemy 30 gold.

This section will go over most of the combos you will use rather often, and some more situational ones. Of course there are more combos and variations than I'm listing here, but after a while of playing with some combos in mind, you will naturally get better at considering different ability usages. Click on the combos to see a video of them!
This video by Mythology zed covers WAY more combos, if you want to check that out!
If you have questions about any combos in particular or think I should add them, please message me!
On the topic of reset and kite combos
If there is demand or I've got more time on my hands for it I will add a chapter concerning these types of combos. Please let me know if you are interested!
I have not included reset combos originally, as they are fairly rare if you aren't building a high ability haste build, however with the recent buffs I think it might make sense to add them.
Kite combos on the other hand do find frequent usage. When I started breaking them down for a subchapter I noticed, they are mostly just Ult combos with delayed swap usage, hence I didn't add them either, but will try to explain shadow positioning in another update.
Your basic combo. Used for trades and to dish out some poke damage to enemies. The E slow makes it easier to hit your Qs.
WQE
Slight variation on WEQ. Trades the E slow for faster damage output. Harder to hit but great when the enemy is CC'd anyways.
WEQW-AA
Standard engage combo. Used to get onto your enemy or trade heavily.
W-AA-EWQ(behind)
Used against melee fighers who you don't want to fight outright or are very dangerous to you.
Used against immobile targets. Applies the slow first to prevent the enemy from getting away and sets up a instant triple Q. Good when you know flash is down or you can burst easily.
You can also swap to W instantly to dodge an ability aimed at you, cutting the last part from the combo, making it safer. The variation would look like this: WERW-AA-QRE
If you need the slow from
RWEQW-AA-R
Used to follow the enemy with W shadow. Oftentimes the combo burst is delayed to catch the enemy off guard.
Dummy that gets ulted is enemy position 1 and enemy position 2 is the other dummy.
WRE-AA-QW
If you know you have enough damage without your W to get a kill against high CC champions, placing your W in a safe spot before going in and swapping to it to avoid cc will allow you to get out without getting yourself killed. The W swap can also be performed before your burst, but landing at least an auto before doing so is preffered due to damage and a potential slow from
WEQ-AA-RE-AA-Q
You'll usually want to use this combo when you are playing against a squishy with a movement ability with high range, like
As always, first attacked dummy is position 1 and second is position 2, making it so the target travels from 1 to 2 during your ult animation.
You most basic flash combo. Mostly used to finish off an enemy when you aren't quite in range.
WQWFE-AA
Perfect for catching the enemy offguard. Extends your normal range even further through the use of flash.
WEQWFE-AA
Can be used at various angles to surprise an opponent if they overextend. Especially useful against short range dash users, who think they are now safely outside your range, just to get followed by.
The upper dummy is where the enemy originally stood and the lower dummy is where they moved to with a dash for example, in this scenario.
Quite often you want to wait long enough to get E up again before you swap. Good if you need just that tiny bit of extra damage. Final combo will look like: WEQWFE-AA.
RWFEQW-AA-R
This is actually my favourite combo. It doesn't see a lot of use, but it's my favourite, so it's here.
It directly counters champions like
I just wanted to quickly say thank you for checking out my guide! :D
Wether you read it all or just parts of it, as long as you've learned something I'm happy. Till' next time!
Special Thanks to
For helping me either directly or indirectly with BBcode
For their insightful guide reviews
Guide Changelog
You must be logged in to comment. Please login or register.