Avoid her (Q) into her (E) spam and turn your back to her (R). If you are not familiar with her animations I would advise to check some Youtube videos related to it. Against her I recommend you to work on kiting and baiting out her poisons while Csing and NEVER trying to trade. She is relatively fast for a champion that can't wear boots. The second you get struck by (Q) or (W) she will follow up with her (E) that can be spammed over and over, which really hurts! They tend to run Conqueror which heals her for a lot. You can't really dodge her (W), but you can build a bit more defensively while building into damage to make up for her damage. The good thing is, she isn't played much anymore so it's rare to see. If you really want to increase your ability to CS and poke her early game without feeding into her combos I would highly recommend Rapid Fire Cannon rush.
Aatrox
Never engage in a fight with an Aatrox when he has his first (Q) up, as he can simply adjust his angle by using his (E) > (Q) combo. If he uses (Q) on minions, you can move closer as his second (Q) has a shorter range and it is much harder for him control and adjust allowing for us to juke it out. His (W) can be blocked by minions and if you do happen to get hit run to the left or the right side. Attempting to run from the skill in the linear path is bad, even if you use Flash it can still pull you back. Running to the side of the AoE is the most effective way, and be aware you take more damage from the highlighted zones.
Skarner
Skarner's adjustments have made him considerably more difficult to deal with, as he is now built to be a heavy engage and CC champion, continually slowing you, smashing you into terrain, and then coming out of terrain to do the same thing again and over again, not to mention building full on tank and still destroying you.
Ryze
Ryze will mostly always run Phase Rush into you. You do NOT win this lane in any logical way. He will have full control over the waves so long as he knows how to utilize his combos correctly. So just keep yourself back, in bushes or to the side of your minions that are not being comboed unless he is not playing well or lining up the correct AoE spread combo. I suggest to take resolve as your secondary runes with Bone Plating and Overgrowth, and max rank your (Q) for poking only. It's often a better option to dodge this match-up entirely instead of having to go into the hard-counter, but this is personal preference. It's a farming and survival lane mostly. The good thing is, he isn't played much anymore so it's rare to see. If you really want to increase your ability to CS and poke him early game without feeding into him combos I would highly recommend Rapid Fire Cannon rush.
Viktor
Viktor is a really difficult lane to trade with as his range and hit box is relatively large and hard to avoid, since he can control which direction his (E) comes from. Avoid standing inside his (W) as it will slow and stun you afterward if you remain inside it, allowing him to activate his (R). When his (R) is activated do not try to fight with him, simply run away as it will slowly catch up to you, and is pretty easy to avoid simply by pressing your (W) and getting some distance. Magic resistance is going to help you out if you can't manage to avoid the damage, as you can safely get in a bit closer to throw out a (Q) to trade with him, however, avoiding the damage is the priority. Basically this is Teemo's hardest Mage match-up outside of Ryze and Cassiopeia with recent changes.
Yasuo
You can not blind his (Q). Purchasing Plated Steelcaps, however, will decrease how much damage this ability does to you. Never run away through your own minions, run through the river/jungle. You will not escape him due to his minion/champion (E) dash. You have a better chance running into his ally with no CC, than you do letting him catch up, using his second (Q) knock up into his (R). You have to predict his tornado and learn to side step. That's all. He lines it up with minions. You want to keep poking and keep tabs on his passive / wind wall which negate all damage and projectiles. If he places a wall, move in between it to hit him from the side as he hides inside it.
Yone
Yone isn't really much of a threat. All of his abilities are very pronounced and either a straight line or arcing slash which are all relatively easy to side step. If he enters spirit form around you and not under a tower, toss a shroom where he entered. If he recalls immediately he will be caught out with the shroom, an if he extends the fight he will also lose the fight to our shroom finishing him. We win all trades with him, so long as you're looking out for his (Q) knock-up combo'ed with his spirit form. He is really weak early, haven't made it to late to see his scaling, it's probably like Yasuo's late game just without the windwall.
Tahm Kench
Finally the Kench has been Benched slightly making him more of a support champion again more than a dominating Top laner. He can still easily run you down or surprise you with his (W) from bushes or while you're near his tower to get behind you and potentially knock you up. Once you get slowed by Tahm there really isn't any escape especially later on when he has acquired Frostfire Gauntlet. He should be easier to deal with, but still it would serve you well to play a more mobile approach with a max E and W, and purchasing Swifties to avoid being run down. He is tanky, has a massive shield and slows / sustain.
Irelia
Maxing (Q) is your best choice & Oblivion orb is mandatory once she acquires Vampiric / BOTRK you lose without it. Late game (Q) this becomes less effective simply due to her gap close chase and lock downs which tends to be impossible to avoid. It's a pain and you can sort of get around it by building Plated steelcaps. Try your best to close out the game before late game arrives. She is a monster later in the game. Early game it's all about avoiding her stun and staying away from low HP minions so she can not dash through them to you with a stun. If you get hit by her (R) don't touch the blades. Flash / sidestep her ultimate. If you get stunned she will win every trade so it's pretty much dodge or die.
Kennen
Playing aggressive against him early and shoving him under his tower tends to be the better option, as he suffers from the same effect we have when pushed in. Side step his abilities and try not to get too close when you are hit, as he can stun you. If you are under your tower, and he decides to all in you with his (R) it would be wise to have a stopwatch in the early game, if you wanna be extra cautious. When he uses Zhonya's Hourglass and & tries to flash away shroom his feet immediately as he enters stasis as he nor any other champion can flash out of setting it off as they changed how it interacts.
Akali
Never trade with Akali while her shroud is up! Your poison will reveal her location, so keep an eye on where her silhouette appears so you can avoid her gap close to trade with her. Unlike when she was first released, she is no longer unstoppable. You will have enough time to throw out a (Q) or (E) before she hides again within her shroud. You can use minions to body block her (E) shuriken. She can also use it to dash over walls and gain distance from you. Do not let her land this or you will LOSE the trade immediately. You must try your best to side step or bait her (E) before trading while her shroud is down! Her sustain is worse than it was in Season 10.
Jayce
Jayce has been one of the hardest counters, for quite a long time. He has range, gap close, CC, mobility and better wave control and better burst. Avoid getting into an extended fight with Jayce, keep your distance and use minions to body block his (E) > (Q) range combo. Never let him get behind you, he will CC into lane cutting off your only route for escape. Maxing your (Q) can help with poking him from a distance as you want to not get too close. Also be aware that good Jayce players will (Q) > (E) in fast succession making it really hard to dodge his combo. He tends to fall off in comparison to our burst unless he purchases Maw of Malmortious.
Ornn
Ornn is a champion that is CC heavy and also relatively tanky. He still deals a ton of damage, however, I would suggest a Ghost and PTA play-style against him, mostly due to his constant slows, he needs to be kited. You can run him down if he misses his stun. Avoid terrain and his pillar or you'll be CC'd and clapped hard. He can miss his ultimate, but it's up to you to juke him out, by pathing a specific way and then immediately turning the opposite way when he has sent out his (R) back towards you. If you don't dodge this, the CC is going to mess you up if you decide either to chase him or run away. He farms with (Q).
Nasus
Depends on the player but Nasus players either max (E) and deal a ton of Magic Damage with Corruption Potion or build Spirit's Visage and focus entirely on trying to max out as many stacks as they possibly can with (Q) for the late game, while maxing (W) which slows you for 95% (over a duration) at max level. You should be focusing all of your efforts on preventing him every single cannon minion stack by blinding him before they die. You don't counter him outside of laning, he counters you severely late game, however, with the Rune build #2, you can mitigate this slow and slow duration drastically especially if your team managed to acquire a Cloud Drake or more. Letting you escape the massive 5 second slow by reducing it to 2.5 seconds and the slow resist up to 10-30% and with dragon that would go up to a max of 14% so roughly 30-42% Allowing us to utilize more mobility to outrun him!
Sion
I would recommend playing a PTA build into Sion. Avoid his bush cheese level 1, keep yourself on the rivers side and watch as he (Q)'s a minion wave from them. Watch your Red/Blue he may steal through his suicide passive early game before the lane begins. It's really all about kiting his (E) slow and then avoiding his (Q) charge up. Watch out for his (R) ult from base! Which you will hear from across the map. The changes to season 11 have made tanks more easier to deal with, since Adaptive Helm was removed, but I don't currently know if BOTRK will be useful at all since most all of them will simply be stacking AR more so that MR. But if they do rush Spectre's cowl. Sure!
Rengar
Rengar can be a tough TOP laner to go up against if he does go top, he's primarily a JNG. It's quite simple really. Let him win the lane. You can not do anything to him and he is efficiently capable of zoning you out of minion CS range. Just let him push and farm under your tower. Sidestep or use your minions to body block his bolas, or be snared/slowed and chased down. It may be demoralizing but this is what you absolutely need to do to survive this lane, please do not try to be some hero, unless he is mentally incapable of playing the champion correctly by camping bushes, then you lose this HARD. His (R) will reveal you so don't play passive game once he is 6.
Rumble
Avoid Rumbles (E) spam with jukes and minion block and back off a bit when he rushes into your minions with his (Q) flamethrower. Buying some Magic Resistance will go a long way for you. You want to predict where he is going to throw down his ultimate and simply, don't run through it as it will deal a hefty amount of damage to you. You can walk around it if he angled it to not completely block you off, or you can flash it if you wish to avoid it completely. If he is overheated you can play more aggressively as his abilities will be down for a short duration, but he also gains increased basic attack damage, so make sure you don't let him on top of you.
Olaf
Olaf is a strong level 1-2 cheese champion. If he picks up his axe after throwing/hitting you, it will reduce the cooldown by 4.5 seconds. You can NOT (Q) most of his auto damage or slow him in his (R). He will often run Ghost and simply run you down once you get hit by one of his axes, if you are extended against him. He is very tanky and makes utilizing (R) and (Q) relatively useless. I would highly recommend you play a kiting build like PTA, as it requires less from you, and deals with many of the key issues when facing him. Focus on things like movement speed and the ability to kite and not rely so much on your (Q) or (R).
Wukong
Wukong, I would suggest a more defensive rune setup like Grasp of the Undying or at the very least, Electrocute with Resolve. You can usually purchase Oracle Lens or look for the visual queue of your poison to know his position as he is running while in stealth, hold onto your blind until he has come out of stealth or if he immediately starts level 1 / 2 with his gap close engage to mitigate the damage before he ducks back into stealth, otherwise he will wait the full duration before dashing in. Simply start (Q) and max (Q). He can use his (R) twice which hurts a lot, and he is extremely tanky with the new Goredrinker mythic item so get some defensive items early.
Jarvan IV
He can not reveal you with his (E)-(Q) combo you simply get knocked up and take damage. His perk is he ganks hard and often, so try and save your flashes for his (R) which is unavoidable besides with deep vision before the gank happens. He tends to be relatively squishy despite this. You're going to be better off maxing your (Q) to mitigate as much damage as possible if you so happen to get caught out in his ult without flash. If you are laning against him be sure to only poke him once he has used his (Q) because it has such a long range and is pretty much unavoidable. If you do have problem with him a bit of AR can help you out in the long run.
Heimerdinger
You can (Q) his turrets and kill them with 2 (AA), so your objective is to focus on this and avoid using abilities, if you prefer to not max (Q). However, if you do max (Q) you can kill his turrets in one (Q) so long as you have the AP early game, which allows you to press your advantage of shoving him back and not setting up a perma shove into your tower. Keep on your toes scout! You need to be vigilant and keep avoiding all of his skill shots. Once his towers are down for a tiny second you can get in and poke him a little or continue to simply take his turrets down until he's out of mana. A good Heimer will keep you pinned under tower all game.
Neeko
Neeko is an absolute nightmare to deal with even though she has been tuned down and her damage has mellowed out. She is everything Teemo is, but better. If you get rooted you are pretty much dead, as you can't avoid being hit by her (Q) which will pulsate & splash multiple times. She will set off your (R) with her (W) which is annoying as hell. Don't show her where you've been placing shrooms as they do this in bushes, from lane and the corners of the walls setting them off prematurely. If they go full on-hit with PTA you're going to have a horrible time dealing with them as there isn't much you can do since their range is higher than yours. A good neeko will ruin your day.
Karma
She is a pain due to her mobility/shields/root, which only becomes more annoying as the game goes on longer. She can either go full AP or Tank, the second one being annoying as hell. It's very hard to chase her or trade efficiently, you can utilize your minions as a way to prevent damage from her (Q) or (R) > (Q) combo, but don't be overextended. If you end up shoving your lane under her tower, you will simply be ran down. She can easily clear the entire wave and run after you or get a gank and lock you down with her mobility and root. Try your best to match your waves through wave control so you're by your tower for allies to gank and stack some MR.
Yorick
You're going to need to increase your ability to side step and avoid his (W) and (E) if he catches you with either you really have no reliable way of escaping with the new patch his minions deal 200% extra damage when they jump to you. Try to (Q) him while he tries to grave stack a minion to slow down his ghoul spam. PTA is often the better choice in higher ELO to simply match his hard split-push potential. Hurricane will make short work of his ghouls and prevent a large scale split-push. That's it really. If he can't catch you, he can't deal with you. If you're playing any other rune, you can just max (Q) if you wish just be sure to never leave him alone in any lane.
Xin Zhao
Similar to that of Lee Sin, he is a very powerful off-meta laner. If you let him strike you with his (W) he can freely gap towards you and chain his knock-up combo from any range. While also being able to (E) to you if you are within 650 range. Respect his capabilities.
Akshan
Akshans passive allows him to fire two shots at once on a cooldown of 14-4 secs. You'll want to trade with him in between this time frame early game while he is CSing as this will put it on cooldown. His (Q) is exactly the same as Gnar's Boomerang granting him more movement speed when striking you. His (W) passive allows for him to revive ALL dead allies if he kills their killer so taking him out before anyone else is important, it's also like Twitch's (Q) but he can hug a wall / sit in bushes to prolong it indefinitely. His (E) let's him hook-shot a wall and swing around dealing damage to anyone he goes near, but will stop if he hits a target/terrain. His (R) is a lock on like Caitlyn, in which he stores bullets to fire in a blast like Lucian, use minions / towers to block it. Overall he can be a real pain to deal with when he is fed and rotating properly, control wards can help you track him.
Lee Sin
Lee is a really difficult champion to deal with due to his infinite energy bar and the ability to freely rotate his (Q), Ward (W) > (R) combo.
If you get hit by him you're going to lose the trade, don't let him insec you or hit you in general with his (Q).
He is an off-meta champion.
Sylas
This matchup is dependant on the main rune Sylas chooses. Aftershock or Electrocute dictates how you should be fighting him. You need to by all means use your minions to body block his (E) dash into his (E) chain CC, especially if he is running Aftershock. If he misses this ability, make sure to run him down. He is squishy as hell if he misses. If he does hit you, however, there is not much you can do, because you let him land the ability and you're going to be taking a shit ton of damage. Throw your (R) on his (R) to track where he places them or buy Oracle Lens to remove the mushrooms he placed.
Mel
She's not too difficult to deal with. So long as you play around her safely, Teemo does has a higher win rate into her. Poke. Abuse bushes.
Maokai
Maokai can be a real pain to deal with, just keep your distance and do not allow him to get too close, as he will constantly knock you back, gap close, sustain and deal a ton of passive damage through his tanky item build. Void Staff will benefit you greatly in this match-up especially into the late game. You're better off keeping your distance and poking passively with your (Q). You can stop him from sustaining early game with Oblivion Orb and help you get more kill pressure upon him throughout it. Overall it's a pretty hard CC match-up where you don't want to be extended into him all game, due to gank pressure and his lockdown.
Riven
Start (Q) which will help you avoid her level 1 and 2 all in cheese. You have to play in a certain manner to completely negate the all in damage she does. You have to make sure you have your (Q) available for when she dives into you with the knockup followed by the stun. Blind her the very second you get knocked up with a level 2 blind to counter her empowered damage and mitigate as much damage as possible. She will either then try to run you down, or dash and back away. You can out-trade her doing this every time. Grasp of the Undying is the best rune for this match-up period, followed by Electro / Resolve. Grasp falls off late game in comparison.
Vladimir
We sometimes take Doran's Shield into this match-up to match his sustain with grasp of the undying. However, this is based on personal preference. You should be working your way into a more damage oriented build around mid game. The simple way to deal with Vladimir is to watch his energy bar. If he is glowing red, back off and let him use it on a minion, as you don't wanna take the increased damage from his empowered (Q). Once he has used it, you can go in and try to poke him out with your (Q) or possibly your (E) auto attack, it may seem boring, and you may miss CS, but you'll go even or win because of it.
Gangplank
Gangplank is all about his barrels, get comfortable with last hitting them. Gangplank can (W) cleanse our (Q), so try not to rely on it, we can't (Q) his (Q). Barrels are priority due to their 40% Armor Reduction that they ignore especially late game, be aware of him past level 13 on that aspect. Regardless of what some people may say to you, getting in close to pop his first or second barrel before he sets it to chain into his combo is extremely important. If you can't last hit them, you'll always have problems dealing with this match-up. The nerf to his (Q) and Grasp makes him much more easier to deal with now since we out damage his poke. His sustain, is still annoying.
Malphite
Depending on what build the Malphite is going (Usually Comet AP) you would want to be utilizing bushes to avoid poke, and only poking when you see him use his (Q) to CS as this will slow you, sending the comet down and there is no way to react to this without (W) active and Mercury's Treads. Don't overextend past level 6 nor have your lane shoved in. This is just asking for you to be ganked and locked down by his knock-up burst from his (R), so it's much better to try to keep the lanes even or pushed up towards your tower. Hold onto your flash to avoid his (R) at the last sec takes practice, stasis is an alternative.
K'Sante
Early game is rather simple, he plays similar to that of a Yone or Yasuo with their wind flowing around them.
If you see this, he has the ability to potentially knock you up and behind him locking you down especially around his turret.
Into the late game he becomes more difficult to deal with as he is a scaling tank that can also deal tremendous amounts of damage.
Once he is level 6, stay away from terrain, as he can grab you and throw you through them to the other side. If he is killed before the ultimate finishes you will get bugged and be unable to move for 6 seconds, before getting stunned for a second.
Udyr
Udyr is a pretty basic champion to deal with now that he has time to cool down with his rework.
You'll want to utilize your (Q) as a form of stun mitigation while putting a few more points into your (W) for mobility purposes. This will allow a smoother transition from the laning phase into the mid-late game.
Trundle
Trundle is pretty straight forward. You will often come out the victor considering he is a (AA) reliant champion. You can (Q) his empowered (Q) and you can utilize your passive against him, so long as you don't get hit by the direct location of his (E) pillar. His damage is very high. He tends to build pretty heavy as a bruiser as well, so a more tank shredding build and mitigation build is favored more over just pure burst potential. You can't reliably out-run a trundle because of his pillar and (W) movement increase he has, so utilizing passive to wait out his mobility is often the best option. His (R) will drain high HP champions, also granting him a ton of resistances in the process. He's great at running us down. Steel platedcaps are your friend.
Darius
I would highly suggest you to take an PTA or Lethal Tempo. That is, if you feel uncomfortable playing against him with any other runes, like Aery, DH or Electrocute. Boots will help you early game due to his +10 higher movement speed along with a few points in your (W) which complements PTA/Lethal Tempo. Otherwise feel free to start with Doran's Ring. Move towards him if he is going to land his (Q) spin so you can prevent a bleed stack & blind his (W) to prevent his slow. Regardless of what you think, this match-up goes either way. You either kite and avoid his pull or get caught and die. Stridebreaker really sucks to get caught by so respect it and keep your distance.
Sett
Sett is going to be all about CC and getting in close to chain CC you while dealing True Damage. You need to avoid the center of his (W) otherwise you take a lot of true damage depending on how much damage you dealt to him. This will also shield him with the correct combo, however, since Sett release his (W) cooldown got higher making it harder for him to spam it. It would be wise to constantly poke him from a safe range and avoid even remotely getting close to him. Lethal Tempo is the best rune to help with this, effectively crippling his ability to chase or hold you down, with Stridebreaker especially if you have caused him to blow his flash (R) previously.
Pantheon
Use (Q) on him when he goes for his (W) stun on you, this will counter the 3 swift CONQ (AA), avoid bursting him when his shield is up as he will mitigate everything, so hold of until it is over and position yourself to deal max damage. His (Q) goes on a 10-5 second cooldown based on how long the ability was held. Use this knowledge to know when it is safe to go in to poke him. You can side step both the thrust/throw of his (Q), however, it will take some time to get used to it. If you are about to get hit by his (R) under his tower, it's better to run through his jungle from his side of the lane. You won't out run his ultimate in time, so go the other way.
Renekton
Watch and listen for his signature glow. This is his stun! You also should never be trying to go for poke harass, while he is at 75%/max fury. The second you get too close will be when he dashes twice shreding your armor for 4 seconds and stunning afterwards with the empowered (W). You must respect him at full fury. He has a lot of kill potential against you, when you are in this position. You can, however, keep your lane shoved up to your tower where you can try and manage your waves to keep him back so you can stay safe near your tower. Remember he can dash twice if he hits a target with (E). He heals with (Q).
Kled
You need to avoid his hook and keep moving away from him if he does hit it, which is pretty standard advice. (Q) him if you ever get pulled in to prevent the first 3 swift (AA) from his (W) and try to get out of his reach with one of your Shrooms placed down as he dashes towards you. You can not body block the grapple with minions, so be careful of his (Q) and (E) > (Q) cheese. If you hear him (R) you can go into stealth. He won't be able to target you, because his ability is not a target skill but a visible range skill. Excellent if you want to assassinate his ADC when their entire team rushes ahead of you for you to flank.
Jax
If the Jax you are fighting is going (E) into (Q) into (W) you simply hold your blind for when he initially lands on top of you. This will prevent empowered damage once you are stunned. However, if he is using (W) into (Q) into (E) you will most likely have a very bad time since you can not blind that initial combo so (Q) him after he is on top of you and he uses his (E). Don't attack him while he is in his (E). Focus all of your attention to (Q) him in fights if he is the main threat. If he is building full AP you will want some magic resistance to counter his (E) damage scaling. Mercury's Treads would be a solid choice.
Mordekaiser
Mordekaiser can be quite a pain to deal with in most cases. However, he isn't that bad to fight in lane against. The objective is to avoid not getting hit! I know that this is probably wishful thinking, but you have to understand... This champion is a "catch" lock down & run down type of champion. Keep on your toes and dodge all his skill shots and you should be fine as he won't be able to activate his passive. If Mordekaiser uses (R) on you, you have 3 options. Buy QSS, fight him (most likely lose) or take advantage of your passive in a nearby bush, while waiting for his ultimate to end. Teemo loses once he is caught.
Volibear
With the recent Volibear rework, some people have been having problems with him, but overall it's much easier to deal with him. The main problem is his movement speed. You would do well with starting (Q) early to avoid his level 1 (Q) stun cheese. We can blind the stun. He no longer can reveal us in bushes, so it's a good safe haven. A few extra points in your (W) will go a long way with this match-up. It's quite easy to keep your distance, however, be wary about his (R) which he can use to close the gap to get on top of you. It's a small AoE for damage that slows and disables nearby turrets. A Zhonya's would help here.
Cho'Gath
While fighting or simply laning, you should always be positioning yourself away from his angle to avoid his spikes that slow you. The second you let him line up a spike-slow, you will be swiftly met with your death through his knock up and more often if he is running Glacial Augment. He is a high HP and sustain stacking champion through killing minions, so preventing his sustain makes killing him easier. If he misses the knock up and can't land a slow, you can simply run him down with auto attacks and burst from your (Q). Be aware if he is running Glacial as it is a huge threat and you really need to play well.
Shen
Shen will mostly build a bit tanky with Wit's End as his primary way to deal a lot of AP damage late game. It would be wise to never utilize your (Q) to poke him unless he has recently used his (E) dash and landed his taunt while in his (W) spirit blade which prevents our (AA) damage from landing, otherwise he can simply stun you and wait out the duration with his (W). He is going to often roam and help his team out a lot and be right back in the lane shortly after with his teleport, you could follow after him, but for the most benefit to your team, try to damage him as low as you can before he arrives, making him very weak.
Urgot
You completely counter Urgot's ability to spam his indefinite late game (W) toggle. The second you get caught out by his (Q) slow, he will follow up with a dash forward, to attempt to flip you. If you are unfortunate enough to get hit by the flip, you should then prioritize immediately blinding him the second you land or while you are airborne with a level 3 (Q). While you are in this position you have a very little amount of time to react, but ultimately you just want to focus on activating your (W) and getting away as fast as possible while sidestepping his (R) as you won't escape once you're trapped in his (Q)/(R) slow and / (W) channel.
Shaco
Despite being a champion that is annoying to deal with due to his invisibility and traps, you can still sniff him out. Keep your eyes on the surrounding area if you have recently attacked him with (E) or (R) as it will give away his current location. Alternatively you can simply use an Oracle Lens. If you used Ignite or Exhaust on him, the effect will not transfer to his clone this also goes double for runes like Press The Attack. So focus on the one with the SFX that is visible it's the real Shaco! His boxes target everything in range, so if your entire team stepped on one of his boxes, expect everyone to take damage whilst being feared, ward early because of his very quick early game clear rate.
Viego
Ultimately Viego is like facing Pantheon and his spear jab, as all Viego can really do is (Q) spam to reach you from range you really want to try to fight in the open away from walls / terrain otherwise he will have the advantage, fighting in the jungle isn’t a good idea vs Viego because of his E and his Ultimate. His E will allow him to gain camouflage and be able to hop in and out of vision which offers him a lot of extra kill protection and survivability. Max your Blinding Dart due to his auto attack reliant nature as well. Viego’s Passive allows him to possess a dead body and take their basic abilities (Q-W-E) and items (among other things). When he does this, he becomes invulnerable and can dodge incoming damage but you can drop a shroom at his feet.
Fiora
Fiora is not hard as you can reset her passive by simply walking away and coming back, if you don't you are just giving her free sustain & damage. You should only ever be engaging her when the passive is angled behind you or against a wall, where she can not simply (Q) you for free. One of the biggest things to know is, you should never-ever, start or try to finish her off with (Q) -> Ignite combo, as she can very easily parry them both at the same time, same thing goes for Electrocute. What you need to do, is keep auto attacking until she parries. Avoid it, then go all in. If she ults position the final vital against a wall. Protect it and duel her.
Gnar
Gnar is a pretty visual champion so you can take into account when to poke or avoid him. If he is yellow/red he is soon ready to transform into Mega Gnar, if he is glowing BLUE after hitting you 3 times, he gains mobility so keep your distance. You want to keep yourself away from terrain while he is Mega Gnar, otherwise he will simply jump to you, combo his ultimate and slam you into the wall, followed by a barrage of his abilities which will further stun you. The laning phase will consist of him trying to land his boomerang which can hit you once on the initial hit or on the return granting rage. He has died down in popularity with the Divine Nerfs.
Vex
Vex is pretty overpowered as a Support or Mid laner, but as a Top laner she doesn't really have much impact due to her immobility. When her bar is full, you have to be aware of her flee engage (it will slow you by 60-99%) along with her level 6 (R) as you can not utilize minions to body block it. If you get struck by this ability she will be able to close the gap on you immediately. If a target is killed this skill can reset letting her recast it to chase you or allies down. The simplest way of dealing with her is waiting for her bar to revert to 0 stacks. Once this happens, run her down. She has no escape outside of fearing you, so if she misses her ability punish her and force her flash.
Garen
Garen has been one of those long time easy match-ups for Teemo, however, with recent changes it made him a even match-up strictly due to the fact that he is much faster and deals much more damage. If you see him activate his (Q), you should activate your own (W) to keep your distance. If he manages to catch you hit him with your (Q) to prevent his (Q) silence. Keeping your distance and poking safely while out of his reach is a solid strategy. He gains more damage based on attack speed from his (E). So don't get caught with him spinning into you. Morellonomicon will help with his massive sustain.
Gwen
If you can prevent her from auto-attacking to get her stacks up with (Q) do so, as it will render her (Q) weaker, if she has 4 stacks of her passive she can do multiple (Q) snips. Bait out her (W) with (E) or she will invuln it. Gwen is an AP tank shredder. She has a dash on her (E) that acts like a Lich Bane proc on her next basic auto attack, so countering it with (Q) is very resoureful, as she is dashing blind her. The most annoying thing about her skillset is her (W). It's like Xin and his (R) but she gets it every 22-14 seconds as early as level 2. This prevents her from being targetted by anyone outside of the arena. If you wish to kill her, you will have to either force her out or stand in the radius with her. She can move it with her once. So put the pressure on. She is mobile, but mostly squishy outside of her invulnerability. Poke her hard especially when her (W) is down, staying inside can be difficult.
Lillia
Lillia can be an annoying champion to deal with. If you get hit by her (Q) AoE she gains a ton of bonus movement speed making it near impossible to actually trade with her since she can hit you for % HP on every (Q) on a 4 second cooldown. The edge of her (Q) is true damage. Besides her movement speed and damage her (W) deals less damage if you avoid the center and 200% in the center. It's pretty pronounced. Side step and do not stand behind minions when her (E) is cast, this is how she can start an engage on you from a distance with her (R). Despite everything she is extraordinarily squishy and easy to burst.
Dr. Mundo
The changes to Mundo made his extremely weak to AP champions due to the rework of his old (E) MR scaling. Really the only thing needed to be taken into consideration while fighting a Mundo, is straight up his cleavers and his massive, massive sustain. He will spend quite a large amount of time keeping his distance and landing his cleavers to last hit. He will become a threat the moment he keeps landing cleavers on you since he can proceed to run you down. A more mobile and poke approach is more favorable. Each time he kills a minion with his (Q) it grants him half of the life cost spent. You can body block cannon minions to prevent him some gold. Watch his body language to avoid getting caught out with his allies gank.
Morellonomicon is mandatory.
Swain
Swain's biggest thing is his sustain and CC. Side stepping against his (E) is something you need to learn how to do. It's pretty visual when he is about to use the ability as he reels back his arm in a swiping motion. Keep your distance from low HP minions as he can shock you through his (Q) just like other champions like (Cho'gath / Lissandra). His (W) and (E) combo can reveal you in bushes but he can't pull you out of stealth if you're hit while in passive. He has a lot of sustain with his (R) and if he kills a target, he gets a soul fragment which can also grant him sustain and increased life. It's really all about positioning and avoiding the initial (E) pull towards his burst.
Ambessa
She is currently being played as a fighter, not really too tanky or that overly difficult to really deal with as a solo laner, until players start playing her more effectively with itemization and proper understanding on the champions rotations. Regardless,, it’s when she catches you out while being backed up by her team that makes things extremely difficult due to her massive mobility that prevent you from being able to fully utilize your own mobility to side step and kite or at least try to kite her.
Her roams are pretty devastating especially as a support, so you’ll need to make sure you’re warding deep and keeping tabs on that mini-map, she can ult over terrain and potentially catch you out and really ruin your whole day.
Tryndamere
Tryndamere has been a very easy match-up for a long time. It would be wise for you to start (Q) to prevent his all in level 1 and 2 (E) cheese, keep maxing out your (Q) after you have invested (2) points into your (E) for CS’ing realibly. Once he gets level 6, he will try to tower dive a lot or he will simply try and catch you out in the lane. You never want to be extended into a Tryndamere unless the lane is one sided and you are winning hard, because again all it takes is for him to (E) > (W) and run you down with his (R) to prevent his death, long enough to kill you or while he is getting ganked in a 1vs2 scenario.
Camille
Camille is a pretty good trader, just try to avoid the outer ring of her (W) which applies a 80% slow, to do this move towards her or bait her with movement. You’ll be fine if she tries to gap close and take you on, in a 1vs1 as long as you (Q) as the initial CC strikes you this dash is avoidable. Her (R), however, is not so easy to avoid as it locks you in place. Don’t over-extend once she hit’s level 6. We can not force her out of her own ultimate with a hard CC so we have to do our best by freezing the lane and avoid hard shoving, unless you dominated the lane. I advise you to take Fleetfoot as to cripple any of her attempts to cheese you early game and also to match her sustain and poke damage.
Illaoi
Illaoi has to be played through her passive. Keep taking the tentacles out as they grant you (5g) and prevent her from landing chain abilities, like when she uses her ultimate and hits a target nearby. That being said her ult needs to HIT a champion to activate. It's flashable and avoidable if you Zhonya. However, she is a very simple champion to deal with I would suggest learning to bait out her (E) and side step her tentacles (E) combo and her (Q). If you allow her tentacles to remain and they hit you, she will gain sustain for every tentacle that strikes a champion.
Kayle
You absolutely dominate this match-up early game, however, if you don’t take advantage of this and let her get to level 11 or 16, by letting her free farm and split all game, you are likely to lose. Her win condition is getting to the point where she doesn't have to rely on stacking her passive. Push her out and keep her out. You have to be super aggressive against her. You completely counter her early game due to her reliance on getting passive stacks, through auto attacking. You can sidestep her (Q) which will slow you if you are hit by it. Just keep putting her down early with (Q) even if it means getting ganked a lot.
Poppy
Poppy will passively throw her buckler at a target. Minions that die automatically grant her a shield but champions struck cause the buckler to bounce off and land nearby, you can destroy it by stepping on it and she has to pick it up. Her (R) has two possible outcomes, either she uses a charged (R) to remove you from battle or uses a non charged (R) to knock you up. Stay away from terrain or her flash (E) will stun you against it allowing her to combo into her (Q) > (R). Don't stand in her (Q) after she has activated it, as it is a two phase damage skill that will set the ground to explode shortly after it is activated.
Vayne
Hands down Vayne is one of the easiest match-up to deal with. Her entire kit is (AA) reliant, aside from her (E) condemn. If you are fortunate to be alone with her, with no minions nearby, you can (Q) her as she (E)'s you into a wall stun allowing you to enter stealth while you wait out the duration. If she activates her (R) just go into stealth on a brush. You don't always have to use this trick, you can simply max (Q) and destroy her in a 1v1, however, once she has acquired quicksilver sash, you want to avoid being with her in a 1v1. You'll need your teammates assistance to deal with her at that point. Counter with Zhonyas. All in all she isn't played TOP lane much at all anymore, but if you do happen to meet her, max (Q) after 2 points in your (E).
Singed
Singed is literally a freelo lane to go into as Teemo. Get your allies to sit in the entrances to your top lane Blue/Red. This is to prevent a proxy Singed. Meaning he's going to farm and prevent your minions from entering your lane, perma shoving his to your tower. You have to be super aggressive, but don't be so aggro that you cause your lane to shove permanently. Putting a few points into your (W) can really help you outrun him as you never want to be on top of him, as his movement speed gets high by drifting off allies and enemies along with his (R). Never chase a singed that's how you die. The early game scouting can land you all a simple free kill.
Quinn
At level 6 expect her to roam quite often. Your best bet is to side step her (Q) as hiding behind your minions is not 100% effective to block her AoE damage. The second she gets in close enough she will use her (E) to knock you back and herself as well, so make sure to blind her as the ability lands to trade effectively with her. If she is running PTA, you'll wanna do a short trade, so back off before your blind is over, otherwise the trade will go even. Electrocute is the best rune to take, for it's short trading burst potential which allows you to play around short trades by auto > (Q) > autoing, followed by backing off before she can get her PTA stacks off if she has gone PTA. She has a very low pick rate, and isn't seen much anywhere anymore.
Yuumi
Yuumi is one of the best supports that a Teemo can have. You scale into the late game very strongly with AP and she can help amplify it higher, while offering you a solid amount of sustain, shields and a lockdown with her ultimate. If you happen to have a duo, you can even ask them to run Everfrost, which is simply an extra layer of CC and protection. While not being too good overall, I find it very fitting for the duo.
Cassiopeia
Cassiopeia is really the only champion in which Teemo synergizes well with, since she feeds off his easy to hit auto attack DoT to spam her (E).
Shaco
Shaco & Teemo have great synergy with his (W) boxes an Teemo's passive or even with his (R).
Play around them and shroom on or on the opposite side of his box to deal even more damage to the champions passing over them.
Shen
Shen can (R) Teemo while he is in passive, this will not disrupt either champion as they will both remain invisible until Shen appears, giving away your position and ambushing anyone.
Synergies
IdealStrongOkLowNone
Yuumi
Yuumi is one of the best supports that a Teemo can have. You scale into the late game very strongly with AP and she can help amplify it higher, while offering you a solid amount of sustain, shields and a lockdown with her ultimate. If you happen to have a duo, you can even ask them to run Everfrost, which is simply an extra layer of CC and protection. While not being too good overall, I find it very fitting for the duo.
Cassiopeia
Cassiopeia is really the only champion in which Teemo synergizes well with, since she feeds off his easy to hit auto attack DoT to spam her (E).
Shaco
Shaco & Teemo have great synergy with his (W) boxes an Teemo's passive or even with his (R).
Play around them and shroom on or on the opposite side of his box to deal even more damage to the champions passing over them.
Shen
Shen can (R) Teemo while he is in passive, this will not disrupt either champion as they will both remain invisible until Shen appears, giving away your position and ambushing anyone.
Kha'zix is just a nightmare to deal with, he is an assassin. Utilize control wards and sweeper whenever you get the chance, to make sure you're not getting surprised by him, be it in your own jungle, or in his. You really do not want to get singled out by him because his damage is insane when he is alone with you. He will out damage you every single time.
Kayn
Kayn is all about his late game, his early game and mid game tend to be mediocre, but when he chooses a form and gets a lead, there usually is no stopping him without the assistance of your team mates. He is very mobile and excels in trying to invade your jungle constantly so keep yourself warded well.
Shaco
Shaco has a very good early game clear, he will be able to invade and gank relatively effortlessly due to his ability to blink over walls and utilize his boxes to prevent your ability to escape, so be mindful of your surroundings. Buying control wards will help along with utilizing sweeper.
Fiddlesticks
Fiddlesticks is pretty much all about surprise with his (R) and silencing/fearing you while sustaining. So during the early phases of the game try your best to burst him down, and play around his (R) once he reaches level 6. Warding bushes and over walls to each lane with shrooms can help you and your allies.
Nunu & Willump
The amount of sustain, movement and overall jungle clear makes it rather impossible to compete with this champion in every regard. He ganks well, takes objectives well. Your best bet is to hope your team mates can manage their lanes and try your best to be in a position where you can assist them when he ganks. If you get invaded, just give it up.
Hecarim
You lose a lot of the early game fights with Hecarim, he will farm better, gank very well. You can not use your (Q) since he is all about running you down and spamming his (Q) sweep. Try your best to match him when you can, but focus more on farming.
Ivern
Ivern may be a weak jungle, but he does well to support his allies with CC and granting them free buffs. That being said he is very squishy, so do your best to take him out.
Zac
It's pretty hard to follow up on Zac's ganks since he is easily able to leap over multiple walls and gank from unlikely areas (tri-bush walls) so try and get some good deep vision of his jungle so you can try to follow up.
Lee Sin
Lee is a very strong early game champion, but that is about it. He will fall off late game but can still be a pain in the ass to deal with with his insec play-style. Once you get through the early game things will become a bit better for you, if you have survived. If you get invaded, just give it up.
Olaf
Olaf can clear relatively quickly and have the utility in his (R) to run you or your allies down, despite using your (R) and can also avoid your (Q) with his thunder strike. Overall respect him or die.
Naafiri
Naafiri can be a pretty tough opponent to deal with during the late game, but her early game is relatively tame and weak. You have the ability to counter jungle this champion if you feel confident in your own abilities, but once she hits level 6 and onward with her spike mythic and damage, you don't really want to be anywhere near her when she gets the jump on you. Activating Zhonya's Hourglass on her (W) dash which is very pronounced with the red lines latching onto your champion.
Karthus
It's going to be rough game for you, as Karthus is overall better in every way while played in the jungle. He will out farm you, and most likely out level you, if you slack off on farming, while being present in every single fight with his (R) that will literally one shot everyone granting him more and more stacks as the game progresses to late.
Elise
Elise has been the best early game presence out of most all the junglers for a while. Don't let her get fed and be careful as she can appear out of nowhere with her mobility and utility to snare you and one shot you. You need to side-step her (E) cocoon and try to match her early ganks.
Vi
Vi is just like any other mobile early game Jungler. You will lose all 1v1 fights with her, and should prioritize farming and matching her ganks, if you get invaded, just give it up.
Rengar
Rengar will win pretty much every fight in the jungle, and you will never be able to contend with him in any regard when it comes to a 1v1 in the jungle. You will lose all attempts to take something from him including scuttle crab, because of bushes. If you get invaded, just give it up.
Kindred
You can't fight a kindred very well in the early game due to her mobility and in general damage output. You can try your best to prevent her from acquiring any of her marks especially if they are in your jungle, but be sure to ward around and keep vision in the chance that she does try to come take it. Stand in her ultimate and save your blind for after it is down while in a fight with her. If you get invaded, just give it up.
Evelynn
Levels 1-5 are relatively easy to deal with, since Evelynn gets her so to speak "power-spike" later once she has her stealth advantage level 6. Once she does hit level 6, remember to respect her, using wards on her camps will allow you to properly track her.
Graves
The changes to Death's Dance really made Graves a pain to deal with, granting him a ton of tank abiliy. Using (Q) against graves doesn't actually stop him from dealing damage, it just spins him around randomly shooting at anything he manages to hit. He is a very mobile champion with a lot of utility to help him chase and lock you down with his smokescreen.
Shyvana
Shyvana has a terrifying amount of mobility and damage especially later in the game. You don't wanna fight her when her fury is full, since she can just transform and fly to you running you down with her (Q) damage which hits like a truck.
Zed
Zed in the Jungle offers a lot of invade potential against us. He doesn't have amazing objective control, unless he has gotten a bunch of kills early and overall is rather squishy. However, we will still need to purchase Zhonya's Hourglass into the mid game as he will scale hard "eventually." It's better to be with Zhonya's and not need it, than to need it and not have it. Plan accordingly.
Dr. Mundo
New season, new meta. Mundo has some pretty heavy clear and mobility throughout the jungle, you normally will not out farm him, so try your best to be there for your team when he goes for a gank. He is a tank still, but respect the fact that tanks still deal a shit ton of damage especially with the new items.
Trundle
Trundle is pretty straight forward. You will often come out the victor considering he is a (AA) reliant champion. You can (Q) his empowered (Q) and you can utilize your passive against him, so long as you don't get hit by the direct location of his (E) pillar. His damage is very high. He tends to be pretty tanky as well, so a more tank shredding build and mitigation build is favored more over just pure burst potential. You can't reliably out-run a trundle because of his pillar and (W) movement increase he has. His (R) will drain high HP champions, also granting him a ton of resistances in the process. He's great at running us down. Overall he will have higher objective control, we need our allies to assist us.
Poppy
Poppy hasn't seen the light of day in quite some time as a laner, and her Jungle presence is pretty good. The biggest thing you want is to simply stay away from her wall stuns and her ultimate. If she can't land either of these she tends to be very easy to take out due to the fact that she is mostly played as full Dark Harvest burst damage.
Nocturne
Nocturne will utilize his (R) to latch onto you from a long distance, and it's his most common playstyle to latch into anyone. However, it is absolutely very important for you to have a shroom placed behind you or in a general location so that when he does get to you, you can kite him through them before he channels his fear into you. You should NEVER blow your (Q) immediately as he will spell shield it. Let your shroom pop it, before you get feared or wait 2 seconds before the fear activates, most players will activate it pre ult or as they land, which allows you to blind him during this duration long enough to retaliate. If you know he's going to (R) you and you're alone, entering stealth with a shroom at your feet can save you the hassle and set you up to duel him. It can be hard to track him, so make sure you try your best to ward deep.
Diana
You should do your best to keep your distance, which is easier said than done! She can simply (E) and combo with (R) for CC and burst. It's quite easy to avoid her (Q) which angles as a counter-clockwise crescent moon. She will mostly use it as a way to CS minions from afar, but the second she lands this ability its effect will be consumed and followed up with by her (E) dash. It's a pretty heavy AP match-up so getting some Magic Resistance is useful. Her (R) will reveal you while in passive. You really don't want to be caught out with your allies in a 5 man (R) as it will scale her AP higher per # of champions pulled in. So long as you can survive her initial all in burst, you shouldn't have any problems fighting her once she is on top of you. Build accordingly.
Ekko
Ekko can go either way, he is a dangerous champion to fight against but usually only if he can get some form of lead in the early game, be this and assist or a kill, which can help him snowball and carry a game. You would never want to fight him once he hits level 6, as he will simply win those trades.
Sion
Similar to Mundo, Sion is no different. High damage, high clear rate, and can engage level 6 pretty hard and pretty often. You can match his clear but barely, once again try to be there early game for his early ganks and avoid his (Q) invade cheese over walls.
Viego
Viego's not really too much of a threat, unless he is trying to invade your jungle, but even then you can trade well with him by blinding him. Make sure to pay attention to the green mist that traverses terrain hit, as this can give away his location from which he is currently coming from or currently at, as he can camouflage himself.
Rammus
It's not good to play PTA against him, since he will simply reflect the damage back, his mobility is amazing which helps him lock down his enemies while ganking. You can easily 1v1 if you do catch him out, after having used his (Q).
Udyr
As per usual with reworked champions, you should either let them on your team or ban them if you feel like you can deal with most other laners, until their damage is toned down a bit.
Xin Zhao
Early game Xin can be a hassle to deal with, but late game it becomes even harder due to his (R) damage mitigation and CC. Save your (Q) for after he engages you, since he will normally start with the gap close, knock-up followed by attacks.
Talon
Talon was played a bit in the jungle when they opt'd to make him as an off-role jungler. He had too much mobility an damage throughout the entire game, which made him a very large threat. He isn't seen here anymore, however.
Skarner
Skarner can be extremely hard to deal with alone especially while leaving his capture points up. You really need to take his capture points to remove his ability to move swiftly through those areas an gain his bonus attack speed, and kite him. Once he hits level 6 he will win every single exchange once he locks you down into his allies.
Lillia
Lillia can be an annoying champion to deal with. If you get hit by her (Q) AoE she gains a ton of bonus movement speed making it near impossible to actually trade with her since she can hit you for % HP on every (Q) on a 4 second cooldown. The edge of her (Q) is true damage. Besides her movement speed and damage her (W) deals less damage if you avoid the center and 200% in the center. It's pretty pronounced. Side step and do not stand behind minions when her (E) is cast, this is how she can start an engage on you from a distance with her (R). Despite everything she is extraordinarily squishy and easy to burst. Her clear is pretty solid.
Jarvan IV
It's the same as if you were facing him in lane, his (E) and (Q) combo should be avoided at all costs or you will lose every single fight against him. He's a relatively tame opponent to run into in the JNG since he is rather on the squishy side, unless building tank.
Warwick
Keep your health high by constantly kiting camps and be very careful as he can simply smell you out if you do manage to be very low on HP early on. You're going to have to try to be there for your team mates to prevent him from snowballing through his ganks.
Nidalee
Nidalee has a pretty weak 1v1 against us, however, you never want to be at a distance against her, due to her spear damage which you should do everything you can to side step. Try to match her ganking and prevent her from getting a lead.
Volibear
Mobile, disruptive but overall a docile creature, if you match his ganks and keep on him throughout the early game you will cause him to fall off sooner as opposed to scaling late game.
Rek'Sai
Rek'sai can actually sense you while you are moving in stealth in bushes while underground. It is wise to not move a muscle if you know for sure that she has not noticed you. Take out any tunnels you see around, don't stand near her when she un-burrows as you will be knocked up. Besides this, she is a really squishy champion unless she has gone aftershock/goredrinker. Keep your distance, as she may (R) you. Don't start with your (Q), save it for when she is actually on top of you and after she has used her (R). You will take increased damage the lower you are put down to from 20-30% extra damage based on HP so you will most likely not survive running. She has free range of the map if you simply let her place multiple tunnels.
Sejuani
Sejuani is all about dashing, getting close and locking your down for her team mates to finish off. She is a tank, so your primary focus should be her allies in a gank especially using your (Q). Her early game is pretty weak but later once she hits 6 her (R) can be devastating if you are caught out.
Wukong
Wukong is honestly more suited as a laner than he is as a Jungler. Unlike other champions like Qiyana, he has much tankier and is more of a threat. Respect his clone, and make sure you have a Oracle for the later game so you can track his movements while in a team fight or while fighting him alone.
Amumu
Amumu is a pretty weak early game champion, and is heavily reliant on landing his (Q) to effectively deal any damage. Once this ability is on cool down, you can often run him down and win the trades. However, once he reaches level 6, he will be really difficult to deal with since he can just flash (R) folllowed up with a (Q) to lock you down with burst.
Qiyana
Qiyana honestly is more suited as a Mid laner, she has very little to offers to herself or her team as a Jungler. So long as you respect her element switching and don't fight her near bushes and walls you shouldn't have any issue with her. She's very squishy.
Twitch
You completely counter his ability to deal damage, he is going to start red buff and go straight to the mid lane, so you would want to go there immediately to stop him at all costs from getting a first blood.
Master Yi
You counter Yi 100% with your (Q) but he still is capable of snowballing and going straight into the mid to late game as an unstoppable menace. Taric and Master-Yi cheese is still a thing with the recent changes to how jungle camps grant EXP making it easy for him to go 4 levels ahead of yourself. It's basically impossible to catch up at that point.
Jax
Just like fighting Jax in the laning phase, Jax has a relatively weak early game in the jungle, getting stronger and stronger and harder to deal with as the game progresses to late. Do your best to be aggressive in the early stages.
Gwen
Gwen has really good objective control once she gets out of the early game and starts stacking her damage, but as a champion she is suited more as a laner than a jungler. You shouldn't have any problems dealing with her early game, it's the late game that becomes a problem, if she's fed or doing relatively well for herself and her allies.
Teemo
Basically while playing Teemo you only have synergy with allies that have any form of CC to prevent their laner from running away as you enter their lane.
Synergies
IdealStrongOkLowNone
Teemo
Basically while playing Teemo you only have synergy with allies that have any form of CC to prevent their laner from running away as you enter their lane.
In a situation where all Teemo needs to do is land one skill to catch you out when he is nowhere near you, having tremendous range, slows, and just a lot of overwhelming power is something that Teemo is not really able to cope with very effectively.
Xerath
Xerath is difficult to deal with, simply due to his ability to spam all of his abilities from a fairly long and safe range. A few points into your (W) will help with avoiding them, but overall he is a hard champion to deal with if you are not accustomed to constantly kiting. You can use minions to body block his stun orb but everything else is either frontal AoE or a circle AoE that can hit all targets in range. His ultimate has a very long range. You can easily get sniped from afar or he can roam around river and simply use ultimate on your teammates for free kills or to get a kill secure or an assist his (R) can be side-stepped.
Anivia
Anivia's kit excels at zoning enemies which prevents you from CSing or attempting a safe trade. Runes are relatively ineffective since you can’t get near (AA) range, let alone in range to use your (Q). Most trade outcomes will lead to you losing or being killed. Her passive is horrible to deal with, as she can get up easily due to the lack of damage output to kill her twice early game. She just has too much range and CC to deal with alone. Play safe, avoid being walled and stunned. Once she hit’s level 6, you can’t do anything against her without help from your allies as her zoning ability becomes even greater.
Azir
Azir's range with his (Q) is extremely powerful, which provides him with soldiers to attack you and minions at the same time. Blinding his soldiers is not possible and blinding him is pointless as the soldiers are a spell. Laning against him is quite dangerous and you can’t get in range to reliably poke him, or trade. If you get too close, he can simply (E), get behind you and combo you with his (R) to either push you back or block your escape, which will lead to a fight you will always lose. The only thing you can do is respect his lane dominance and try not to feed too much into him. The first few levels are easy until you reach level 4 where he gains all of his skills to torment you.
Cassiopeia
Cassiopeia's main problem is her (Q) into her (E) spam which is impossible to avoid after being poisoned. Turn your back to her (R). If you are not familiar with her animations I would advise to check some Youtube videos related to it. Against her I recommend you to work on kiting and baiting out her poisons before trades. She is relatively fast for a champion that can't wear boots. The second you get struck by (Q) or (W) she will follow up with her (E) that can be spammed over and over, which really hurts! They tend to run Conqueror which heals her for a lot. You can't really dodge her (W), but you can build a bit more defensively while building into damage to make up for her damage.
Orianna
Orianna can zone you back with relative ease because of her long range and her (W). It's hard to effectively trade with her, due to her range along with her shield. Once she reaches level (6) you must be careful around her reach because of her (R) CC which will turn the fight in her favor, especially if she is about to get a gank by her ally. Simply keep your distance, poke with your (Q) and do your best to make her to waste mana in the early game, as it will allow you to match her lane wise, until you are capable of purchasing some defensive items. You in no real sense win this lane, due to her permanent zoning.
Aurelion Sol
The Asol rework has made him quite and annoying and unfun champion to deal with both in and out of the laning phase.
The main problem is his reach and ability to pull you back into his (E) singularity while also being capable of stunning you, making it equally hard to escape the pull to avoid his follow up (Q) starfire.
Magic resist comprising of Mercs and Force of Nature with Anethema's chains following a PTA playstyle is one of the better styles into him due to his raw damage and burn capability you would have to stand your ground and fight him in an extended trade rather than trying to run away.
Karma
She is a pain due to her mobility shields and rooting, which only becomes more annoying as the game goes on longer. She can either go full AP or Tank, the second one being annoying as hell. It's very hard to chase her or trade efficiently, you can utilize your minions as a way to prevent damage from her (Q) or (R) > (Q) combo, but don't be overextended. If you end up shoving your lane under her tower, you will simply be ran down. She can easily clear the entire wave and run after you or get a gank and lock you down with her mobility and root. Match your waves through wave control so you're by your tower for allies to gank.
Ahri
Ahri is extremely hard to deal with due to her mobility and the fact she will use her (Q) quite safely to hit through the minions into you, plus every 3 abilities she uses she can sustain with her next (Q). She will kill you if when using her (R) dash she lands her (E) Charm, be aware she can adjust her (E) with her Flash as well. You can, however, use minions and side-step to avoid her (E), so never stand still against her! Since she is a burst champion, I would recommend you to match her burst with Electro/DH. If she is running Glacial you’re going to run into trouble if you are shoved into her. So do plays around your tower.
Brand
You can utilize minions to body block his (Q) stun, however, don’t let him land his (Q) or (W) after he has set you ablaze with his (E). His burning DoT passive reveals your position. Your objective is to force him to spend mana while he trying to land abilities onto you. If he uses (R), get away from minions and allies as his ultimate won’t bounce to additional targets, otherwise you risk dying to his combo. He's mostly found in the support role, so if you do find him MID make sure to dodge the empowered skills once you've been set ablaze.
Diana
You should do your best to keep your distance, which is easier said than done! She can simply (E) and combo with (R) for CC and burst. It's quite easy to avoid her (Q) which angles as a counter-clockwise crescent moon. She will mostly use it as a way to CS minions from afar, but the second she lands this ability its effect will be consumed and followed up with by her (E) dash. It's a pretty heavy AP match-up so getting some Magic Resistance is useful. Her (R) will reveal you while in passive. You really don't want to be caught out with your allies in a 5 man (R) as it will scale her AP higher per # of champions pulled in.
Fizz
If you wish to effectively deal with a Fizz player, you must first know what to look out for, and when should you be using your skills. Fizz is an ability type champion. You never want to engage him with your (Q), therefore use AA on him as well at level 1 start with (E). When he uses his (E) he negates all incoming damage, so when he lands you can simply (Q) him to negate his empowered auto attack. Normally a Fizz will start the fight with his (R) and walk up or gap close with his (E). If he lands this while you are lacking any significant magic resistance, you're dead. Keep away from allies when is (R) is on you or them.
LeBlanc
Laning against Leblanc can be tough, as she is able to gap close into you and immediately return to her previous location. This, however, is where you would run towards her previous location if you were capable of doing so, as long as you are not almost dead to place your (R) on top of it. Which at this point gives her one of two options, return and become slowed or stay and fight/escape elsewhere. This can be absolutely crippling for her, if you are able to catch her mark out in a flank or a team fight. Especially if your team mates chase her through the jungle.
Katarina
Katarina is ability reliant. Never stand around her fallen daggers, I advise you to play more defensively. She can reveal you with her (R) when in range just like Morgana. It would be wise to purchase a Zhonya's Hourglass against her, otherwise magic resist will help you out a great deal. Her daggers land behind you which allows for you to run to the side rather than into them. So long as you avoid the gap close of the daggers damage, and keep your distance and poke/harass her, you should be fine as to not feed into her throughout the early game. Zhonya's Hourglass is a must into late game to survive getting caught.
Kassadin
You can't really do anything about Kassadin's (R) gap close, nor his abilities. Besides bursting him or gaining assistance from allies, you cannot outrun him. The more you spam abilities the more he can use his (E). You can slightly utilize your (Q) to prevent his Lich Bane’s but overall stay with your team when he is around. You do not win 1v1's in the late game. You need the assistance of your teammates in the late and mid game, his early game is very weak but the longer the game goes on and the more he scales, the more of a threat he becomes. It's pretty important to shut him out and close games as fast as you can.
Qiyana
Qiyana is a high mobility and high damage output champion. Do not poke her near walls, because if she uses (R), it will push you into them and her AoE stun, which can also affect allies and minions the full length of that walls terrain. Never escape from her pressed up against a wall, make sure you're running right between them. She is a physical damage champion, and can burst you, so grab yourself some armor as it will help you greatly. Brush element grants her invisibility & River element grants her a root and a slow effect, while Earth element grants bonus damage to enemies below 50% HP. Be mindful of this.
Talon
You out-range him with your (Q), however, he has better roaming potential and you can't do a thing about it. If you are not poking him from a certain range, and avoiding his (W) which is in your (E) auto attack range, you will simply lose trades. Keep your distance, (Q) him and capitalize on his roaming by sieging his tower, but make sure to ping that he is missing and keep your eyes on where he has run off too, he is after all a roaming champion focused on flanking over walls and catching people by surprise. A bit of Armor and HP will go a long way in terms of keeping you alive from most all in AD assassins.
Syndra
Syndra is she is going to be sending Dark Spheres left and right, with the intent to chain her (E) range CC into her minion tossing (Q) and point and click (R) burst. Banshee can prevent her initial CC, however, it only blocks one ball from her (R). She out ranges you and out damages you as well, so building more defensively with some added damage will help you out in the early to long run. You can use Zhonya's Hourglass to deny her (R) which should be saved for when you fall below 40% HP. Keep on your toes and try your best to predict her CC orb stun, it's the prime source of setting her up deadly combo.
Veigar
You have little room for error if you allow Veigar to trap you in his (E) as you can’t move around freely. Do not touch the edges of his (E) arena, otherwise you will become stunned and bursted by his abilities. Simply move inside and avoid the walls and do your best to avoid taking damage or if necessary flash out if you are being ganked while trapped. You won't have enough time to wait out the duration of the skill to end. It's very useful to build some magic resistance to deal with his infinite AP scaling, if the game goes on for too long. He is relatively squishy although. It’s compensated by his burst damage oriented kit.
Viktor
Viktor is a really difficult lane to trade with as his range and hit box is relatively large and hard to avoid, since he can control which direction his (E) comes from. Avoid standing inside his (W) as it will slow and stun you afterward if you remain inside it, allowing him to activate his (R). When his (R) is activated do not try to fight with him, simply run away as it will slowly catch up to you, and is pretty easy to avoid simply by pressing your (W) and getting some distance. Magic resistance is going to help you out if you can't manage to avoid the damage, as you can safely get in a bit closer to throw out a (Q) to trade with him, however, avoiding the damage is the priority.
Yasuo
You can not blind his (Q). Purchasing Ninja Tabi, however, will decrease how much damage this ability does to you. Never run away through your own minions, run through the river/jungle. You will not escape him due to his minion/champion (E) dash. You have a better chance running into his ally with no CC, than you do letting him catch up, using his second (Q) knock up into his (R). You have to predict his tornado and learn to side step. That's all. He lines it up with minions. You want to keep poking and keep tabs on his passive / wind wall which negate all damage and projectiles. If he places a wall, move in between it.
Ziggs
You can side step Ziggs (Q) pretty easily, however, keep your distance from him as he can zone you with his (W) and cut off your escape route or blast you into his (E) or even his (R) by landing his (W) knock-up/knock-back. Minions will body block his (Q) but will still splash if you are too close. Ziggs is a sieging champion. You can't simply allow him to free farm and have lane shoved all game, as he will use his (W) against towers that are below 25% up to 35% based on skill rank, which will destroy them. Despite all this he is very squishy and easy to burst down, so long as you avoid his skill shots.
Ryze
Ryze will mostly always run Phase Rush into you. You do NOT win this lane in any logical way. However, lately he tends to try to manage his mana much more. He will have full control over the waves so long as he knows how to utilize his combos correctly. So just keep yourself back, preferably in bushes or to the side of your minions that are not being comboed unless he is not playing well or lining up the correct AoE spread combo. I suggest to take resolve as your secondary runes with Bone Plating and Overgrowth, and max rank your (Q) for poking only. You shouldn't be demoralized in this match-up. It's boring.
Neeko
Neeko is an absolute nightmare to deal with even though she has been tuned down and her damage has mellowed out. She is everything Teemo is, but better. If you get rooted you are pretty much dead, as you can't avoid being hit by her (Q) which will pulsate & splash multiple times. She will set off your (R) with her (W) which is annoying as hell. Don't show her where you've been placing shrooms as they do this in bushes, from lane and the corners of the walls setting them off prematurely. If they go full on-hit with PTA you're going to have a horrible time dealing with them as there isn't much you can do since their range is higher than yours.
Zyra
A relatively squishy champion to deal with. However, if you are in bushes, do not step on her seeds. Half of them will reveal you as these are the ones that come from her (W) active, and half of them will not and these ones are from her passive, it is very hard to differentiate one from another due to different skins she has, and how minor the detail is. You have a very short time to react if she ends up activating her (R) which will knock you up, and deal a ton of damage coupled with her seed-plant combo. You can not utilize minions to body block her root. The root must be sidestepped as it will root everything in the way.
Zed
If Zed is not going up against you. You can hold off on building Zhonya's Hourglass and rather only focus on Seeker’s Armguard if you see he isn't being much of a threat. Otherwise getting Zhonya's Hourglass early will be required to survive his roams and tower dives, but also to shut him down in certain scenarios. It isn't worth building anything more than this, besides some HP to survive the full combo when he is finished and walks away. A bit of Armor and HP will go a long way in terms of keeping you alive from most all in AD assassins. Avoid his shadow as it will compy his abilities allowing him to damage from range.
Swain
Side stepping against Swains (E) is something you need to learn how to do. It's pretty visual when he is about to use the ability as he reels back his arm in a swiping motion. Keep your distance from low HP minions as he can shock you through his (Q). His (W) and (E) combo can reveal you in bushes but he can't pull you out of stealth if you're hit while in passive. He has a lot of sustain with his (R) and if he kills a target, he gets a soul fragment which can also grant him sustain and increased life. It's really all about positioning and avoiding the initial (E) pull towards his burst while purchasing Oblivion Orb to remove his sustained fighting threat more so than anything else.
Zoe
If Zoe decides to (R) to try and escape you or, get some time for her to combo back with her (Q) or (E) you can (R) her portal so she ends up activating it upon return. Try not to utilize too many of your active items or summoner spells around her, as she can pick them up and use them right back against you! Which is certainly not a good thing! Minions can be utilized pretty easily to body block her (Q) or (E) sleep CC. Her (E) can travel a very long distance if used through terrain. So try not to get caught out this way, as the follow up (Q) will be devastating for you. Banshee's Veil can help a lot with this aspect.
Heimerdinger
You can (Q) his turrets and kill them with 2 (AA), so your objective is to focus on this and avoid using abilities, if you prefer to not max (Q). However, if you do max (Q) you can kill his turrets in one (Q) so long as you have the AP early game, which allows allowing you to press your advantage of shoving him back and not setting up a perma shove into your tower. Keep on your toes scout! You need to be vigilant and keep avoiding all of his skill shots. Once his towers are down for a tiny second you can get in and poke him a little or continue to simply take his turrets down until he's out of mana.
Seraphine
Seraphine is nothing special as she is basically Sona 2.0 with double cast abilities. Her kit is all about dropping both Heals, Charms, Slows and Roots while being granted a ton of bonus attack range playing around her abilities and allies. You basically want to avoid her every third basic ability, as it will echo and cast twice which is solid for her (E) combo root. Her ultimate is a pulsating wave that charms enemy champions from a distance, so Ahri (E) combined with Sona's (R). Due to the nature of new champions, it's normally a good idea to ban them during the first month or so of release to prevent abuse of damage.
Irelia
Maxing (Q) is your best bet, however, late game this becomes less effective simply due to her gap close chase and lock downs which tends to be impossible to avoid. Try your best to close out the game before late game arrives. She is a monster later in the game. Early game it's all about avoiding her stun and staying away from low HP minions so she can not dash through them to you with a stun. Your first item is mandatory to purchase Oblivion Orb, otherwise she will simply heal back to full on a full wave rotation. If you get hit by her (R) don't touch the blades. Flash / sidestep her ultimate. If you get stunned she will win every trade so it's pretty much dodge or die.
Naafiri
Naafiri is a pretty easy early game champion, until she reaches her mid game spike, in which if she lands her (Q) it will allow her to initiate her follow up leap engage which is pretty devastating. It can be avoided with something like Zhonya as taking it head on is not really something you'd want to do. Outside of this engage, she doesn't have much. Her pack is hard to deal with as they are pretty high health and hard to kill individually unless you were to take something like Runaan's Hurricane or potentially Liandries into Zhonya to potentially burn them down before the stasis is over.
Akali
Never trade with Akali, while her shroud is up! Your poison will reveal her location so keep an eye on where her shadow appears next so you can avoid her gap close to trade with her. Unlike when she was first released, she is no longer unstoppable. You will have enough time to throw out a (Q) or (E) before she hides again on her shroud. You can use minions to body block her (E) shuriken she can also use it to dash over walls and gain distance from you. Do not let her land this or you LOSE the trade immediately. You must try your best to side step or bait her (E) before attempting while her shroud is down!
Annie
Your aim is to engage on Annie whenever her stun is down. She will win the trade against you as you will get stunned and you will get bursted down especially after level 6 when she gets Tibbers. Keep an eye on Annie using her (Q) or (W) on minions and once her passive is gone, proceed for a quick trade with her, but avoid over-extending. Don’t understimate her ability to combo (E) > (Q) > (R) > (W) stun. A good Annie will attempt to hold the stun for as long as she can to hold lane pressure. So proceed to wave clear to force her to waste her stun and attempt trades when it is wise to do so. Don't stick under her tower.
Corki
So many people consider Corki an AD champion, simply because of his build. However, Corki is actually 85% Magic Damage. His (Q) can reveal you in bushes to him and his allies, he is also more ability prone than (AA). Avoid projectiles and get away from his AOE (E) and the gap close with his (W) which if he has “The Package” will drop and slow enemy targets in a rumble like ultimate applying a 90% slow. This can also reveal you. I advise you to bait his rockets and kite him, as you will not have enough damage or defenses to duel with him on prolonged fights. Magic Resistance will help you alot against him.
Ekko
You can blind his (E) and his body language lets you know what he's going to use next, subtle things like his character model reeling back means his (W) has been cast. This just means that he is most likely getting ready to dive you with the assistance of his allies or get in close with a shielded poke/CS. You want to never be standing in the center of his (W) while he enters it, otherwise you will be stunned. You can be damaged by his initial (Q) and the return you take extra damage from the return.
Galio
Galio has a pretty nasty combo when he obtains Hextech Protobelt and uses his (E) into his (W) combo. When he is full AP his burst will make you pretty much helpless, made even worse in a ganking situation. Keeping yourself away from his (W) is the standard idea. Magic Resistance or a Zhonya's Hourglass can help you avoid the taunt. But not the (E) CC, and if he runs after-shock a void staff will be your best bet to damage him. Team fights can be extremely dangerous since he can use his ultimate globally and fly down from the sky with a massive AoE knockup. So keep your distance to not get singled out in a large scale fight with him and his team.
Gangplank
Gangplank is all about last hitting his barrels, so try to get comfortable with preventing him, by last hitting them first. Gangplank can (W) cleanse our (Q), so try not to rely on using it to counter him, we can't (Q) his (Q). Barrels are priority focus because of their 40% Armor Reduction that they ignore especially late game, be aware of him past level 13 on that aspect. Regardless of what some people may say to you, getting in close to pop his first or second barrel before he sets it to chain into his combo is extremely important. If you can't last hit them, you'll always have problems dealing with this match-up.
Gragas
Just like Galio, Gragas has a nasty combo which can throw you off from your escape route, however, you can also use this to your advantage simply by flashing into his ultimate to send you flying in the opposite direction (over a wall, into your tower) but play it safe into his (Q) > (R) > (E) combo. Which is often set up by leaving his (Q) down for the full duration followed by his (R) as you draw near, while he (E)'s into his (Q) where he has planned to send you. It's very useful to build some magic resistance to help deal with such burst. You can use your (Q) to prevent his empowered damage from his (W) activation.
Lissandra
With Lissandra want to position yourself away from her angle behind your minions, as if you stand too close she will simply deal damage through splashing behind them. She has a gap close with her (E) along with a root from her (W), so try not to overextend against her, because she can simply gap close and trap you in her (R). Speaking about her (R) try not to get into a position where she is under her tower and you are about to burst her to death, she can simply (R) herself, heal and become untargetable or (R) you to stun you under tower allowing her to turn the fight into her favor since we're still targetable.
Malzahar
The second he spawns his voidlings, kill them as they grant extra gold and line him up for tremendous damage through utilizing his (E) and his (R) CC, however, raising your Magic Resistance levels a little will prevent a sure death. Stay away from your purple glowing minions or it will bounce to you, making you the prioritized target for his voidlings, it only takes one auto to kill them. You should not use your (Q) to poke him, while his passive shield is up, attack him with your (E) to take it down before attempting to use (R) aswell. It's okay to take QSS to deal with being his priority target for utilizing (R).
Morgana
Morgana is a real nuisance! Blinding an enemy champion is impossible if she (E)'s them, which negates the effect of the blind. Along with this, she can simply lock you down for a very long time if you allow her to land her (Q). This ability can be body blocked by minions. Try not to play too aggressive with her. You can not hide from her. Her (R) becomes highlighted when near you alerting her to your presence. Revealing you the second she decides to activate it. So don't go for any of those stealth plays while she is nearby, as it is going to end poorly for you.
Taliyah
Taliyah is quite an easy champion to deal with. Utilize the lightly browned circles on the ground, to fight her in. She loses most all damage output because she needs to be standing on the non-patched areas to use the standard (Q) spam. Keep kiting her around and try your best to avoid her knock-back especially if she does it inside her (E) which gains massive boost in damage. You want to have vision of her when she is activating her (R) which sounds like a bunch of boulders rolling. Do your best to get on the opposite side of the wall or she will block off your escape route trapping you with her teammates! Flash if it's needed.
Vel'Koz
If Vel’Koz is running glacial augment it can be very hard to avoid his (Q) split, and of course his knock-up. Thankfully his (Q) is blockable by minions but his other abilities are not, so keep yourself in and around them. He melts via burst relatively easily. So long as you don't get caught out by the initial circle knock-up (W) combo into his (R). Vel'Koz can be poked from range, so max your (Q) and burst him down from a safe distance. You never wanna flash and engage him unless his (W) circle knock-up is on cooldown. Magic resistance is going to help you out a great deal if you fail to avoid skill shot's entirely.
Yone
Yone isn't really much of a threat. All of his abilities are very pronounced and either a straight line or arcing slash which are all relatively easy to side step. If he enters into spirit form reposition and toss a shroom where he entered especially if you're ganking him. When he recalls immediately he will be caught out with the single shroom, an if he extends the fight he will also lose the fight to our shroom finishing him. We win all trades with him, so long as you're looking out for his (Q) knock-up combo with his spirit form and his slow animation (R). He is really weak early, and scales very well into the late game making it very hard to survive his (R) & (Q) combo.
Sylas
This matchup is dependant on the main rune Sylas chooses. Aftershock/Conq or Electrocute dictates how you should be fighting him. You need to by all means use your minions to body block his (E) dash into his (E) chain CC, especially if he is running Aftershock. If he misses this ability, make sure to run him down as he is squishy as hell if he misses. If he does hit you, however, there is not much you can do, because you let him land the ability and you're going to be taking a shit ton of damage. Throw your (R) on his (R) to track where he places them or buy Oracle Lens to remove the mushrooms he placed, unless you have a good memory on placements.
Vladimir
We sometimes take Doran's Shield into this match-up to match his sustain with grasp of the undying. However, this is based on personal preference. You should be working your way into a more damage oriented build around mid game. The simple way to deal with Vladimir is to watch his energy bar. If he is glowing red, back off and let him use it on a minion, as you don't wanna take the increased damage from his empowered (Q). Once he has used it, you can go in and try to poke him out with your (Q) or possibly your (E) auto attack, it may seem boring, and you may miss CS, but you'll go even or win because of it.
Akshan
Akshans passive allows him to fire two shots at once on a cooldown of 14-4 secs. You'll want to trade with him in between this time frame early game while he is CSing. His (Q) is exactly the same as Gnar's Boomerang granting him more movement speed. His (W) passive allows for him to revive ALL dead allies if he kills their killer, it's also like Twitch's (Q) but he can hug a wall / sit in bushes to prolong it indefinitely. His (E) let's him hookshot a wall and swing around dealing damage to anyone he goes near, but will stop if he hits a target/terrain. His (R) is a lock on like Caitlyn, in which he stores bullets to fire in a blast like Lucian, use minions / towers to block it.
Karthus
This matchup can go either way, if he gets fed you're going to have problems. Never stay in lane/jungle with low HP once he is level 6, because you will simply be Dark Harvest fodder for him to scale late game or if he has First Strike, easy gold and a kill. He is, however, extraordinarily squishy to burst. Stay away from his corpse when he is dead as he can still cast spells while respawning. It's good to build an early pair of Boots of Speed, if you are having trouble avoiding his (Q) which requires more of a baiting and juking playstyle, while kiting him around. Remember once again, he may deal a shit ton of damage but he is a very glass cannon champion so long as you can avoid his damage entirely by side stepping. Banshee's Veil will aid you in staying alive.
Zilean
Be careful with his (R) if you are about to kill him or one of his allies, if you know you can kill them, follow them, wait for the (R) timer to deplete or they will revive with 50% or more HP based on Zilean AP! Avoid his (Q) stacking, as if he lands (2) together he will stun you. If he does stun you expect him to either slow you with his (E) or boost his or his allies mobility. He can combo this on a minion/himself. The main problem is trying to chase him as if you were to chase him you're more than likely going to be stunned and killed with his allies assist or just end getting soloed by him since his full AP build hurts badly.
Kennen
Playing aggressive against him early and shoving him under his tower tends to be the better option, as he suffers from the same effect we have when pushed in early levels. Side step his abilities and try not to get too close when you are hit, as he can stun you. If you are under your tower, and he decides to all in you with his (R) it would be wise to have a stopwatch in the early game, if you wanna be extra cautious. When he uses Zhonya's Hourglass and & tries to flash away shroom his feet immediately as he enters stasis as he nor any other champion can flash out of setting it off as they changed how it interacts.
Vex
Vex is pretty overpowered as a Support or Mid laner, but as a Top laner she doesn't really have much impact. Her auto attack range is pretty long, much longer than Teemo's. When her bar is full, you have to be aware of her flee engage (it will slow you by 60-99%) along with her level 6 (R) as you can not utilize minions to body block it, if you get struck by this ability she will be able to close the gap on you immediately. If a target is killed this skill can reset letting her recast it to chase you or allies down. Overall so long as you have any form of magic resistance she isn't too hard to deal with. It's just when she is fed and starts roaming is when she becomes a problem.
Lulu
Besides being a fellow Yordle, she is quite annoying in her mobility, slows and poke with her (Q). Along with being able to increase allies, mobility, attack speed and damage through her (W) and (E) along with (R) granting large HP and AoE CC. She is, however, one of the most squishy champions to face despite her slows and poke range. So dealing with her personally, isn't really that much of a big deal, it's when she is supporting a good ranged champion that she becomes a huge problem, by granting them additional damage and protecting them with her (R) while also disabling you/allies with her (W).
Lux
If she is killed before her (R) is activated, it will not go on cooldown and will be up when she revives. The real solution to dealing with her is to avoid her (Q) root. It passes through only (1) minion/monster/champion before stopping on the second target and rooting them both. So if you only have one minion between you and her, you're going to want to not position yourself behind it, only if there are two. Her (E) is very pronounced so you'll want to guess where it is being sent and avoid it’s location as it is usually being projected behind you. A late game fed Lux in any role is terrifying.
Twisted Fate
You can blind his (W) cards and you should aim to blind is golden card. It does take some time to get used to it, but you will often be able to (Q) and (R) him when he uses his (R) to teleport to your location globally. This ability will also prevent you from using your passive as it reveals all stealthed champions. You become visible for a short duration, but blinding his (W) will help save you or even your allies that have been caught out or are about to be killed through his next auto. Weave in between his (Q) spread which is pretty visible and easy to avoid since this ability is so large and has a long range spreading outward.
Kayle
You absolutely dominate this match-up early game, however, if you don’t take advantage of this and let her get to level 11 or 16, by letting her free farm and split all game, you are likely to lose. Her win condition is getting to the point where she doesn't have to rely on stacking her passive. Push her out and keep her out. You have to be super aggressive against her. You completely counter her early game due to her reliance on getting passive stacks, through auto attacking. You can sidestep her (Q) which will slow you if you are hit by it. Just keep putting her down early with (Q) even if it means getting ganked a lot. Oblivion Orb is great for early game to keep her low HP.
Shen
You can go stealth and he can ult you without being seen.
Also has CC
Veigar
High burst, and CC
Cassiopeia
You allow her to spam her E because of Poison.
Alistar
CC
Blitzcrank
CC
Gragas
CC
Braum
Multiple CC which allows for easy ganks.
Morgana
Multiple CC which allows for good ganks.
Nautilus
Nautilus offers multiple forms of CC, slows and knock-ups, which is very good for Teemo.
Karma
Sheild + Movement Boost allowing for better ganks and chases if used onto you.
Thresh
CC
Taric
CC
Annie
CC
Rakan
CC
Twitch
Double poison, right? RIGHT?!
Darius
CC
Galio
CC
Camille
CC level 6.
Aatrox
CC
Anivia
CC
Bard
Bard has decent synergy if he actually lands his stun or is constantly placing down his shrines throughout your jungle in the early game. It can keep you healthy if you're having trouble with clearing. He can also grant you new ways to gank their lane with his (E) through terrain.
Orianna
CC and Shield.
Aurelion Sol
CC
Synergies
IdealStrongOkLowNone
Shen
You can go stealth and he can ult you without being seen.
Also has CC
Veigar
High burst, and CC
Cassiopeia
You allow her to spam her E because of Poison.
Alistar
CC
Blitzcrank
CC
Gragas
CC
Braum
Multiple CC which allows for easy ganks.
Morgana
Multiple CC which allows for good ganks.
Nautilus
Nautilus offers multiple forms of CC, slows and knock-ups, which is very good for Teemo.
Karma
Sheild + Movement Boost allowing for better ganks and chases if used onto you.
Thresh
CC
Taric
CC
Annie
CC
Rakan
CC
Twitch
Double poison, right? RIGHT?!
Darius
CC
Galio
CC
Camille
CC level 6.
Aatrox
CC
Anivia
CC
Bard
Bard has decent synergy if he actually lands his stun or is constantly placing down his shrines throughout your jungle in the early game. It can keep you healthy if you're having trouble with clearing. He can also grant you new ways to gank their lane with his (E) through terrain.
You can use minions to body block his (Q) hook, but be aware he can still jump into the minion and use his (E) to move you closer to him and his teammates. You can bait out his (E), which sometimes will not reveal you, if you are struck by the outer side edge of the rectangle, but be aware you will be revealed if you take the full force beneath him or adjacent to the flay itself. This is a minor thing to take into consideration if you are playing support. You don't wanna touch his (R) wall as it will slow you for 99% for 2 seconds. Avoid his (Q), poke safely and respect his pressure as a support when he moves forward.
Janna
We have to be careful about her shield/heal/slow and tornado harass. Yasuo/Janna duo is a nightmare to deal with. It really just comes down to how well she is placing tornados and healing/shielding your damage. Avoid staying in bushes while tornados are placed, as it just allows you to force her to waste mana. Once the tornado is down, you can play a bit more aggressive when she backs off a safe distance behind her ADC. She will shield her ally pretty frequently so you need to be a tad bit more aggressive if you wish to deal damage. The most annoying thing is her point and click slow, you'll always trade it.
Soraka
Against Soraka focus on avoiding getting hit by her (Q) poke and not granting her free sustain, other than that, this match up can be pretty easy. However, you can not take into account the actions of your ADC, who will most likely be letting her land freebies. She is a very squishy, high sustain champion. Focus her, but don't flash into her silence which will screw your ability to do anything, but auto attack and become rooted if you stay in the ring for the full duration. Start with Long Sword and buy Executioner's Calling as soon as possible and later on buy Morellonomicon.
Nami
She has so much sustain and damage, along with CC with her (Q). It can be tricky to deal with, especially when she is with a long range ADC. You will want to definitely acquire an Morellonomicon as soon as possible, as the sustain will be a big problem late game. You can't reliably poke her until her (W) has been used as it will simply bounce between allies and enemies. Healing herself and dealing damage in return. Which really sucks. Despite this, she is actually very squishy. You don't want to get trapped in her (Q) which is a very pronounced bubble which will knock you up! Otherwise you'll lose the fight.
Kai'Sa
Her (W) can, and will reveal you, but it can be body blocked by minions. Never be alone with her or her (Q) will shred you. Her late game shield is annoying with her (R) engage when it comes to late game. You're not going to really get the most out of your (Q) until she has utilized her (Q) which is held until her full passive stacks. So she isn't a good champion to prioritize (Q) but you can burst her pretty hard once you do max it out. Just again, make sure you're near allies or minions to take less damage, from her (Q) burst, since it will spread out and not focus all into you.
Brand
You can utilize minions to body block his (Q) stun, however, don’t let him land his (Q) or (W) after he has set you ablaze with his (E). His burning DoT passive reveals your position. Your objective is to force him to spend mana while he is trying to hunt you in the bushes, however, don’t overdo it as he will eventually get lucky and hit you. If he uses (R), get away from minions and allies as his ultimate won’t bounce to additional targets, otherwise you risk dying to his combo.
Sivir
Sivir will constantly spell shield your (Q). You can, however, try to bait her (E) by throwing and canceling your (E) or (Q), this will not put your ability on cool down, but it will normally fool a bad Sivir who isn't looking for the (Q) but the champion animation, to spell shield. It's also very hard to prevent her from shoving. Because of her general ability to wave clear and shove, with her (Q) boomerang and her (W) ricochet, it makes it very hard to deal with her or poke her, when you're stuck under your tower. Along with these things, she has a group movement speed ultimate so outrunning them is impossible.
Morgana
Morgana is a real nuisance! Blinding an enemy champion is impossible if she (E)'s them, which negates the effect of the blind. Along with this, she can simply lock you down for a very long time if you allow her to land her (Q). This ability can be body blocked by minions. Try not to play too aggressive with her. You can not hide from her. Her (R) becomes highlighted when near you alerting her to your presence. Revealing you the second she decides to activate it. So don't go for any of those stealth plays while she is nearby, as it is going to end poorly for you.
Blitzcrank
Dealing with Blitzcrank, is annoying, as he makes your passive useless either if you are in a bush or hiding on lane. He can throw his (Q) and hook you, while comboing you with his (E) which will likely lead to your demise. His (W) is pretty much almost the same as your (W) aside from the slow down and extra attack speed. Your best option is to trade with him after he missed his (Q) and used his (W). You can blind his (E) and use minions to block his (Q). Blitzcrank players tend to use their (W) when they are getting assisted by their jungler, so keep focus and be ready to ping for danger while side stepping his (Q).
Swain
Swain with another CC bot lane is practically unplayable, especially if it's Pyke, Veigar or any other hard CC mage. Respect him and don't make unnecessary decisions that could mess up your lane.
Xerath
It's no suprise. Xerath or for that matter any long range mage champion is the bane of Teemo's existence. It's really hard to side step or play bush harass due to his constant spam of his skills. The idea is to wait until he has most of his skills down, most notably his stun, while being low mana. This will offer the best opportunity to engage him an his ally.
Milio
Generally speaking Milio himself is a really annoying champion to be around due to his high mobility and sustains/shields along with his knockback from most of his abilities. This makes it difficult to engage on him or his allies.
If you can get the jump on him, it's often short lived due to his ability to react and knock you away quickly.
Akshan
Akshan can be an absolute pain in the ass due to his ability to swing forward and do a tremendous amount of damage while also having tons of sustain and a shield if he does his combo correctly while playing with Shieldbow as his Mythic. Note: You can flash or step between him as the swing to cancel his rotation really easily if you find the opportunity to do so, especially while in stealth. Speaking of stealth, you're going to need Control wards to track him late on in the game, do not let him get kills or he will revive his entire team one by one. He is the biggest threat to your late game.
Kog'Maw
Kog'maw's (R) can reveal you, his (E) will slow you and in general paired with the right support such as a Lulu it can absolutely shred you, so be careful. Once he dies, he will still be able to chase you and explode on top of you, dealing true damage which can finish you off, in most cases. The damage can be avoided by running away with your (W) active. So keep your distance. You don't often see full AP Kog'Maw ever anymore, but watch his item builds, and adapt your builds to match him.
Ezreal
Ezreal is problematic to deal with due to his ability to spam (Q) and being more ability reliant than (AA) reliant. Minions can be used to block his (Q). However, you should not be utilizing bushes too much, as he will constantly bombard you with his (Q) eventually landing a few dealing a lot of damage. He is very squishy, with a lot of safety in his kit. Max your (Q) and poke him from behind your minions as it will be your best option. Keep your eyes on his ultimate, especially if your allies are low HP or you are yourself. He can easily snipe you from across the map. Most Ezreal's are pretty much toddlers that deal 0 DMG.
Zilean
Be careful with his (R) if you are about to kill him or one of his allies, if you know you can kill them, follow them, wait for the (R) timer to deplete or they will revive with 50% or more HP based on Zilean AP! Avoid his (Q) stacking, as if he lands (2) together he will stun you. If he does stun you expect him to either slow you with his (E) or boost his or his allies mobility. He can combo this on a minion/himself. The main problem is trying to chase him as if you were to chase him you're more than likely going to be stunned and killed with his allies assist or just end getting soloed by him since his full AP build hurts badly.
Pyke
Just like facing off against Blitzcrank or Thresh, use minions to body block his (Q) and side step his (E) gap close. If by any chance you get stunned, you are pretty much a goner to his (Q). You can avoid his (R) if you side step in between the sides of the visual (X) mark. Otherwise is (R) resets, allowing him to land his ultimate on multiple team mates, so long as he kills someone, it will always reset and grant his recent ally that assisted him, 300 gold. Which is a massive boost to the enemy economy! You can notice when he is going for a gank when you see sharks rotating your characters model, so watch out!
Lucian
He is quite difficult to actually (Q) reliably due to his kit allowing him to hit you (3) times very swiftly, PTA passive deals more damage than you really want to take from him. Utilize bushes to your advantage to get your (Q) out before he can react. His (R) can be avoided by minions or running to the sides as it is a straight line and can also be cancelled prematurely to allow him to rotate back through his gap close and burst of auto attacks. So essentially he has a lot of range and abilities that let him trade very quickly before our (Q) reaches him without getting the jump.
Neeko
Since her release, Neeko has been tuned down and her damage has mellowed out. She is everything Teemo is, but better. If you get rooted you are pretty much dead, so avoid being hit by her (Q) which will pulsate & splash multiple times and will be often comboed when she has you rooted. She will set off your (R) with her (W) which is annoying as hell. Don't show her where you've been placing shrooms as they do this in bushes, from lane and the corners of the walls setting them off prematurely. It's overall an okay match-up as long you simply, learn to dodge her combos or avoid them all together.
Varus
If you're unfortunate to lane against him, he will mostly be prioritizing his long range (Q) poke from way back behind his minions. Try your best to avoid these pokes as they do deal a large amount of damage. If your allies get (R)'d stay away from them and vice versa if you yourself fall victim to it. It will chain react anyone nearby up to 3 targets including yourself but 1 at the time. Besides his long range and ability to go AD (Guinsoo) or full AP, he's still a very squishy champion. He is reliant on being at range in most scenarios, so getting in close enough for (Q) is usually not a good idea. Try to catch him out / flank him.
Karma
She is a pain due to her mobility, shields & root, which only becomes more annoying as the game goes on longer. She can either go full AP or Tank, the second one being annoying as hell. It's very hard to chase her or trade efficiently, you can utilize your minions as a way to prevent damage from her (Q) or (R) > (Q) combo, but don't be overextended. If you end up shoving your lane under her tower, you will simply be ran down. She can easily clear the entire wave and run after you or get a gank and lock you down with her mobility and root. Match your waves through wave control so you're by your tower for allies to gank.
Maokai
Plain and simple, Maokai counters bush harass which is our main form of cheese in the support role. While normally building full AP with Imperial mandate. It's devastating. You'll want to never use bushes to harass, and survive the lane with your ally until you can get out.
Samira
Samira as with any new champion is normally going to be busted. The ideal thing to do is ban and wait for the community to settle her down in her designated role(s) which is most likely going to be ADC. Once again like every new champion, she is a mixture of multiple champions. Yasuo and Akali specifically, she can prevent projectiles about to hit her and dash a good distance. If she is fully styled (S) or close to getting (S) back off and let it reset, sort of like how we reset Fiora. You'll definitely want to hold off using (Q) as she will simply negate it, like Yasuo's wind wall. Despite this, she's very squishy.
Seraphine
Seraphine is a pretty annoying champion, she's literally Sona (2). Once she hits level 6, you have to treat her like Sona and respect her charming AoE. She doesn't offer massive sustain like other healing supports, but offers a lot of ranged CC, which needs to be avoid, especially if she casts a double cast to apply extra effects like Rooting, or AoE splash damage.
Aphelios
Aphelios got several nerfs after his release. You will still need to get use to his kit and what each of his weapons do. He is the same as 5 champions but combined into 1. He can heal with his Scythe Pistol, place a turret like Heimerdinger with his Chakram & channel like Urgot’s (W). He gains 100 range like Caitlyn with his Sniper Rifle and unlimited range if he marks you. He gains spread damage with his Flamethrower, forcing you to position properly. And finally the gravity cannon which will root you. Overall he is squishy but can sustain like crazy with his Scythe Pistol if you don’t blind him in his channeling ult.
Vex
Vex is pretty overpowered as a Support or Mid laner, but as a Top laner she doesn't really have much impact. Her auto attack range is pretty long, much longer than Teemo's. When her bar is full, you have to be aware of her flee engage (it will slow you by 60-99%) along with her level 6 (R) as you can not utilize minions to body block it, if you get struck by this ability she will be able to close the gap on you immediately. If a target is killed this skill can reset letting her recast it to chase you or allies down. Overall so long as you have any form of magic resistance she isn't too hard to deal with. It's just when she is fed and starts roaming is when she becomes a problem.
Fiddlesticks
Fiddlesticks is all about mind games with his effigy placements and his passive allowing him to blend into the environment by pretending to be one himself. It can be confusing at times because his effigies will flash, ultimate and run away making you think it's the real Fiddle. You can not stealth against him as his effigies grant true vision of invisible units. It is very important that you keep track of where Fiddle is always. If you lose track and vision of him for 2.5 seconds the next skill that hits you will fear you and slow you for 90% if he lands his (Q) on you. You take extra damage if you've been recently feared so be careful.
Bard
Bard matchup is fairly even for both sides, unless you position poorly and he lands his (Q), which will slow you for either 60% or stun you if it passes through you and another target such as a minion or terrain. Avoid this ability at all cost. His (R) “The World!” is made to stop a siege, zone someone, catch someone to get closer or protect his allies. Never chase a Bard into his (E) tunnel, as this is a setup for him to stun you with his (Q). You can step on his (W) to remove them as well placing shrooms on top of the chimes that appear in the game as he won’t be expecting shrooms to be placed on his passives. Bard players often leave their lane to help others as he roams around. This makes the laning phase a little bit easier, but watch out because he may be roaming to bring his ally in from behind you to flank you.
Taric
You can't reliably dodge his (E) especially if his allies flank you from the side. You can position yourself in between them usually by heading into their side of the lane, but really you can't avoid it, if you just let them set it up the stun, so keep your distance. Utilize the bushes to go into stealth. Burst them before his (R) takes effect, or they will be immune and you will be in a really bad spot and you will be run down by invulnerable champions all over. He is not really that much of a problem, he does, however, has a bit of sustain which you can lower by purchasing Morellonomicon, but it's not too bad to warrant it.
Miss Fortune
Avoid being behind minions/allies, since her (Q) will seek you out even if you are in stealth just like other certain champs and their bounces (Ex: Jhin). It will deal a tremendous amount of damage, so position well. She can flush you out with her (R) easily. You can not blind her (Q) since it is an ability and not an empowered AA. She is also a pretty quick champion due to her added mobility. Her mobility acts like our own (W), if she takes damage she loses her movement speed, if she doesn't take damage for 5 she gets 25 MS and if another 5 seconds after she gets from 50 up to 90 MS based on (W) rank.
Rakan
Don't get caught out by his (W) which is a gap close CC and the same with his (R). You can avoid is (W), however, not his (R) but his (W) gap close is basically a free poke and sustain, unless you avoid his (Q) which will heal both him and his ally once he returns to them while gaining a shield through Guardian. Despite all of the acrobatics he shows off, he is moderately squishy, but you shouldn't focus him all the time, his ADC is still the prime target when it comes to fighting. If he is in a solo lane, however, it's pretty much a free lane to win, since he needs allies to utilize his abilities. He's just disruption support, really.
Caitlyn
Caitlyn is the ADC with the highest range early/mid game. Her traps can catch you out in a bush which increases her range even further for a head shot type (AA). Be careful when entering bushes, as there are usually traps lined on the edges to catch you out of surprise. Her (R) can/must be body blocked to protect an ally! However, sometimes your teammates can be...less than supportive in this regard. If you get her by surprise and use your (Q) she will have a hard time properly retaliating. Hardest aspect of this match up is the range advantage she has, so respect it and abuse your passive as much as possible.
Draven
Draven is a heavily AA reliant champion and despite that, he can still come back into the game with a QSS. He can reveal you with his (E) which shouldn't be underestimated. Killing him early will shut down his passive gold stacks. Ninja Tabi is one of the best ways to deal with him, also purchasing Executioner's or Morellonomicon first prevents his mid-late game Bloodthirster spike. Maxing your (Q) is pretty much all you got to really worry about, just don't simply walk up to him, he will always get the first shot in, you need to get the jump on him, or poke in between him trying to CS if you're playing Teemo Support.
Corki
So many people consider Corki an AD champion, simply because of his build. However, Corki is actually 85% Magic Damage. His (Q) can reveal you in bushes to him and his allies, he is also more ability prone than (AA). Avoid projectiles and get away from his AoE (E) and the gap close with his (W) which if he has “The Package” will drop and slow enemy targets in a rumble like ultimate applying a 90% slow. This can also reveal you. I advise you to bait his rockets and kite him, as you will not have enough damage or defenses to duel with him on prolonged fights. Magic Resistance will help you a lot against him.
Yuumi
You can use minions to body-block her (Q), I would suggest as I do for all other sustain champions to purchase a Executioner's or Morellonomicon. Focus taking out her ADC once you have acquired this item, as she will become relatively useless in healing. Don't get hit by 3 of her (R) waves or you get rooted. Her damage and (W) along with her (E) have been substantially nerfed. The most annoying thing to deal with is her invulnerability while inside an ally, as well as being capable of hopping to another once they die. Yuumi is helpless when she is alone, catch her out as she roams to place vision, or after killing her ADC.
Jhin
Grenades can bounce to you in stealth if they bounce near you, either from minions or allies, giving away your position. (E) and (W) snare combo makes it hard to not get caught while using bushes to harass Jhin. You should use your (Q) while he is just about to fire his 3rd (AA) to prevent the 4th (AA) and getting in some poke as he reloads. Watch out for the snare/traps they don't deal damage to you initially, they can easily be avoided by walking out, unless he roots you. He is a very mobile champion once he gets to late game, but really you just need to learn to side step or body block his (W) with minions.
Tristana
This match-up in general gives the advantage to Tristana by default, and she will have better wave clear than your ADC in most cases. So this isn't good for us, since we need to be even or shoved. Teemo fails at supporting a tower freeze. Her gap close and burst damage is deadly. If you happen to be facing her alone, utilize the nearby bushes to poke her, but step back in so she can't retaliate as quickly. You definitely don't wanna be the prime focus of her (E) > (R) combo, which will be a large amount of damage if you are not building defensively. She can (E) towers so stay away to avoid large AoE damage.
Nautilus
Despite looking like a Physical Damage champion, Nautilus is primarily a full magic damage champion, while also being a Tank. So keep your distance, utilize minions to body block his (Q) hooks and never allow him to keep himself on top of you. The amount of CC and Slows he applies is what hurts the most, you can run and flash a great distance before his (R) is able to reach you, so if you are close to your tower, you can try to avoid being caught out, especially if he is using it to help his Jungler or allies with a gank. He is rather easy to deal with in general, as long as you play smart and keep on your toes.
Kalista
Kalista is more about (AA)ing, while passively kiting. You can blind her (AA), but she can keep up with you, while also preventing your stealth either through her (Q)/(R) CC, while she finishes you off by rending her spears. Keep your distance from her, and try to avoid her (Q) spears. Place some shrooms down in the lane an bushes to hinder her kiting potential, as it makes it easier to run away. She is, however, extremely squishy, so long as you don't get into a position where she is kiting you into oblivion, or is simply split pushing or alone nowhere near her tethered ally which grants her a lot of bonuses.
Senna
Utilize minions to block her (W) as this a skill-shot ability and is an AoE CC so stay away from allies who have it and vice versa if you have it. Keep your distance from low HP minions, because it will immediately go off, if it kills a minion. When she uses her (R) stand out of the dark center rectangle, or you will take damage. The outside rectangle is just for healing her allies. Overall she is a really hard match-up to go into, due to her scaling range and damage late game. (She has more range than Caitlyn, depending on how many passive stacks she has!) Blinding her is pointless, you can't get in that close before the trade.
Ashe
You can body block her (W) with minions. She is more of a utility champion making it very hard to chase her. She is very squishy, however. We lose our movement speed bonus upon taking damage so the added slow, cripples us even further, so take advantage of minion block. Her (W) is on a long CD early game, but becomes a nuisance late game with the cool down going as low as 2,4 seconds with 40% CDR. Being aggressive after her first (W) is important in the early stages of the game. You must be wary about her (R), especially while fighting or backing, you can be easily killed or stunned for 3.5 seconds.
Zyra
A relatively squishy champion to deal with. However, if you are in bushes, do not step on her seeds. Half of them will reveal you as these are the ones that come from her (W) active, and half of them will not and these ones are from her passive, it is very hard to differentiate one from another due to different skins she has, and how minor the detail is. You have a very short time to react if she ends up activating her (R) which will knock you up, and deal a ton of damage coupled with her seed-plant combo. You can not utilize minions to body block her root. The root must be sidestepped as it will root everything in the way.
Sona
Teemo doesn’t handle sustain match-ups that well, Sona will normally go even with you, but mostly it will be into her favor. Simply try to wait for her to use her (Q) to poke while keeping yourself hidden in bushes, as this is her main source of poking, before attempting to harass her. Magic Resistance helps a ton if she goes full AP and purchasing Morellonomicon is a must. Despite being a sustain support she is really squishy and easy to deal with, if you are capable of catching her out before she has time to stun you with her (R). Never run up to her, especially if she is playing a full AP burst build as you will be erased.
Lux
If she is killed before her (R) is activated, it will not go on cool down and will be up when she revives. Late game the cool down of her (R) is very low especially with clouds. The real solution to dealing with her is to avoid her (Q) root. It passes through only (1) minion/monster/champion before stopping on the second target and rooting them both. So if you only have one minion between you and her, you're going to want to not position yourself behind it, only if there are two. Her (E) is very pronounced so you'll want to guess where it is being sent and avoid it’s location as it is usually being projected behind you.
Ivern
A good Ivern can give you a really hard time. But, he can be relatively easy to deal with when all he does is miss his CC and run out of bushes to hide in. You can use these bushes if they have no vision of the area to sneak around / inside of it. Overall he's really easy to deal with early, until level 6, where he summons Daisy to chase and knock you up repeatedly.
Lulu
Besides being a fellow Yordle, she is quite annoying in her mobility, slows and poke with her (Q). Along with being able to increase allies, mobility, attack speed and damage through her (W) and (E) along with (R) granting large HP and AoE CC. She is, however, one of the most squishy champions to face despite her slows and poke range. So dealing with her personally, isn't really that much of a big deal, it's when she is supporting a good ranged champion that she becomes a huge problem, by granting them additional damage and protecting them with her (R) while also disabling you/allies with her (W).
Pantheon
Just like dealing with a Pantheon in the top lane, you'll want to throw your (Q) down on him if he lands a stun on you or your ally. If possible, however, it would be much more reliable to blind his ally if they are someone like Draven, Vayne or any other basic auto attacking ADC.
Rell
Rell attacks very slowly, but makes up for it by stealing a portion of you and your allies MR and AR for 4 seconds, which is her basic perk. She is extremely tanky, while having the ability to gap close with a rather large shield. If she gets in between you and the ally she is tethered to, you will be stunned upon her reactivating her (E). Ultimately she is slow, and tanky with very little actual damage, so it's best to kite her around and focus on the people she is protecting. Void Staff is mandatory against her for late game.
Renata Glasc
Renata is all about supporting herself and supporting her allies, more so than fighting.
She will use her (R) to make her targets fight each other, which can be really painful if you happen to have champions like Master Yi currently in his ultimate.
The easiest explanation about how this champion works is, the old "Chemtech" Dragon effect was effectively put into her (W) “Bailout”. If you try to kill her or any enemy affected by this skill they will be put back at full HP and burn to death until revived with whatever amount of HP they had left if they kill a target before they die.
It can be annoying to try to get close if she grabs and pushes you away, but overall she isn't too much of an issue unless in a big team fight.
Zeri
This matchup will be updated as I have time to play against her and get a feel for her. Overall consider her sort of like Graves. If you blind her, she can still periodically hit you with her (Q)? Auto. She just turns around to hit a random location.
Jinx
Besides her (E) and (W) she is relatively straightforward to deal with. Don't get snared by her (E) and avoid getting hit by her (W) slow. Minions can body block this ability, however, be careful of her global (R) rocket especially around objectives, be sure to keep an eye on your health and make sure to watch for her if in vision while backing. Ping your allies danger once she hits level 6. You need to be their eyes for when they are about to get ulted from across the map. If they have low HP and you see her backing off or ulting, let them know. A big problem is when she gets kills, gaining bonus movement speed consecutively.
Leona
You can simply (Q) Leona once she is attached to an ally or yourself, or even if you run into her by chance in bushes or around a corner. Your (Q) prevents her from activating her empowered stun. Don't place wards on her while she is in a bush, as she can auto > (Q) > auto, allowing her to strike 3 times, quickly taking out any wards placed on top or near her. Aside from being tanky and a peel for her teammates, you should never focus her outside of saving yourself or an ally from the initial engage and empowered stun.
Xayah
Before attempting to trade with Xayah make sure to get the first (Q) out on her while she is occupied CSing, as most of her abilities are centered around throwing feathers out and using them as a recall to root as long as 3 feathers are on the ground and damage targets in their path. Careful not to flash + ignite when she is level 6 and above as you want to save that for when she uses her (R) invulnerability and flash after her if she tries to escape. You can not blind her feathers, you can, however, blind her (AA) damage, just be aware that the feathers are stacking up behind you! Stay out of the feather recall zone.
Twitch
Being the fellow rat that he is, Twitch is easily one of the more simple ADC to go up against. However, his poison from his (W) AoE and (AA) in general will give away your location over time (A white silhouette) while invisible. Allowing a good support like (Blitz/Thresh) to hold of vision on you, to hook and catch you out. Therefore it's best to keep moving around or to simply not play around in bushes, while facing one of those match-ups. Control wards can be helpful if he is playing jungle as they will reveal him as he comes near. Place shrooms around your enclaves to prevent him from simply sneaking in behind them.
Alistar
Alistar's gap close CC he is very tanky and offers a lot of damage blocking for his allies. While you shouldn’t normally focus on him, you should not underestimate him as a champion and avoid letting him get behind you. Alistar players enjoy flashing and knocking you back into his allies or under their towers as well as away from their allies. It’s simply about respecting these players and keeping your distance from him while not getting caught out. He can reveal you in bushes with his knock up. If he does try to face check you in bushes simply back off entirely, there isn't any reason for you to challenge him.
Vayne
Hands down Vayne is one of the easiest match-up to deal with. Her entire kit is (AA) reliant, aside from her (E) condemn. If you are fortunate to be alone with her, with no minions nearby, you can (Q) her as she (E)'s you into a wall stun allowing you to enter stealth while you wait out the duration. If she activates her (R) just go into stealth on a brush. You don't always have to use this trick, you can simply max (Q) and destroy her in a 1v1, however, once she has acquired quicksilver sash, you want to avoid being with her in a 1v1. You'll need your teammates assistance to deal with her at that point. Counter with Zhonyas.
Braum
This lane is extremely simple to poke, however, do not waste your (Q) until Braums shield is down, so he can’t negate the effect or damage to either him or his allies. Make sure to avoid his (Q) by taking advantage of your minions otherwise you risk getting marked and if you are hit 4 times will cause you or your allies to become stunned. You can (Q) the auto stacking passive. He is extremely weak once he finished blocking with his shield. He needs an ally to support to take full advantage of his kit. So as long you play well and avoid skill shots you should not have any problem with him. His ult will reveal you.
Jhin
Jhin has been since the start of Season 8 one of the BEST ADCs to lane with. He has range, he has damage and he has CC. A good Jhin Teemo combo is unstoppable with Deadly Flourish.
Caitlyn
Very long range, great synergy with her traps and your shrooms, especially if the enemies are not AP and just melee tanks like Braum / Leona, allowing you to harass with little effort from the bushes standing around the traps.
Kai'Sa
Very strong ADC in the sense of having everything she needs. Gap Close, Mobility, Range, Burst. The laning phase can go either way depending on the matchup. It's better to try and give her the kills, due to it being very hard for the enemies to stop her from snowballing.
Brand
Burn combos well with your poison, the stun is great aswell... He can play ADC or SUPPORT so vice versa to you.
Cassiopeia
If you lane up with a Cassiopeia who knows how to play the champion, you can dish out some extreme amounts of damage, since all she has to do is press (E) once you land your (E).
Aphelios
Aphelios has pretty much everything he needs, to protect himself and deal with enemies on his own. Sustain, CC and range. It's very fun to support a good Aphelios as we can simply do our own thing while protecting him with our (Q).
Veigar
The long story short is, Veigar and Teemo are a force to be reckoned with, Veigar can focus on stacking his AP and locking people down early game which allows you to freely burst people down for your own DH stacks. So long as you're not shoved right under their tower all game and ganked all the time you should be fine to win every lane with his assistance.
Akshan
Akshan can handle himself very well. That is, so long as he is capable of engaging and disengaging with his Hookshot properly. Since Teemo and Akshan can both enter invisibility, it offers some really great cheese opportunities when laning against low engage compositions, like mages and low range ADC champions.
Draven
Draven is a pretty solid ADC to support, so long as he is positioning well and not simply eating hooks and CC. He has mobility, CC and damage to pretty much dominate, however, if all he is doing is playing passively in lane and not utilizing Teemo's early game harass, it's pretty much over.
Varus
Very good range poke and an overall good ADC however, if they are not as stated before being aggressive and looking for poke opportunities you're not really going to get much accomplished.
Twitch
Double poison sounds great but it's pretty lackluster, you both stealth and have the element of surprise but are very prone to hard CC and getting caught out.
Xayah
A decent synergy, range, harass, CC, Immunity. It's a good thing for an ADC to have these while you dish out the DoT and pressure.
Tristana
Tristana is great to support just due to her ability to jump in or jump away, allowing her to focus on the important things like staying alive, and focusing on CS. She can come to our aid and knock champions back if things get too heated, which is a good thing.
Lucian
Lucian is the type of ADC who is great at getting in and getting out with a quick poke and then back to CSing. He isn't great when it comes to getting out of harms way, as his only escape is a small dash. This makes him an "Ok" synergy as he does have damage, but it would be better for Teemo to be supporting someone like Draven in this case, as he has both CC, Mobility and Damage.
Samira
TBD: It should be a solid supporting lane for you due to the nature of new champions being released and pumped full of damage.
Yasuo
A little off meta but this Duo bot lane is pretty hecking strong when played into the right enemies and played well by the duo. Great for engaging onto a matchup like Caitlyn x Janna.
Jinx
I would say the same as Draven, if the are not utilizing switcharoo, it's going to be a cluster fuck of a bad duo. Along with utilizing good Chompers. Be it to help you escape if they catch someone off guard/escaping.
Vayne
Nothing really special about Vayne until the mid/late game, she doesn't really dominate the laning phase early on and gets out poked by pretty much everyone else unless she has a good CC support. Outside of the laning phase she's pretty godlike when played right.
Miss Fortune
Miss Fortune is pretty great when she is being played correctly, landing her (Q) bounces, and offering assistance through her (E) slow and her (W) mobility to stay mobile and safe.
Sivir
Sivir has too much wave shoving to really be a good ADC to support, but can protect herself with her spell shield, allowing her to not get caught out or CC'd enough to support her and turn a fight in your favors.
Ashe
Having no escape or mobility and being as basic as an auto attacking champion can be, it's safe to say she isn't the best to work with as a Teemo Support. The laning phase can be annoying, Late game stuns is about all she's useful for if she's not being one shot. Her slow run down is great, but she herself as a champion is terrible without a solid engage support which Teemo is not.
Kog'Maw
Kog'Maw doesn't really have that much going for him without a proper support like Lulu or a lock down support. It's really hard to support him due to him having nothing to really protect himself with.
Senna
Senna is better off played as a support, despite playing her as an ADC every now and again. She doesn't do much for you or herself, unless she lands her stun.
Kalista
Kalista benefits supports that can actually be of use to her as a front line, like a Malphite being thrown into a team fight, allowing him to CC them twice with the initial toss + ultimate. Often times we will only be able to use her ult to be saved and that is it.
Ezreal
The worst ADC period. Ezreal has no synergy with really any support. He has a very poor early game 90% of the time they can not land a single skill. If you were to ask any support, do they like Ezreal the most response would be "I feel like he does nothing, and I can do nothing for him." This is quite true due to his passive/aggressive nature. He will yes become a monster late game if he gets to this point, but the early to mid game, is quite horrendous. There are yes, some very good Ezreal players, however, in most every scenario they will do nothing but feed and or farm from tower, preventing you for really doing anything but wait.
Synergies
IdealStrongOkLowNone
Jhin
Jhin has been since the start of Season 8 one of the BEST ADCs to lane with. He has range, he has damage and he has CC. A good Jhin Teemo combo is unstoppable with Deadly Flourish.
Caitlyn
Very long range, great synergy with her traps and your shrooms, especially if the enemies are not AP and just melee tanks like Braum / Leona, allowing you to harass with little effort from the bushes standing around the traps.
Kai'Sa
Very strong ADC in the sense of having everything she needs. Gap Close, Mobility, Range, Burst. The laning phase can go either way depending on the matchup. It's better to try and give her the kills, due to it being very hard for the enemies to stop her from snowballing.
Brand
Burn combos well with your poison, the stun is great aswell... He can play ADC or SUPPORT so vice versa to you.
Cassiopeia
If you lane up with a Cassiopeia who knows how to play the champion, you can dish out some extreme amounts of damage, since all she has to do is press (E) once you land your (E).
Aphelios
Aphelios has pretty much everything he needs, to protect himself and deal with enemies on his own. Sustain, CC and range. It's very fun to support a good Aphelios as we can simply do our own thing while protecting him with our (Q).
Veigar
The long story short is, Veigar and Teemo are a force to be reckoned with, Veigar can focus on stacking his AP and locking people down early game which allows you to freely burst people down for your own DH stacks. So long as you're not shoved right under their tower all game and ganked all the time you should be fine to win every lane with his assistance.
Akshan
Akshan can handle himself very well. That is, so long as he is capable of engaging and disengaging with his Hookshot properly. Since Teemo and Akshan can both enter invisibility, it offers some really great cheese opportunities when laning against low engage compositions, like mages and low range ADC champions.
Draven
Draven is a pretty solid ADC to support, so long as he is positioning well and not simply eating hooks and CC. He has mobility, CC and damage to pretty much dominate, however, if all he is doing is playing passively in lane and not utilizing Teemo's early game harass, it's pretty much over.
Varus
Very good range poke and an overall good ADC however, if they are not as stated before being aggressive and looking for poke opportunities you're not really going to get much accomplished.
Twitch
Double poison sounds great but it's pretty lackluster, you both stealth and have the element of surprise but are very prone to hard CC and getting caught out.
Xayah
A decent synergy, range, harass, CC, Immunity. It's a good thing for an ADC to have these while you dish out the DoT and pressure.
Tristana
Tristana is great to support just due to her ability to jump in or jump away, allowing her to focus on the important things like staying alive, and focusing on CS. She can come to our aid and knock champions back if things get too heated, which is a good thing.
Lucian
Lucian is the type of ADC who is great at getting in and getting out with a quick poke and then back to CSing. He isn't great when it comes to getting out of harms way, as his only escape is a small dash. This makes him an "Ok" synergy as he does have damage, but it would be better for Teemo to be supporting someone like Draven in this case, as he has both CC, Mobility and Damage.
Samira
TBD: It should be a solid supporting lane for you due to the nature of new champions being released and pumped full of damage.
Yasuo
A little off meta but this Duo bot lane is pretty hecking strong when played into the right enemies and played well by the duo. Great for engaging onto a matchup like Caitlyn x Janna.
Jinx
I would say the same as Draven, if the are not utilizing switcharoo, it's going to be a cluster fuck of a bad duo. Along with utilizing good Chompers. Be it to help you escape if they catch someone off guard/escaping.
Vayne
Nothing really special about Vayne until the mid/late game, she doesn't really dominate the laning phase early on and gets out poked by pretty much everyone else unless she has a good CC support. Outside of the laning phase she's pretty godlike when played right.
Miss Fortune
Miss Fortune is pretty great when she is being played correctly, landing her (Q) bounces, and offering assistance through her (E) slow and her (W) mobility to stay mobile and safe.
Sivir
Sivir has too much wave shoving to really be a good ADC to support, but can protect herself with her spell shield, allowing her to not get caught out or CC'd enough to support her and turn a fight in your favors.
Ashe
Having no escape or mobility and being as basic as an auto attacking champion can be, it's safe to say she isn't the best to work with as a Teemo Support. The laning phase can be annoying, Late game stuns is about all she's useful for if she's not being one shot. Her slow run down is great, but she herself as a champion is terrible without a solid engage support which Teemo is not.
Kog'Maw
Kog'Maw doesn't really have that much going for him without a proper support like Lulu or a lock down support. It's really hard to support him due to him having nothing to really protect himself with.
Senna
Senna is better off played as a support, despite playing her as an ADC every now and again. She doesn't do much for you or herself, unless she lands her stun.
Kalista
Kalista benefits supports that can actually be of use to her as a front line, like a Malphite being thrown into a team fight, allowing him to CC them twice with the initial toss + ultimate. Often times we will only be able to use her ult to be saved and that is it.
Ezreal
The worst ADC period. Ezreal has no synergy with really any support. He has a very poor early game 90% of the time they can not land a single skill. If you were to ask any support, do they like Ezreal the most response would be "I feel like he does nothing, and I can do nothing for him." This is quite true due to his passive/aggressive nature. He will yes become a monster late game if he gets to this point, but the early to mid game, is quite horrendous. There are yes, some very good Ezreal players, however, in most every scenario they will do nothing but feed and or farm from tower, preventing you for really doing anything but wait.
My GOOGLE POWERPOINT unlike with our match-up information provided above this well formated section will go into much more detail for each and every champion than I could here.
Runes, items, and what to look out for with visual reference. A lot of time and effort went into this. I do make mistakes and sometimes forget to update a champion or two. If you do notice anything out of place, like a changed champion then please let me know so I can make the necessary changes!
Throughout the years, I have honed my obsessive hobby as a writer here on Mobafire. While I have always enjoyed Teemo, I do love to play other games. This lead me down the path of journalism, where I could help others explore the world of gaming! Starting out as a STEAM CURATOR, is what eventually opened plenty oportunities. I have been enjoying as of lately, since League has become a fleeting memory. Follow me on my journey through video games with my article features on STARTMENU!
You can follow me on TWITCH even if I don't play League anymore since I have moved onto better hobbies, I would still love to answer your questions and help you improve in anything Teemo related.
We do a lot of editing while covering all sorts of Indiegame and AAA titles. Who knows, you might find something new that catches your eye, maybe even help you escape the vicious toxic cycle which is League of Legends! Either way, there is no pressure, I genuinely just want to help others succeed.
The Official DISCORD for Teemo players. Discuss everything Teemo and some off-topic things with us!
We pride ourselves on keeping things civilized, friendly and absolutely toxicity free. We care about you, so why not drop by, who knows? You might even make a brand new friend to play League with!
You can find me on BlueSky, I may not be a socialite, but I do like spreading the word of gaming!
With how people have been treating Twitter the last few years, it seems right to redirect people to one of the few social media platforms that I actively use outside of Reddit. You can find me on TWITTER
Subscribe to me on YOUTUBE. We do have a few older videos regarding to Teemo if you would like to delve into some helpful step by step assistance. We mostly feature video game reviews these days.
I don't really have any plans on releasing any more Teemo videos in the future.
I've since stopped taking League of Legends seriously. Once you start taking it seriously, it's an extremely depressing and poisonous experience, so please be cautious and take care of yourself. I welcome feedback and suggestions from everyone in order to make this guide easier to follow and understand. Don't be afraid to assist me in assisting you.
It's a pleasure to meet you! I'm more than an internet personality, I'm a friend. You can always count on me for help! You may know me on reddit as u/SovereignKitten on the sub of r/Teemotalk as a Moderator, for all things related to our lord Teemo.
I've poured my heart and soul into this guide to help you succeed, not to flash my rank.
CHANGE-LOG
Jan 13th, 2025
Added in the new features of Atakhan and the differing varients and also added in the jungle plants, since I for whatever reason never cared to add them in before.
Jan 10th, 2025
Adjusted some rune builds and removed some outdated content / runes and text. Will be slowly updating the powerpoint over the course of a few days, not in any real rush. You can get the new rune builds through the base guide in the meantime.
October 30th, 2024
Changed up some of the build itemization since it was outdated like Blasting Wand build path for Liandry builds. Also changed some base body text, plan to eventually update the visual references, but not all that concerned with that portion.
August 25th, 2024
Just adjusted some basic runes and build order / outdated items being spoken about and some base text removed due to things like Zar being obsolette.
May 15th, 2024
Added in new runes, items and build optimization while removing outdated information, will continue to update over the course of the next few weeks to fine tune things.
January 11th, 2024
Added in Item changes and will continue updating slowly throughout the week. Apologies for anyone who wants the content immediately.
August 8th 2023
Adjusted some champion threats, runes, items and body text for some of the explainations.
July 19th 2023
Introduced new Teemo Jungle pathing and general strategy based on rotational timers and pushing people behind with a lot of visual video references on what you should do. Also Tweaked Jungle builds.
June 28th 2023
Removed Statik Shiv as it was gutted to the ground and it borderline unplayable due to some issues regards it's AP scaling being capped.
May 18th 2023
Adjusted some top builds and some item body text to accomodate some new itemization changes.
Mar 12th 2023
Tidied up the item and rune section of the cheat sheet. Also made some smaller adjustments to summoner spells. Major changes will be made to the guide as a whole whenever the ASU hits.
Dec 29th 2022
Tidied up some code, and some font sizes / text.
Added in a referral link to a gaming sponsor.
November 17th 2022
Added in the new Jungle smites and adjusted the information for a few of the jungle clears.
Fixed some code and moved things around.
Added in some new placeholders for future videos to explain thing in brief but helpful information.
November 16th 2022
Adjusted the information in Jungle due to camps being adjusted along with jungle item start when icons are updated.
Adjusted a few runes and their descriptions.
Adjusted a few items descriptions.
August 24th 2022
Changed Udyr from Even to Major, will update once things calm down.
July 20th 2022
Fixed a bug that removed / merged threats of Jungle + Support. Fixed a bug with Powerpoint that removed Evelyn and added in Nilah.
March 30th 2022
Removal of Ravenous Hunter + some item modifications applied with the new patch.
January 13-16th 2022
Visual update for spoilers and mostly the "Rune" section. Spelling errors fixed here and there, along with some Item adjustments + rune adjustments for more ease of access.
January 1st-9th 2021
Reformating of Items, Champion Match-ups and Body text, more to come in the future days.
December 14th 2021
Added in many new champions in each role, that were missing for some time. While also fixing some minor spelling errors and build changes. More fixes to come.
July-October 2021
Just general changes and fixes here and there. Added in Cosmic Drive as a primary item more early on for those who want extra CDR to maintain 75 AH early on to perma-blind champions with (Q).
July 16th 2021
Reformatted and tidied up some code, Cheat-Sheet and Match-Up information will be changed in the future, as I am overworking myself trying to get everything updated.
June 19th 2021
Changes were made to a few matchups and reworked champions, nothing else has been added until patch 11.13 hits.
May 5th 2021
Added in a few starter items in the items and runes section, and added in Frostfire Gauntlet and Riftmaker explanations included. Reformated the items to be more visually easy to read and look through as well.
April 30th 2021
Added in a roaming explanation.
April 28th 2021
A whole new visual change, and sections completely reworked to look pleasing to look at, ultimately making everything extremely tidy. New rune section, some items removed some added in.
April 14th 2021
Removed Chemtech Putrifier as a optional item, since they patched the interaction with Ravenous Hunter. Changed a bit of information on the Spreadsheet regarding Jarvan and his revealing interaction, plus ability maxes.
April 5th 2021
Added some information to the Jungle section. Made some rune changes to the spreadsheet. Nothing major.
March 30th 2021
Added in Chemtech Putrifier as a optional item, since it's got great synergies. Changed a few sections up to accommodate ADC synergies and new items.
March 17th 2021
A few errors here and there, changed the format of tables with ((td border="5px outset #23314e" border-radius="0px")) as well as reworded some old text to match the current meta of items.
March 3rd 2021
Changed the description of a few sections, like (W) explanation, and changed around some structure here and there.
Feburary 19th 2021
A few item adjustments, and rewording for explanations to match current / past item changes. A few rune explanation errors & added in Second Wind as a mandatory sub-rune.
Feburary 18th 2021
A few adjustments and wording with Cosmic Drive and build paths incorporating it.
January 6th 2021
Corrected old numbers for changed items / runes due to 11.1 adjustments.
December 29th 2020
Re-wording paragraphs in items and runes. A few changes to item builds.
December 22th 2020
Re-addition of old rune-sub choices, altered for season 11. A few paragraphs here and there fixed up to fit the descriptions better.
November 18th-December 12th 2020
Occasional adjustments with runes and items, removal of certain parts of the guide, in wait for an updated version to be replaced in the future.
November 11th 2020
Reworked and reworded the entire spreadsheet, while also editing some runes out of the sheet entirely. This was done to narrow down the runes into specific champions as 5 runes are not really that ideal at this current time.
Reworked and reworded the base body text of the TEEMO guide to accommodate new items, and rune changes to match the season 11 changes.
Reworked and reworded new item sets to accommodate for the new items and interactions with season 11. These things will no doubt be changing during the next few months, but overall everything is up to date and here for your reading pleasures.
August 18th 2020
Added a few new slots of information in the Jungle and Support sections of the guide.
August 4th 2020
New visuals throughout the guide and a new visual for Pros and Cons added to match the ToC design. Removed "Passive" section and replaced with "Art of War" may go back to re-do wording with it in the future.
July 21st 2020
Added in a new Table of Content design, which will replace all current designs such as banners and imagery. Moved SUPPORT and TOP manually around so the first thing people see is Teemo TOP. Changed some bold text with custom font images to look more "clean". Visual updates should be ready within the next week.
July 14th 2020
Added some video references to Jungling and changed some wording.
June 30th 2020
Added a new section to the Teemo Spreadsheet and tidied it up. Added a new visual section to "Laning".
June 14th 2020
Removed legacy guide format and replaced it with the newer version. Tidied up text to format it into the new format.
May 26th 2020
Tidied up code to make the guide better visually. Reworded some information here and there to improve the literature.
May 12th 2020
Removed a bunch of spoiler text in Laning and compacted to them down into a neat and tidy structure.[/size]
May 9th 2020
Compacted cheat sheets into smaller clickable links to be more clean looking.
May 5th 2020
Re-formatted "Abilities" and added custom videos to accurately describe each section for visual references. Will update once I have enough time to.
April 28th 2020
Added Barrier and Exhaust in the laning section for players who like that play-style.
April 21st 2020
Added more detailed explanations to Laning and what to do while Ahead, Behind and Even.
March 13th 2020
Re-wrote the guide, due to a bug which wiped the entire guide of all content. Fixed a few sections, an added more information to "Credit where credit is due".
February 4th 2020
Added in some information to "Laning" regarding Teemos importance level 1-5. Added some information to "Support" regarding Teemo and his asset as a support. Added information back to Threats and Synergies.
January 28th 2020
Reformatted "Extra" and "Support" sections, while also repositioning old content.
January 21th 2020
Added new information to existing sections. Included all sub runes and shards into "Runes/Items", Trinkets and such to "Map Control" and Summoners to "Laning" and summoners to "Jungle" an reintroduced threat information.
January 19th 2020
Added which abilities to max (when and why) to the ability section of the guide.
January 17th 2020
Added extra text to each section of the guide, to fill in void space to make things less OCD inducing. Removed some spoilers.
January 16th 2020
Removed some code, added in a new "Back to Top" button for a more professional feel to each section at the bottom.
January 15th 2020
Added in a rune page Cheat-Sheet along with a "How to use this guide" section above the Table of Contents.
December-January, 2019-2020
Added a new "Item" section with new code, and changed up item builds due to support items being changed again. Visual changes.
November 19, 2019
Removed all information in "Threats" to redirect you to the spread-sheet below. Which offers more information than I can input here.
November 18, 2019
Finished a large 100+ hour effort spread-sheet for every single possible match-up for Teemo in Docs above the Table of Contents.
FAQ
Q: What has compelled you to make this guide so indepth!?
When it comes to extremely in-depth guides, they are always so few and far between. We needed more especially for our lord and savior Teemo. I was lost when I began. You won't be lost with this guide.
Q: So why are you hardstuck ___?
Motivation. If I was hardstuck it would be because I'm not putting in my 100%. Choosing to limit yourself on how seriously you play can effect your overall outcome greatly. It's a game, yes. But if you do everything you can to improve you'll succeed. I want others to succeed, more so than myself. I've gotten what I wanted out of casually playing, I only climbed to Diamond to spite people like you.
But even spite has it's limit to what I am willing to put up with in a toxic community.
I tend to like to play other games on the side while I am playing League to keep myself more occupied.
I genuinely could care less about rank. So I tend to just do whatever and help others climb higher.
Q: So who are you exactly? I've never heard of you.
Brian, but people call me CAT. There isn't much to know about me, in all honesty I'm just some loser with a genuine drive to get out there and help all Teemo players of all skill levels get better individually. I am a scout and reviewer here on Mobafire, so if you do feel like you'd like to create your own guides and have a good work ethic and ever need a review, you can head on over to REQUESTS and follow the instructions.
Streamer on Twitch. Sometimes play with viewers as well. Outside of this, I'm just the guy you'd see sitting alone in the lunch room. I've always kept to myself and just help people when I can.
Q: Why don't you use face-cam?
I do, every now and then. My eyes are extremely sensitive to the light is all. It's also very hard to focus with two giant studio lights beaming in my face. That and I prefer to use my Vtuber avatar, nothing wrong with that honestly.
Q: Out of all the champions in League, why Teemo?
I am an annoying person. Who wouldn't play themselves?
Q: How the hell can you play one champion so damn much!? It's boring!
Because it's fun? Annoying people, annoying allies, annoying you. It's what I consider fun.
Q: Can you help me become a better Teemo player?
Yes. Drop by the Twitch Stream sometime and ask me personally. Reading this guide helps aswell.
Q: I want Mastery 7, how the hell do I get S or S+!?
It's all about consistency. CS, KDA, ROAM, KILL PARTICIPATION, VISION.
I created this guide about 6 years ago slowly improving it as new changes arrived, and I am proud to present you with constantly updated daily/weekly information that isn't just clickbait. I hope this improves your success with Teemo.
People seem to always assume that I am a very busy person with no interest in speaking with them. This is untrue. I absolutely love meeting and helping new people and am never truly busy. I do all of the things that I do on Mobafire / Reddit for free! You're not an audience to me, you're fellow Teemo's so honestly, treat me like a close Teemo friend.
However, if the content that I have provided you with has sparked a drive in you in some way shape or form and you would like support me through donations or prime subscriptions? I'd be happy to be supported for what I do for you.
If you ever need help with anything be it Teemo/Life, you can contact me through one of the external links above.
Teemo is all about making your opponents suffer. Both mentally and physically. He is a pestilence to any and all who oppose him, in the hands of a knowledgeable player he's a monster, he's also cute.
He is in general a straightforward and honest champion, without any forms of cheese like shields or massive sustain / invulnerability. He is all about knowledge & strategy, he will help you learn about League.
If you like being annoying or ruining peoples fun, then do I have good news for you my friend. Teemo is the champion for you!
One of the biggest problems with playing Teemo comes with being flamed and put down by almost everyone you come in contact with. It's basically a never ending cycle of hate for picking him anywhere.
Teemo has always been considered a meme to people & troll pick for years. People refuse to understand how useful he actually is, when played properly. His objective control or vision provided by shrooms, to being focused by everyone on the enemy team for allies to have less focus, to finish them off. So if you're someone who struggles under pressure, Teemo might not be the champion for you.
The fact that I have played this game for 11 years, persistently 5+ hours a day. Reached Diamond multiple times on multiple servers (high/low ping) with no real actual desire to get to these ranks. While still managing different strategies and adjusting to the meta shifts each an ever patch, be that role swapping until things cooled down or when a specific role was more in favor than the others, like with how Teemo was considered a troll pick in JNG, until more people caught on.
Coaching works as such. You simply have to tell me what you are looking for in a direct message either on here, Discord or while I am livestreaming. A review of your OP.GG? Perhaps for me to go over some of your games replays to help locate major flaws? So long as you provide a link or replay file, I would love to help when I have time.
I have time every day of the week from the hours of 5 AM - 2 PM (PST). We can go over everything and you just do your best to improve off of that. If I find that you're too toxic to explain things to, I reserve the right to refuse coaching.
I offer free coaching. You do not have to feel obligated to pay me a dime. I offer quality and satisfaction.
Unlike other people in this world especially in the world of League of Legends. I truly love Teemo and the Teemo community and all who look at him with the slightest interest in making him their a part of their life.
Yes, I could ask you to pay me, but I choose not to because I do not care for money. I’m not nor have I ever been a wealthy person. I wouldn’t say no to donations out of respect so I could buy food, if you wanted to. It's free coaching.
If you read through this guide, then you have to be the one to ultimately implement your own type of play-style and charm to your builds. Reading this guide isn't going to suddenly bounce you from Iron to Challenger overnight. There are no shortcuts, or easy ways to do so. You practice, practice and practice. Things will become clear to you, as you naturally try to understand first hand and improve. Focus on yourself not your allies and stay positive.
This guide alone will yes, guide you in the right direction by teaching you the basics of how League is meant to be played, be it with how to counter an enemy champion, or to survive a very hard match-up, however, it isn't foolproof. You, yourself have to learn this champion with your own two hands and mind. So someone you know plays him differently? That doesn't mean you have to mimic them. You can also implement your very own style and strategies in how to play in a comfortable way you built for yourself. Find what works for you, while looking around!
Teemo is not a champion that you can simply pick up, put on a rune and build any item you want and hard-stomp anyone that gets in your way, he actually requires the knowledge of the game as a whole to dominate.
Knowledge of champion match-ups - as in what their abilities do and how to counter them. What objectives do for you and your teammates. Minion control and how controlling a minion wave can severely cripple the opposing team, with objectives. Knowing all of your strengths and weaknesses, right up to when you simply can do nothing on your own or with your team mates, which simply means move on to the next game instead of holding people hostage.
WHY AM I NOT ABLE TO WIN GAMES!?
The answer is consistency. It's consistently not tilting when your allies feed and lose every game or when you lose your lane. You have to understand, this is a team game. If your teammates are feeding purposely, or the enemy is constantly flaming you, ignore what is going on, and focus on what you can do to provide assistance.
You are not in the right state of mind, when you're preoccupied with wanting to type to tell someone off. This will only incite more flame / feeding which ultimately causes you to lose for giving into the negative player mindset, not to mention a very easy way to get yourself banned for participating in that toxicity.
Don't think you are going to breeze through every game as a 1v9. If you can help them help you. Do it.
Games where people troll and ruin your games happen, they are variables that you can never control, but you can prevent escalation by keeping to yourself and not becoming tilted. Take a breath.
If you ignore bad behavior people will simply give up and either leave or play the game through, don't give them a reason, it's just a game. The misconception with low elo vs high elo is that people play the game better and troll less. This is not true. It doesn't matter how high you climb, trolls are everywhere & people play like shit.
People are targeting you? Then it most likely means you did something to deserve it. Did you ban their hover? Did you trash talk them in lobby? Don't act like the victim if YOU are the one who started the toxicity.
Say something encouraging like "You got this man!" or nothing at all. I can understand people running it down mid on purpose, to lose out of spite these things happen often in low elo. They will remain there while you improve and climb higher. This goes double for taking your teammates buffs out of spite of never getting a gank because YOU are incapable of laning against someone in a one on one or after being ganked multiple times.
Teemo is supposed to be ganked; it's why he is considered a "global taunt." It's up to you to see it before it happens, and allow your teammates to make plays elsewhere while you have 2 players busy on the top side trying to kill you. That's basically it, consistently playing well and improving while having a calm mind.
The following advice will aid you in the basics of how to improve on your own. 1: Find out your strengths and weaknesses are and work on improving them as you continue to improve. 2: If you end up fed, try to utilize your lead elsewhere other than your lane so you can help allies scale. 3: Do you have horrible CS? Open up a custom game to practice CSing, strictly through last hitting. 4: Remember to purchase control wards and oracles to place and remove vision while roaming. 5: Mute everyone with the menu settings, and stop wasting time with flaming.
PERSONAL SETTINGS
Turn on quick cast. While also keeping your quick cast indicator disabled. There is a very small delay if you have this enabled which really prevents that smooth transition from using your (Q) especially when you have to click the enemy champion. Just hover and press, it's all you should need to do.
The huds in League take up a very large portion of the screen, especially the chat. I would highly recommend turning everything to 0 besides your cursor and minimap, the cursor is based on personal preference, but the map should always be 100. It may not seem like much, but trust me. You begin to notice the game more and less toxicity, since your focal points become the game.
Audio may not seem like it plays much of a role in this game, but it does. Listening to your allies pinging you to listening for the enemy skill sound effects. I tend to do nothing but spam Teemo's laugh so that's all I really care about, but work around what works for you. Having everything set to 0 is a bad choice.
There isn't much to add or change with this portion, I would highly suggest swapping (Y) for (Space) toggling the lock on camera, if you are the type who likes to cycle through both. It is much more smooth and reliant since your thumb rests on the space bar, unless you have a different hand placement.
By default you do not have all of your pings enabled, I would highly suggest you turn on the "Area is Warded," which will allow you to properly warn your allies instead of pinging for danger. I use the (Tilde) key, as it is easy to access.
Nobody really needs to bother with chat. You need to focus on the most important of things, yourself. Who cares if they want to talk shit to you. You do want to win, correct?
Hopefully these small changes to your settings will help improve your overall ability to communicate and free up elements. Making things more easier to see, allowing you to focus on what's most important.
YOUR GO TO BANS
This is a very hard question to answer or to give advice for thoroughly. Overall it comes down to your basic knowledge of how to play Teemo, your Server and how good your opponents are in your current MMR ranking. I'll try to be detailed with these recommendations and why they are often good bans for Teemo or for your team.
These bans are great for Low Elo: Yorick, Nasus, Shaco, Katarina & Zed
These champions are generally very highly chosen due to the likelihood due to popularity and ease of snowballing, which will make it nearly impossible for you to do anything against them in general late game. Once these champions snowball out of control it's frequently very difficult to shut them down or rely on your allies.
These champions are good game dodges: Malphite, Olaf, Fiddlesticks, Naafiri & Anivia
You can definitely still play into them, or choose to ban one of them instead, but as a laner you'll have your work cut out for you as they are pretty difficult to deal with offering you little in terms of snowballing.
These bans are great for High Elo: Tahm Kench, Aatrox, Yasuo & Irelia
Are very strong bans but overall it's more about banning the current featured meta abuse champion of the month due to LCS or what is really popular on your server at the moment. Still very good choices.
Learn match-ups you really hate instead of wasting your bans on them, as a lot of champions are actually really simple to deal with. You of course can still ban any champion you want if you truly wish to do so. But honestly, become that champion, understand that champion and play around their skill set. You'll be better off.
I truly hope that the information provided in this guide will help you and provide you with all the knowledge that you need to improve yourself steadily & consistently reaching your personal goals. It's laid down plainly.
Even while at the top of your game, you will always run into problems. Problems you might not be effectively able to deal with on your own. It might be ganks, your team or mana. Overall the message I am trying to spread is to keep your head up and keep looking for ways to improve yourself to do better next time.
Your primary spell is going to always be Ignite. It's used everywhere because it's an aggressive spell. It's not worth taking anything other of the other spells, because of the extra kill pressure. So if you do feel like you play more passive in lane, a different spell would most likely compliment your play-style.
Teleport is rarely taken as this spell is for players who want nothing more than split-push and play objectively. You can flank and back door with Noxious Trap's especially if you have them shoved to their open nexus while your team fights around objectives. It's personal preference, however.
Ghost seems to find its way back into many players playstyles, but it's not as great as you may think. If you desire mobility, just play an (E) into (W) max ability build eliminating the necessity for this summoner and allowing other aggressive playstyles to come out with a summoner like Ignite.
Some may enjoy taking Exhaust in some of their games as a form of CC and added utility for when they get ganked and want to escape/kill when they dive you under tower. It will also reduce their damage by 40% allowing you to out-trade them when they extend into you.
Barrier can be used to help prevent you from being dove under tower and executed. It also helps you to enter passive due to the interaction with shields and champion damage. Enemy champions are not hitting you directly, you're never in combat.
First and foremost, if you are playing Teemo in a solo lane then your main goal is to take control lane period, before they hit level 6. This means, being super aggressive when the time calls for it, being mindful of minion aggro and trying to push them out of lane or to get a kill every time they make a minor mistake, like going for that cannon minion and getting hit for 75% of their HP in the process, while also missing because of our well timed Blinding Dart. If you lane passively because you're scared especially into an easy champion, you lose.
Teemo is at his strongest during first few levels (1-3), falling off for a bit before coming back strong at level 11 and onward. Once most champions hit level 6, they normally have everything that they need to take you out even if you've gotten a few kills off on them. This could be any number of things, their gap close, CC, burst, spike items. While all we have is Move Quick & Noxious Trap's which doesn't really do much, since we can't place down many shrooms until later. If they simply dash and hit us, we lose all passive speed and get run down rather easily. Farm & simply stall for level 11 don't make mistakes, because you got a kill, you'll stack up kills into the mid to late game.
You most likely will get the first blood or a few kills off of your laner in the early game, especially if you are a low-elo player, players here are more willing to make mistakes and allow you to freely snowball because of it, but this is where it becomes extremely important for you to remain ahead throughout the entirety of the game through proper roaming, warding, csing and team fighting. You never wanna simply stay in one place. You need to push your lead hard.
You can do this roughly a few ways. You can utilize your lead to punish them further, while also zoning them from gaining CS while freezing your waves, preventing them from gaining EXP / Gold while building up a large enough wave to crash their tower after you kill them setting them back through gold with a huge wave to protect you from ganks and them moving forward. Because if they die to you, they lose so much more EXP continuing your lea to snowball.
These games tend to be very boring. If you are going up against an enemy laner that knows how to deal with you. They understand your threat and respect you by backing off, then there really isn't much you can do in terms of snowballing.
Especially if they play extremely passive during the first few levels, and allow the waves to naturally crash to their tower by giving up a few CS where they can freeze and zone you with threats of ganks and possibly Ghost pressure if you're up against Darius or other hard engage champions. This simply sets them up for an ally to gank and kill you, setting you behind heavily because if you were not able to kill them before, you now have very limited options for what you can do, so don't get into this position. Control your minion waves much more effectively, play smart.
Focus on last hitting, and utilizing your poke and harass for when they step forward. That's pretty much all you have to do, respect them when they act a bit more aggressively and punish them for making a minor or major mistake. A form of mistake would be Darius missing his pull allowing for us to play aggressive for a few moments, it's a small window but you get the idea. You're primarily going to be focusing on CS, warding and harassing when they make the mistakes while, respecting them when their abilities are up and when they become a lot more aggressive after being passive all game. Usually this is an indication of being ganked, sometimes it's because they lose their patience.
So if you have not been capable of taking control of the lane early, then you should be farming and prioritizing other lanes and your allies. Once you hit level 6, you become a huge asset to your teammates and to yourself if you are effectively utilizing your Noxious Trap and granting them vision of top sides jungle, allowing you to play more respectfully into champions who are only now beginning to play more aggressively towards you, since they have their all in damage, and threat from their jungler/support if they are ganking your lane.
The best thing you could do is to not get into this position in the first place. Being behind on Teemo is one of the worst things that can happen to you in a game, unlike other champions, he needs to be even or ahead to impact games.
Once again, Teemo has his biggest chance to get a snowball his lane while he is level (1-3). The higher rank you are the more this becomes true. If he is killed by level 2 or 3, that's it. You've pretty much already lost this lane in general.
Focus on CS, managing waves and simply staying alive while not making the same mistakes over and over again, killing is a part of the game, but you getting a kill after being set behind 2-4 waves isn't going to change things, period.
This is something you need to understand. Teemo is a very easily ganked champion from levels (1-5), because there is no threat of shrooms and in most cases we don't even have our Move Quick or Boots to get away.
Most every champion in the Top lane has 5-30 more movement speed than us from level 1-2 and if we get struck by a tower or champion our speed goes back to 330, which will always be below our opponent, we can't outrun them.
It doesn't help if all you do is shove to tower all game. It's all about not losing to this by simply becoming more wary of these instances and your surroundings. Place vision wards out early around minutes (2:30, 4:20 & 6:10) to be more accurate, these are the most common times most all enemy junglers will be top-side due to their pathing early game.
There are plenty of ways to prevent losing to ganks, plenty of benefits to being the prime focus of ganks especially when it's the enemy jungler. Placing down deep Stealth Ward at the right time and properly utilizing Guerrilla Warfare to waste more time while your allies grab objectives elsewhere and put pressure which is invaluable. In the end you may have died, but you wasted their time which is a huge set back ajnd siphoned their EXP. Take pride in being ganked.
This is understandable, you're not suppose to be a perfect player, nobody is, League isn't an easy game to master.
It takes the ability to multitask consistently to maximize your Macro & Micro management. You need to be focusing on everything, even if it is hard to do so. Get to the point where you can pull it off like it's just second-nature for you.
This can be simply looking at your mini-map while you're waiting to poke the enemy or simply to last hit your CS. Pinging when you see something in the quick glance to alert your allies. You might notice you have 0% vision and decide you should shove the lane to roam a bit to remedy that. The reason you would shove is so your minions die and keep a majority of the enemies minions alive due to their tower killing our minions faster than ours can kill theirs.
Tunnel Vision is simply the act of repressing everything around you while focusing entirely on killing champions and nothing else. Are they low HP? Good! But... take a glance at the mini-map where are their allies? No vision? Probably around the corner so if you chase, you run the risk of dying. You must avoid this by forcing yourself out of that mindset or you'll simply never improve.
I get it. You feel empowered. You're 20/0 and boy you're out for blood and nothing in this world can stop you! However... You'll lose sense of time, your surroundings will disappear among all things until it is too late and you simply get caught out over and over again. Killing is a part of the game, but don't let it consume you.
Because of the removal and closure of the lane on the top side of the wall. There is no longer a requirement for us to lay down three mushrooms in order to cover our back and the river and bush exits. This is of great use to you because it allows you to concentrate more on the lane and or broaden your vision by using mushrooms throughout the river and jungle.
The good thing about these placements is the fact that they are not really anywhere near the minions pathing, so they will never be tripped, unless the minion waves are huge, causing minions to push out to the sides more.
Vice versa of the previous image, is the mirror set up on the opposite side of the lane, when you are starting on the Bot side team.
You will have to get used to the reality that the River is just so enormous now, and there aren't a lot of things you can do other than cultivate vision and mushrooms deeper in order to see things before they happen. This will be the most difficult challenge that you will have to overcome.
The alcove does make certain match-ups annoying to deal with, specifically champions like Shaco, Evelynn and any other champion with lock down or gap close.
If you do not currently have vision or at the very least a shroom placed in the bushes you will fail to notice them until you walk into the gank.
These shrooms offer a way to chase around the alcove as they try to avoid you when you do not have a vision to see them. Your shrooms placed near their tower can catch them, if they escape.
Having such a huge open space here in the Top side, especially after the removal of bushes and the addition of a Pixel Bush, gives the impression of being quite menacing. It has made auto-pathing a little bit more consistent and it is now much simpler to activate mushrooms.
Warding the Pixel bush is pretty much the only spot you would want to ward, unless you are on Top side start, then occassionally you would want to ward the closed off wall which can be exploited by a lot of champions that can jump over them.
It is strange when it comes to auto-pathing, which we have been familiar with for a great number of years, because the jungle has experienced some broadening in many areas, new paths, and old paths that have been blocked off.
If a person wished to travel from the Bot side start to the Top side Red, they would naturally take the road that goes through the river bush on the left side, rather than the jungle.
In this particular configuration, the players are more likely to be attempting to go for a Baron play or rotate through their jungle clear in preparation for a possible gank through the river to the Mid lane.
These shrooms single handedly protect you more than any other placement so long as you are starting on the Top side team. It offers both vision and awareness when someone is pathing top side. Pop the blast cone over wall so they have to go through river or they can surprise you.
If they enter towards the blast cone you will see them, if they enter from the river entrance it will warn you they are near top side, but not that they want to path towards top side every time.
Once again if you want a much more in-depth explanation check out the video below as it goes into a few tips and tricks about finer details.
VIDEO REFERENCE: BECAUSE THERE ARE SO MANY LOCATIONS I PUT THEM IN A VIDEO
We don't normally take Teleport unless we feel like we need to play more objectively and know we don't have much kill potential in lane.
You can use Teleport while invisible to escape to safety, so long as they have no displacement skills or while their displacement skills are down.
This interaction was changed sometime back in Season 8, when they made some adjustments.
Don't forget that if you're currently being swept by Oracle Lens you will want to move around as much as possible without clicking enemies, wards or minions while you're avoiding skills.
You can move around while in stealth, most people don't really do anything but waste time trying to kill you. While on this topic I'll inform you that Control Ward's do not reveal Teemo.
Sometimes, it's better to play your luck and enter into stealth in hopes that people will not sweep you and leave, if you noticed that you are about to be focused by a 4 or even a 5 man.
Running away isn't always the best option, nor is trying to fight your way through more than 4 people, unless you are mega fed with burst.
Do try to keep this in mind for your games.
One often ignored strategy with Teemo is his ability to Blinding Dart an enemy champion that is auto attack reliant, this lets you stealth.
This is one of the best strategies often used against, Tryndamere, Jax & Nasus. So long as their main stuns / abilities have been used you can just stand still after blinding them.
You also need to take into account minion aggro, if they are hitting you, it will prevent your stealth.
While it isn't advised. You can bait people with your passive by just... being an annoying "rat".
Popping out of the bushes and out of stealth while laughing. There is a very high chance that someone with a lock down CC or displacement skill will blow it trying to catch you an reveal you.
It just might give you the opening you need.
Often times there are some very funny plays with Teemo and certain champions.
You really should give stealth plays more credit. It can literally save your life, while getting kills.
In this case, Xin Zhao's (R) will push Teemo and if you are pushed out of the bushes you are revealed. But he did it over the wall which had no vision. So we stay visible until we land on the other side, which ultimately is what saved us.
A freeze is used to keep yourself safe or to further dominate the lane if you're winning an being ganked. Keeping 4 more enemy minions alive is useful for champions without killing or zoning pressure against you especially with no wave control. You become safe under the veil of your tower & can harass freely as they try to CS. While making sure to thin out minions/keep them alive long enough for your next wave to freeze them in case your tower messes it all up. So long as they have 4 minions alive more than your minions. It will remain frozen until you shove it back out, otherwise by default it will force your minions to grow in size and keep growing uncontrollably forcing a slow-push. It's a horrible feeling, try not to get in this position like Fiora.
Video Reference
A slow push is used to slowly apply pressure to the enemy, setting up kills, setting up dives and setting up sieges which help prevent yourself from being killed due to your minions being larger in size. You simply make sure you always have 1 more minion than them to build up while last hitting the rest. It's amazing to have them turn and fight to defend you especially while in passive since they can still aggro so long as they are near you and the enemy can use some form of ability to damage you. It's a defensive layer / pressure which causes you to get ganked more often, which is what you want, you want your allies to acquire Drake or towers.
Video Reference
A fast push or shove is simply killing things quickly to push it under their tower. They may have roamed or backed to base due to poke without Teleport or you may simply want to roam. So you'd want to fast push to prevent them from acquiring a vast amount of EXP upon return if you are very close to their tower. The tower can help clear them out, primarily cannon and melee minions since they are the most valuable.
You'd want to roam/return to base after having shoved your wave to retain as many of their minions as possible upon returning to the lane, their minions will turn around into your favor due to their waves being larger and slow-pushing, so long as you keep last hitting. This is great after a slow push has built up.
If the enemy has stuck you in a freeze while permanently zoning you, you can't do anything, the only thing that you can do is ask politely for your jungler to help break free, or don't get in this position in the first place.
Video Reference
Zoning is very simple concept, it's when the enemy is being pressured away significantly from obtaining any CS or gaining EXP from dying minions. If you can get in between them and their minions. If they try to move forward to grab the CS you back off while punishing them from range for making that mistake. This would cause them to go back to base, allowing you to crash the wave further preventing EXP and CS while they walk back if they do not have Teleport. This can cripple any top laner. It's done when you're ahead mostly.
Video Reference
While playing as Teemo, you must understand. You shouldn't be standing still for extended periods of time, move around and utilize bushes so you gain both the ability to use passive while moving and be less of a target for skillshots. If you are not focusing on CS or poking champions you really shouldn't be standing still.
You can clearly see the difference in utilization of Teemo's passive and his mobility being used while being protected by bushes and zigzagging. If an enemy were to gank, you would have nothing to fear as you are able to flee through bushes or wait them out in stealth if it is possible to do so. Please utilize this well.
Video Reference
Guerrilla Warfare is an underappreciated skill. It can be used both defensively and offensively depending on the situations. There are a lot of unique interactions with enemy champions and allies alike. Let's talk about these interactions so that you can fully understand the scope of it's versatility.
If you stand still for 1.5 seconds you will enter stealth. Enemy champions can not see you, hear you nor damage you, unless they have specific skill-shots like Lux here. If you take damage you will glow white for a moment to enemies, giving away your location. The only thing that can reveal us is a hard CC displacement, in this case Darius. Control Ward's will also not reveal you but Oracle Lens will highlight you allowing for a champion to land skill shots.
Often times you can pull off some amazingly lucky plays with your passive alone. In this case the Zed's going to kill us, so we abuse his (R)'s weakness of not being able to damage us while it is channeling so that we can enter stealth to plan our escape after having blinded his auto.
There are plenty of other plays you can make defensively with this playstyle. So if you know you're going to die, what do you have to lose?
Utilizing this ability in the laning phase early game can be extremely effective, the attack speed can help with CSing or trading.
Another often ignored thing is using the passive to set up ambushes when you pretend to leave the lane or roam when enemies are low HP.
This allows you to wait for them to extend past you or into a shroom before assassinating them.
Teemo's passive is not limited to just Teemo.
Both Shen & Yuumi can benefit from it.
They will not break Teemo's stealth when Shen uses his (R) nor Yuumi when she uses her (W), what's more is they will both remain invisible.
This can really turn a losing battle into your favor if you managed to get behind their frontline.
Blinding Dart with it's duration of 2 to 3 seconds can also prevent anyone who is a basic attacking champion to miss entirely. However, you would never want to just spam this ability as it will drastically drain your mana, something which Teemo really can not spare much of. It's a great offense, but also an amazing defense against champions that try to all in you level 1-2 like Tryndamere, Wukong & Riven. We'll normally start (Q) against them over (E).
While enemy champions are under the effect of Blinding Dart, their abilities that empower their basic auto attacks will fail to connect or deal damage. This can be an absolute lifesaver in the late game against certain late game scalers like Jax, Master Yi & Tryndamere if you ended up in a position where you were going to be killed. You can blind them and go stealth by standing still and not reacting while they try to kill you when their main skills are down.
Blinding Dart as stated will prevent enemy champions from dealing empowered damage to us. This also prevents champions from using status effects like stuns, silences & slows.
Garen, Udyr, Jax, Renekton & Leona or Blitzcrank's empowered knock up after his hook. There are plenty of other champions. Blinding the correct champion at the right time, can save you or your allies.
Move Quick is considered one of his weaker skills. It doesn't really do too well in the game these days because of mobility creep. It's hard to avoid being hit by the basic abilities compared to previous seasons, however, it's often ignored as a first or second max. It's pretty huge into bruisers and tanks.
Teemo's Move Quick only needs +3 due to the diminishing returns of softcap and hardcap.
Once you take damage from any source (aside from minions) you will lose all bonus movement speed. So the idea is to never get caught in the first place. This synergizes well with mobility runes like Press the Attack with (W) max 2nd.
You can activate the ability to gain a bonus in movement speed double of what the passive is. This is countered if we've been slowed recently.
Toxic Shot will normally be maxed every game. It's our primary source of damage. The more points it has, the better we CS and deal damage to enemy champions on-hit and over time. Play practice tool game without putting a single point in (E) and try to CS after putting one into it. You'll understand.
Teemo used to have synergy with his poison, extending each rune in a way but because of a bug, it doesn't work anymore.
Auto attacking an enemy with activation runes like in this case Summon Aery and you could double activate her for free poke.
So long as you have poisoned them run to pick her up, it's damage that won't provoke minions. So instead of having to constantly attack to activate it, all you have to do is make sure you poke once, pick her up and repeat the process.
You can poison multiple targets so long as you keep switching between them. Toxic Shot is considered an "on-hit" applied effect.
Toxic Shot can be a double edged sword. It's important for you to understand that if you hit an champion and try to poke them again while under tower, you wait 4 seconds to poke if you have to enter tower range, otherwise you have a high chance of being struck by the tower. This is unnecessary damage you are taking, which will also deactivate Move Quick's passive.
Noxious Trap's primary use is for map control. It lasts for a maximum of 5 minutes which is a massive amount of vision & time when used properly and placed in ideal locations, especially if the enemies are not clearing them out effectively around objectives like Baron Nashor and Drake.
During the laning phase what you're looking for is places that will slow the enemies advances towards you, while avoiding minions.
Unexpectedly placed shrooms are usually the best, allowing you to lure your opponents towards them, positioning yourself so that they run in the direction that you want them to go.
It's used as a defense as well as offense so long as you know how to manipulate their pathing.
One of the most powerful assets to Teemo is his ability to infinitely bounce his shrooms.
This can be huge late game if you have a section to bounce off of to make some objective plays which could even net you Baron Nashor or push the the enemy team off long enough for your teammates to make a play or to get them to back off preventing it or even stealing it.
Our go-to smite is Gustwalker Smite. You'll be able to cover a lot of ground rapidly if you max (E) into (W) while weaving in and out of bushes. The Cloud Drake and Celerity bonuses, as well as many other factors, can boost your movement speed to 800+ especially with Dead Man's Plate.
Scorchclaw Smite is ideal for dealing damage to champions with shrooms especially with the item Malignance. If you're battling champions who are squishy and not difficult to deal damage to, the other smite is a better fit, but will make traversing the map more tedious due to mobility.
It's important to understand that Teemo can have a difficult time in the jungle compared to his normal roles. Keep track of your opponents and where they are likely to appear. Once you understand their clear speed and basic rotation timers, things become much more easy to the point where you just naturally understand where most players will be even if not playing JNG. If you spend too much time ganking and not enough time farming, you quickly find yourself 2-3 levels behind and unable to catch up and soon the target for flame from your allies so be mindful.
Before you can begin with your clear, you must first comprehend a few principles. They are relatively simple to grasp.
Atakhan
Atakhan is the League's latest neutral objective, alongside Baron, Grubs, Rifts, and Dragons. The arrival of Arakhan has shifted the Barons spawn duration to 25 minutes, with it replacing the previous 20-minute timer. This is the first event in League of Legends history to change based on how well or poorly the game is performing in terms of kills and deaths. 14 minutes into the game, the fissure for it will appear in the river at TOP or BOTTOM. This gives you around 6 minutes to decide if you want to plan around fighting for it, because you don't want these buffs being handed out freely!
Ruinous Atakhan: Provides a 25% boost to Epic Monster buffs for the remainder of the game, including any dragons already taken, and will only spawn if there has been a considerable increase in kills and damage throughout the current game.
So basically if one team has been snowballing out of control this really does drastically increase their chances to become more difficult to deal with if they get it for themselves, adding ontop of the multiple drake / soul bonuses and so on. It could also turn the tides back in your favor if your team can turn things around, adding an extra reason to never give up.
Voracious Atakhan: Provides an extra 40g per takedown and a one-time death mitigation to the team that gets the buff, and will only spawn if there have been a low number of kills/damage done in the current game.
This is meant for those slow and drawn out games where you're not seeing many kills until maybe 15-20 minutes, in which this buff becomes very good for taking the initiative into making the first move since you don't lose a whole lot, once you "die" you drop 100g and spawn in base. So make sure to adapt to each of their spawns and of course to not throw your leads.
Jungle Plants & Bonuses
I'm surprised I didn't include this in the guide originally. I guess I didn't think about it too much because they are very simple to comprehend, but there are certain things that people don't seem to understand with some of them, so it's about time we placed them here along with the new plants released with the lauch of Season 15!
Scryer Bloom: is a pretty basic plant that sends out a blast cone wave of vision in the direction you hit it towards. This will reveal all control wards and normal wards in the pathing, but will not reveal traps like Noxious Trap it will, however, reveal Teemo directly if he is currently in passive. It also shows up briefly on the map if someone sent the wave into your tower or lane for example, you would then get a basic understand as to where they are, it can be great to use for tracking.
Blast Cones: offer a lot of diversity for a lot of champions, especially those that don't have a lot of mobility/leaps/traversal skills. If you strike one while standing in the raius you will be sent flying over walls to safety or sometimes into danager, so use both the Scryer Blooms vision effect and Blast Cone together when you can. It's a very great plant for aggressive invades in and out.
HoneyFruit: is a plant that spawns sporatically throughout the river and jungle (depending on drake soul game) and will drop small fruits for you to pick up and heal yourself with, while also applying a slow. It can be used both to help you escape and also to restore your HP enough to fight or survive, while also forcing your chaser into a slow debuff giving you enough time to escape.
Blood Pedals: are a new plant that appears throughout the map, particularly near defeated players and the Atakhan pit itself. They also spawn once Ruinous Atakhan is killed. Hitting a plant will earn you a new stacking buff that gives you 25 EXP and sometimes a 100% bonus if you have a low KDA, as well as 1 Adaptive Force, which grants you either AD or AP depending on your build.
A Vertical jungle is when someone starts their Red or Blue side, then instead of going to their second buff (Horizontally) they instead go (Vertically) through the river to take the enemies jungle if they have the capacity to do so normally with champions like Kayn or Shaco and Ivern. This allows them to focus one side of the map, repeatedly putting pressure on lanes in that vicinity. It's often used into champions like Teemo and Kayle to put them behind hard.
Playing in the Jungle is very different from playing in the lane because of the difference in your ability to simply go somewhere else when you can't do something where you had originally planned. There is a lot of tracking, thinking, and adjusting, similar to laning when you have to play safe or aggressively. Below is a list of several starter clears that you can look at to better grasp the early game before working on your mid and late game rotations.
The rationale for always starting Red on the top side of the map, even if it isn't your side of the map, is that the enemy is very likely to invade your bot side jungle while also being a powerful move to gain control over their overall movement.
It's critical to comprehend the significance of the first clears. You don't want to gank anyone in the early game unless it is on your way to your next clear. You'll get 3 attempts to help allies on your first full clear, whether it be invading or a normal clear, which will net you 1800 gold by 6 minutes. If you can acquire access to their rotation timers, you will be able to predict where and when the enemy jungler will emerge because they will become desperate for gold and CS.
Invasion Jungle Clear (Blue Side Start)
Normal Jungle Clear (Red Side Start)
Invade Example: The enemy will be on their raptor pit by 2:30, which is when your ward will comes in handy while you're taking it. If you haven't seen them by 2:40 while you're finishing Krugs, it's because they've rotated your side or are attempting to gank Bot / Mid. This provides you enough time to gank via the top lane, putting them behind and you or your ally ahead.
Red buff provides passive HP regeneration and damage, allowing for speedier clears while staying healthy for potential invades. If you are invaded and unable to defend yourself, flee and try to invade with your allies on the enemy's red. Starting bot side red is a lot more weaker than invading for the enemies red. If an invasion occurs, have your allies defend it, making it less likely that it will be stolen.
Blue side on the bot side of the map is always invaded, and mana really isn't something that Teemo needs at all in the jungle, due to the high mana sustain and low use of mana since we won't be maxing (Q) for quite some time.
After Red buff head towards the Ancient Krug and kill them while kiting. Krugs were one of the only camps not really affected by the camp reset range changes.
It's also now a lot faster to clear than previously before, just make sure you utilize your Blinding Dart to blind and run past the large one to mitigate damage.
If you're invading, you will kill Raptors and ward the bush before killing Krugs.
Once you've killed Krugs, now it's time to move onto the Crimson Raptor camp.
You will still have Red buff to assist you, and you will also need your Smite, under no circumstances should you have to use it on the previous camps.
Start by attacking each individual mini-raptor once while kiting around slightly. AA > AA > Q > Smite the large raptor and finish off the little ones before moving on.
Once you have killed the Raptors you would want to head right over to your Wolves, unless you feel you can apply pressure mid-lane if they are pushed in.
Check your surroundings, because the enemy jungler depending on who they are playing could have invaded your Blue and be right around the corner. You'll need your ward for the next section. So it's better to face check and smite it if it's low.
Blue Buff is often times the final camp you take. Unless you had a very hard leash and have some time to spare before the Rift Scuttler spawns. Then you would want to take out Gromp but due to the need to rush over to the opposite scuttle crab to potentially contest it and steal it. It's best to hold off on it until later.
You'll want to kite it while blinding it as you go through to the other side to avoid resetting the camp from pulling it too far. Once it's died, proceed to the scuttle.
HOLDING SCUTTLE CRAB HOSTAGE
Rift Scuttler is a very crucial objective for you and your team, not only does it offer a lot of vision of the river, it also offers a lot of EXP and gold and movement speed through the ring it spawns, which can really save you later in a fight or if you get caught out. If you let the enemy take both, you'll be set back a lot.
Gank mid and then go for the opposite Scuttle. Generally this works 40% of the time due to skipping Gromp giving a bit more time to get there to contest.
Even if you can't manage to get the second Scuttle, make a rotation to gank Top if they are shoved near or under their tower. A kill or an assist will be perfect.
Regardless of how it ends, you'll be back to your first rotation. Start over and go in order of what you started with minus the Red and Blue. Back to base at 6 minutes.
What do I do now?
Because every game is different, it's difficult to say what you should do following your first clear. You may have been invaded, all of your allies may have been pushed into the enemy towers, and there may be nothing you can do for the early game other than farm till you can assist teammates when it is in your best advantage, not when everyone is behind. As the games vary, adjust and adapt your strategies and playstyles. Your priority should be to take control.
So, with this in mind, you should just think about your current circumstance and adjust to it. Get some ganks in if allies are shoved under tower, especially if you've been following the junglers pathing and know he'll be somewhere else. If they're all shoved under the enemy towers, attempt to invade for a while and farm / contest dragon. Teemo is not that hard to play in the jungle. All you have to do is farm, rotate, and track. It's simple once you get the hang of it.
In my case, I love rotating and controlling the enemies JNG because of knowing exactly where they are at 2:30 usually at 50% HP while Teemo has the ability to maintain 80-100% HP due to his kiting and sustainability with his (Q) mitigation.
Pathing is extremely beneficial because it lets you be places without wasting time. It helps to prevent the enemy from trying to get kills while also helping allies to snowball or go even. It's not for everyone; there's a lot of responsibility to supporting allies and tracking while also keeping yourself safe from invaders and understanding your limits.
Who do I gank?
Primarily TOP and BOT lane are the easiest lanes to assist, as mid lane is often a coin flip and filled with assassins or burst mages with a lot of hard lockdown CC, once if fed are nearly impossible to help with. So depending on how well your mid is doing be they feeding, winning or going even. You can often make the decision to help or ignore their lane completely. You should never help a losing lane, help winning lanes or even lanes.
Playing in the jungle can be stressful. You actively need to be looking for ways to help your team. This could be to get them fed or ahead or to get a kill for yourself, but you also must understand that if your ally is 3 levels behind and losing, no amount of you helping them will do anything for them but reset their gold.
They can not help you help them, so look elsewhere. If you don't have a bot lane or mid lane but a front line fighter or tank who is doing well then help them get out of the laning phase and help transition them to helping allies. Make it to the mid or late game while doing everything you can to help them help your team. This could be as an engage or simply catching someone out. It's difficult to take on fed assassins & mages.
When you are going in, make sure they are ready for the gank. If they aren't ready then there is no reason to go in. Respond to them with pings and go in when they are ready or back off if they ping you that they are not. If they are about to die, there really isn't any point for them to go into someone with 50%+ HP unless they have the sustain / combo to pull it off, because quite frankly Teemo ganks are a team effort. He's screwed if he ends up going in alone.
There isn't any "better" or "best" runes to choose from. Generally it's all based on personal preference. Some people really like playing one form, as opposed to others who prefer another. Electrocute and Grasp of the Undying are good examples because one is for bursting & the other is to survive burst. Both can still build straight into damage, but Electrocute is more beneficial with that, going the extra mile with Dark Harvest being even better.
Regardless of what your friends or "coaches" tell you, Teemo is extremely versatile and can play pretty much anything, and isn't restricted to sticking with one single rune or build. There are plenty of Diamond, Master, and Challenger Teemo players who run more than one rune page all with relatively good success, it's not the runes or items. It's their ability to play well under any circumstance, this goes the exact same for you.
Certain Teemo players can stomp anyone regardless of which runes they choose, but others, especially new players, may have a very hard time with someone like Darius, Irelia, or even a Tryndamere. Switching their runes around can become extremely resourceful. Teemo is not restricted to playing one specific way. He isn't a Veigar.
There is nothing in his kit forcing or restricting him from going straight AD or TANK. It's not as effective as AP in the long run, since he does scale massively with AP, but it is still an option for those specific types of players. Though I would highly advise you to stick with the general AP builds until you find something that works well in your current ranking.
(Old Seasons) A DETAILED VIDEO OF ALL OF OUR CURRENT PRIMARY AND OFF-META RUNES.
IN-DEPTH Arcane Comet
Arcane Comet is a niche but powerful rune. It's exclusively for shroom damage, which means you'll give up the ability to kite and survive on your own for the ability to melt targets from a safe distance via shrooms.
Unlike other runes such as Dark Harvest, it does not require a prerequisite to cause damage. To deal a ton of damage regularly, you only need a comprehensive build centred on shrooms, so rush Liandry's Torment.
That being said, it would only be viable as a support while focusing on aiding your team with objective plays.
IN-DEPTH SUMMON AERY
Summon Aery is an offensive rune in which you can relentlessly poke out your opponent while also focusing on CS. Toxic Shot compliments this rune greatly, as the damage over time will allow you to reset her, sending her flying in the enemies face once more, unlike damage this will not draw the aggro of minions allowing you to chase through minions without the fear of taking damage. Many websites will tell you that this rune is the best. This is not actually true, it's just the introductory rune for every new and returning players to get them into the playstyle of Teemo. It's actually pretty weak in comparison to every other rune these days.
Keep this in mind as this is most effective when you run towards the enemy, as you have to meet Aery half way in order to take full control over this advantage. Simple things like the enemy hiding in a bush, make this useful since we just have to hit them once and pick her up for free damage and that's really all there is to it with this specific runes playstyle.
This rune allows you to constantly poke them to utilize her ability to fly out and strike. You would by default be grabbing the Manaflow Band, Absolute Focus with Scorch due to the nature of this rune not having that great of a late game scaling compared to other burst and scaling runes.
You can gain either more sustain with the handy Taste of Blood secondary rune or the extra true damage with the more preferred Cheap Shot rune to give yourself more of an edge against champions who have no ability to get in close to trade or to take less damage and heal back in an even trade if you do decide on taking the first rune in place of this option.
I would advise you to never go for bush plays or rather keep them to a minimum. The reason is pretty plain and simple if you have a Noxious Trap anywhere near you, and an enemy is nearby Summon Aery will fly out and hop, skip and jump right back to your very location which can give you away in an instant. A good player will notice this and run you down so long as they can actually damage you or pull you out of stealth. A less than knowledgeable player will just ignore you entirely.
A little thing to know, Aery gets sent out faster and faster the higher you level up. It doesn't really change much about the rune, but can help execute someone faster before they can heal later in the game.
IN-DEPTH PHASE RUSH
Phase Rush is a rune that really only has one real use, mobility. It's main use is simply to escape slow. Once we are stripped of our only safeguard, we simply get run down.
Some players do like taking this rune into general match-ups for the utility it provides to escape, but outside of that you get nothing. It grants us a 75% slow resistance along with a large boost in movement speed, not damage.
I would not recommend it into anyone but Tahm Kench if you are unfortunate enough to play against him.
Sorcery row one explanations
Axiom Arcanist is a perfect rune for those that really are only interested in doing a lot of Noxious Trap damage with no real care for a slightly lower CDR since you wouldn't be able to realistically take this rune without having mana sustain issues without Manaflow Band or Presence of Mind so it's very good when paired together with Cut Down due to the combination increasing your shroom damage by 17.7%.
Manaflow Band is an amazing rune for us now that we don't have to spam Blinding Dart to get a stack for the mana regeneration later in the game. It's quite simple now, since all we have to do is land our Toxic Shot through poke and we automatically get a stack for free. This rune helps us gain and manage our mana late game especially with a game where we have multiple clouds. However, Presence of Mind is a far superior rune since it grants mana for all damage dealt including poison and is combinable if you just so happen to not feel the need for a defensive secondary sub rune like Taste of Blood or Bone Plating. The other runes in this category just don't offer as much.
Sorcery row two explanations
Transcendence is an amazing rune for ability haste & cooldown reduction upon taking down an enemy for your non-ultimate abilities, if you play support or Dark Harvest orientated builds it speeds up our ability to (Q) pairing up very well with Liandry's Torment or Blackfire Torch since both are reliant.
Celerity is an excellent rune for increasing overall movement speed for Teemo. Most notably when playing with Gustwalker Smite because of the large advantages that are applied constantly when you sprint through bushes, cloud drake soul, kill camps, and activate (W) all at the same time. It is useful in the laning phases of a few champions, such as Darius and Sett or Garen, although it is rarely required in the long term.
Absolute Focus is a great rune to increase your overall damage all throughout the early game so long as you keep your HP above 70%. This can really help you with the ability to last hit minions, and to simply deal a lot more damage to the enemy champion who can't really heavy poke. It's horrible against heavy poke.
Sorcery row three explanations
Scorch is amazing & all about that early game. So from minute 1-19 is where you get the full benefit. Once you hit minute 20 and onward the use of this rune is less effective than Gathering Storm since Scorch is all about the laning phase. If you do have some troubles keeping them low HP, especially while stacking Dark Harvest it is an amazing choice for a rune to help you snowball early on.
Waterwalking is the type of rune you should only use if you're playing Teemo Jungle and want to prioritize control over Scuttle Crab as well as Dragon and Rift objectives, because it increases your overall damage while in the river while also enhancing your mobility. This is a good pick for a playstyle like On-Hit, Press the Attack because of the increased damage and single target shred / mobility.
Gathering Storm unlike Scorch is an amazing late game rune. If you constantly play games that last 30-40-50-60 minutes. You're going to get the most out of your games by taking this rune and maxing out your AP with items that scale well, like Rabadon's Deathcap which will decimate your enemies with maximum magic penetration. But for the first 1-9 minutes, you get nothing to help you in lane.
what about the greyed out runes?
Nimbus Cloakis useless. A lot of people seem to like taking on Teemo for the added mobility it applies after using a summoner. That's great and all but you're wasting a lot of potential due to it's high cooldown and severe lack of mana if you choose to take it over a rune like Manaflow Band.
IN-DEPTH ELECTROCUTE
Electrocute is one of the strongest runes due to it's short cooldown and synergy with Toxic Shot. This rune is strictly a bursting rune and primarily based around bursting people down with an auto auto Blinding Dart combo. Once you get them down below 40% HP you can start to lower the enemies HP very slightly through Toxic Shot's poison duration. The duration of this poison will extend the duration of which you are currently in combat with the enemy, this simply means your poison is being counted as 1/3 of the needed attacks to activate Electrocute for 4 seconds allowing for us to finish them off with a quick combo of auto Blinding Dart & Ignite when they fall to low HP.
So with this alone you can simply poke the enemy champion down with a single or double Toxic Shot. Once they fall below 40% and lower, you can simply bide your time with poison duration before finally throwing out your burst with Blinding Dart and Ignite to set off the rune, as you toss out the finishing Toxic Shot which will often be enough to kill them or at the very least finish them off coupled with Ignite and one final strike from Toxic Shot, which should kill by duration.
Because of this rune being a short cool-down burst rune, it is no surprise that you would really want to maximize your amount of damage dealt to an enemy champion by maxing your magic penetration out fully with Sorcerer's Shoes and Shadowflame followed by full AP items, which all stack together nicely to take out anyone trying to build a moderate amount of magic resistance against you. You should never be prioritizing enemy tanks, because squishy targets should be your one and only main concern while fighting it out with your allies in a team fight.
IN-DEPTH DARK HARVEST
Dark Harvest is strictly a soul stacking rune that requires you to consistently lower your opponent to 50% with little to no effort. Once you get them down below 50% it is very important to keep them that way in the entire early game to continue stacking your souls for the mid to late game. Your goal isn't necessarily to kill them, because compared to Electrocute your kill potential is late game and mid game, not early.
The damage is insane with a full build that compliments your Blinding Dart and Noxious Trap. You should never play passively with this rune, you should be aiming for at least 1 soul stack every 2 minutes to be decently powerful around minute 30. So by 15 minutes 7-8 stacks is average but 12 is more acceptable. This also being stated, you should never in your entire life ever play this rune into a match-up you know you can not handle or feel wary about even if the enemies composition is 100% squish. You would simply be better off with Electrocute, since it isn't reliant on stacking and you'll end up going 10 minutes with 1 or 2 stacks, which at the end of the day is terrible and in no way going to be of any use to you.
Dark Harvest is straight the gamble rune since you need to be absolutely sure you can handle your laner and focus more on stacks, than surviving or killing. It is oftentimes impossible to get more than 10 stacks by 20 minutes. Let alone get kill potential on your opponent. The long story short is this rune is meant for the late game and only the late game, so if your games are lasting 15-20 mins, you won't do much, so you'd be better off with Summon Aery or Electrocute.
There are many sub-runes you can utilize for different reasons. If you have problems lowering enemies HP to get stacks early game try Scorch, which can be taken as a secondary with Absolute Focus for better early game stacking damage. If you are running into mana problems late game, you're going to be better off taking Presence of Mind or Manaflow Band. Mind you this is strictly if you have mana problems, otherwise pair it up well with Coup de Grace and Legend: Alacrity
Into the late game Teemo becomes a nightmare, leaving them absolutely no choice but to use oracles to deal with it, losing them out on a lot of ability to place vision. It can be an issue since we can't place them as fast as they clear them somethimes. We can place upwards to 32-35 shrooms before the first one times out.
IN-DEPTH HAIL OF BLADES
Hail of Blades is a quick exchange rune. It's primarily only useful for champions and or certain tanks that benefit from very short trades due to their abilities to stun or lock you down in place or slow you while leaving very little room for you to react due to a lack of attack speed. The recent changes to this rune and how it behaves with our Toxic Shot makes it ideal now for players who have difficulties dealing with those gap close quick exchange types. We no longer will force reset the rune due to poison, so after 8 seconds it will be right back up, without any delay to make the rune useless on us. It falls off late game.
It can also be very useful for wave control after striking an enemy once, focus on shoving a soon to be sieged wave. You can still build full AP, it's mostly just a different type of feel for the play-style. You gain attack speed and a little bit of wave control at the cost of extra damage compared to other runes that do damage significantly all throughout the game straight into the late game.
However, do not be fooled into thinking this rune is the most powerful rune. It's down to personal preference of the player. Stick to the runes you can actually utilize in your Elo and you'll be fine, it isn't meant for late game compared to other runes. It can also be utilized with a full on-hit effect attack speed build utilizing Blade of the Ruined King as the main for of damage against specific tanks, until they decide to purchase Thornmail to counter us completely. Keep that in mind if you want to play this way.
DOMINATION ROW ONE EXPLANATIONS
Cheap Shot is all about dealing extra true damage, which can't be mitigated with magic resistance or armor. It is the go to rune of choice when it comes to dealing damage. You can activate it automatically with Noxious Trap along with Blinding Dart so long as you have them poisoned beforehand it will automatically apply otherwise an following auto attack will too.
Taste of Blood is all about granting you a little sustain especially for those heavy poke matchups like Malphite or Gangplank. It's a 20 second cooldown, but it can be insanely useful for keeping you healthy, and capable of staying in your lane for extended periods. You can forget having to back to base every 3 mins.
DOMINATION ROW TWO EXPLANATIONS
Sixth Sense is a new trinket rune that basically is a really great choice for those that prefer sweeping around for wards to keep track of enemy wards and to take them down whenever given the chance to do so. A great choice for supports in unison with Oracle Lens.
Grisly Mementos would be more for those that prefer getting as much vision out as possible in conjunction with knowing for a fact that they would be able to score multiple take downs on their laner(s) which would continue to increase how many wards they can constantly place out. In general your Noxious Trap more than makes up for the need or desire for more vision without any pre-requisite. Still it'll grant that possible endless supply of wards if you want to be more supportive.
Deep Ward's are for those that love getting deep into the enemies jungle, like how I do with playing Teemo JNG, I'm never not in their JNG so having an extra few seconds is absolutely huge and making it harder to take them down with +1 health gives so much more vision control. Debateable if it would be any use for laners since you don't often get to roam as much or have that much control. Support possibly!
DOMINATION ROW THREE EXPLANATIONS
Treasure Hunter has been a contentious rune for some time, but with the loss of Ingenious Hunter, it has slightly improved in its use, particularly if you're playing a more snowball playstyle in which you value gold and close games earlier rather than stacking very late for shroom map dominance.
Ultimate Hunter isn't as strong as it used to be. A lot of synergies have been removed which allowed for some strong builds for Teemo to get as low as 2-5 second shrooms. If you don't plan on buying any items that offer you ability haste, it is much more effective than if you did, giving you more than just (1) second off (R).
what about the greyed out runes?
Sudden Impactsounds amazing a 6 magic penetration upon leaving stealth and giving even more damage works well with Teemo, very well. On pen and paper this is an amazing rune, but it's outshined by non-mitigated damage runes like Cheap Shotthat deal a good chunk of true damage normally.
Relentless Hunter Poison from both Toxic Shot and Noxious Trap's will keep us in combat from across the map, completely negating this rune making it less effective than it seems.
IN-DEPTH PRESS THE ATTACK
Press the Attack is the best rune period for countering top lane tanks and bruisers that do or don't build to counter. The biggest benefit of this rune is the ability to freely max out your Move Quick second or first based on the situation you are in, since we are going to be Toxic Shot reliant. If we have need of more movement speed to kite mobile champions like Garen, Darius & Sett we can, because it isn't going to dwarf our damage in the slightest, it's just going to help us stay mobile so that we can try to avoid them while auto attacking them to death especially since a lot of these champions have higher base movement.
This is a rune used in our main split-push build. It is impossible to justify choosing any of the other rune at this current moment in time for any purpose as Hail of Blades is superior to the precision rune in terms of quick exhanges and running away, while PTA excels at long extended exhanges putting you in combat with them for 8 seconds increasing damage by 8%, reseting with each reapplication of damage.
I would also like to mention that it really does matter what type of champions you take this rune into, it will not be good against champions you can not kite period. Champions with a lot of things like gap close and burst, invulnerability, invisibility, especially CC. So please at the very least try to keep this rune for the purpose of kiting champions, melting tanks and splitting. Taking this rune into hard AP match-ups is not as good as it used to be so I would advise you to avoid trying to since other runes will benefit you way more.
There really is no downside to this build besides being hard CC'd and champions who have way too much mobility to click or kite them. Take Celerity it's ultimately the better rune allowing for a more mobility and kiting early on and later especially when coupled with Gathering Storm or Waterwalking if playing Jungle.
LESS IN-DEPTH FLEET FOOTWORK
Fleet Footwork grants additional movement speed while healing us as a result. The sustain is definitely stronger than Grasp of the Undying the only difference is you deal much more damage with pretty much every other rune.
You don't deal a lot of damage with this rune as it is entirely item build reliant, but the sustain is pretty crazy right now. You can sustain off of Towers, Jungle, Champions, Epic Monsters, Invulnerable champions even Champion Minions like Heimerdinger. So until they patch this interaction, it's one of the best runes for laning right now.
Demolish and Second Wind are personal preference, but understand my reasoning. It will grant you tremendous damage for towers early and late game while playing a burst build utilizing Lich Bane. Alternatively you can take Manaflow Band & Gathering Storm for long late games, but the synergy is much more preferred with what is currently shown to end games faster. Fleet Foot on towers / champions for sustain you'll need.
Be aggressive and push your tower advantage, especially against immobile melee champions.
PRECISION ROW ONE EXPLANATIONS
Triumph is a sustain rune. It's best utilized while tower diving or getting a kill on an enemy champion or multiple enemy champions, restoring your health by 12% of your max HP. You do not need to kill the enemy, so long as you get an assist, you will be granted the sustain, which could have come from across the map on a random shroom you had placed around an objective that you completely forgot about, which could have turned the tide of a fight you're currently in on the other side of the map.
Presence of Mind is a great rune that compliments Dark Harvest or mana hungry builds more so than any other rune. It grants 15% mana on kill/assist and regeneration of mana on damage up to 11 per second (80% for ranged). This would be roughly 150-250 mana restored on kills which can help out a bunch in those games where you take Ultimate Hunter and end up getting 3 or 4 cloud drakes. It's impossible to manage 7 or lower second shrooms without a large pool of mana to back it.
PRECISION ROW TWO EXPLANATIONS
Legend: Alacrity is the only rune in this section that you would bother to take. Teemo has a relatively low attack speed, and this rune coupled with items like Nashor's Tooth will make kiting & CSing a much more smooth interaction which will allow you to poke more efficiently if you do struggle with this aspect of laning.
Legend: Haste is what we got as a replacement for Legend: Tenacity, which we utilized into heavy slow and lockdown compositions. This is useful for shroom playstyles, especially with all of the new ability haste items, if you prefer the extra 0.20 second cooldown off your Ultimate with a complete build over attack speed which personally I value more than anything else. So it really just comes down to personal preference.
PRECISION ROW THREE EXPLANATIONS
Coup de Grace is a great rune, the damage may not seem like much, but we are normally capable of keeping enemy laners below 40% HP due to our poison and poke early game. It's not very great into champions with a ton of sustain, unless you're capable of poking through their sustain with Oblivion Orb.
Cut Down is an amazing rune for dealing more damage once the enemy falls below 60% HP. The damage is pretty good early game. Once they start scaling their HP up and getting tankier, not so much. You will deal a consistent 8% extra damage, so long as you keep their maximum HP below 60%. Not many Champions stack massive HP now'a'days, so it's a pretty easy rune to abuse.
Last Stand is a rune we take when we know we will be sitting on low HP for extended periods of time into a laner. You deal 5% more damage below 60%, and 11% below 30% which can be utilizes really well to bait people out. But it's a personal preference as Coup de Grace is much safer.
what about the greyed out runes?
Conqueror is the only rune that feels like the old-school (fervor stacks) we use to have back in the first few seasons of league of legends, long ago. Unfortunately we can not stack this rune effectively at all, due to being on such low duration and not interacting with our Toxic Shot damage over time.
Legend: Bloodline is not needed. While we have no sustain in our build, it doesn't mean that building for a rune like this is worth it. We lose severe attack speed without Legend: Alacrity which is huge.
IN-DEPTH GRASP OF THE UNDYING
Grasp of the Undying is a defensive, sustain oriented rune which allows you to survive or to simply stay in lane longer. It will prevent the enemy in most cases from getting any kill pressure on you, so long as you constantly utilize the runes poke and sustain while also utilizing your ability to freeze minion waves.
This rune and it's subs are designed to help mitigate and heal most all damage taken from champions that trade very often, and raise your HP steadily. This rune is usually a good choice against many champions, but not everyone. Some champions you just need the damage or the poke, which this rune does not provide much of if you can't get close enough to activate or set the rune off on them.
This rune is rather horrible into champions like Ryze or Cassiopeia due to the fact that their range and damage/stun out-range your ability to CS or really poke at all with your short ranged Toxic Shot.
But a better choice for more sustain and flexibility item and build wise is Fleet Footwork.
I can once again not recommend this build into champions you have no hope of trading with in the first place, examples of these champions would be Anivia & Azir really anyone with massive range and who can simply zone you very effortlessly. You can easily get a grasp proc by auto attacking a minion, waiting a few seconds, then attacking the enemy champion shortly after. Since you have 4 seconds of poison, you only need to wait 3 seconds and then hit the final second on an enemy champion and get 3 HP for free and a small heal while also refreshing the duration for the next full stack.
This build is based around high health and moderate sustain, making you harder to kill with the added mitigation with Bone Plating from assassins and burst. Your damage does not suffer unless you end up taking actual tank items. I would suggest not doing this, as damage is important for Teemo, however, if your teammates are extremely fed and you wanna front line for them, by all means try something fun and new! You might just find a new play-style. But for the most part, you're going to be building HP/AP items.
If you ever find yourself going into a full AD composition, against a suitable top lane champion for a rune like Grasp of the Undying, then consider taking the two armor shards, as it is one of the best strategies with a Seeker's Armguard rush. You become a force to be reckoned with being able to survive countless bursts, so long as you avoid the majority of locks downs / knock ups. Your damage does suffer a litle bit.
RESOLVE ROW ONE EXPLANATIONS
Demolish is the only rune here that you will ever take, the other runes just don't have much interaction with Teemo. It helps with taking objectives and scales well into the late game with Grasp of the Undying.
RESOLVE ROW TWO EXPLANATIONS
Second Wind is and amazing sustain rune for champions that only end up hitting you once before backing off. Champions like Camille, Pantheon, Gangplank & Malphite with their poke and disengage.
Bone Plating unlike Second Wind is an amazing mitigation rune, for champions that continue to hit you after the first. Simply put if they can not poke you, your shield will be up for when they dive in to engage you. It does not mitigate the first instance of damage, this first hit will activate the rune for the next 3 hits.
RESOLVE ROW THREE EXPLANATIONS
Overgrowth is a decent rune for Teemo, 3 HP and 3.5% max HP might not seem like much, but it can make a huge difference, when built properly with the right items into the corresponding correct champions.
Unflinching is mandatory when facing Nasus because of his ability Wither, it disables our ability to kite effectively. This has become a more important rune due to the continued nerfs to Phase Rush.
Guardian while it can be used while supporting an ally in the bot lane, it just doesn't offer much in synergy with his kit or playstyle.
Font of Life is a supporting skill, we will never really be around allies in most all of our games and even if we are, we do not get anything from it, where as our allies get a small heal.
Shield BashWe don't have shields, and if we take Barrier we will lose most of our lane kill pressure. So we don't bother with this rune.
Conditioning has the potential to be huge for you, if your game turns out to be a 4 stacked Earth drake but that is rather inconsistent and betting on the RNG outcome of dragons to be fully utilized as it has tremendous synergy with them.
Revitalize is not usuable on Teemo, unless we want more sustain from the. Grasp of the Undying stacks by 10%, but this is uneccessary as we can't utilize it's increased shield power along side the sustain.
WHAT HAPPENED TO GLACIAL AUGMENT?
Glacial Augment will no longer work with Teemo. It has been changed to act just like Aftershock. You will have the rune replaced with by First Strike which is is a terrible rune. It doesn't do what you think it does.
It's a good rune for champions like Karthus who can cast one skill to potentially kill multiple people, but even if he doesn't he gets 300 gold. We can't do this, the 10% extra damage is circumvented by taking a proper rune-tree that gives you more damage. I'm not saying you "can't" play FS, just that it makes little sense to do so.
INSPIRATION ROW ONE EXPLANATIONS
Magical Footwear is a rune that I personally do not agree with, since you really want to have your boots on first back, otherwise you're going to run into problems. If you can survive without them (an easy counter lane) the choice is really yours if you want that extra movement speed over more control early. Realistically speaking the only role that does moderately well with this rune is JNG and even then, better runes can more than make up for this rune page like Celerity and Waterwalking both for mobility and extra damage.
INSPIRATION ROW TWO EXPLANATIONS
Biscuit Delivery isn't that great anymore, mainly due to the fact that taking this over every other sub-rune like Resolve or Sorcery nets you less survivability and damage. Still the only rune you would really take here.
INSPIRATION ROW THREE EXPLANATIONS
Due to meta shifts along with alterations to the interactions with Teemo and runes, these three runes are ultimately useless to us. You might think that one or the other would still be decent in comparison to the others, but they are all equally garbage mainly due to being in the Inspiration tree.
what about the greyed out runes?
Unsealed Spellbook has very little interaction with Teemo. While losing and entire rune section that can help him in lane / late. It would be a huge waste since all you get is spells, not runes.
First Strike is suboptimal. In comparison to other runes you lose way to much attack speed, damage or sustain for a measly low amount of Gold early game and a ton of gold late game. You could argue with me day and night about how much damage you would be doing to an enemy champion every 25-15 seconds based on level, but it doesn't add up. You lose too much, don't bother. We are not Karthuswith his ultimate applying Liandry's Angush to 5 champions burning them for massive income.
Hextech Flashtraption was changed a few seasons ago on how it interacts with invisible champions. We use to be able to channel the skill while stealth which made for some very funny ways to outplay people while in bushes. Right now, it's rather useless.
Cash Back 6% of a typical Legendary item for Teemowould only be 180-210 gold refunded. Sure, it will add up over time, but given the lower overall damage or lack of mana sustain depending on the main rune you've chosen, it would have to be combined with a few of the other economy runes, further limiting your ability to deal damage and transition from lane to late. It could be chosen for a secondary rune page, but it's really a waste.
Triple Tonic doesn't really do a whole lot for you, since the Elixer of Avarice is more useful to a laner compared to a support and in general all of the potions only last 60 seconds. The Elixer of Skill, however, could be very promising to get a bit more out of one of your skills, but really the whole rune and runepage doesn't offer a whole lot.
Time Warp Tonic is useless so long as you're playing well and spacing properly to avoid champion engage alongside utilizing your (Q) to mitigate damage, you shouldn't have to rely on sustain from something like this as you shouldn't be falling below specific thresholds by laning alone unless you're making tons of mistakes.
Cosmic Insight is mostly for champions that want to get around faster with Teleport or for people running with the Unsealed Spellbook which we never take, we don't need item haste or summoner haste.
Approach Velocity was a great rune paired along with Glacial Augment since it was our go to rune when running slowmo. The idea is you slow someone in this case we would slow with (E) and then proceed to get a boost of movement speed towards our target. We now only slow with (R), that would be giving up too much damage to warrant this tree as an optional secondary or primary.
Jack of all TradesIn theory depending on the build you're playing, we could probably utilize this for an increase in damage, based on all of the unique stat boosts from different items, but it really doesn't sound all that great on paper since a lot of the builds we use rely on HP and AP stating, rather than a bunch of different effects.
WHAT ABOUT RUNE-SHARDS?
When it comes to rune shards, it's all personal preference. Some people prefer the default 10%/AP/HP Flat. Some people prefer AP/AP/HP scaling. Others prefer something different. It does make a difference how you end up doing in the laning phase. That extra AP can really help you last hit and deal damage. Mix things up, and try something new. Something might benefit your style.
Health Potion vs Refillable Potion is a frequently argued debate. Some prefer Refillable healing throughout the game saving you gold for two uses. Some prefer the slightly greater healing from normal potions without needing it later. Usually if you take a Dark Seal start you're better off taking the Refillable, where as Doran's Ring will be much better with the (3) basic potions.
Ultimately for the price you're going to get more HP from 3 Health Potion's than you are in comparison to Refillable. However, with Refillable Potion you're going to get an constant supply of sustain every time you go back to base to refill it. You can also just pick refillable up after laning.
Doran's Ring is one of the best starter items for Teemo period, in pretty much every single situation. You gain a large amount of damage increase throughout all of your abilities especially Toxic Shot while also gaining mana sustain and more on-hit damage to minions, you also will get a nice solid chunk of HP. Deal more damage and CS more effortlessly.
Dark Seal is basically the exact same item as Doran's Ring the biggest difference, however, is the lack of HP, On-hit & mana sustain. Despite this, if you manage to stack it fully. Mejai's Soulstealer becomes one of the strongest AP scaling items in the game for you to snowball with. It's ultimately a risky item to take as dying losing your stacks which you need 25 to fully scale.
Doran's Shield doesn't really have much use to us now that there are better items, runes and builds that help us mitigate incoming damage deal with heavy poke champions. Second Wind is the rune we take often to mitigate damage, which is similar to what this item used to be used for. If you do take this item, Doran's Ring will be locked, though you can still pick up Dark Seal.
Zaz'Zak's Realmspike is the item in the support series of upgrades from World Atlas to the secondary form of Runic Compass that provides Teemo with a significant advantage regardless of whether he is playing the Burn or Burst playstyle. The other support items really don't synergize with him well or even at all. This item goes along way for his late game shroom damage.
Sorcerer's Shoes will increase your overall damage drastically in everything you do because of the flat 18 magic pen. It will not protect you, in any way shape or form compared to the other defensive option. It's seen on pretty much every build and stacks very well with full AP. However, with the changes to Nashor's Tooth, Berserker's Greaves is a better choice offering more.
Berserker's Greaves is an amazing option while playing Press the Attack as it makes stacking and raising your attack speed a breeze, along with kiting / properly CSing more effectively very early on. If you're playing any of the other runes, you just do more with Sorcerer's Shoes so it wouldn't be as beneficial for the main use which is split-pushing and dueling bruisers / tanks.
To answer your question, absolutely. Zephyr is very useful if you're playing a more On-Hit kite and fight playstyle into the late game with the upgrade from Berserker's Greaves. The bonus on-hit movement speed is substantially increased especially for those playing him in the jungle with Celerity and Waterwalking with Gustwalker Smite with Move Quick passive activated.
Mercury's Treads will help you in those tough games where you are going up against a lot of AP with a lot of hard CC like Morgana, Lux or Swain, otherwise another MR item would be much preferred. It's not a good choice if it's just one champion that has heavy AP or CC. The extra tenacity these offer will help to reduce their effects slightly while raising our already low MR greatly.
Plated Steelcaps will protect you against a lot of champions who are adept in dealing BASIC auto attacks while also not dealing much on-hit from items like Blade of the Ruined King or Wit's End, On-Hit is completely ignored so don't buy it into Irelia. Champions like Draven, Udyr, and even Riven. It's not exclusive to only them, if you find yourself against more empowered attackers.
Boots of Swiftness is taken into champions that have a lot of mobility or a lot of skill shots slows that we need to avoid, often times with Fleet Footwork as our primary rune. Generally it's a safe choice, rather than an aggressive one like the others. You really don't need these into the large roster of champions. It's simply a crutch to help "You" be mobile, just put more into your (W) early.
Nashor's Tooth's main purpose is granting a good solid amount of Attack Speed along with consistent CSing to transition into poking the enemy champions while laning. It's great for dealing poke damage, extended fights and burst while complimenting Toxic Shot and Lich Bane's on-hit. It's one of the best items that power spike him into the early-mid game, though it falls off late.
Noxious Trap an Blinding Dart get a nice damage increase to champions in general. It's always built into into the late game even if you decided to go for a different build as shrooms are extremely resourceful for your late game control and defense even if they all have Oracle Lens. Combined with Malignance proves to be some of the biggest damage spikes we have seen in a while.
Blackfire Torch works by increasing the amount of damage you deal based on how many targets you are currently damaging with abilities. In principle, if correctly set up, you could preemptively stack a ton of lanes, camps, and opposing champions with (R) at the same time, increasing your overall AP by 100-200 for a short period which is absolutely insane since the burn stacks with other DoT effects.
MUSHROOMS ONLY Malignance has a powerful and dominant effect. It is not recommended for early game or first pick because you need an early game to transition into shrooms. It can cast numerous AoE fields and proc Dark Harvest, something Liandry's Torment has never been able to do. This makes it seem extremely broken dealing upwards to 3000 damage on a single shroom.
Shadowflame is pretty bonkers. It is one of the best cost efficient items in the game! 120 AP, 35% HP Crits and 10 flat magic penetration is absolutely absurd. You can combine this item with Liandry's Torment with certain rune builds to really punish people in the early stages of the game where Teemo is at his strongest. Once you get into the late game people will drop like flies.
Morellonomicon has been changed a lot over the years to both combat sustain creep and also to just help overall in dealing more damage, but these days sustain really isn't much of a problem unless you're dealing with compositions like Soraka and or Vladimir since it doesn't do much else for your damage since Ignite has it's own build in anti-sustain though on a long cooldown.
Lich Bane is a very powerful item for Teemo when fed early game after purchasing Nashor's Tooth. Teemo can abuse it with W-E, Q-E, or R-E if given enough time to reset the (1.5) cooldown. Since Teemo's basic auto damage is On-Hit and scales with AP, it's going to melt anyone on one combo when combined with, Toxic Shot, Nashor's Tooth & Rabadon's Deathcap.
Cosmic Drive offers a solid amount of movement speed boost when striking an enemy with your basic attack. It has some high synergy with Fleet Footwork with a focus on maxing your (W) and other items like Lich Bane to get in and out quickly with high amounts of mobility. It also has some use in shroom builds, but it is more useful as a mobility item for us these days.
Rabadon's Deathcap coupled together with all of his other core items like Liandry's Torment, Morellonomicon as well as items like Lich Bane will see tremendous amounts of damage increase. It is, however, not an item you would build first rather, until you have other items to compliment it. So with this in mind it's normally a 3rd-4th purchase on many builds or a final purchase on others.
A lot of players seem to sleep on the idea of an item like Cryptbloom, which is effectively the same thing as Void Staff but plays a significant role in assisting your team as getting kills or assists blast the area with a healing radius that scales with AP, meaning if you managed to get 800-1000 AP with a specific build, you'd heal allies nearby for 400-500+ while granting other useful stats.
Void Staff is often only meant for champions who have a lot of magic resistance. If you are up against a composition of squishy champions with no bruisers or tanks, this item will only add 15 Magic Penetration which obviously isn't a lot, so in that case you would be better off building other items instead for more damage. Item's it's great against are Spirit Visage & Maw of Malmortius.
Wit's End is a great item to acquire if you are going up against a few AP champions who have little to no CC. This item works extremely well with Runaan's Hurricane & Nashor's Tooth as it provides scaling on-hit and huge resist / tenacity making late game split-pushing and team fights more impactful. Ideally played with Press the Attack as other builds have poor/no synergy.
Runaan's Hurricane is all about split-pushing. It benefits from on-hit items and attack speed builds by allowing you to target three targets at once rather than one. Teemo is an on-hit champion. Toxic Shot will apply on-hit, before it applies DoT which synergizes well while building into AP scaling. Though this is literally an Item more geared towards very low rank play.
Rapid Firecannon is an item used to help against Cassiopeia or Ryze difficult mages to poke and CS with Toxic Shot. It will raise your auto attack range just outside of their skill-shot, allowing you to safety poke and burst them down. You won't lose anything in comparison to Nashor's Tooth, besides (Q) and (E) scaling AP. Offers a lot of synergy with Fleet Footwork.
Mejai's Soulstealer is devastating if you find yourself in a situation where you are dominating, and have need for even more AP scaling than defensiveness. Rabadon's Deathcap's 35% scaling makes this much greater. It will also offer 100 extra HP and 10% movement speed which is great since it's always been the gamble item that was meant to give damage at the cost of everythelse.
Banshee's Veil is a one time spell-shield which will prevent CC from an ability or ability damage of any kind from hitting us, before going on a 40s cooldown. Please note that due to the current META of Lich Bane mages, it WILL NOT prevent the basic auto attack enhancement. So you would be better off with something else that provides you with more resistance + health.
Zhonya's Hourglass is a stasis item allowing for us to become invulnerable for a duration of 2.5s to prevent all damage about to or currently afflicting us. It will often times end up getting you killed if you don't have a team to back you up. Seeker's Armguard is very helpful in heavy AD poke and engage match-ups, so if you're struggling, getting it and a Ruby Crystal goes along way.
Warmog's Armor may sound like a weird item to build on Teemo, but hear what I have to say about it. It's an amazing item in-between fights, and really good if you don't run sustain runes/builds. It's only ever thought about being purchased into the very late game with Grasp of the Undying. Forget about this item if they have Blade of the Ruined King champs like Master Yi, Irelia etc.
Quicksilver Sash isn't at all a good item in terms of synergy with Teemo. It's only used for countering one specific champion, Malzahar. The item was nerfed to no longer work on champions like Mordekaiser and thus it has no place in our builds, not that we ever really needed to use it against him unless he was fed. So keep that in mind next time you fight him.
Take Oracle Lens mid-late game, to deny vision. Playing as Teemo comes with the perk of not having to keep your Stealth Ward's outside of the laning phase since Noxious Trap's naturally act as vision themselves every 11-4 seconds. There really is no need to hold onto shrooms outside of 1.
You would be taking Farsight Alteration in games where you have demolished them and want to take full control over the entire map, permanently. Another reason would be to never face check, to grant vision over walls where they might all be stacked around objectives like Baron Nashor.
There is no when or why. You will always be purchasing extra Control Ward's while you have enough gold to do so. It's important to know where the enemy currently is, or even to grant permanent vision for you and your team for up to 20 minutes specifically in the two locations listed below.
Buying a Control Ward really early in the game can be massive for your vision and ability to track enemy jungler for your whole team. While chasing someone into bushes & while your Stealth Ward's on cooldown, don't face check. Grant yourself vision with control wards.
Replace the current Control Ward if someone is taking it down, it's free EXP and GOLD for them, deny them it.
The two placements on the map are also the most ignored placements in the early game. You can all benefit from this information.
They have the potential to last for up to 20 minutes before being taken down granting large vision score for a single ward placement.
It is a gamble and doesn't always work out the way you hope for it to. It's especially very useful in low elo, due to the fact that people play a lot more poorly without seeking to clear vision.
You can purchase one control ward if you figure you won't need potions.
The following map will give you a rough idea as to where you should be placing your Noxious Trap's all throughout the game, these are heavily travelled locations.
Please remember that Shrooms should be placed 3-4 (R) shroom radius's away. You can place the (R) skill AoE as a reference to get yourself in the mindset of Teemo.
The video linked below goes into much better detail.
This is an amazing example of how utilizing Noxious Trap's poorly effects you an your allies.
You are not doing anything while doing this. It offers no vision, no real support for your allies or to catch enemy champions out anywhere.
Shroom's do not stack, they are refreshing the Slow/DoT, but this only benefits you if they reset it at the end of the current slow/dot.
Learn to save some shrooms for when you have the potential to roam the enemy jungle or even the river to get some deep shrooms down.
It's good knowledge to know and to utilize.
If you place Noxious Trap's deep into the jungle, it has a higher chance of staying the entire duration or close to it's entire duration using it to it's fullest potential.
This can quite possibly catch someone out that is trying to flee, or warn an ally or even yourself of incoming danger. Don't be a dumb, take control.
If you take a look and compare the two maps, you can clearly see why people fear Teemo and purchase Oracle Lens to hold us back.
I would like to start by saying, If you are going to play support. You support your ADC, don't run off and AFK Mid. You stay with your ADC and support other lanes when you can. Nothing good comes from trolling an entire playerbase.
The benefit of playing support is the mind games you can apply. Even if you are not in the lane anymore. People will be scared which allows you to roam across the map and apply pressure to other lanes when you can't impact bot lane.
However, if you just so happen to be paired up with an incompetent ADC one who refuses to do anything but farm under tower. Leave them. It may sound weird to go against what I previously said, but you have to understand. If they are not working together with you to win that lane. You will lose it and die over and over again, so leave and go help out other lanes while roaming around. There's nothing worse than a bad ADC who is giving up in champ select.
While we play Teemo support, we're in a role where we are free to do whatever we want. We are not bound by the laws of CS, with this we can roam freely, stand still wherever we want & attempt to ambush people.
Bushes are our best friends in the bot lane, a little trick not many people use is the "Where is Teemo" game. You show yourself visible in a certain location, and run through the fog of war. This makes one assume you're still in bushes, when they come forward to CS they will hug the wall in between their support on top of you.
Once they have fallen for it, you would simply fight with your ally to get them or yourself the kill. It's as easy as that. It's a pretty basic trick, but the amount of times people fall for it is nothing short from astounding.
Video reference
Jhin is hands down, one of the best ADC champions to support as Teemo period. Jhin has everything he needs to to compliment us and our poke playstyle well. He has fantastic damage, along with traps that synergize well with Noxious Trap's basically making your bot lane a minefield.
Landing Toxic Shot is normally enough for him to properly land his Deadly Flourish, which is when you would both begin your engage. Again, he is one of the best champions that synergizes well.
Caitlyn is an extremely aggressive champion with a very long reach with her auto attacks (650), this helps in keeping herself out of reach from most champions making it difficult to poke her in return.
What's more is she has her 90 Caliber Net dash, helping her slow and flee or dash and chase enemies. The biggest synergy is her Yordle Snap Trap's used defensively to help us put pressure through bush harass. She is a very solid high damage champion that can support our bush harass.
Lucian is an amazing quick trade champion, there are very few champions who can out trade him.
We are more about quick trades and returning to our bush harass once our Blinding Dart is on cooldown. Even in extended fights he does extremely well with his high mobility and damage while we protect him the best we can, be this by blinding the ADC as he goes in or negating a stun.
He's a great and solid ADC to support due to his high trading play-style and mobility.
So long as she is utilizing her Blade Whirl properly to negate an important projectile like a Caitlyn ultimate or even a Blitzcrank hook, you shouldn't have much of a problem supporting her.
Once she hit's level 6, she normally has everything she needs to go in for an extended fight in which she blasts anyone with her (R) combo so long as they don't have hard CC to stop her mid channel.
Tristana is a wonderful yordle with a solid lane pressure, mostly keeping waves shoved up to their tower or at the very least in the center of the lane throughout the early game. Which benefits us.
We never want to be pushed up under our own tower, just due to the nature of our own playstyle. We need bushes to properly abuse and so, we need a champion who is adept in pressuring. Tristana has her Rocket Jump and Buster Shot as her escape and CC/finisher. A very solid ADC to support.
Veigar is not an ADC you say? It's true, but it is something that Teemo can support extremely well.
Veigar has the ability to lock down enemy champions with his cage. This prevents them from running away or even trying to turn into you allowing us to deal massive damage together as duo bot AP.
I've have never personally lost a bot game with Veigar as my APC, once his cage is down you basically both back off and play it safely while you poke from range until it's back up again for another engage.
It's no surprise. Shaco has been an absolute powerhouse as Support or ADC the past few seasons, mostly due to his disruption because of his invisibility along with his Jack In The Box's shenanigans.
Laning against him in any regard is an absolute nightmare. Couple that with Teemo's Blinding Dart and bush harass with Shaco and his boxes make entering bushes impossible leading to some very oppressive gameplay, which becomes more annoying when Teemo acquires Noxious Trap's. He's not often seen as an ADC, but if you managed to find yourself one, it's very solid duo to play with.
Swain is a powerful APC or SUP when played together with something like Pyke or Brand, so the synergy isn't as strong when we support him with Teemo because we lack CC. Despite this, his ability to lockdown and pull a target towards himself and to us is great similar to that of Veigar.
What's more is his ability to sustain through the lane with his innate passive when he does land his stun and strike the target. What makes him a good champion to support is his all in potential at level 6, massive sustain and a large amount of AoE burst.
Ezreal has always been the most useless ADC to support in the laning phase period.
Farming under tower while missing every single (Q) he throws out while feeding into CC matchups.
I have never had more than 1% of Ezreal players playing well, even when double stacking tear was a thing. He is a late game champion, with an absolutely poor "safe" early game playstyle. No synergy.
He is a very powerful champion in high elo / pro play, but the average playerbase is not great.
Ashe is a very difficult champion to support most of the time, she has great poke from her Volley but she doesn't have much of anything until level 6 to support herself outside of her AA slow.
The reason she is listed as a poor ADC to support is her lack of disengage early on with her (14) sec cooldown on Volley, which becomes 4 secs late game but does little for your early game offense.
Vayne is a very strong late game ADC, however, like Ezreal is primarily a champion that needs a support with lock down and engage so she that she can properly position and land her condemn stun.
She has very little for herself early on until she hits level 6. The early game tends to be a tower farm simulator, unless the enemy champions in Bot/Sup are not respecting the both of you.
THE WORST CHAMPIONS TO FACE WHILE YOU ARE SUPPORTING
Whether you are playing a game or going into an all out war, the fundamentals are always going to be the same.
If you have the knowledge of the enemy and also have knowledge of yourself, you will succeed in the vast majority of your games. If you have knowledge of yourself, but not of the enemy, then you'll bounce back and forth from victory and defeat. If you have knowledge of neither yourself nor of the enemy then you will succumb with each and every attempt you try to make. Read up on enemy champions, play them to grasp what they do before facing them fully.
Try to understand your flaws, your weaknesses and work on fixing them. Vice versa when facing an enemy, look for their weakness, what have they done wrong? No matter how big/small, capitalize on it and punish them.
A high level and well thought out plan to achieve one or more goals under conditions of uncertainty. Strategy is important because the resources available to achieve these goals are usually limited, especially when it comes to competitively playing against disadvantages. Items, runes, positioning, warding, shrooming, utilizing everything while keeping multiple goals to fall back on. It's perfectly fine if one strategy doesn't work out, adapt & overcome them.
Being prepared for anything that could happen, even if it doesn't happen when you expected it to happen. You were prepared for it allowing you to be ready to react accordingly. Warding and setting up a minefield for your allies to retreat into or for the enemy to be flanked by. There is also building correctly instead of building due the greedy mindset of "If I have more damage, they will die faster!". Prepare for what you know you need before you need it.
There are a multitude of different ways to manipulate opponents into doing the things that you want them to do for your own benefit. Some of these forms may be more targeted towards mental manipulation "EZ" after every kill to cause someone to become angry enough to lose their cool and do everything to try and kill you and nothing else.
While others are more about actually controlling their movement allowing for you to lure them at specific angles where you want them to be guided. Enemy positioning and sudden changes in their behavior are big red flags that you're being manipulated to come closer to them or to run in a specific direction, so their allies can assist properly.
Math behind how Magic Penetration Works
Magic penetration and magic resistance reduction work exactly like armor penetration and armor reduction. Magic penetration and magic resistance reduction are considered on the target champion in the following order:
Magic resistance reduction, flat.
Magic resistance reduction, percentage. Currently, there is no way for Teemo to gain any source of magic resistance reduction.
Magic penetration, percentage: Void Staff
Magic penetration, flat: Sorcerer's Shoes, Stormsurge, Shadowflame, Hextech Rocketbelt.
FLAT MAGIC RESISTANCE REDUCTION
Flat magic resistance reduction stacking stacks additively instead of multiplicatively. EXAMPLE: 20 magic reduction reduces the target's resistance by 20, so a target with 30 magic resistance will be reduced to 10.
(30 - 20 = 10)
Flat magic resistance reduction can reduce a target's magic resistance below zero. EXAMPLE: if an enemy with 10 magic resistance has their magic resistance reduced by 25, the enemy will have -15 magic resistance.
PERCENTAGE MAGIC RESISTANCE REDUCTION
The target's magic resistance is multiplied by a percentage (100% - the listed reduction).
Percentage magic resistance reduction stacks multiplicatively and is ignored if the target's magic resistance is 0. EXAMPLE: 20% magic resistance reduction multiplies the target's resistance to 80%, so a target with 30 resistance will be reduced to 24.
(30 - 0.8 = 24)
% magic resistance reduction makes a bigger difference on targets with higher magic resistance. For instance, with 40% magic resistance reduction, a target with 200 magic resistance will lose 80 while a target with only 50 magic resistance will lose 20, so you can see just how ineffective it is against non-MR stacking targets.
PERCENTAGE MAGIC PENETRATION
A target's magic resistance is treated as being multiplied by a % for purposes of damage calculation (100% - the listed penetration). Percentage magic penetration stacks multiplicatively and is ignored if the target's is 0 or less.
EXAMPLE: 20% magic pen causes the target to take damage as if its magic resistance was multiplied by 80%, so a target with 30 magic resistance will be treated as though it had 24 for purposes of damage calculation (the actual magic resistance value will not change.).
Because the target's magic resistance value does not change, anything depending on it also doesn't change.
% magic resistance reduction makes a bigger difference on targets with higher magic resistance. For instance, with 40% magic resistance reduction, a target with 200 magic resistance will lose 80 while a target with only 50 magic resistance will lose 20 so you can see just how ineffective it is against non-MR stacking targets.
FLAT MAGIC PENETRATION
The target's magic resist is treated as being reduced by an amount for purposes of damage calculation, but cannot be reduced below 0. Flat magic penetration stacks additively.
EXAMPLE: 20 magic pen causes the target to take damage as if its magic resistance was 20 less, so a target with 30 magic resistance will be treated as though it had 10 for purposes of damage calculation. The target's actual magic resistance value does not change.
Because the target's actual resistance value does not change, anything else depending on it also doesn't change.
SPECIAL THANKS TO
SOZANEK the artist that helped with visual content, I would highly suggest checking them out.
The coders that helped fix broken code, and troubleshooting. Kata, Fruxo, Citric, Blue.
The Teemo community for proof reading purposes and insights I may have missed.
You.
Certain skins animations are extremely smooth whereas some skins are clunky and have a sense of delay if you play multiple skins for a long time you would have eventually noticed this. Despite what some people may say, it's true. The animations are clunky and it can make a huge difference in your ability to play.
Out of all the skins that I have and others have played, this is by far one of the clunkiest skins you can possibly play with on Teemo, requiring a lot of time to get used to in our opinions. However, if you're exclusively playing this skin an nothing else, you will not notice this issue since you're familiar.
We began to notice due to our On-hit play-styles becoming less viable over the seasons making this skin very attack speed reliant, to counter the wind up. It is often argued that the skin is fine and there is nothing wrong with it, but this is a biased opinion from people who only play this skin.
In comparison to Omega Squad Teemo and other skins, this is by far the best Teemo skin, not because of the skin itself but rather due to the animation and how smooth it is.
It's so smooth to the point where you never really cancel autos, again this is all down to preference you can play any Teemo skin and be great at it, but if you're having trouble with canceling auto attacks it normally comes down to skins and your experience with it, in this case how often you play it.


 THE PASSIONATE GUIDE TO TEEMO
 Build Guide By Sovereign Kitten


 23,941,432
Views
23,941,432
Views
 836
Comments
836
Comments
 Thank You!


 Threats
 Synergies
 Show All


 CHANGE-LOG


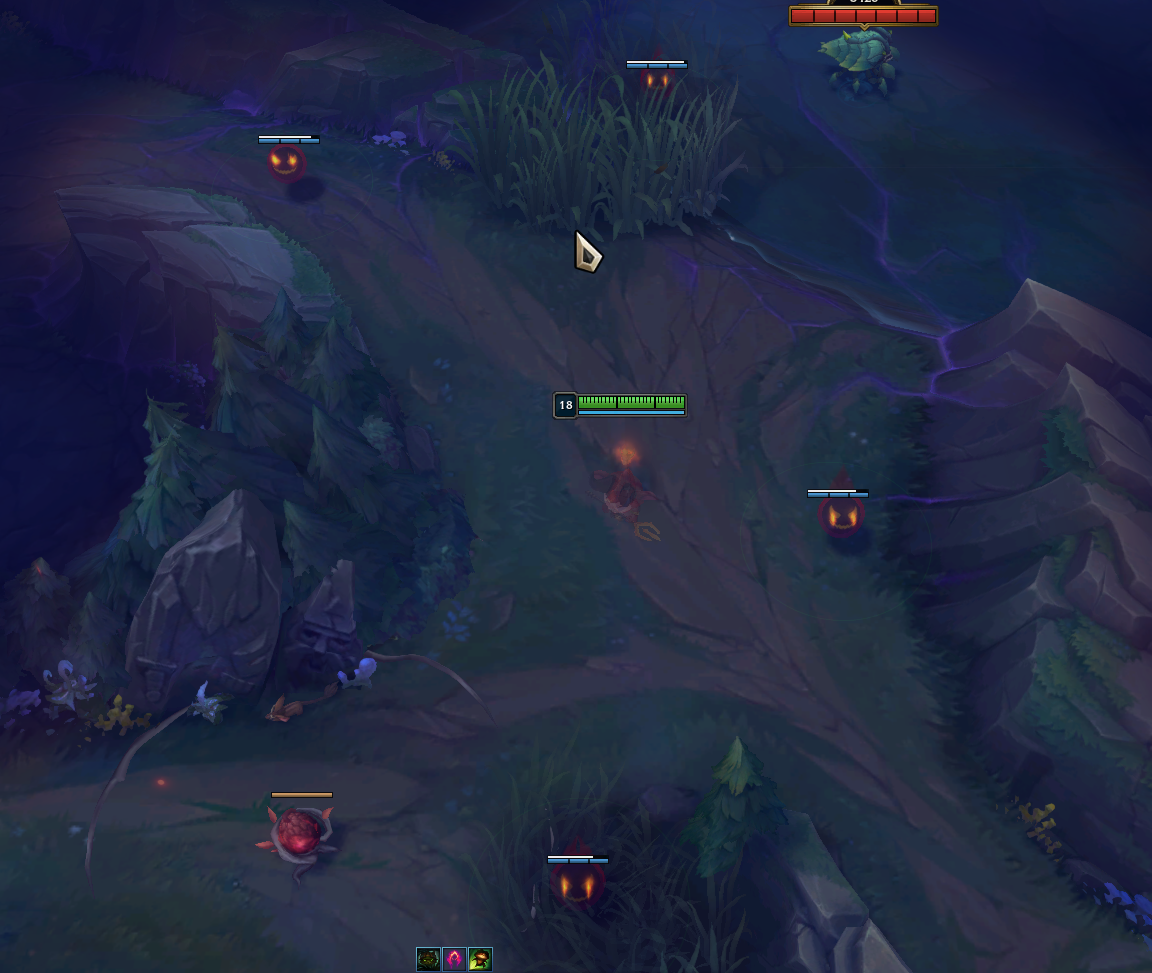
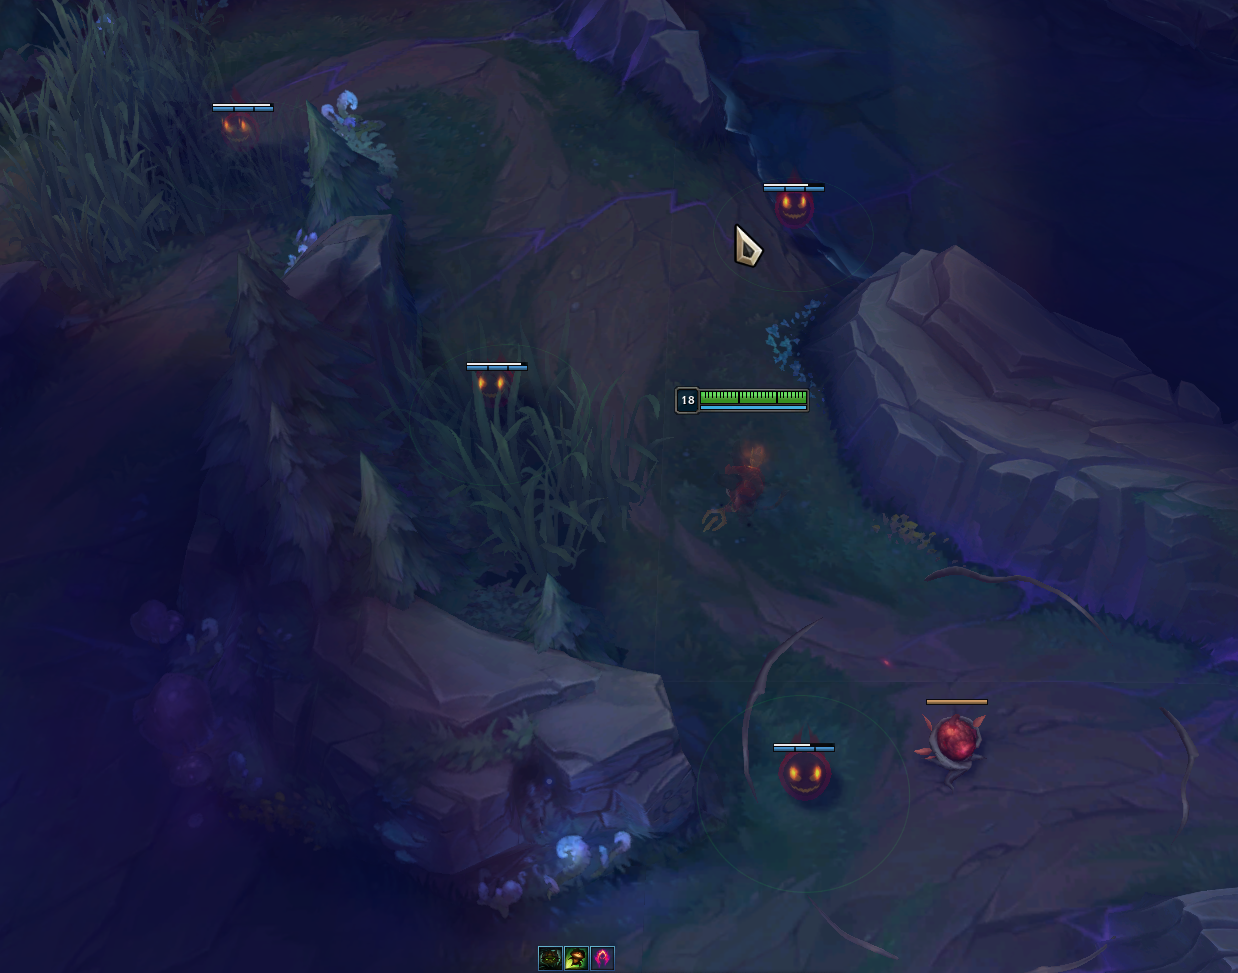


 Twitter
 YouTube
 Twitch
You must be logged in to comment. Please login or register.