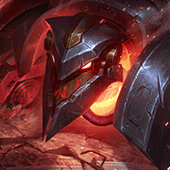
Amumu's Crowd Control makes it easy for him to stall fights inside the Realm of Death, and make you very vulnerable to burst outside of it. But since he doesn't have the damage to deal with you alone, this is mostly a skill-based matchup where you are better off focusing his backline carries and dealing with him afterwards.
Bel'Veth
Bel'Veth's high mobility makes her hard to land Obliterate on and her true damage means she can kill you by herself very easily if you let her get out of control. Do not use Realm of Death on her unless you know for sure that Royal Maelstrom is on cooldown, and preferably if she's also off her final form.
Brand
Brand has a really easy time landing his Sear Stun on slow, large champions such as Mordekaiser, and on top of that he also tends to build Rylai's Crystal Scepter, making it extremely difficult for you to gap close. He still makes for a valuable target to take away with you to the Realm of Death since his real value as a champion comes in teamfights, so protecting your team from him is a good win condition.
Briar
Briar is one of the easiest champions to land your abilities on and is easily shut down with Armor items and especially Bramble Vest, so consider building one earlier in the game than usual.
Diana relies on going into melee to do anything, which is exactly what makes her easy for Mordekaiser to deal with. She has less damage and durability than you do, and is also at a massive loss when you take her to the Realm of Death as her abilities find their most value when used against several enemies, rather than only one. As long as she doesn't get extremely fed from ganking your lanes, you shouldn't struggle to fight her at any point of the game.
Ekko is very slippery and his innate durability from Parallel Convergence and Chronobreak means you will rarely be able to burst him, and he can also burst you down surprisingly quick. Your best bet is to hold on to Realm of Death until he attempts to engage on your team, then taking him away to protect them from him. As long as you make him spend his important cooldowns, your team can finish him off.
Elise
Elise has more range, burst and mobility than you do, but gets easily outscaled in the mid game especially if she couldn't get fed from Ganks early. She's a good target to ult first in a fight, as she will rarely be able to kill you alone and is easy to deal with in isolation.
Evelynn
Evelynn plays out similar to the Elise matchup except even easier, as she doesn't pose any threat at all in the early game and at best is a small nuisance later on in the game because she's bad into juggernauts such as Mordekaiser in a 1v1. Just make sure to not leave your backline exposed to get stealth flanks before a teamfight breaks out.
Fiddlesticks
Fiddlesticks is a very predictable Jungler: he will full clear until level 6, look for a Gank, retreat and then repeat. This means you can invade him with ease and also countergank with ease since your clear speed is faster and, just like with Diana, taking him into the Realm of Death screws over his win condition almost absolutely.
Graves
Although Graves is a ranged champion with good mobility, both of them are very limited and he will need to be within the range of your Darkness Rise to deal damage to you. The main concern is his clear speed and snowball potential outpacing yours, so make sure to not let his Ganks go unpunished in the early game by either counterganking or taking resources on the opposite side of the map every time.
Gwen
Gwen is one of the few fellow bruisers in the game that you straight up cannot deal with: she has better sustain, mobility, damage and Crowd Control than you do, and does not care about being taken to the Realm of Death as she can easily duel you at any point in the game. Worthy permaban.
Hecarim
Hecarim has better mobility and can engage from longer distance than you, but easily loses the 1v1 against you. Ult him away to protects your carries if he engages, and ideally do so after he has cast Spirit of Dread, so that you steal more Armor and Magic Resistance from him.
Ivern
Ivern is difficult to deal with for similars reasons as Morgana: he can easily zone you away with Rootcaller, is hard to burst down thanks to Triggerseed, and Daisy! can put up a fight better than you'd expect. You're better off thinking of him as a second support on the enemy team and going for his carries instead.
Jarvan IV
Jarvan IV get screwed over by Mordekaiser because he can be taken out to the Realm of Death almost immediately after casting Cataclysm, and its terrain will be left behind, rendering him extremely vulnerable to just being beaten down solo. It's only in the late game where his abilities are on a low enough cooldown to be more slippery than what you can keep up with, but before that he's forced to play at your pace.
Jax
Jax outscales you and does better inside the Realm of Death than he would in an open fight. So unless you're clearly ahead, don't prioritize ulting him over his carries, especially if you're being outnumbered.
Jayce
Jayce can poke considerably well from beyond your range and his damage is not to be underestimated, but as long as you build any amount of Armor you should easily win the 1v1 inside the Realm of Death. He's a good target to ult early given his dependency on using abilities, so if you can make him spend his cooldowns, he will be rendered useless against your team when you step out of the realm if you couldn't kill him.
Kayn
Kayn is likely to go Rhaast in games against you. Rhaast can easily stall you when he's in a losing position, and downright beat you when he's ahead. Don't take him to the Realm of Death if he still has Umbral Trespass and try to position far enough from your team as to not open easy AoE damage and knock-up angles for him.
Kha'Zix
Kha'Zix is one of the toughest Attack Damage assassins to face due to all the tools he has to deal with Mordekaiser: he can get away with Leap, make you unable to close the gap with evolved Void Spike and he benefits from being isolated in the Realm of Death to deal much higher damage to you. It is still a good idea to take him out an stall each other for 7 seconds, as you are less dependant on cooldowns than he is.
Kindred
Kindred is hard to reach at first and her best players can kite you in a way that makes it impossible to get into melee. On top of that, Lamb's Respite can buy her needed time to stall you or even turn around a fight. The best use case of Realm of Death against her is to use it after her own ultimate, which will leave the zone of invulnerability behind and you can finish her off like normal.
Lee Sin
Lee Sin can be slippery but he needs to be within melee range of you to do anything, and is by default a weaker champion if he's deterred from engaging, as is the case when he's facing a Mordekaiser. Make sure to not ult him near thin walls, as he can easily dash away from you and you should give him as little terrain as possible to place between himself and you.
Lillia
Lillia has the mobility to avoid you, the Crowd Control to stall you and the damage to kill you on her own, making her extremely difficult to deal with. Try to look for picks on the sidelanes away from her and to focus on her backline during fights for objectives, and ult her away if the enemy engages first to at least protect your team from Lilting Lullaby.
Malphite
Malphite is another tank matchup where you may struggle to deal with him alone given his Crowd Control and mobility, but he's also unlikely to shut you down due to his lack of damage or durability depending on his build. Don't use Realm of Death on him if he's already engaged with Unstoppable Force, as he would already have spent his most important cooldowns outside of it anyway.
Master Yi
Master Yi is arguably the hardest Jungle matchup for Mordekaiser. Early in the game he isn't much of a treat, but he absolutely outscales you and you are left with no methods to deal with him since he doesn't care about being Slowed, will easily burst you down inside the Realm of Death and Highlander outlasts any attempts at stalling him for long enough. He's the one champion I permaban every lobby.
Morgana
Morgana thrives against slow, large champions that make easy targets to land Dark Binding on... such as Mordekaiser. On top of that, her Black Shield is the most common cause of Realm of Death failing to go off, completely frustrating your gameplan. Only look to fully engage on her when her cooldowns are spent, and
Nidalee
Nidalee can be quite obnoxious in the early game since she's stronger both in ranged and melee fights compared to you, but gets outscaled extremely easy if she doesn't get fed. From the moment you complete your first item, ulting her away will always be a guaranteed kill as long as you're not fighting her near thin walls or on low Health.
Nocturne
Nocturne is even weaker against you than champions like Xin Zhao because he becomes a sitting duck as soon as you enter his melee range, and the best he can do to is keep you away for a couple of seconds with Unspeakable Horror just to delay the inevitable. His clear patterns are very similar to yours so you should be able to match his Ganks and plays very easily.
Nunu & Willump
The Nunu & Willump matchup plays out in a similar fashion to Amumu and Malphite, except he's easier to deal with given his real lack of mobility, and the fact that Absolute Zero grounds him in place for several seconds allowing you to land abilities very easily. He's a high priority target to take into the Realm of Death as early as possible in fights, because he's useless if he cannot impact teamfights.
Olaf
Olaf is the only champion in the game that can get out of Realm of Death prematurely, thanks to his immunity to Crowd Control from Ragnarok. This puts you in an awkward place as you don't want to be the one engaging first in any circumstance, and instead look to fight him only with teammates nearby or if you know for sure that his ultimate is on cooldown. Some Armor and even Zhonya's Hourglass are necessary to make sure he won't just run you down before you can strike back.
Pantheon
Pantheon is mostly reliant on bursting down an opponent before they can't reach, which is naturally hard to pull off against Mordekaiser, giving you the upper hand. He's also easy to land abilities on given his lack of real mobility tools and the need for him to be in melee. Just make sure to be ready to keep up with his Ganks after he's hit level 6.
Qiyana
Qiyana is one of the most slippery assassins to play against, and her permanent stealth from grass Terrashape makes it really difficult to keep your Darkness Rise stacked during an encounter. Even though she normally doesn't have the damage to burst you down alone, where she really thrives is teamfights so you should ult her away as soon as you see her trying to engage, especially before she has cast Supreme Display of Talent. If you can't kill her, at least protecting your team from her will be enough.
Rammus
Rammus is the hardest tank to burn through because of his high amounts of resistances even before items become a factor, meaning that he can stall you almost indefinitely and will also kite you easily thanks to Powerball helping him counter your Slow from Rylai's Crystal Scepter. His Ganks are better and his teamfighting is stronger at all points of the game, so it'll be better to focus on his carries while your team deals with him outside of the Realm of Death.
Rek'Sai
Rek'Sai becomes a sitting duck once she has gone in for an engage with Burrow / Unburrow, and can only stall for a couple of extra seconds with Void Rush, making her easy to deal with as is the case with most other Attack Damage bruisers. It is only late into the game when her cooldowns are low enough to become too slippery for you to keep up, but at that point you easily outdamage her and also have better teamfighting.
Rengar
Rengar is all about burst damage and he's easy to burst down himself as long as you're not fighting him near a string of Bushes. A few Armor items, mainly Randuin's Omen are enough to make him ineffective against you, but he still has the potential to annihilate your weak carries with ease. If he is ahead, position defensively before teamfights and ult him away to protect your backline.
Sejuani
Sejuani's only threat is her ability to Crowd Control you for long enough that her team will burst you down before you're able to react, but this will only happen if you're caught out of position and don't react preemptively. Your clear speed is faster, but Sejuani players are likely to skip their camps for the sake of Ganking sooner. As long as you keep up with them and countergank, she won't be able to get her laners ahead.
Shaco
Shaco is a little more complicated to deal with as Mordekaiser compared to other champions. You would normally figure out which one is the real Shaco and which one is the clone from Hallucinate, then avoid the clone to prevent its burst of fear. The problem is that Darkness Rise makes it impossible to stop dealing damage to the clone if you keep fighting the real one, so you may render yourself vulnerable to the Crowd Control.
Don't engage on him unless you know that Deceive is on cooldown, and make sure to build resistances according to what itemization he's following.
Shyvana
Shyvana is one of the few champions that can clear the Jungle faster than you, and she also puts up a respectable fight both in melee and from distance at similar powerspikes to Mordekaiser's. She predictably aims to rush the first Dragon every time, but if you stick to the gameplan I outline in this guide then you'll be in position to contest them and frustrate her win condition.
Make sure to not spend more time than necessary doing Ganks or catching waves, since she can and will counterjungle one of your quadrants very quickly if given the opportunity.
Skarner
Skarner has been nerfed so much that he's now one of the easiest tanks to deal with. Since he's likely to stack far more Health than he does resistances, building Liandry's Torment and Bloodletter's Curse are guaranteed to reduce his threat level in every fight.
The only scenario you need to be wary of is if he Impales you near enemies that have strong AoE or burst abilities, such as Miss Fortune's Bullet Time. For this reason, ulting him away when you see his allies moving to follow up on his Crowd Control is a good idea.
Sylas
Sylas is expected to lose the 1v1 against you at all times unless he manages to get fed, which can only happen if you let him Gank on repeat without trying to countergank him. He's also worse at taking objectives, so you should try not to let him catch you unprepared while you're killing one alone and instead play around ambushes near live objectives.
If he Hijacks the Realm of Death, he can eitheruse it against you or take himself and one of your allies to the same realm as you and an enemy are, in case you both use it simultaneously. If this were to happen, you should focus Sylas to protect your ally as he will have increased stats and be almost guaranteed to win that isolated 1v1.
Talon
Talon follows a hit-and-run pattern that relies on oneshotting his target before retreating. As long as you're building a decent amount of Armor, ideally through Zhonya's Hourglass, you're gonna be a low priority target for him and in this case, you should prioritize him as your target for Realm of Death. If he can't burst you down but also can't target your backline, he's effectively out of the game.
Trundle
Trundle is popularly one of the best champions against stat/checkers such as Mordekaiser. He can steal your resistances, Health and even some Attack Damage, greatly impacting the way you perform in fights.
For this matchup, it's extremely important to never use Realm of Death on him before he uses Subjugate since whoever ults first will lose part of the gained stats from the opponent's own ultimate.
Udyr
Udyr shares archetypes with Mordekaiser to a great degree. He's also a profficient Ability Power champion in melee combat, but he can also build full Attack Damage so you should be wary of what items he's building to itemize properly. His burst is stronger and he's hard to stick to, but is considerably worse in teamfights.
Vi
Vi is one of the most slippery bruisers you can face and her damage is no small threat in long fights. Her Cease and Desist turns her unstoppable momentarily, so you should hold onto Realm of Death until she has used it or when you're sure that she's not about to use it. Her engages are better but she becomes a sitting duck when she's in melee in the middle of a teamfight until Vault Breaker's cooldown is complete, so fight next to your teammates when you see her right on them.
Volibear is a stronger stat-checker than you are for the most part of the game, both in duels and teamfights. For this matchup, you will have to more carefully and never overstep into the Jungle if your laners don't have prio and you don't have visual confirmation on Volibear, but in the mid and late game you should switch this up and be the one to start fights, unless the enemy team is clearly ahead, since his engages are stronger than yours.
Warwick
Warwick has heavy sustain and will easily outdamage you in long fights unless you make sure to build any form of Grievous Wounds. Another important aspect of this matchup to keep in mind is that his Jaws of the Beast turns him unstoppable for a short time, until its dash is complete; it is vital that you do not cast Realm of Death on him during this time, since it will not go through and you will have spent an important cooldown on nothing.
Wukong
Wukong is hard to stick to because of his Warrior Trickster and Cyclone, abilities that also make him a better teamfighter than you. His Armor shred through Crushing Blow and Black Cleaver also means that his damage isn't to be underestimated. If your team is behind, ulting him away as the fight happens is ideal to at least protect your team from his Crowd Control.
Xin Zhao
Xin Zhao needs to be in melee to do anything, making your game easier as you either save up on having to engage yourself, or deter him from playing fights his way. The main difference to similar Attack Damage bruiser matchups is that he can push you away with Crescent Guard, but if he has to play defensive like this because of you, you're all set up to dominate the matchup.
Zac
Zac is relatively simple to deal with early, but past level 6 becomes a complicated matchup. He's extremely hard to stick to, has infinitely better engages and teamfighting than you, and his damage isn't the worst you could find in a tank. It's important that you build Grievous Wounds, ideally through Oblivion Orb and also Bloodletter's Curse to make it easier for your team to kill him, as you're unlikely to be able to on your own.
Zyra
The Zyra matchup feels very similar to Morgana: you will have a hard time getting up close to her, and she can very easily zone you away in teamfights. Luckily, she doesn't have any utility or self-peel past her own plants, which you can instakill with one Auto Attack each.
It's important to keep in mind that if you use Realm of Death during/after her cast of Stranglethorns, the circular zone will be left behind and so will any plants alive as well. Use this to your advantage to easily turn her engage around.
Alistar
Since Mordekaiser can isolate himself not only from the enemy team but also from his own when using Realm of Death, it's hard to argue that there are champions with clear strong or poor synergy for him to share a team with, as their ability to help Mordekaiser will be limited.
With this said, champions with strong, reliable Crowd Control abilities that can set you up to land Obliterate and Death's Grasp more are generally the best champions to have next to you when you visit a lane to Gank or in teamfights.
Blitzcrank
These champions also have good Crowd Control to aid you before and during fights, but are less reliable and/or useful compared to the champions from the upper synergy tier.
Bard
These enchanters make for bad pairings because their buffs cannot reach you inside the Realm of Death and they also need to stay behind in fights, meaning that you will be left alone in the frontline and following you would make them vulnerable to enemy assassins oneshotting them. Their Crowd Control also tends to be lackluster.
Braum
Galio
Gragas
Leona
Lissandra
Malphite
Maokai
Morgana
Nami
Nautilus
Poppy
Pyke
Rakan
Rell
Seraphine
Sona
Soraka
Tahm Kench
Thresh
Xerath
Yuumi
Yuumi is arguably the worst support to have on your team. If she hops onto you, she will be dismounted immediately whenever you cast Realm of Death on a enemy, leaving her completely vulnerable to other nearby enemies and without hope of surviving unless there are other allies nearby.
Zilean
Zyra
Synergies
IdealStrongOkLowNone
Alistar
Since [[mordekaiser]] can isolate himself not only from the enemy team but also from his own when using [[realm of death]], it's hard to argue that there are champions with clear strong or poor synergy for him to share a team with, as their ability to help [[mordekaiser]] will be limited.
With this said, champions with strong, reliable [[Crowd Control]] abilities that can set you up to land [[obliterate]] and [[death's grasp]] more are generally the best champions to have next to you when you visit a lane to [[Gank]] or in teamfights.
Blitzcrank
These champions also have good [[Crowd Control]] to aid you before and during fights, but are less reliable and/or useful compared to the champions from the upper synergy tier.
Bard
These enchanters make for bad pairings because their buffs cannot reach you inside the [[realm of death]] and they also need to stay behind in fights, meaning that you will be left alone in the frontline and following you would make them vulnerable to enemy assassins oneshotting them. Their [[Crowd Control]] also tends to be lackluster.
Braum
Galio
Gragas
Leona
Lissandra
Malphite
Maokai
Morgana
Nami
Nautilus
Poppy
Pyke
Rakan
Rell
Seraphine
Sona
Soraka
Tahm Kench
Thresh
Xerath
Yuumi
Yuumi is arguably the worst support to have on your team. If she hops onto you, she will be dismounted immediately whenever you cast [[realm of death]] on a enemy, leaving her completely vulnerable to other nearby enemies and without hope of surviving unless there are other allies nearby.
Hello everyone. I'm Hazardis, but also go as Sieghardt in other games/accounts. I've been playing League since season 7 and peaked at Master 300-something LP seasons ago, until unhappiness with the game led me to take a long break from it.
This time, I bring a guide for a pick I have been spamming since the start of season 16: Mordekaiser Jungle. He has become one of the most underrated champions to play in the Jungle due to several circumstances lining up in his favor, such as his items being strong, his clear speed outpacing many meta champions and his unique ability to turn one-against-many situations into isolated fights, which can singlehandedly turn around a losing situation into a win. With this guide, I hope you can learn the basics quickly enough so that your first games on him will already.
Why Mordekaiser? Pros & Cons
Twice slain and thrice born, Mordekaiser is a brutal warlord from a foregone epoch who uses his necromantic sorcery to bind souls into an eternity of servitude. Few now remain who remember his earlier conquests, or know the true extent of his powers—but there are some ancient souls that do, and they fear the day when he may return to claim dominion over both the living and the dead.
Mordekaiser is one of the most unique champions of the Juggernaut class in the game. Thanks to his ultimate ability, Realm of Death, he is capable of turning a situation of numbers disadvantage into an even one-on-one combat, where he can tip the scales into his favor with a consistency that makes him rewarding to play and master. He thrives in close range combat and duels, but is by no means a weak teamfighter and actually thrives off of situations where he can apply his abilities and debuffs from items to several targets at once. His simplicity makes him easy for anyone to pick up, and the fun aspect of his gameplay loop makes him a champion worth playing for hundreds of games.
PROS
+ Easy to learn + Fast Jungle clear + Turns fights around + Wide itemization options + Strong mid and late game
Mordekaiser can turn situations where he is outnumbered into a favorable 1v1 at the instant press of a button, which inherently turns him into a threat that the enemy must respect. His kit is designed to make him a strong fighter whether he's fighting one champion or five of them, making him a versatile champion in terms of what team compositions or strategies he can fit into. Even though his early game is on the weaker side, he does not get outscaled easily and, if anything, benefits from his opponents growing stronger in stats that he can steal for himself. He also finds success with many mage and tank items that make it easy for him to adapt to different game situations, and also serves as one more reason why players might want to keep picking him over several games.
P
Q
W
E
R
CONS
- Weak early game - Slow and immobile - Lackluster Ganks - Stat-checker by nature - Weaker against high elo players
Mordekaiser doesn't really hit a considerable power level until you're into a few levels and items into the game, and being a stat-checker makes him easy to play but simultaneously limits his outplay potential, putting him at a disadvantage when you are versus higher skill champions piloted by good players. The quality of his Ganks are heavily comprimised by his lack of a gap closer other than Hextech Rocketbelt and his only Crowd Control available being Death's Grasp, a low-impact, easy to dodge ability, leaving you reliant on perfect angles of approach and the help of your laners, who won't always be competent.
Runes
Damage Build Runeset
In spite of Conqueror being the only viable keystone on Mordekaiser, the good news is that it is very good on him indeed. The growing Ability Power you gain from stacking it complements his extended fight potential very well, and the sustain pairs well with effects such as the Omnivamp from Riftmaker if you have it as well.
Triumph is simply the best in slot, as neither of the other two options are useful at all for Mordekaiser. The burst of healing after a takedown can be a lifesaver in some fights, and the bonus 20 gold will stack nicely throughout the game to a decent amount overall.
The bonus Attack Speed you gain from Dusk & Dawn is enough to turn Mordekaiser's Auto Attacks fluid enough for your Jungle clears, and you don't need an excess of it since the item also makes it extra easy to activate Darkness Rise in case you could not stack it from landing your other abiltiies, erasing the need for faster Auto Attacks for this purpose. For this reason, take Legend: Haste, the next best rune in this slot.
Cut Down makes it so all your sources of damage will hit harder on enemy champions that are high on current Health, making this rune useful for getting your targets within kill range and finish them off in time before Realm of Death runs out. Of course, it also makes reducing targets to lower Health before casting the ability, making execution easier.
Additional notes:
Spoiler: Click to view
Mordekaiser top players tend to take Last Stand almost always instead, and the reason we avoid it as Jungler is because, through the Ability Haste earned via items, the Crest of Insight buff and etcetera, Indestructible is on a cooldown low enough to be used twice or even thrice in a single fight, which is far more useful than a mere 3% conditional extra damage for a few seconds.
Magical Footwear will grant you Slightly Magical Boots through normal gameplay at minute 12, and even quicker into the game if you pull off any successful Ganks or Jungle skirmishes early in the game. Saving 300 gold on Boots while also getting an extra 10 Movement Speed out of them is simply too good to pass up on, especially given Mordekaiser's naturally sluggish movement.
Cosmic Insight will shorten a few vital cooldowns that come with this build, most importantly Flash, helping you respond to enemy flashes or shorten the gap to the enemy backline to use Realm of Death on. It also shortens the small delay between Sheen effect procs from Dusk & Dawn, making it easier to activate multiple times during a fight and when you are clearing a Jungle camp.
Approach Velocity synergizes extremely well with the Slow from Rylai's Crystal Scepter, and also with that of Gustwalker Smite whenever you use it against champions, helping you stick to targets that will inevitably try to kite away from you. Before you are done building the item however, it will also activate when you Slow champions thanks to the Crest of Cinders buff.
Additional notes:
Spoiler: Click to view
Bear in mind that it also activates if you Slow a champion from long distance by hitting them with a rocket from Hextech Rocketbelt while you also have Rylai's Crystal Scepter, making it extremely easy to close gaps on ranged champions.
Flash is with no discussion the best summoner spell you can run on Mordekaiser. It enables combos with your abilities that would otherwise not be possible, allows you to blink over terrain, close the gap to enemy champions quickly and dodge skillshots. Since you are almost guaranteed to burn at least a couple of enemy Flashes inside the Realm of Death in each of your games, it becomes unnegotiable that you have it as well.
Gustwalker Hatchling is the best Jungle pet choice for Mordekaiser as it helps compensate for his natural lack of mobility. When completed, you will be moving between camps and Brushes around the Jungle quicker, a gamechanger when it comes to enhancing your tempo throughout the game and making sure you are at the rights places when you are needed to be.
Mordekaiser generates a stack for each enemy champion or large monster damaged by his Auto Attacks on-hit or basic abilities, lasting for 4 seconds, refreshing on subsequent triggers, and stacking up to 3 times. At 3 stacks, he gains 3% / 6% / 9% / 12% (based on level) bonus Movement Speed and deals「0.625 (+ 3.75% AP) (+ 0.13% – 0.68% (based on level) of target's maximum Health) magic damage every 0.125 seconds」to nearby enemies. Against monsters, the damage is capped at「40 – 218.82 (based on level) per second.」
Mordekaiser strikes his mace down in a line in the target direction, dealing「0 – 55 (based on level) (+ 80 / 115 / 150 / 185 / 220) (+120% bonus Attack Damage) (+70% Ability Power)」magic damage to enemies within, increased by 30 / 35 / 40 / 45 / 50% if only one enemy is hit.
PASSIVE: Mordekaiser stores 45% of the post-mitigation damage he deals and 7.5% of the pre-mitigation damage he takes, reduced by 75% for non-champion sources, as Potential Shield on his secondary resource bar, up to 30% of his maximum Health. The Potential Shield decays by 8 – 25 (based on level) every second after not dealing or taking damage for 1 second. While Indestructible is not on cooldown, the Potential Shield will not decay below a minimum of 5% of his maximum Health, and it will be set to that amount when it comes off cooldown if it was previously below it.
ACTIVE: Mordekaiser consumes his Potential Shield to grant himself a shield for the same amount for 4 seconds. The shield decays exponentially over the duration. Indestructible can be recast after 0.5 seconds while the shield is active.
RECAST: Mordekaiser consumes the remaining shield, healing for 35 / 37.5 / 40 / 42.5 / 45% of the amount.
ACTIVE: Mordekaiser summons a claw in the target direction that grants sight of the area. After 0.5 seconds, it deals「60 / 75 / 90 / 105 / 120 (+ 40% Ability Power)」magic damage to enemies within and pulls them 250 units.
ACTIVE: Mordekaiser aims his mace towards the target enemy champion, Slowing them by 75% and revealing them over the cast time, and then banishing them with him to the Death Realm for 7 seconds.
Mordekaiser also consumes the target's soul for 7 seconds, healing himself for 10% of their maximum Health and reducing their current Ability power, total Attack Speed, maximum Health, Armor, Magic Resistance, and radius size by 10% for the duration. Additionally, the target's base Attack damage is reduced by 10% of their current total Attack Damage for the same duration. Mordekaiser gains the reduced stats of the target for himself for the same duration, and if the target dies while inside the Death Realm, he keeps their partial stats until they respawn.
Units between realms see each other as spirits, considering each other dead and negating any interactions between each other. Only Mordekaiser and the target will enter the realm; other champions cannot follow them. Everything that occurs inside the Death Realm is hidden to units outside of it, and vice versa. Most pets still inside the realm are killed at its end.
If one of the two affected champions leave the Death Realm, because of having died or having it dispelled, the other will do so as well.
When it comes to the sequence in which to learn these abilities throughout the game, there's only one that makes sense for Mordekaiser Jungle. It optimizes what his kit has to offer and what your needs are throughout the game.
Q MAX
1 Q
2 E
3 W
4 Q
5 Q
6 R
7 Q
8 E
9 Q
10 E
11 R
12 E
13 E
14 W
15 W
16 R
17 W
18 W
Taking Obliterate at level 1 is a must because your clear speed would suffer considerably without it. It is the lowest cooldown ability in Mordekaiser's kit and its amplified damage lands on either Jungle buff that you start on. Learning Death's Grasp immediately on level up is good not only for the damage of the ability's active itself, but also for the passive % Magic Penetration that comes with it, granting a little extra damage passively that only gets better as the game goes on.
You may look at what the benefits of spending a point into Realm of Death does past rank 1, see that all it does is reduce its cooldown, and think that it's a good idea to skip ranking it up at levels 11 and 16; but the truth is that Mordekaiser heavily relies on having this ability available as often as possible so that he's not caught in fights without it, since his threat mostly comes from it and not the other parts of his kit. For this reason, we invest points into it whenever is possible just like with most other champions.
Combos
Mordekaiser has a handful of combos that allow you to land abilities in a creative, less straightforward manner and have some potential to catch enemies by surprise, both offensively and defensively. The order in which abilities/spells are listed in their respective clip is important, since the combo in question would not come off otherwise.
If you cast Obliterate right before pressing Flash, the ability's range will be extended to match that of your position after you have flashed, and it is somewhat bugged since the first half of the animation will not visually update in time to show what happens neither from your or the enemy's point of view. This means that you can easily catch enemies by surprise and leave them little to no time to react to it.
Death's Grasp can be used not only to engage, but also to disengage from enemies chasing you. If you have champions right on top of you or within short range giving you chase, cast it on top of yourself but in the direction where you are fleeing to. That way, the claw will pull enemies away from you, creating some extra distance and applying effects like a Darkness Rise stack or Rylai's Crystal Scepter's Slow if you have it.
If there is more distance between you and your desired target than what Death's Grasp normally covers, you can Flash before using the ability and it will be cast quickly from your new position, enabling a better engage from longer distance. Make sure to not cast it before Flash, because you cannot buffer it as with Obliterate in the combo shown previously.
Note that the perimeter to which you and your target are limited within the Realm of Death has a fixed size, but its exact location can be manipulated. The center of the area will depend on the position of your target at the time of casting, and your own position from which you cast it. If you are positioned behind the target (in relation to the enemy nexus), the outer edge of the realm will be closer than normal to you both, leaving your enemy less space to kite towards safety. If you cannot cast the ability from behind organically, you can quickly reposition yourself by casting Realm of Death and then Flash.
Itemization in Detail
Starting Items
Even if you don't purchase it directly, the game will set Stealth Ward as your trinket by default after you leave the base, and is generally the best trinket to take at the start anyway. You will get one charge of it right away, and you'll gain another by the time you can Recall for the first time.
Additional notes:
Spoiler: Click to view
I suggest that you use that second charge to plant vision useful to your laners before retreating, like in the Brush closest to their lane or near the enemy Jungler's Crimson Raptor to track his position.
The best situation in which to start with Oracle Lens instead is if someone on your team, most commonly the support, took an engage champion and wants to force an early invade into the enemy Jungle. Taking this will help clear vision and make sure your team remains unseen during the process.
You will take Gustwalker Hatchling as adviced, as it helps compensate for Mordekaiser's lack of mobility. Pay attention before you leave the fountain for the first time in the game, as any item purchases you have made at the start will be unrefundable after this point, and you'll be stuck with your choice of Jungle pet for the rest of the game.
First Recall Purchase Options
If you are rushing either Dusk & Dawn or Rylai's Crystal Scepter, pick up a Blasting Wand when you have 850+ gold on your first Recall, which is going to be the case on most games unless you get invaded and killed at level 1-2. It's the best component in either of those build paths and will instantly boost your clear speed and dueling prowess.
When you are sure that your first item purchase will be Rylai's Crystal Scepter, grabbing a Giant's Belt becomes viable. You will end up with less damage output for your second full rotation, but the bonus 350 Health is noticeably powerful for a part of the game where your enemies are unlikely to be dealing high damage. It is particularly good when your team doesn't have many or any other frontline champions, meaning it'll be you tanking most of the damage in fights for objectives before they do.
Grab a Dark Seal early if you find yourself with 350 or more gold left to spare after buying your first component. Since Mordekaiser has so many first full item options that are relatively cheap, it is good to delay their completion by 350 gold for the sake of a small boost to his Ability Power and Health, and the possibility of making it snowball with some early takedowns if things are going well for you. You can always sell it later in the game when you're running out of item slots.
Core Item Options
These items will be your first or second purchase
Dusk & Dawn is the new item introduced in season 16, and Mordekaiser has been finding great success with it according to winrate data since the start of the year. What sets this item apart from other damage items viable on him is the fact that you gain the Attack Speed necessary to make your Auto Attacks more fluid without depending on runes dedicated to it, and that its Sheen effect helps you activate Darkness Rise after landing only one ability + one Auto Attack, saving you crucial time when fights start and also lowering the skill floor of the champion even further
Riftmaker is arguably the most bread and butter item on Mordekaiser. It fits his playstyle of a beefy magic fighter who wants to stay in a fight for as long as possible and grow stronger from it, and helps him achieve so thanks to the bonus damage he gains from simply being in combat, the Omnivamp it provides and its conversion of 2% bonus Health into Ability Power, making your other items stronger by default. I almost never go a game without building it within the first three purchases.
Hextech Rocketbelt is one of the strongest Ability Power items in the game currently, and luckily Mordekaiser gets to benefit from it well. The stats it provides are all useful on him, and the short dash from its active makes a very considerable difference when it comes to closing the gap on enemies, especially high priority backline targets to take into the Realm of Death, and all for a very low cost of 2650 gold.
Additional notes:
Spoiler: Click to view
The only downside of the item is the fact that it provides less total DPS compared to alternatives such as Dusk & Dawn or Riftmaker, but the dash is valuable enough to make up for it in many situations.
Rylai's Crystal Scepter is a viable rush in certain games. What sets it apart from Hextech Rocketbelt is the fact that you will take longer into the game before you're stacking Ability Haste, meaning that your abilities will be less available and it'll be more costly to miss them. Besides that, it is a great first item against enemy team compositions of champions that will want to kite away from you throughout the whole fight, which is to say most champion classes other than tanks and other juggernauts.
Additional notes:
Spoiler: Click to view
An added bonus to rushing it is the fact that Approach Velocity will start impacting your mobility earlier in the game, especially while you haven't upgraded Gustwalker Smite yet.
Tier 2 Boots Options
Only buy after your first two full items
Plated Steelcaps is the go-to purchase when the enemy Jungler (or the majority of champions on the enemy team) is an Attack Damage champion, which only becomes more efficient against Auto Attack-heavy champions like Viego, Xin Zhao or Briar. Don't hesitate to choose them if you need the extra Armor early in the game before you can stack it through higher cost tank items.
Mercury's Treads will become a must in many situations due to Mordekaiser naturally being the main target of enemy Crowd Control abilities to prevent him from getting close. The 30 Tenacity will help you greatly to stay on top of targets so you can dish out your damage reliably, and the small bonus to Magic Resistance is a nice plus as well.
Boots of Swiftness are undeniably a good pairing for any champion that relies on Movement Speed rather than any dashes for their movement, and interact very well with the bonus Movement Speed you gain from Darkness Rise. I consider them less compatible with Mordekaiser's kit than the more defensive options because of Mordekaiser's need for some resistances to increase the value of the shield from Indestructible, so I only build them in games where the enemy has strong Slows that can't be left ignored.
Third Item Options
Choose among these for your third item purchase
Bloodletter's Curse works great on a champion like Mordekaiser, especially when you're facing enemies likely to build any Magic Resistance items, as most bruisers and tanks will do. It also comes with very useful type and amounts of stats relative to its cost, and should be more prioritized in games where your mid laner and even ADC are Ability Power champions as they get to benefit from the shred.
Liandry's Torment is an item that used to work universally well, but after several nerfs it's been left in a state where you won't find much value in it unless you build it on the right situations. The best games to take it is when you are facing 2 or more champions guaranteed to stack vast amounts of Health, think champions such as Dr. Mundo, Sion and such. While the item works great when clearing your Jungle camps too, its stats are too lackluster to outweigh other items of similar cost available to you.
Experimental Hexplate became viable on Mordekaiser after he was given an Attack Damage ratio on Obliterate, but the playerbase overestimates how good it really is on him. It works great for the effects of boosting your DPS considerably inside the Realm of Death when you ult someone, especially melee champions, but still provides less damage overall compared to Ability Power items of similar cost. With this said, the Ability Haste for your ultimate can be a game changer in fast-paced games where you need it available as much as possible, and the bonus Attack Speed can stack up very well with that from Dusk & Dawn if you can afford to Auto Attack a lot against the enemy team you're up against.
Matchup-dependent
You should consider taking Thornmail or Morellonomicon or at the very least their components Bramble Vest or Oblivion Orb second or third in matchups where the enemy relies heavily on healing. The deciding factor on which to pick is the source of said enemy's healing: if they are Auto Attackers like Warwick and Briar, take the defensive option; if they heal through spells like Sylas and Vladimir, and also Soraka, take the offensive option.
Tank Item Options
Start building defensively from your fourth item onwards
Dead Man's Plate is the best Armor item to run when, rather than defense against critical damage, you need extra mobility to keep up with targets. Being faster passively helps you get to fights on time and keep up with fleeing enemies more easily, and the Slow applied from your first Auto Attack can help set up your abilities to follow up with your full combo.
Critical Attack damage has been buffed considerably for this new season, making most ADC marksmen but also some Junglers like Graves, Kindred and even Master Yi stronger by default. To help counter their extreme damage, Randuin's Omen is your best option. The active Slow becomes somewhat redundant if you're also running Rylai's Crystal Scepter, but is still useful to have in case.
Zhonya's Hourglass is famously one of the strongest mage items in the game and even though it doesn't fit Mordekaiser as well as other champions, it's still worth considering in every game. The bonus Armor can by itself offset the damage from enemy Attack Damage carries, especially Junglers, and the stasis effect can buy precious time when you're stuck in the middle of a teamfight tanking for your team, all without sacrificing any damage output unlike with other tank items.
Force of Nature is better purchased when you're up against fellow Ability Power champions that thrive on extended fights, such as Swain or Cassiopeia. Even though you will rarely find yourself in games where they are the main threat on the enemy team, it's still good to keep this item in mind over the other Magic Resistance options.
Although a bit lackluster compared to other items of its class, Abyssal Mask pairs really well with Mordekaiser by increasing all the damage he does in a way that involves no extra player input, and can also benefit your teammates as well. It's my preferred Magic Resistance item to run in games where the enemy has some Ability Power threat, but me or my team are ahead enough to not require much investment into defensive stats.
Spirit Visage is arguably the tank item that suits Mordekaiser the best. It benefits him three times more than other champions: its enhancement of shields increases the shielding from Indestructible, which by default has increased healing on the active part of the ability the larger the shield is, and this increased healing is increase further by the item's enhancement to healing received. This synergy makes the item worth considering even in games where the enemy doesn't have heavy magic damage threats.
Zeke's Convergence is one of the most underrated tank items in the current season. What makes it strong is the amount of stats you get for an extremely low cost of 2200 gold, and access to more Ability Haste for Realm of Death, lowering your downtime in-between fights. Even though its active effect largely goes to waste if you're also running Rylai's Crystal Scepter, it is never the reason this item is built so don't let it put you off from considering this item.
Bandlepipes fits the utility build amazingly well, as you will be guaranteed a permanent buff during champion combat granting you extra Movement Speed and Attack Speed that also extends to your allies. In fast-paced games where you need to hit powerspikes as early as possible to be ready for the plethora of fights popping off is when this item finds its highest value. Just make sure to check that your support is not building it as well, as the effect does not stack and it'd be a considerable waste in that case.
Jak'Sho, The Protean is a good choice for games where you have to care for physical and magic damage by the enemy team in equal measure, and is better built when you have previously purchased other items that provide either Armor and/or Magic Resistance. The only situation where I'd advice against it is when you are against a majority of champions that rely on burst damage, rendering this item's effect mostly ineffective.
Brief Gameplay Guidelines
HOW TO GANK: Learning the blind vision spots is of utmost importance when it comes to approaching a lane quickly. Stick to the walls if you're approaching from the river, and pop your Oracle Lens as you enter the river without waiting; if the river Bush is warded and the enemy faelights are active, you will be warned about it before you even reach the Bush. If this happens, now you know to either clear the ward as soon as you approach it, or bypass it and keep running towards the enemy laner in hopes of catching them before they react to your Gank, but do bear in mind that you will have been seen coming from earlier than usual.
WHEN TO GANK: As Mordekaiser, ideally you want to powerfarm until you hit level 6, which means that Ganks will probably not come before then. The only exception would be the small window of time you have between your end of first clear and the spawn of the first Rift Scuttler (2:55), in which you should think about Ganking the nearby sidelane or at the very least hover around it to be ready and countergank the enemy Jungler if they show up.
WHOM TO GANK: I really advice you to not waste any time ganking any laner that has died before 3 minutes, or that by the 10 minutes mark has at least 3 deaths; that's all the proof you need that they don't know how to lane properly and that they're not worth trusting with any resources. You're better off focusing on lanes near live objectives who are also even or not losing by too much, and especially in volatile matchups (melee vs melee, etc). Since my most adviced pathing involves clearing the Jungle towards bot side from the start of the game, the majority of your Ganks should and will be happening in your bot lane, where you have higher chances of success thanks to the presence of a support that can help set you up with Crowd Control or baiting fights as you approach.
JUNGLE TRACKING: In this season, tracking the enemy Jungler has lost relevancy given the discrepancy between the spawn of the first objectives in the game; however, you should still be mindful of where your counterpart is at all moments in the early game so that you can prepare your plays properly or react to theirs in an intelligent manner. At the spawn of the first Rift Scuttler is when you will find out for sure where the enemy Jungler started their clear, and if he started on the same side of the map as you did for the first clear, he will remain on the same side as you for most of the first 10 minutes of the game, assuming that 1) you are focusing diligently on farming, and 2) he hasn't wasted too much time hovering around mid or the sidelanes while his camps have respawned and are still alive. Use this information to ping your laners intelligently to warn of his presence and potential Ganks, and to assess when you should try to be on the lookout for plays in your lanes.
Highlighted Matchups
In this section, I will offer more in-dept information about a few specific matchups on the basis of them being more common in certain elos, the champion having standout interactions with Mordekaiser or me having more experience against them in my own games.
Gwen is never weaker than you in melee, and easily outsustains you as well as being capable of bypassing your Magic Resistance with more ease than you do. Since she will rarely be the one engaging before you, for this matchup you need to be patient and have situational awareness if you spot her within your reach. Assess if any of your teammates are nearby, if any of her teammates are nearby, what level she is compared to yours, how many items does she currently have compared to yours, and what objectives are nearby before committing on an engage. If she engages first and has serious advantage, such as having her Conqueror or Riftmaker fully stacked, it's intelligent to try and disengage from her and make her move beyond the area of Hallowed Mist, since she's much more vulnerable when the ability is on cooldown and your teammates will have an easier time holding her off with you. Even though she has no strong Crowd Control, you may want to secure some Slow resist from your items to make sure her Needlework doesn't keep you in place, since that's how she tends to set up her combo.
You can think of Volibear as another Ability Power fighter that keeps up with you very well just like Gwen, since the matchup plays out very similarly. Unless you catch him with low Health, I advice to not try to ult him since Stormbringer turns him unstoppable for a couple of seconds, and thus, invulnerable to being taken to the Realm of Death. On top of that, try to save your ult for when he's casting Sky Splitter and use it before the circle of storm lands on the ground, this way it will disappear and you will be denying both damage on you and shielding on him. Getting a Grievous Wounds item and Bloodletter's Curse are necessary if you ever wish to be able to deal with him. In cases where you are even or behind past the early game, the game plan that I recommend is to build such items and also to make sure you go for Rylai's Crystal Scepter with the purpose of debuffing him in teamfights and getting in his way, so that your team can handle him without worrying for his sustain and Slowing him to disrupt him when he's trying to stick to your carries or yourself.
Bel'Veth excels against targets she can hit uninterrupted by Crowd Control and that can't kite away from her reliably; unfortunately, this describes Mordekaiser to perfection. Unlike Master Yi though, it is possible to play out this matchup and come out ahead if you respect her win conditions. Her reliance on landing Above and Below if she wants to gap close to you properly makes it possible to counterplay her, and this is best achieved by building Hextech Rocketbelt and saving the dash active to get out of the ability's hitbox when she casts it. A good part of her damage output comes from Royal Maelstrom, and luckily this ability gets hard countered by Zhonya's Hourglass if you time it properly, and Rylai's Crystal Scepter is a must if you want any hope of sticking to her when you're on the offensive side in fights, as you normally couldn't follow up on her Void Surge by any means. With these items, situational awareness and patience, she can be handled in teamfights. In the worst case scenario, taking her to the Realm of Death and frustrating her ability to pop off in fights should give your team the space necessary to deal with her.
Morgana frustrates Mordekaiser's gameplan with an intensity and versatility that few other champions can: her Dark Binding leaves you unable to move for a long period of time in fights, turning you into an easily kitable champion at best, and an easy kill at worst; her Black Shield grants effective invulnerability to your forms of Crowd Control, most importantly the Realm of Death not only to herself but to any ally she chooses; and if you have successfully gone through these, Soul Shackles is a failproof way for her to root you and cost you valuable time in a fight. The good news is that itemizing against her tools is very straightforward: make sure to pick up Mercury's Treads for its Tenacity to reduce the cost of being hit by her abilities, a Magic Resistance tank item such as Force of Nature to prevent her damage from being significant, and you could even mix Dusk & Dawn with Hextech Rocketbelt as your core items to help you shred through Black Shield's magic damage shield more quickly, and to dash into her to set up your abilities once it's worn off. Items like Rylai's Crystal Scepter become a bit redundant in this matchup as you won't be able to Slow her reliably, and your priority is to burst her down as quickly as possible, for which you need better damage output.
Brand is potentially more of a headache than Morgana herself, since one could argue that at least against her, simply dodging Dark Binding reduces her threat tremendously and you can proceed to walk up to her without much issue, but Brand's power lies in Rylai's Crystal Scepter and he's pretty much guaranteed to land at least one persistent damage ability on you, namely Conflagration, although the rest of his abilities are easy to land on a slow juggernaut such as Mordekaiser. Since these abilities apply damage constantly, through his passive Blaze, it leaves you permanently Slowed similar to what you normally do to enemies, except you have to be in melee and constantly attacking. As you can realize, this makes getting up to enemies, keeping up with them and even moving at all more difficult than normal and it's the reason why a mix of Slow resist on items as well as Magic Resistance are a must. I recommend Boots of Swiftness while completely ignoring Mercury's Treads, since the Tenacity doesn't help at all in this case. It's also one of the few matchups where Force of Nature is undeniably the best tank item to take, and you may even pair it with Dead Man's Plate to make extra sure that Brand can't single-handedly put you out of the game.
Shaco players these days tend to build either Ability Power or Attack Damage unpredictably, so I'll give tips for each. Against Ability Power Shaco, you want to play fights aggressively because they play around Jack In The Box and Two-Shiv Poison for the bulk of their damage, disengaging from you while you're Slowed and dealing with the traps. If you don't push forward to deal damage, you will lose the war of attrition as he'll be free to dish out damage but never taking any himself. With this said, the real threat of this Shaco playstyle is the Hallucinate clone explosion dealing massive damage in area, and your only way of dealing with this is to lure the clone away from your team and try to kill it in a relatively safe area: that is, away from enemies that can follow up while you are feared. For Attack Damage Shaco, you can expect a more aggressive playstyle with him trying to stick on you to Auto Attack, much like most other assassins do. In this case, the matchup is much more straightforward and you will do just fine by buying a good amount of Armor to survive his initial damage, since he can't do much else other than try and burst you down in a blink.
Much like Shaco, Udyr players will unpredictably build either Attack Damage or Ability Power, although the latter is less common these days. If he's building Attack Damage, make sure to not take him into the Realm of Death until his awakened Wilding Claw has been used or is unavailable, as he can burst you down easily with it 1v1, and for this same reason you should avoid fights in the Jungle where you're alone and isolated, and also make sure to build some Armor to defend against any potential Lethality he may get from his items. Ability Power Udyr is fine to ult even if you don't think you can kill him in time, because the real strength of that build lies in teamfighting and disrupting your teammates heavily and you can at least defend them from him and potentially win the teamfight outside while you keep him busy. Against either build, you should be wary of his awakened Blazing Stampede which turns him unstoppable and, as you can guess, immune to being taken to the Realm of Death if you are unlucky enough to cast it on him before the effect wears off.
Trundle gets to steal an important chunk of your stats via Chomp and Subjugate. This forces you to default to a reactive playstyle throughout the game, as he can easily turn a fight around if he can counterengage and catch you in the middle of a skirmish or teamfight being targeted by his allies. The good news is that Trundle himself relies on closing the gap to melee to do most of his work, so be patient and let him try to engage first every time except when an enemy laner leaves an obvious opening to score a kill before Trundle can react. As adviced at the start of the guide, you should never cast Realm of Death on him until after he has used Subjugate on either you or someone else, and ideally you should try to ult one of his teammates if he has stolen your stats first: you'll have an easier time dealing with a weaker teammate than him while he's empowered, and your team is better equipped to deal with him outside of the realm than you inside of it isolated. His Pillar of Ice is really tricky for Mordekaiser to get away from, especially if you have Trundle himself further Slowing you with Chomp, and for that reason, this is one of the few melee matchups where you should prioritize getting Hextech Rocketbelt to dash away from the pillar and regain agency over your own movement.
Jungling in the Early Game
I advice to clear towards the bot lane in every single game, since the first objective to spawn is always the Dragon, at 5 minutes in the bot lane river. At the very start of the game, you should move to the Jungle quadrant opposite to the one you start and drop a Stealth Ward near the pit where Crimson Raptor spawn if you're playing on blue side, or on the faelight spot in the river Bush if you're playing on red side. This is to defend against vertical jungling from the enemy Jungler, so that you're not caught by surprise and can respond appropriately, while also revealing his location to your laners.
First Clear - Blue Side
A full clear of your Jungle (6 camps + Rift Scuttler) is the most advisable strategy for your initial clear, and you should always do it leashless so ping your teammates away and give them an optimal start to the game instead of having them waste time leashing for you. Be wary of possible enemy invades or counterjungling while you're still in the first quadrant. The most consistent route, and my personal favorite, is to do Red Brambleback -> Ancient Krug -> Crimson Raptor, then moving on to the opposite quadrant to clear Murk Wolf -> Gromp -> Blue Sentinel, and then finish by taking or contesting the Rift Scuttler.
Note that when clearing the second quadrant, you want to stick to the logic of clearing the smaller camps before taking the buff camp. This is for the sake of making their respawn timers be as close to each other as possible, so when you go back to clear them again, you won't have to wait around for either of them to finish respawning, and be as quick and fluid as possible.
Analyze the state of your lanes after you are done taking the Rift Scuttler. If the sidelane or mid lane don't seem easy to Gank, take the downtime to explore the enemy Jungler's quadrant to gain vision of taken camps and blow the Scryer's Bloom that spawns on it, then move to where you began your clear to take that quadrant camps' second spawn before you Recall to spend your gold.
At level 6 when you have unlocked Realm of Death is when you can start to be proactive with Ganks, and ideally you should look to impact a lane or river fight while it's not on cooldown, then retreat back to farming while you wait for it to be back up. If the enemy Jungler is another champion that relies on their ultimate ability for their Gank prowess, such as Nocturne, be assured that they will try to Gank the lane closer to them after they're done clearing their camps after Recalling; if you are mirroring them because of having started on the same side of the map, you should preemptively hover near your laners after you're done farming or even before, as to be ready to countergank.
Jungling in the Mid and Late Game
When the Dragon is alive or the next one is coming up, move to the bot side to gain vision control around it and prepare an ambush on any approaching enemies with smart uses your Oracle Lens and Control Wards. If the Voidgrub or Rift Herald are alive or coming up, play around top side on your next rotation. Your support should always move to prepare as well, so ping them to come. If they move, you can afford to be aggressive when looking to plant vision or catch the enemy Jungler to secure an advantage for the objective; if they don't move, be more conservative as you may even have to forfeit the objective fight completely.
In losing situations, when you are at an items and experience disavantage and your team lost all of the Tier 1 towers, go into your own Jungle more carefully from there on. Nevertheless, it is really important that you do your best to keep your CS numbers as high as possible since you have to keep up with the enemy solo laners being really high level on average.
Your own laners are likely to abandon minion waves on the sidelanes sometimes, and it'll be your job to catch them to prevent enemy pushes, and to gain these gold and experience resources for yourself. Always keep an eye for these waves being pushed too close to your turrets, and if no allies seem on their way to capture them, prioritize going there yourself over your own camps.
Once the late game kicks in (when the average champion level in the game is equal or above 13) is when Mordekaiser starts getting outscaled by hyperscaling champions like Master Yi, Kayle, Kassadin etc. Your attitude towards proactive or reactiveness will depend on the presence of such champions on the enemy team, and you shouldn't be looking to initiate fights 1v1 if they have champions that can shut you down solo with ease.
Stick with your team's support or top laner and look to catch targets in the sidelanes before an objective, and prioritize being as early as possible to the side of the map where the next objective will spawn. Mordekaiser suffers greatly against poke and you won't always be able to break it if the enemy is positioned safely on their side of the Jungle; the best way to prevent this situation is to be there first, guard Bushes to zone them away and potentially pick away the enemy support who will look to ward the area.
If the enemy team has champions that scale equally to you, or get outscaled, you can be more aggressive when trying to close out the game. Forcing fights in mid lane is sure to attract everyone to come contest it, and you can have the upper hand during this by ulting away a squishy enemy when your team is nearby; even if you don't finish the kill, they will have likely spent more important cooldowns than you, and now the fight will be on your team's favor.
Farm becomes less important the more minutes have passed into the game, so if you find yourself with 4+ items already, it is intelligent to bypass a few camps or even an entire Jungle quadrant to go straight into an area where you are needed the most, such as a fight breaking out in the lanes or the river.
Closing Thoughts
Thank you for reading through my Mordekaiser Jungle guide. I hope it served as a foundation from where to start playing him in your own games with confidence, and that you can have as much success and fun as I've found thanks to him. Mordekaiser tends to receive balance changes every now and then throughout the seasons, and thus this guide will be constantly updated to match any changes done to the champion or to his preferred items, to keep up with any changes to his relative strength in the current meta.
You must be logged in to comment. Please login or register.