





 (26.19) Rock Solid: a Malphite Jungle Guide
 Build Guide By Hazardist
 2,144
Views
2,144
Views
 0
Comments
2,144
Views
0
Comments
Malphite Build Guide By Hazardist
0
Comments
2,144
Views
0
Comments
Malphite Build Guide By Hazardist

 Thank You!
Your votes and comments encourage our guide authors to continue
creating helpful guides for the League of Legends community.
Recommended Items


Runes: Hail of Blades










+10% Attack Speed
+9 Adaptive (5.4 AD or 9 AP)
+10-180 Bonus Health
Spells:

Flash

Scorchclaw Smite
Items


Threats & Synergies
 Threats
 Synergies
 Show All
Extreme Threats
Show All
Extreme Threats
 Ideal Synergies
Dr. Mundo
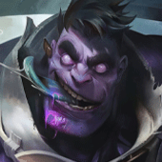
 Dr. Mundo is a tough matchup for Malphite Jungle for the same reasons that it is in top lane: his high Health pool and massive sustain make it nearly impossible for you to ever kill him and, on top of Goes Where He Pleases, give him the ability to shrug off your Crowd Control like it's nothing. Never fight him on your own and prioritize him last after his teammates have been dealt with, as you don't ever want to spend your cooldowns on him.












Ahri
The most synergetic champions with Malphite are those that have strong Crowd Control to either set up his engages or follow up on them for a long chain of it, high damage to kill Malphite's targets while they're vulnerable, and either mobility or long range to keep up with how far his engages may be triggered from.
















 Synergies
Ahri
The most synergetic champions with [[Malphite]] are those that have strong [[Crowd Control]] to either set up his engages or follow up on them for a long chain of it, high damage to kill [[Malphite]]'s targets while they're vulnerable, and either mobility or long range to keep up with how far his engages may be triggered from.


Champion Build Guide
I used to OTP
Skarner before and up until his rework in 2024. Some readers might recognize me as the author who made the most upvoted and viewed Skarner guide on MOBAFire, from before he was reworked. I am also the creator of the first place-winning guides: The Bible of Yorick Jungle, Thrice Born, Never Slain: a Mordekaiser Jungle Guide and The Last Bastion of Ixtal: a Skarner Jungle Guide.This time, I come with a guide for a champion that has broken into the
Jungle role in the last year and has not spent a single day being weak at it ever since: Malphite. He is a very easy champion to learn, but no less of a champion capable of solo carrying games and, most importantly, being extremely fun to play. Belonging in the tank class means tha he will never be the wrong champion to pick, and can potentially be the best-in-scenario against teams that rely heavily on Attack Damage due to his nature; since this is the most likely case in the game, Malphite is a champion every Jungler should consider adding to their pool in modern day League.
|
|
A massive creature of living stone, Malphite struggles to impose blessed order on a chaotic world. Birthed as a servitor-shard to an otherworldly obelisk known as the Monolith, he used his tremendous elemental strength to maintain and protect his progenitor, but ultimately failed. The only survivor of the destruction that followed, Malphite now endures Runeterra's soft folk and their fluid temperaments, while struggling to find a new role worthy of the last of his kind. Malphite is a champion that needs little introduction. Universally known as the best tank against Attack Damage champions and one of the best overall, while being extremely easy to play and find success with, it is never wrong to have him in your champion pool and is very worthy of being mained, and even one-tricked. Malphite is all about keeping your enemies in check via tons of Crowd Control both from long range and close quarters, while also being capable of solo carrying thanks to the diversity of his builds, which allow him to dish out damage just as well as he can take it. This adaptability is also what keeps him relevant no matter the situation he's in.
|
|
PROS
+ Easy to learn + Strong early, mid and late + Easy and effective Ganks+ Counters most meta champions + Can itemize as tank and damage dealer If you ask people who is the easiest champion to play in this game, more than a few are likely to tell you that it's Malphite; and they wouldn't be wrong. His lack of skillshots, straightforward combos and ability to shrug off damage make it nearly impossible to struggle when playing as him. Even though Unstoppable Force is a big deal, it's not a make-or-break part of his kit and he's strong enough in fights before level 6, getting only stronger afterwards. His several tools to disrupt enemy Movement Speed and Attack Speed make him the nightmare of pretty much every Attack Damage champion in the game, and if you are too merciful to do this to your rivals then you can build Ability Power items, and hit them with the best form of Crowd Control instead: death. |
|
CONS
- Weak dueling - Subpar damage - Low effective range - Suffers in extended fights - Vulnerable to true damage As durable as Malphite can be, many champions will be able to wear him down if a fight extends for too long, meaning that you rely on getting enemies killed shortly after landing your engage. Unstoppable Force has a long enough range but once it goes on cooldown, Malphite lacks any considerable mobility tool to help him keep up with hypermobile enemies, or those that are still outside of his melee range. A strong champion in teamfights, at the cost of being rather weak in 1v1s often because he won't have enough damage to deal with his opponent without teammates following up on him. As is the case with most tanks, champions that deal true damage will render most of his otherwise strong tankiness useless, although Malphite's particularly good interactions with Armor items that help counter true damage dealers to some extent, such as Randuin's Omen and Frozen Heart, make him more hopeful than ohers in this regard. |
Hail of Blades Runeset
|
|
|
|
|
|
|
|
Hail of Blades has been my favorite keystone to run on Malphite ever since he became a viable Jungler. His damage pattern follows a burst-oriented approach rather than one for sustained fights, so the succession of three quick Auto Attacks empowered by Thunderclap fits perfectly into his ability rotation. The bonus damage that naturally comes on top of the hastened Attack Speed is a nifty bonus as well.
|
|
|
Cheap Shot will add a small but overall considerable amount of true damage on the first instance of damage you deal to a champion under Crowd Control. Since Seismic Shard and Unstoppable Force trigger it by default, and you'd also be applying the Slow from Scorchclaw Smite anyway, you will get value from this rune in pretty much every fight you engage in from the start until the end of the game.
|
|
|
Malphite is a rather slow champion that can be seen coming from a mile away if he walks through any warded spots when preparing to pull of a Gank or a similar situation. Your only solution to this problem is to clear enemy vision yourself with Oracle Lens, and Grisly Mementos is a massive buff to the trinket's cooldown that will allow you to pop it more often during the game, ensuring that you're never sitting in a warded Bush and disrupting the enemy's control over the map.
|
|
|
Little needs to be said about how important it is to have Unstoppable Force available as often as possible so you're actually capable of carrying fights. Ultimate Hunter helps you massively lower its cooldown through organic gameplay, as you will be scoring takedowns across the map anyway. At max stacks and with the itemization recommended by this guide, you should have your ultimate available for pretty much every fight that breaks out during the mid and late game.
|
|
|
Magical Footwear will grant you Slightly Magical Boots through normal gameplay at minute 12, and even quicker into the game if you pull off any successful Ganks or Jungle skirmishes early in the game. Saving 300 gold on Boots while also getting an extra 10 Movement Speed out of them is simply too good to pass up on, especially since Malphite can't normally reach the soft cap on Movement Speed on his own, ensuring that he will always benefit from these 10 bonus points in it at their fullest.
|
|
|
Approach Velocity helps you chase your targets better, and it will more often than not be your only source of bonus Movement Speed during fights, making it a necessity if you don't want to be outran by most champions. As you will be keeping your targets permanently Slowed with Seismic Shard and both the passive and active features of Scorchclaw Smite, there will hardly be a fight where you're not benefitting from this rune during every moment.
|
|
|
|
For your rune shards, Attack Speed, Adaptive Force and Health Scaling is the most optimal for making your Jungle clears as quickly as possible in the early game to get you through it comforably, and to have a small insurance for later in the game in the form of more Health to feed your shield from Granite Shield.
|
|
Flash is the most used and also the strongest spell on Malphite. It helps you close the gap for very long range engages together with Unstoppable Force and to stay in the face of mobile enemies that need to be kept in check during fights, to land Ground Slam more reliably for example. Given its several offensive uses, and the fact that it enhances your engage power so efficiently, you should try to avoid ever using it as an escape tool. |
|
Scorchclaw Pup is the best Jungle pet choice for Malphite for two reasons. First, because the effects that come alongside it (the Slow and its maximum Health-based true damage) make your engages and overall fighting prowess all the more threatening. And second, because the other Jungle pet options are redundant to Malphite's kit: the bonus Movement Speed you get during clears from Gustwalker Hatchling is nothing you aren't already getting from Seismic Shard, and the bonus shield from Mosstomper Seedling is pretty much the same effect you get from Granite Shield, and doesn't stack together too well.
|
|
Passive: |
|
Q: |
|
W: |
|
E: |
|
R: |
As for the order in which to learn these abilities, there's two optimal paths you can follow which you will have to choose from depending on what the specific game you're in requires the most. The main variation between them is whether you will be affecting the enemy's
Movement Speed more than their Attack Speed, or vice versa.| ANTI ATTACK SPEED |
1
W |
2
E |
3
Q |
4
W |
5
W |
6
R |
7
W |
8
E |
9
W |
10
E |
11
R |
12
E |
13
E |
14
Q |
15
Q |
16
R |
17
Q |
18
Q |
Thunderclap at level 1 and max it out first as it is the main source of damage during farm, but also very relevant during fights against champions. Most of the time, the enemy team will have one or more champions that rely on Attack Speed for their DPS, so maxing Ground Slam second, for the sake of disrupting them in fights as much as possible in the mid game, is the best choice. It also deals higher damage overall compared to Seismic Shard, at the cost of leaving you a little less mobile during your Jungle clears and being easier to kite away from.
| ANTI MOVEMENT SPEED |
1
W |
2
E |
3
Q |
4
W |
5
W |
6
R |
7
W |
8
Q |
9
W |
10
Q |
11
R |
12
Q |
13
Q |
14
E |
15
E |
16
R |
17
E |
18
E |
Attack Speed for their damage, either because they're oriented towards Ability Power damage, or they have unconventional gameplay patterns, like Samira. Situations like this is when you want to max Seismic Shard second instead, as stealing more Movement Speed from the enemy is more consistently valuable and better fits the specific win conditions against such opponents.
Malphite has a few combos to optimize the use of his abilities, his damage output and the amount of time he gets to keep his targets disrupted by his Crowd Control.
|
|
|
|
|
|
|
|
|
|
Starting Items
|
|
Even if you don't purchase it directly, the game will set Stealth Ward as your trinket by default after you leave the base, and is always the best trinket to take at the start anyway. You will get one charge of it right away, and you'll gain another by the time you can Recall for the first time.
|
Additional notes:
 Spoiler: Click to view
|
|
When you take Scorchclaw Pup as adviced, on top of dealing a bit of extra damage, you will be able to apply a very heavy Slow on any target you hit with any ability once your Jungle quest is done. This is the better path to follow as Malphite rather than the other defense-oriented Jungle pets, since you already have enough tankiness and can make up for your low Movement Speed through runes and Seismic Shard, so you're better off adding to your offensive arsenal.
|
First Components Options
|
|
If you are rushing Dusk & Dawn, pick up a Blasting Wand when you have 850+ gold on your first Recall, which is going to be the case on most games unless you get invaded and interrupted early. It's the best component in either of the build paths and will instantly boost your clear speed and dueling prowess.
|
|
|
Chain Vest is your go-to component when you're rushing Iceborn Gauntlet. 40 Armor have an immense impact in the early game and, thanks to Malphite's ability ratios, you get to turn that into damage output as well, meaning that your clear speed is increased twofold and the strong durability that enables a tank playstyle comes online as early into the game as possible.
|
|
|
Grab a Dark Seal early if you find yourself with 350 or more gold left to spare after buying your first component. It's fine to delay your first item powerspike every now and then by 350 gold for the sake of a small boost to your Ability Power and Health, and the possibility of snowballing some early takedowns you may get harder than normal. You can always sell it later in the game when you're running out of item slots.
|
Core Item Options
These items will determine what the rest of your build looks like
|
|
Dusk & Dawn is an item that Malphite has found great success with since its introduction at the start of the season. What sets this item apart from other damage items viable on him is the fact that you gain the Attack Speed necessary to make your Auto Attacks as fluid as a Jungler needs them to be, and that its Sheen effect grants you some sustain that you would not have otherwise, enhancing how capable of tanking damage you are overall.
|
|
|
Zeke's Convergence is a great fit for second item on either core build, but pairs particularly great alongside Dusk & Dawn to offset the impact that a 3100 gold item would have on your second item powerspike, and to make your engages with Unstoppable Force slightly deadlier with its passive effect's damage. Every stat provided by the item is of great value to a tank, and its extremely low cost make it easy to build on two or even less Recall sequences, so you can hardly ever go wrong with it regardless of game state and other conditions.
|
|
|
Malphite makes great use of Iceborn Gauntlet as a first item unlike most other tank champions currently. It costs slightly less than Dusk & Dawn and comes with its own Sheen effect for a bit of extra damage and disruption in fights, but also allows you to begin stacking Armor earlier in the game for scenarios where you really have to, like when you're facing a majorly Attack Damage team or a very threatening Attack Damage Jungler that depends on snowballing early.
|
|
|
Frozen Heart's lost cost make it an amazing item for second purchase on a full tank build. The 75 Armor will make a massive difference by the time you complete the item, and it's got one of the most comfortable build paths you could ask for. Its passive Attack Speed cripple will stack with that from Ground Slam, further helping you survive against champions that normally have a way to bypass your high Armor. Malphite also suffers from mana issues even as a Jungler since his mana pool doesn't allow for long stays in a lane, but this item helps offset this problem for the most part.
|
Tier 2 Boots Options
Only buy after your first two full items
|
|
Plated Steelcaps are the go-to purchase when the enemy Jungler (or the majority of champions on the enemy team) is an Attack Damage champion, which only becomes more efficient against Auto Attack-heavy champions like Viego, Xin Zhao or Briar. With them and the vast amounts of Armor you will stack from the rest of your items, you become capable of shrugging off most of the damage from the majority of Attack Damage champions in the game.
|
|
|
Mercury's Treads will become a must in many situations due to Malphite naturally being the main target of enemy Crowd Control abilities to prevent him from getting close and move around. The 30 Tenacity will help you greatly to stay on top of targets so you can dish out your damage reliably, and the small bonus to Magic Resistance is a nice plus as well.
|
|
|
Boots of Swiftness are undeniably a good pairing for any champion that relies on Movement Speed rather than any dashes for their movement, and interact very well with the bonus Movement Speed you gain from Seismic Shard since it will add to its % increase. I consider them less compatible with Malphite than the more defensive options because your job will be to tank as much damage and debilitating effects as possible rather than move around during a fight, so I only build them in games where the enemy has strong Slows that can't be left ignored.
|
Third Item Options
Choose among these to follow up on your core items
|
|
Bandlepipes gives you a lot of utility as you will be guaranteed a permanent buff during champion combat granting you extra Movement Speed and Attack Speed, which also extends to your allies. This bump to your mobility helps you stick to targets that are fleeing from you a bit better, and also dodge more skillshots than usual being thrown at you.
|
|
|
Critical Attack damage has been buffed considerably for this season, making most ADC marksmen but also some Junglers like Graves, Kindred and even Master Yi stronger by default. To help counter their extreme damage, Randuin's Omen is your best option. The active Slow is useful once you get on top of your enemies when engaging, helping you keep them Crowd Controlled easier and for longer than usual. Its flat damage reduction against Auto Attacks also makes it a good purchase against champions that deal true damage through them.
|
|
|
Dead Man's Plate is a better Armor item to run compared to Randuin's Omen only when, rather than defense against critical damage, you need extra mobility to keep up with targets. Being faster passively helps you get to fights on time and keep up with fleeing enemies more easily, and the Slow applied from your Auto Attacks will only make you more disruptive in general during fights.
|
|
|
Spirit Visage is a good Magic Resistance item to buy second when the enemy team has mostly Ability Power champions that you need to itemize against, and you have Dusk & Dawn. The item will passively increase the shield you get from Granite Shield but, most importantly, make the healing from Dusk & Dawn's Sheen effect better, keeping you alive for longer in fights where you get to proc it repeatedly.
|
|
|
Force of Nature is better purchased when you're up against two or more Ability Power champions that thrive on extended fights, such as Swain or Cassiopeia. Even though you will rarely find yourself in games where they are the main threat on the enemy team, it's still good to keep this item in mind.
|
Matchup-dependent
|
|
In matchups where you need a form of Grievous Wounds to counter your rival's strong sustain, mostly when you're against Warwick or Briar, picking up a Bramble Vest after your first item is a good idea since you will need it eventually anyway, and spending 800 gold for it early lets you forget about it for the time being while meeting an important need. Look to upgrade it into Thornmail only after you're done with the rest of your build, and check the items of your teammates to see if they have purchased any Grievous Wounds items themselves to decide whether to spend gold on it further, or swap it out for a more useful item.
|
Additional notes:
Spoiler: Click to viewFourth & Beyond Item Options
Choose items within this list to complete your build
|
|
Zhonya's Hourglass is famously one of the strongest mage items in the game and even though it doesn't fit Malphite as well as other champions, it's still worth considering in every game. The bonus Armor can by itself offset the damage from enemy Attack Damage carries and boost your own, and the stasis effect can buy precious time when you're stuck in the middle of a teamfight tanking for your team, all while sacrificing less damage output compared to other tank items.
|
|
|
Kaenic Rookern performs best when you're facing Ability Power champions that rely on gaining a Health advantage for their team through poke or trap damage before fights as their win condition. If you find yourself against champions like Teemo, Nidalee, Vel'Koz or Xerath, picking this up will help you stay healthier when you are contesting an area for zone control before and during teamfights, since you will more often than not be getting hit by their abilities as you traverse through the map to close distance to them.
|
|
|
Jak'Sho, The Protean is the best item to finish out almost any build you can put together. By the time you have to purchase your fifth and final item, you should have stacked a decent amount of Armor and Magic Resistance, meaning that this item's passive offers great value and will accomplish its function of keeping you alive through the extreme damage that is being dealt by enemy champions in the very late game.
|
Additional notes:
Spoiler: Click to view Malphite or me having more experience against them in my own games.|
|
Bel'Veth excels against targets she can hit uninterrupted by Crowd Control and that can't kite away from her reliably. Even though Malphite can normally disengage from skirmishers like her with little issue thanks to Seismic Shard, Bel'Veth is uniquely challenging in this regard due to all of the dashes from Void Surge. This makes her one of the few matchups where using Unstoppable Force as a potential disengage tool can be good, if not a strict necessity. Her reliance on landing Above and Below if she wants to gap close to you means that you should let her be the one engaging if she's ahead in terms of power, or if you're being outnumbered. If she has to spend her Above and Below charges to flee from you after a successful engage, then you will be in an extremely comfortable position from where to play out the fight. A good part of her damage output comes from Royal Maelstrom, and luckily this ability gets hard countered by Armor items that have direct effects against Auto Attacks, such as Randuin's Omen and Frozen Heart. With these items, situational awareness and patience, she can be handled in teamfights. If you have to play defensively, do your best to land Ground Slam on her when she's fighting your teammates even if she's the only target, so that she will have a harder time bursting them down.
|
|
|
Brand is potentially more of a headache than Morgana herself, since one could argue that at least against her, simply dodging Dark Binding reduces her threat tremendously and you can proceed to walk up to her without much issue, but Brand's power lies in Rylai's Crystal Scepter and he's pretty much guaranteed to land at least one persistent damage ability on you, namely Conflagration, although the rest of his abilities are easy to land on a slow tank such as Malphite. Since these abilities apply damage constantly, through his passive Blaze, it leaves you permanently Slowed similar to what you normally do to enemies, except you have a time limit of Seismic Shard wearing off. As you can realize, this makes getting up to enemies, keeping up with them and even moving at all more difficult than normal and it's the reason why a mix of Slow resist on items as well as Magic Resistance are a must. I recommend Boots of Swiftness while completely ignoring Mercury's Treads, since the Tenacity doesn't help at all in this case. It's also one of the few matchups where Force of Nature is undeniably the best Magic Resistance item to take, and you may even pair it with Dead Man's Plate to make extra sure that Brand can't single-handedly put you out of the game.
|
|
|
Gwen is always a serious threat when you're fighting her in melee, and can easily outsustain you as well as bypass your Magic Resistance and overall tankiness with more ease than you do to hers. Since she will rarely be the one engaging before you, for this matchup you need to be patient and have situational awareness if you spot her within your reach. Assess if any of your teammates are nearby, if any of her teammates are nearby, what level she is compared to yours, how many items does she currently have compared to yours, and what objectives are nearby before committing to an engage. If she engages first and has serious advantage, such as having her Conqueror or Riftmaker fully stacked, it's intelligent to try and disengage from her and make her move beyond the area of Hallowed Mist, since she's much more vulnerable when the ability is on cooldown and your teammates will have an easier time holding her off with you. If you find yourself fighting her within her mist, do make sure to land Seismic Shard and Ground Slam to prevent her from bursting you down and give yourself more manoeuverability to play around it. Even though she has no strong Crowd Control, you may want to secure some Slow resist from your items to make sure her Needlework doesn't keep you in place, since that's how she tends to set up her combo.
|
|
|
At the time of writing, Shadow Assassin Kayn is so objectively underpowered that the chances of any rival Junglers on Kayn that take it is extremely low, so this advice will mostly apply against Rhaast Kayn. On this form, all 5 of his abilities will prove strong against Malphite: The Darkin Scythe lets him heal back some damage he has inflicted according to his target's maximum Health; Reaping Slash is a two-fold damage ability that also makes him dash over walls; Blade's Reach is an AoE Crowd Control ability that knocks up and is difficult to dodge; Shadow Step lets him go through any terrain freely, offering a clear counterplay to your engages without Unstoppable Force and even with it, if he manages to survive the initial burst; and his ultimate, Umbral Trespass, is a mix of all of those effects, plus temporary invulnerability. With this toolkit, Kayn is extremely difficult to pin and burst down by Malphite and much less killed, as his mobility and sustain can outdo your damage regardless of the skill of the players involved. Still, he's relatively weak at the beginning of the game, so your best hope to win this matchup is to make sure he doesn't get out of the laning phase with too sizable of a gold advantage. You are to achieve this by counterganking, but you must keep in mind that he benefit tremendously from any extended fights against you, since a champion like Malphite will drop red orbs when he damages you, massively accelerating his form adquisition. Play for short fights and only engage if he's outnumbered. Prioritize building Armor after you are done with your first core item too.
|
|
|
Master Yi is, contrary to what it may seem at first glance, a counter to Malphite. His ultimate, Highlander, grants him immunity not only to your Slows, but also to the Attack Speed cripple from Ground Slam and also Frozen Heart, which are your tools to deal with champions of his kind. On top of that and despite being an Attack Damage champion, he can easily bypass all of your Armor with his extremely high DPS which also includes true damage from Wuju Style, and disengaging with Unstoppable Force isn't guaranteed to work as he can follow you through it with Alpha Strike. All of this translates into a matchup where you have to avoid being caught by him alone at any cost past level 6, only fighting him in the presence of your teammates even if you are outnumbered. The most reliable strategy is to wait until he spends Alpha Strike on someone once a fight has begun, and then tunnel vision your full engage onto him, doing your best to burst him down while he's Crowd Controlled with the help of your carries. For this reason, you should rarely be the one engaging on the enemy team first unless you have confirmation that he isn't anywhere nearby, as he can very easily clean up an ongoing fight by himself even if your side won before he has entered it.
|
|
|
Morgana frustrates Malphite's gameplan with an intensity and versatility that few other champions can: her Dark Binding leaves you unable to move for a long period of time in fights, turning you into an easily kitable tank at best, and an inoffensive threat at worst; her Black Shield grants effective invulnerability to your forms of Crowd Control, most importantly Unstoppable Force not only to herself but to any ally she chooses; and if you have successfully sorted through these, Soul Shackles is a failproof way for her to root you and cost you valuable time in a fight. The good news is that itemizing against her tools is very straightforward: make sure to pick up Mercury's Treads for its Tenacity to reduce the cost of being hit by her abilities, a Magic Resistance tank item such as Force of Nature to prevent her damage from being significant, and make sure to take Dusk & Dawn as your core item to help you shred through Black Shield's magic shield more quickly; your priority is to burst her down as quickly as possible, for which you need the build with higher damage output.
|
|
|
Shaco players these days tend to build either Ability Power or Attack Damage unpredictably, so I'll give tips for each. Against Ability Power Shaco, you want to play fights aggressively because they play around Jack In The Box and Two-Shiv Poison for the bulk of their damage, disengaging from you while you're Slowed and feared from the traps. The good news about this is that if you're the one going ahead activating all the traps by yourself, then your teammates won't have to worry about them and you should remain healthy despite this if you are building Magic Resistance, as you should be. With this said, the real threat of this Shaco playstyle is the Hallucinate clone explosion dealing massive damage in area, and your only way of dealing with this is to either lure the clone away from your team and try to kill it in a relatively safe area; that is, away from enemies that can follow up while you are feared. For Attack Damage Shaco, you can expect a more aggressive playstyle with him trying to stick on you to Auto Attack, much like most other assassins do. In this case, the matchup is much more straightforward and you will do just fine by buying a good amount of Armor to survive his initial damage, since he can't do much else other than try and burst you down in a couple of seconds, which is very hard to do against Malphite to begin with.
|
|
|
Trundle gets to steal an important chunk of your stats via Chomp and Subjugate. This forces you to default to a reactive playstyle throughout the game, as he can easily turn a fight around if he can counterengage and catch you in the middle of a skirmish or teamfight being targeted by his allies, or if you two are alone. The good news is that Trundle himself relies on closing the gap to melee to do most of his work, so be patient and let him try to engage first most of the time. If you can catch him before he has used Subjugate, that is, before he gets to inflate his stats by stealing them from you, you should fully commit on him in an attempt to keep him Crowd Controlled for as long as possible during this window of opportunity, and chunk down at least part of his Health to dissuade him from turning the fight around. His Pillar of Ice can be tricky for Malphite to get away from if you get caught in it while not having Unstoppable Force available, or if you don't have a clear angle to use it without Trundle himself blocking your path to safety. It's important to build both Frozen Heart and Randuin's Omen in this matchup; he will steal a large part of your Armor, but he can't steal the anti- Auto Attack properties of those items, which will help you remain durable against him after you're under the effects of Subjugate.
|
|
|
Much like Shaco, Udyr players will unpredictably build either Attack Damage or Ability Power, although the latter is less common these days. If he's building Attack Damage, make sure to build more Armor items than usual, or even tunnel-visioning into following the full tank build, in order to survive his awakened Wilding Claw, the main threat of his build; he can burst you down easily with it 1v1 regardless of how much Health you may have - this is especially true if he's building any Armor penetration or shred items as well. Ability Power Udyr is more of a juggernaut, because his strength lies in teamfighting and disrupting your teammates heavily. Even though you will rarely have enough damage to deal with him alone before he can disengage, you can at least defend your backline from him by standing between them and him, keeping him Slowed and Crowd Controled at a safe distance from your ranged carries. Against either build, you should be wary of his awakened Blazing Stampede which turns him unstoppable and, as you can guess, immune to being Crowd Controlled in any way.
|
|
|
You can think of Volibear as an Ability Power fighter that prevails in slow-paced extended fights just like Gwen, and their matchups play out very similarly. Unless you catch him with low Health, I advice to not try to ult him since Stormbringer turns him unstoppable for a couple of seconds, and thus, invulnerable to Unstoppable Force's strong Crowd Control. On top of that, try to stay on the move around him until he's casting Sky Splitter and try to kite away before the circle of storm lands on the ground, this way you will be denying both damage on you and/or shielding on him. Getting a Grievous Wounds item is necessary if you ever wish to be able to deal with him, or at least disrupt him significantly. In cases where you are even or behind past the early game, the game plan that I recommend is to build such item and also to make sure you stick to him in teamfights with the purpose of debuffing him and getting in his way, so that your team can handle him without worrying for his sustain, and Slowing him to disrupt him when he's trying to stick to your carries or yourself.
|
GANK: Learning the blind vision spots is of utmost importance when it comes to approaching a lane quickly. Stick to the walls if you're approaching from the river, and pop your Oracle Lens as you enter the river without waiting; if the river Bush is warded and the enemy faelights are active, you will be warned about it before you even reach the Bush. If this happens, now you know to either clear the ward as soon as you approach it, or bypass it and keep running towards the enemy laner in hopes of catching them before they react to your Gank, but do bear in mind that you will have been seen coming from earlier than usual. Unstoppable Force is best used outside of vision from beyond walls near to the lane you are approaching if you can find a good angle for it, and also from the Bushes placed in the top and bot lanes that you can approach from the lane itself when the enemy wave is pushed far enough and the enemy has no vision placed inside of them.WHEN TO
GANK: As Malphite, your Ganks are extremely strong after you unlock Unstoppable Force, but nothing to write home about before then. You should aim to complete full clears of your Jungle until that point, and if you get any clear Gank opportunities before, only go for it if your laners have a high enough amount of current Health, the enemy laner is already weakened and/or Flashless, and if it doesn't interrupt your full clear sequence too significantly. Seismic Shard may help set an early Gank up to a good degree, but you really need to prioritize hitting level 6 as quickly as possible.WHOM TO
GANK: I really advice you to not waste any time ganking any laner that has died before 3 minutes, or that by the 10 minutes mark has at least 3 deaths; that's all the proof you need that they don't know how to lane properly and that they're not worth trusting with any resources. You're better off focusing on lanes near live objectives who are also even or not losing by too much, and especially in volatile matchups (melee vs melee, etc). Since my most adviced pathing involves clearing the Jungle towards bot side from the start of the game, the majority of your Ganks should and will be happening in your bot lane, where you have higher chances of success thanks to the presence of a support that can help set you up with Crowd Control or baiting fights as you approach. JUNGLE TRACKING: In these past few seasons, tracking the enemy Jungler has lost relevancy given the discrepancy between the spawn of the first objectives in the game; however, you should still be mindful of where your counterpart is at all moments in the early game so that you can prepare your plays properly or react to theirs in an intelligent manner. At the spawn of the first Rift Scuttler is when you will find out for sure where the enemy Jungler started their clear, and if he started on the same side of the map as you did for the first clear, he will remain on the same side as you for most of the first 10 minutes of the game, assuming that 1) you are focusing diligently on farming, and 2) he hasn't wasted too much time hovering around mid or the sidelanes while his camps have respawned and are still alive. Use this information to ping your laners intelligently to warn of his presence and potential Ganks, and to assess when you should try to be on the lookout for plays in your lanes.
Dragon, at 5 minutes in the bot lane river, and the second is that bot lane has two teammates to help and two enemies to disrupt, twice the numbers you'd encounter at top lane. At the very start of the game, you should move to the Jungle quadrant opposite to the one you start and drop a Stealth Ward near the pit where Crimson Raptor spawn if you're playing on blue side, or on the faelight spot in the river Bush if you're playing on red side. This is to defend against vertical jungling from the enemy Jungler, so that you're not caught by surprise and can respond appropriately, while also revealing his location to your laners.First Clear - Blue Side
A full clear of your
Jungle (6 camps + Rift Scuttler) is the most advisable strategy for your initial clear, and you should always do it leashless so ping your teammates away and give them an optimal start to the game instead of having them waste time leashing for you. Be wary of possible enemy invades or counterjungling while you're still in the first quadrant. The most consistent route, and my personal favorite, is to do Red Brambleback -> Ancient Krug -> Crimson Raptor, then moving on to the opposite quadrant to clear Murk Wolf -> Gromp -> Blue Sentinel, and then finish by taking or contesting the Rift Scuttler.
Note that when clearing the second quadrant, you want to stick to the logic of clearing the smaller camps before taking the buff camp. This is for the sake of making their respawn timers be as close to each other as possible, so when you go back to clear them again, you won't have to wait around for either of them to finish respawning, and be as quick and fluid as possible.
First Clear - Red Side
Below is how it's done when you're playing from the red side of the map instead. The same order logic applies, so you will do
Red Brambleback -> Krugs -> Crimson Raptor -> Murk Wolf -> Gromp -> Blue Sentinel -> Rift Scuttler.
Analyze the state of your lanes after you are done taking the
Rift Scuttler. If the sidelane or mid lane don't seem easy to Gank, take the downtime to explore the enemy Jungler's quadrant to gain vision of taken camps and blow the Scryer's Bloom that spawns on it, then decide on whether you will hover around for long enough to move to where you began your clear and take that quadrant camps' second spawn, or just Recall to spend your gold.Once you hit level 6 and have unlocked
Unstoppable Force is when you can be most proactive about Ganks, although this doesn't necessarily mean that you shouldn't pursue one or two in the early game if a good window of opportunity opens up. Every time that your ultimate is available to use, you should seek the nearest Gank opportunity as it's easy for Malphite to force Ganks when the conditions aren't fully ideal, and this way you get to retreat back to clear your Jungle camps with its cooldown ticking off. If the enemy Jungler is a champion that relies on their ultimate ability for their Ganks, such as Nocturne, be assured that they too will try to Gank the lane closer to them right after hitting level 6; if you are mirroring them because of having started on the same side of the map, you should preemptively hover near your laners after you're done farming or even before, in order to be ready to countergank.
Dragon is alive or the next one is coming up, move to the bot side to gain vision control around it and prepare an ambush on any approaching enemies with smart uses your Oracle Lens and Control Wards. If the Voidgrub or Rift Herald are alive or coming up, play around top side on your next rotation. Your support should always move to prepare as well, so ping them to come. If they move, you can afford to be aggressive when looking to plant vision or catch the enemy Jungler to secure an advantage for the objective; if they don't move, be more conservative as you may have to forfeit the territory around the objective momentarily.In losing situations, when you are at an items and experience disavantage and your team lost all of the Tier 1 towers, go into your own
Jungle more carefully from there on. Nevertheless, it is really important that you do your best to keep your CS numbers as high as possible since you have to keep up with the enemy solo laners being really high level on average.Your own laners are likely to abandon minion waves on the sidelanes sometimes, and it'll be your job to catch them to prevent enemy pushes, and to gain these gold and experience resources for yourself. Always keep an eye for these waves being pushed too close to your turrets, and if no allies seem on their way to capture them, prioritize going there yourself over your own camps; the minion waves are more time-sensitive than
Jungle camps, after allOnce the late game kicks in (when the average champion level in the game is equal or above 13) is when hypercarry champions such as
Master Yi, Kayle, Kassadin etc begin outscaling most other champions and can melt you down solo regardless of how durable you are. Your attitude towards proactive or reactiveness will depend on the presence of such champions on the enemy team, and you shouldn't be looking to initiate fights 1v1 if they have champions that can kill you much faster than you can kill them, even if you land all of your Crowd Control abilities on them.Stick with your team's most important carry and look to catch targets in the sidelanes before an objective, and prioritize being as early as possible to the side of the map where the next objective will spawn.
Malphite can create opportunities to catch enemies off guard very easily when everyone is moving to plant and clear vision before an upcoming objective, and preparing ambushes in the Jungle at the right time can quickly turn the tides of a losing game, or solidify your lead while you are winning; the enemy team will know this, so even if you can't get kills during this setup then you can at least help your teammates control the vision and space for the upcoming fight.If the enemy team has champions that scale equally to you and your carries, or get outscaled, you can be more aggressive with an advantage when trying to close out the game. Forcing fights in the mid lane is sure to attract everyone to come contest it, and you can have the upper hand during this by looking to catch any enemy squishies out of position to either get kills on them or force their summoner spells, which will give you and your team a temporary advantage to push waves and take turrets or objectives more comfortably.
Farm becomes less important the more minutes have passed into the game, so if you find yourself with 3+ items already, it is intelligent to bypass a few camps or even an entire
Jungle quadrant to go straight into an area where you are needed the most, such as a fight breaking out in the lanes or the river.
Malphite guide. I hope that iyou gained information and tips that add to your enjoyment with the champion, and the Jungle role overall. Malphite almost never receives balance changes from patch to patch, but his items tend to get better or worse during the season and these changes tend to alter what his optimal builds look like, so my plans to keep this guide updated will mostly consist of swapping out good items that become bad to build, bringing in new items that become good to buy on Malphite, and finding new combinations that make for strong, versatile builds while not straying away from consistent viability too much.




You must be logged in to comment. Please login or register.