


Not Updated For Current Season
This guide has not yet been updated for the current season. Please keep this in mind while reading. You can see the most recently updated guides on the browse guides page
x
 [S4] Renekton Top
 Build Guide By DoomGlad
20
2
Build Guide By DoomGlad
20
2
 376,844
Views
376,844
Views
 61
Comments
61
Comments
20
2
376,844
Views
61
Comments
Renekton Build Guide By DoomGlad
376,844
Views
61
Comments
Renekton Build Guide By DoomGlad
x
Did this guide help you? If so please give them a vote or leave a comment.
You can even win prizes by doing so!
Vote
Comment
I liked this Guide

I didn't like this Guide
 Thank You!
Your votes and comments encourage our guide authors to continue
creating helpful guides for the League of Legends community.
Recommended Items

Spells:

Ignite

Flash
Items
Then Buy This
![]()

Or This
![]()
Next Buys
![]()
If You Need Damage
![]()
Ability Order

Reign of Anger (PASSIVE)
Renekton Passive Ability


Introduction
|
|
|
|
|
|
|
Hello everyone! DoomGlad here for my second guide on Mobafire and it will be on  Renekton. Renekton is a very tanky top lane bully who when played right can do large amounts of damage while still having 3k health and 150+ armor and magic resist.
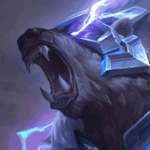
 Preview of Renekton's Awesomeness!
Anyway, without further adue, I present to you, my simple but clear, Renekton guide. I will work to update this guide and make this the best guide I can possibly publish so please reconsider any down votes as I am very open to all suggestions and will change my guide for your reading pleasure. Thank You.
Some Notable Victories
-DoomGlad

Pros / Cons
|
Pros
|
+ Very Tanky + High Burst + AoE Damage + Strong Gap Closer + Single Target CC + Manaless + Good Sustain |
|
|
Cons
|
- Slightly Falls off Late Game - Weak Without Fury - Long Cool downs - Slightly Item Dependent |
Like all champions in the game, |
Masteries
|
|
space |
Offense
|
|
Defense
|
space |
|
Runes
Runes


Summoner Spells
Champion Abilities
|
|
1
W |
2
E |
3
Q |
4
Q |
5
Q |
6
R |
7
Q |
8
E |
9
Q |
10
E |
11
R |
12
E |
13
E |
14
W |
15
W |
16
R |
17
W |
18
W |
Maxing
Renekton gains 50% more Fury from all sources while below half health.
Renekton deals physical damage to all enemies within range and healing for some of the damage dealt.
Renekton’s next basic attack will hit twice, stunning his target for 0.75 seconds.
Renekton dashes forward, dealing physical damage to enemies he hits along the way.
Walls Slice and Dice can go ThroughRenekton enlarges his size and gains bonus health. Additionally, he deals magic damage every second.
Items
Item Sequence


Sunfire Aegis
2700

Spirit Visage
2700

Ravenous Hydra
3300

Randuin's Omen
2700

Black Cleaver
3000
|
|
Currently the strongest start in the game for top laners, |
|
|
Extremely useful item on |
|
|
Great boots to prevent heavy auto attack champions. Also helps reduce the damage from AD carries. It is also cheaper then it's alternative, |
|
|
I rarely take |
|
|
Arguably the best item for |
|
|
THE BEST magic resist item currently in the game. Providing a ton of health and magic resist, |
|
|
One of the top AD items for |
|
|
Great tank item for |
|
|
Also one of the best damage items for |
|
|
Great item against AP top laners like |
Synergies
|
|
|
|
|
Orianna Explanation: |
|
|
|
Lulu Explanation: |
talisman of ascension |
Match-Ups
|
|
Aatrox Severity: Medium Explanation: |
|
|
|
Darius Severity: Medium Explanation: Mostly a skill match-up. Rushing armor in the form of |
|
|
|
Dr. Mundo Severity: Medium Explanation: This match-up is a stale mate. Basically, you can't do damage to him, and he can't do damage to you. You should win trades early on, especially if you dodge |
|
|
|
Elise Severity Hard Explanation: A bit of a hard match-up. Farm till level 6 and buy |
|
|
|
Garen Severity: Medium Explanation: |
|
|
|
Jax Severity: Easy Explanation: |
|
|
|
Jayce Severity: Medium Explanation: Mostly a skill match-up. His |
|
|
|
Kennen Severity: Medium Explanation: This match-up is similar to |
|
|
|
Kha'Zix Severity: Easy-Medium Explanation: Against |
|
|
|
Lee Sin Severity: Medium Explanation: |
|
|
|
Malphite Severity: Easy Explanation: Pretty simple lane. He can't kill you but you can possibly kill him. Keep his |
|
|
|
Master Yi Severity: Easy Explanation: Simple lane for |
|
|
|
Nasus Severity: Easy Explanation: Prevent |
|
|
|
Olaf Severity: Medium Explanation: |
|
|
|
Rengar Severity: Medium Explanation: Watch out for a level 2 all in with |
|
|
|
Riven Severity: Easy Explanation: |
|
|
|
Rumble Severity: Medium Explanation: Pretty even match-up. Avoid taking too much free damage from |
|
|
|
Shen Severity: Easy Explanation: |
|
|
|
Shyvana Severity: Medium Explanation: You have a stronger early game against |
|
|
|
Vladimir Severity: Medium Explanation: |
|
|
|
Yasuo Severity: Easy Explanation: Fairly easy lane. |
|
Gameplay
All-Ins!
Summary
Thank you for taking a look at my Renekton guide if you have gotten this far. To sum it up, Renekton is a very strong top laner with a powerful early game and strong mid game who can completely dominate the enemy AD carry.
Please up vote my guide if you learned something new or you just enjoyed my guide in general and please rethink any down votes as I worked long and hard on this guide. If you have a suggestion or want to point out an error I have made, please inform me as I am open to all suggestions and will work to make my guide the best it can be.
Have fun playing Renekton is your solo queue adventures.
-DoomGlad
Please up vote my guide if you learned something new or you just enjoyed my guide in general and please rethink any down votes as I worked long and hard on this guide. If you have a suggestion or want to point out an error I have made, please inform me as I am open to all suggestions and will work to make my guide the best it can be.
Have fun playing
-DoomGlad
|
|
|
|
|
|
|
Resources Used/Credits
- The League of Legends Wiki
- jhoihoi's Making a Guide, Guide
- Personal Experience
- jhoijhoi's Decoding Service
- Thanks to Veng Lmfao's Graphic Shop for the amazing banners and line dividers!
- Thanks to Khazem and GrandMasterD for the abilities coding layout!
- Thanks to this guide for the image on where Slice and Dice can go through.
- And thanks to jpikachu1999 for all the coding help.
- Thanks to Maintained for helping me out with the guide and the image on where to ward.
- Line Dividers thanks to YayaFTW!~
FAQ-Frequently Asked Questions
Frequently Asked |
Answers |
| Q: Why do you start with W then E then Q? |
Starting |
Change Log
1/15/2014-Removed Stats
1/15/2014-Fixed Minor Coding Errors
1/17/2014-Added Banners and NEW Line Dividers!
1/18/2014-Added some Notable Victories
1/19/2014-Cheat Sheet Edited
1/19/2014-Grammar fixes thanks to Obnoxious
1/25/2014-Brand Spankin New Line Dividers thanks to YayaFTW!, Minor Code Change, Added Additional Line Dividers
2/2/2014-Grammar Fixes


DoomGlad
Renekton Guide
[S4] Renekton Top
You must be logged in to comment. Please login or register.